
Word plugin - Conditions
Add conditions
Once Associations have been set up, you can click the
Conditions
tab to build conditional rules. Select Add
in the panel on the right. The Conditions builder
window opens.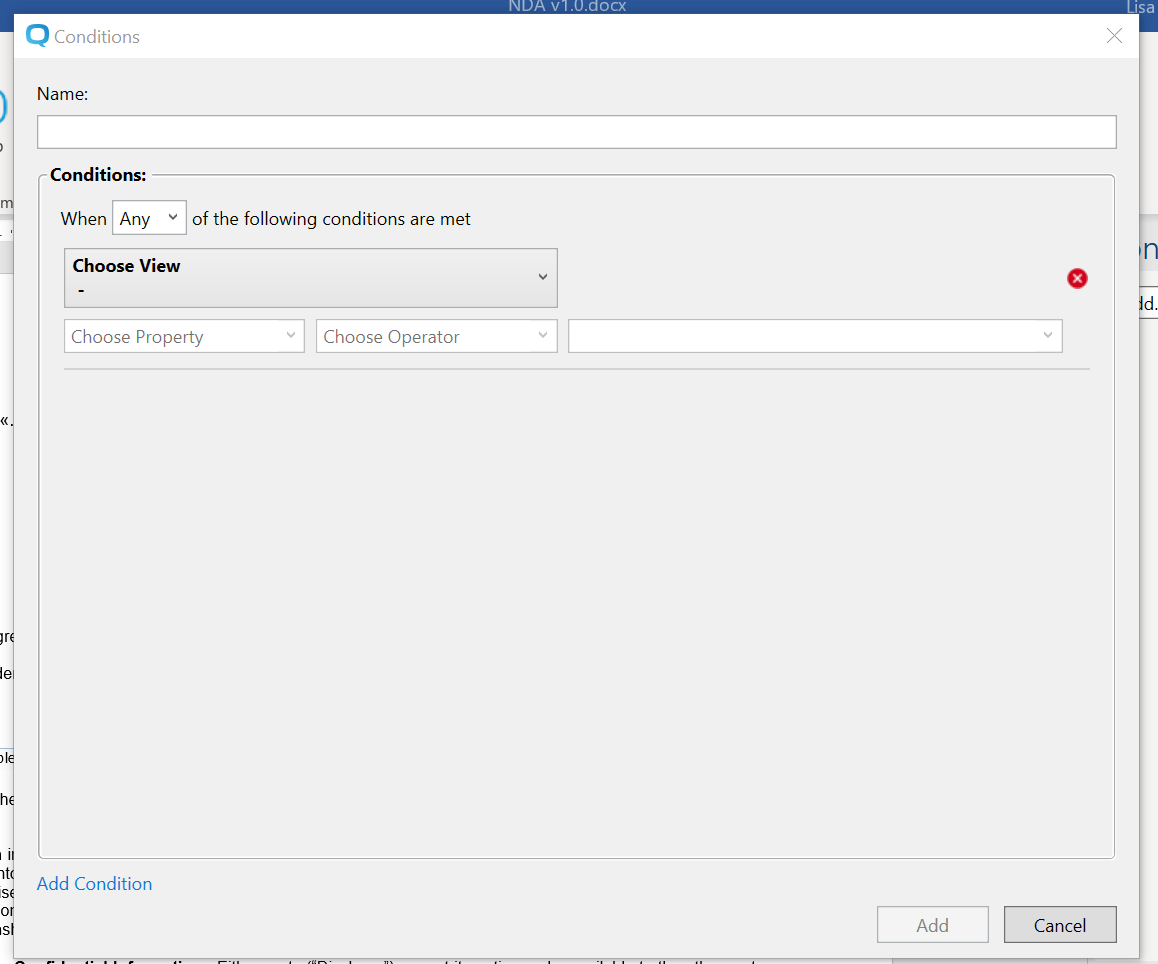
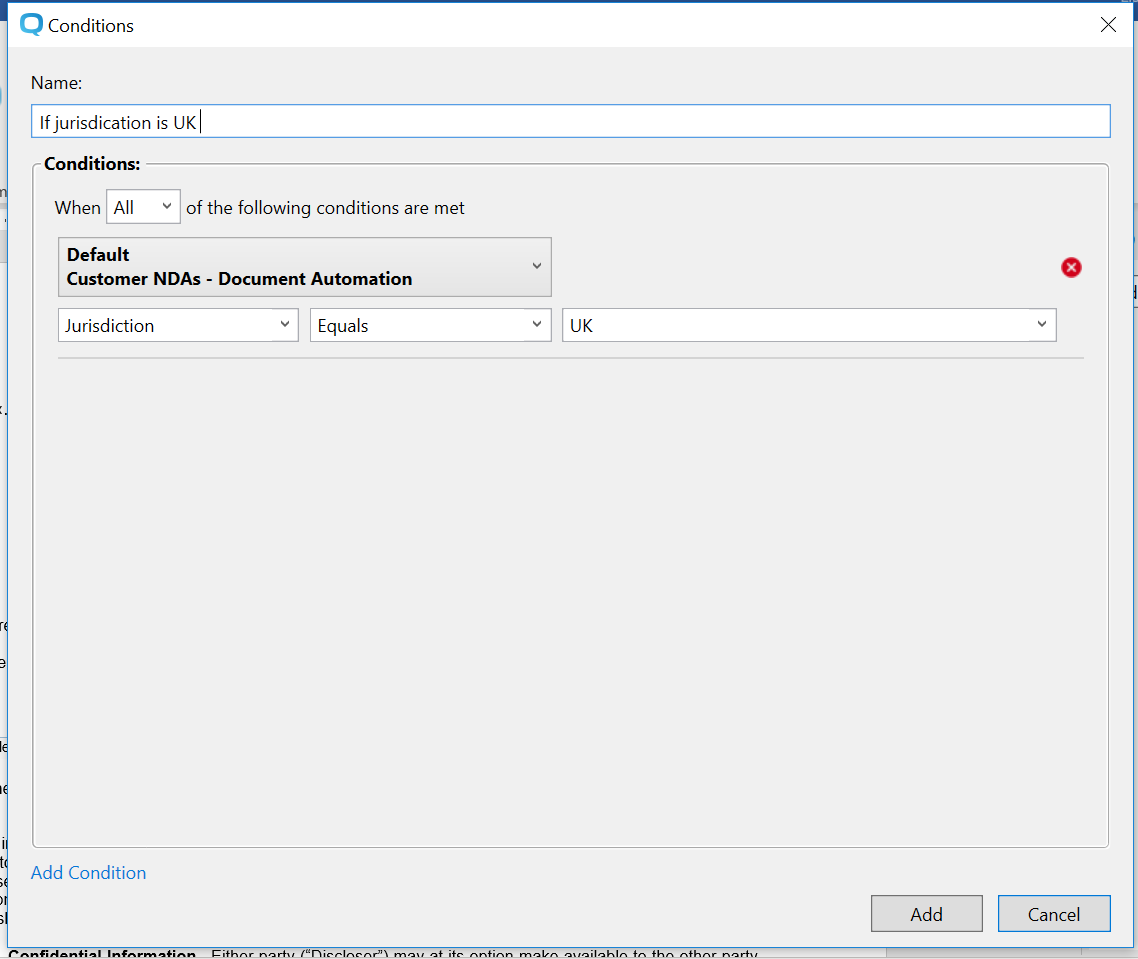
Enter a
Name
for the Condition. In the iSheet View
dropdown, choose a view that has the columns you want to use in the conditional rule.Once this has been chosen, the
Property
dropdown populates with all the associated columns from the iSheet view. Choose a column from the Property
dropdown and then select a logic Operator
. The value field updates with all available values for the chosen column. Choose a value from the dropdown or users can type a known value that can be used in the selected column.The value for this field should exactly match the text of the value in the iSheet.
A condition can be built from many conditional rules. Use the
Add condition
option on the bottom left to add another rule.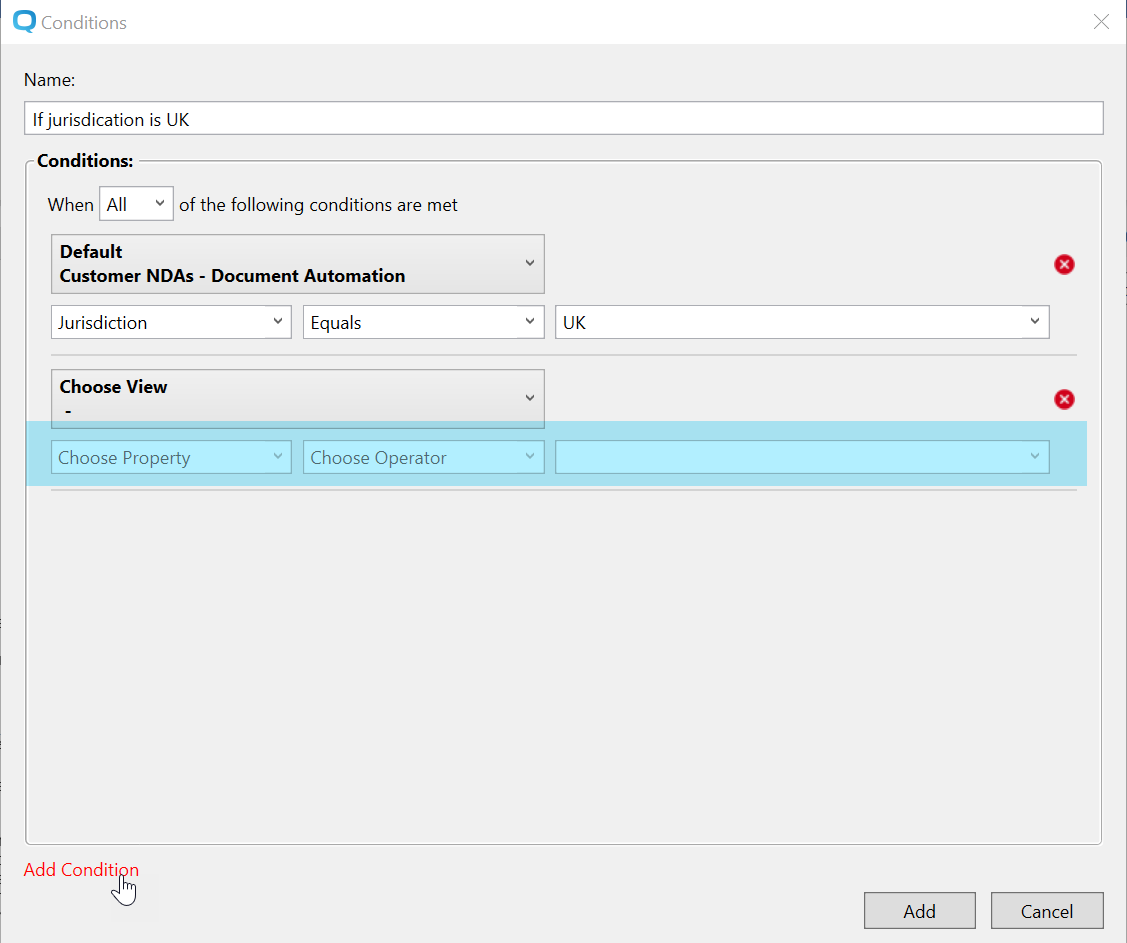
Add as many rules as needed and then change the top dropdown to
Any
or All
.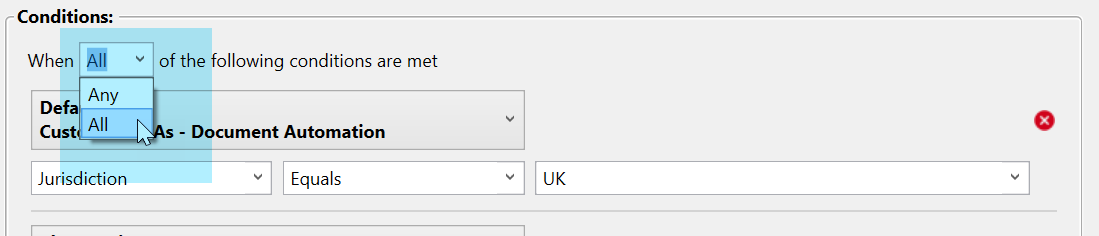
If you choose
All
, the condition will apply if all the rules in the condition are true. If you choose Any
, the condition will apply if at least one of the rules in the condition is true.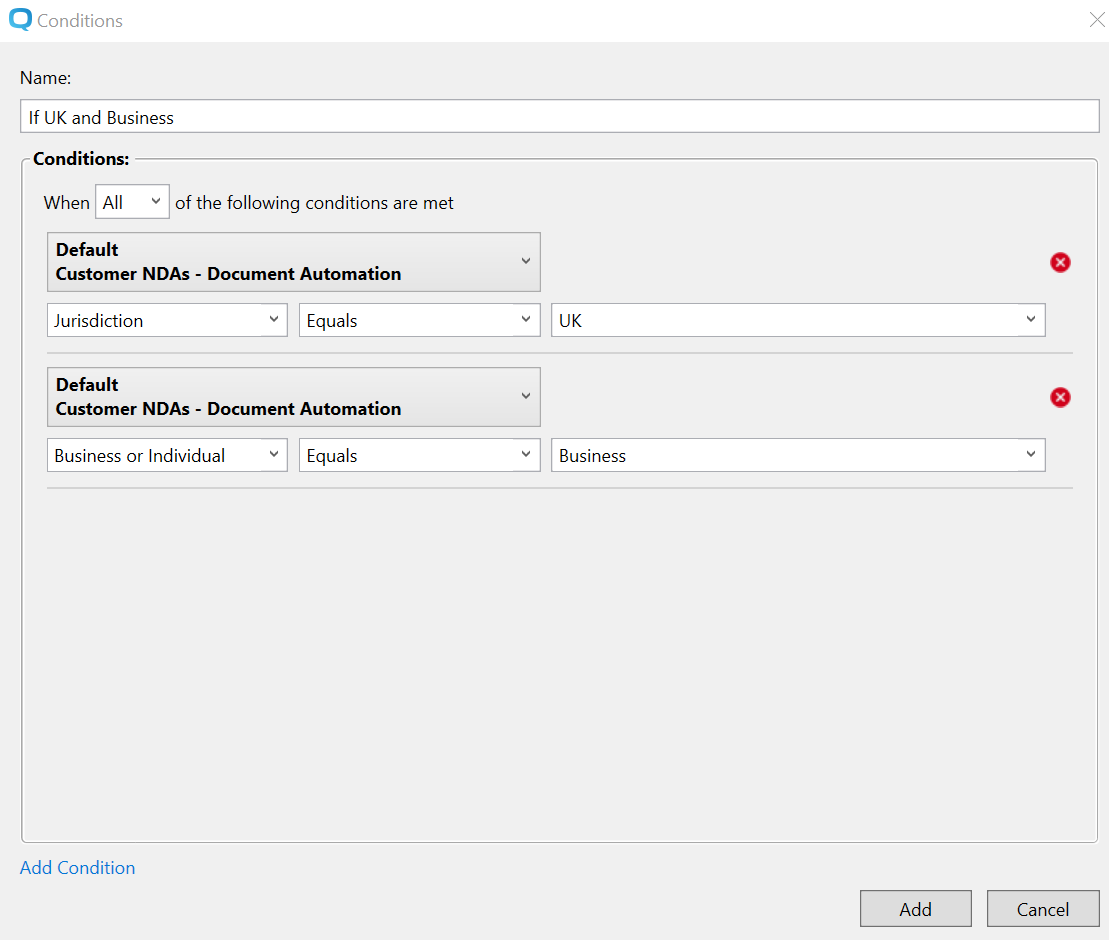
Select
Add
to add the conditions to the right-hand panel.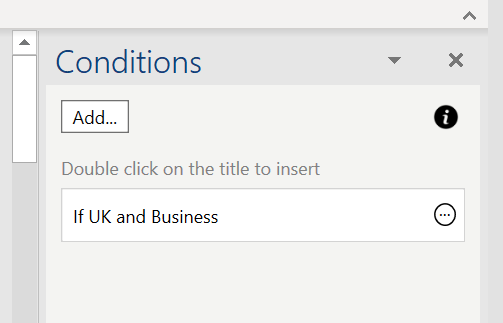
Now apply the condition in the template.
Apply conditions
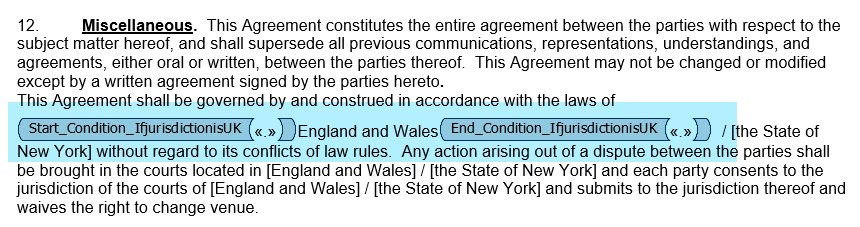
To apply the condition highlight the part of the document to place under the condition. Double-click on the condition to apply it.
Editing and removing conditions
Click the
More Actions
icon next to the condition in the right-hand panel. You can Edit
or Remove
the condition.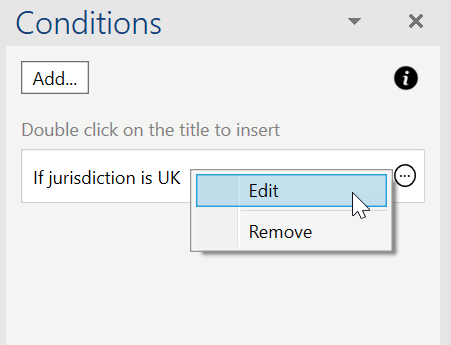
If you
Edit
the condition and then click on Update
, all the instances of the condition used in the template will automatically update.Related Content
-
Word plugin overview
Format: Article,
2 min read
Article,
2 min read