
Workflow rule - Add events
Use the
Add events
action to automatically add events with dynamically calculated dates when the trigger conditions are met. If you select Add event
as your action, then the following fields open: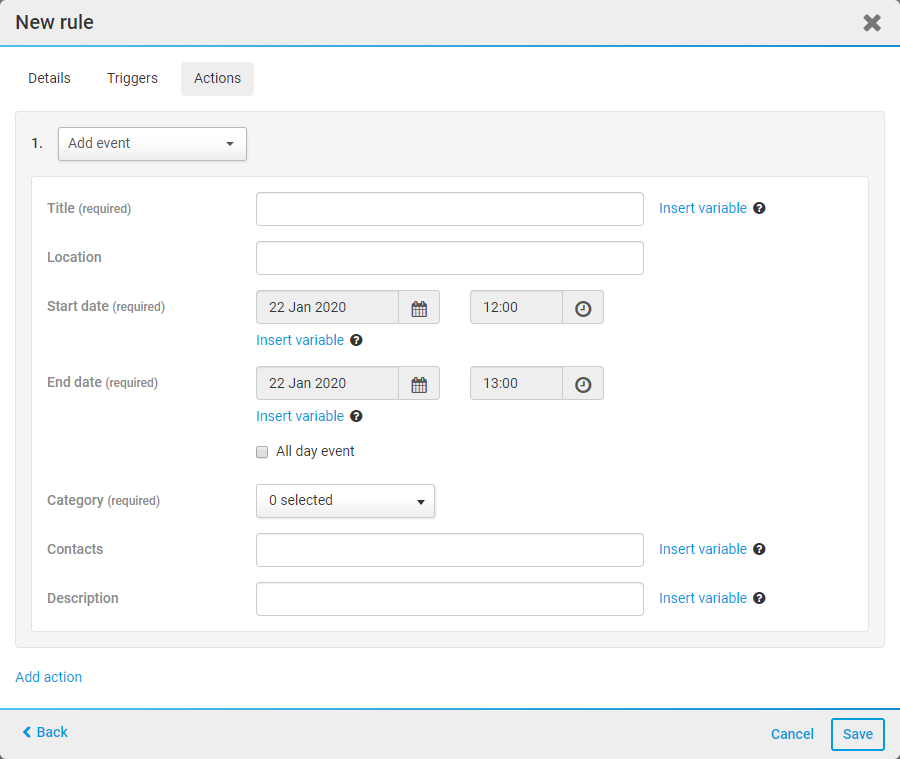
- Title- the name of the created event
- Location- the location of the event
- Start date- the start date and time of the event
- End date- the end date and time of the event
- Category- the category, or categories, of the event
- Contacts- add any people you want as contacts for the event
- Description- a description of the event
Variables
You can add variable content to some fields, dynamically retrieving data from the triggering object.
There are five fields in the
Add event
action that can use variables: Title
, Start date
, End date
, Contacts
. and Description
.Title
Select
Insert Variable
next to the Title field to display the Insert variable - Title
screen.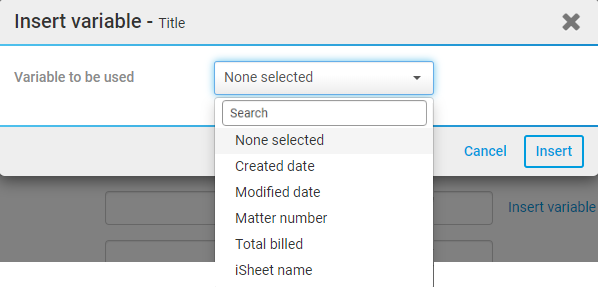
In the
Variable to be used
dropdown, you will see all of the variables available to you. In this example, we have several options taken from the triggering iSheet.note
As of April 2023, if you know the name of the variable, you can use the Search field to quickly find the variable from a long list of variables.
Select the variable you want to use, (we have chosen 'created date' for this example) and select
Insert
. 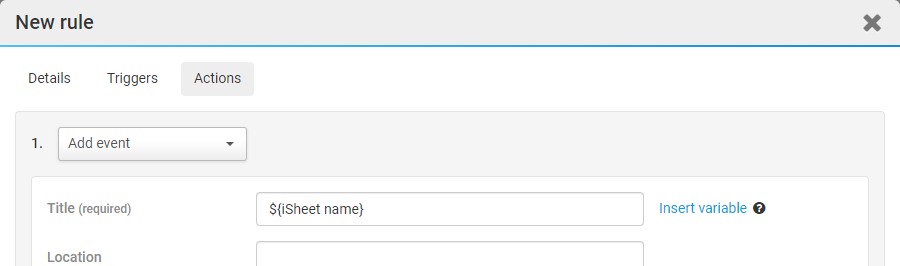
In this example, the field will be populated with the name of the triggering iSheet.
Start date and End date
Select
Insert Variable
underneath the start date (or end date) to display the Insert variable - Start date
(or Insert variable - End date
) screen.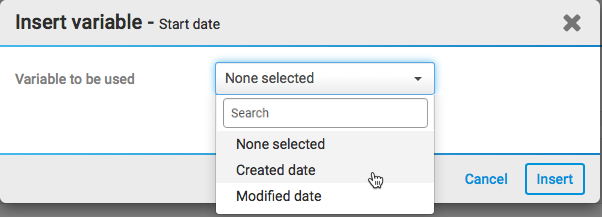
In the
Variable to be used
drop-down, you can see all of the variables available in this field. In this example, we have Created date
and Modified date
.Select the variable you want to use, (we have chosen 'Created date' for this example) and select
Insert
. 
In this example, the field will be populated with a date equal to when the record was added to an iSheet, or when a file was added to a folder.
Use the modifier drop-down to add or subtract time from the date provided by the variable.
- Ignore weekends: This option will 'skip' weekends when the date is calculated. For example, if you select a date, and add 10 days, but exclude weekends; the new date will be 12 or 14 days later (depending on how many Saturdays and Sundays are included in the 10 days).
Contacts
Select
Insert Variable
next to the Contacts
field to display the Insert variable - Contacts
screen.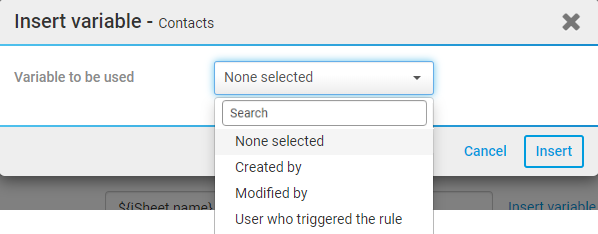
In the
Variable to be used
drop-down, you can see all of the variables available in this field. In this example, we have Created by
, Modified by
and User who triggered the rule
.Select the variable that you want to use (we have chosen 'User who triggered the rule' for this example) and select
Insert
.
In this example, the field will be populated with the name of the user who has triggered the rule.
Description
Select
Insert Variable
next to the Description
field to display the Insert variable - Description
screen.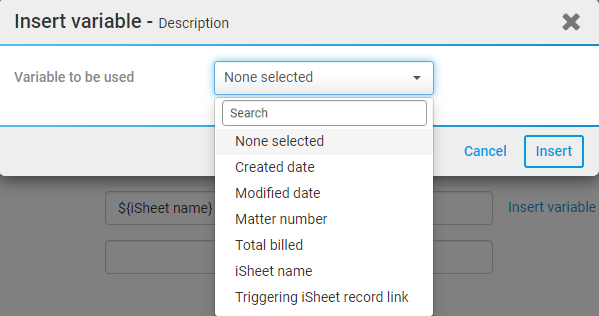
In the
Variable to be used
dropdown, you will see the variables available to you. In this example, we have several options taken from the triggering iSheet, as well as Triggering iSheet record link
.- ATriggering iSheet record linkwill insert 'click here' text and a link to the iSheet record that triggered the action.
note
The Description field can use rich text formatting; variables will be highlighted in yellow.
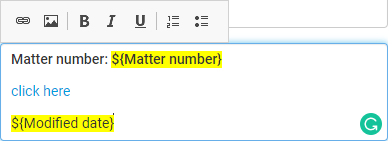
Select the variable, or variables, that you want to use and select
Insert
. You may add additional text and formatting to improve the description.
In this example, the field will be populated with the matter number, a link and the modified date of the iSheet that triggered the rule.
note
As of June 2024, you can use a default or system-generated Folder link (i.e. from a Folder / File Metadata iSheet, not a Folder Link column from a standard iSheet) as an insert variable in the description.
Finish your rule
Select
Save
to save your event actions.