
Workflow rule - Update iSheet record
You can use rules to update
choice
, dates
, number
, user lookup
, single-line text
and multi-line text
columns in iSheets.
Add a new rule
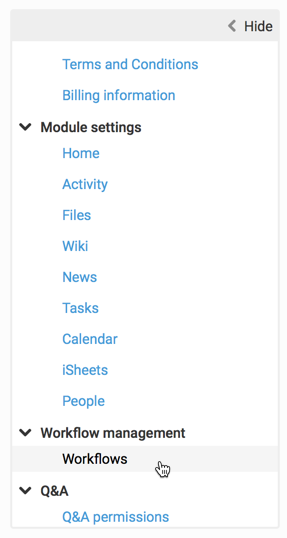
Navigate to
Admin
> Workflow management
> Workflows
:
The
Workflows
screen opens: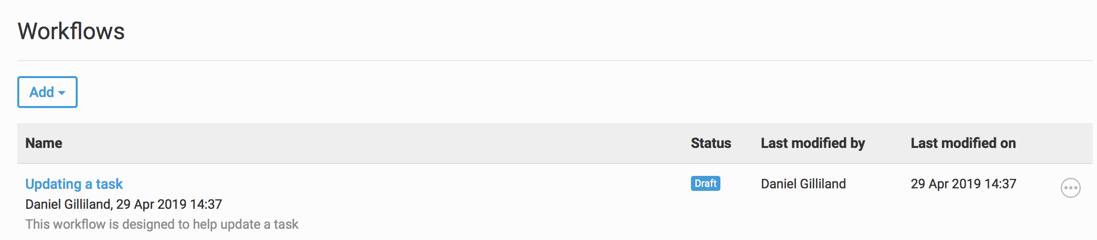
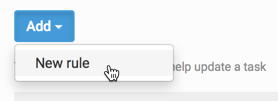
Click the workflow that will contain the new rule, and click
Add
> New Rule
:
The
New rule
screen opens: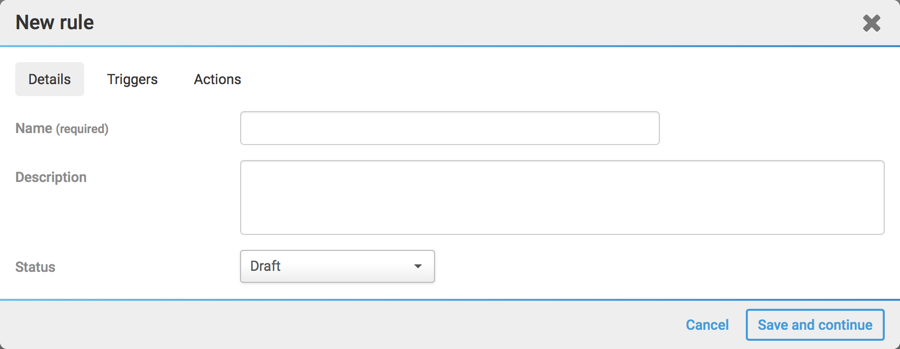
note
If you intend to update an existing rule, click the name of the rule instead of
New rule
.When creating your new rule, give it a
Name
and Description
. When you have finished, select Save and continue
.Set triggers
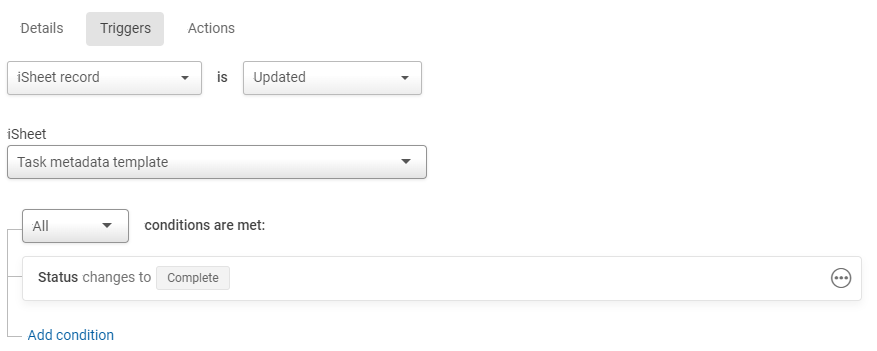
The
Triggers
tab opens: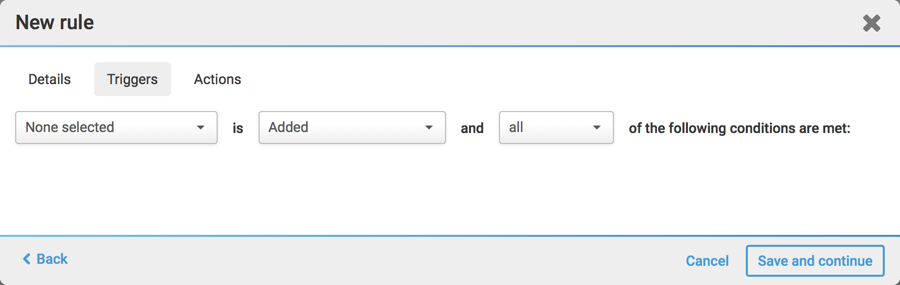
Select
iSheet record
from the first drop-down menu: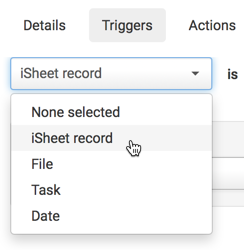
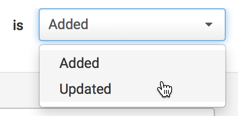
And select if your rule will trigger if an iSheet record is
Added
or Updated
:
Select an iSheet from the
iSheet
dropdown menu: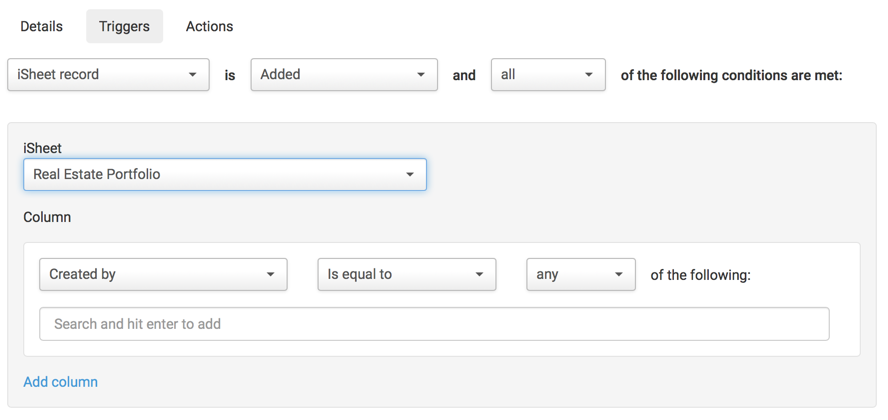
Select the column that will be monitored to trigger the rule:
In this example, we have chosen
Area (square meters)
: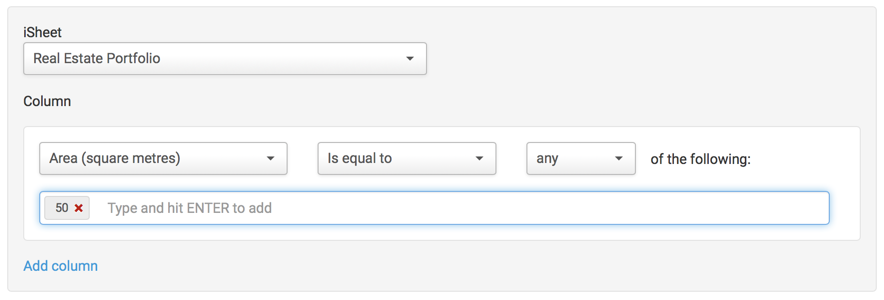
In this case, if the 'area (in square metres)' is equal to '50', the rule triggers.
You may add more triggers. When you have finished select
Save and continue
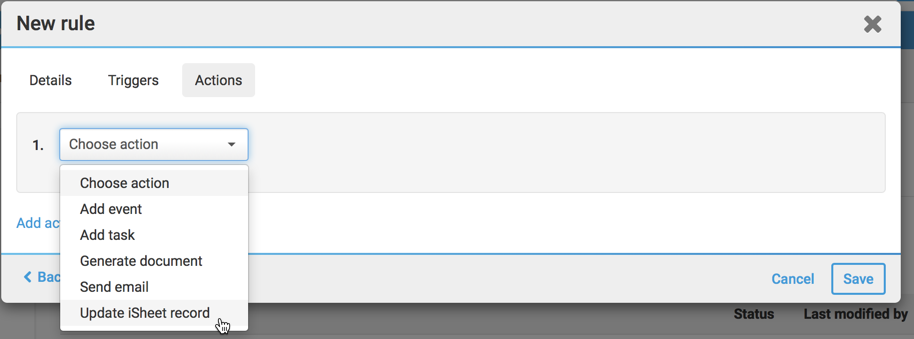
.Actions
The
Actions
tab opens. In the Choose action
menu, select Update iSheet record
:
Select which column you want to update in this workflow:
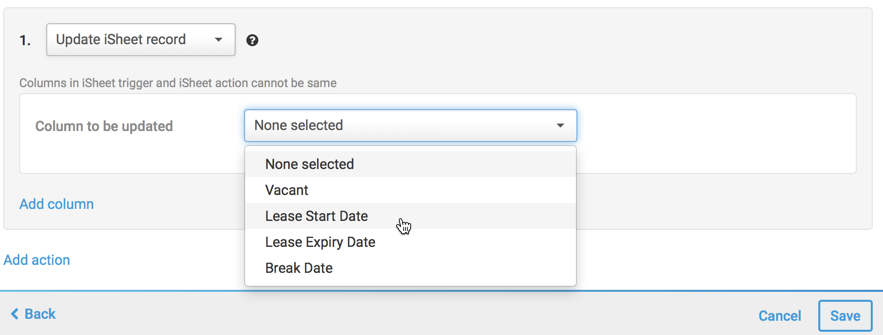
In this example, update the
Lease start date
: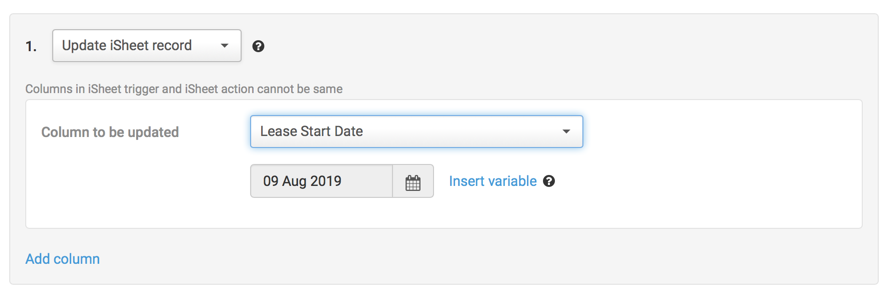
When all the conditions have been met, the workflow will update the iSheet record.
note
Click
Add column
to update multiple columns in the iSheet.Select
Save
to save your actions.Using a variable to set a date
Select
Insert Variable
underneath the start date
(or end date) to display the Insert variable - Start date
(or Insert variable - End date
) screen: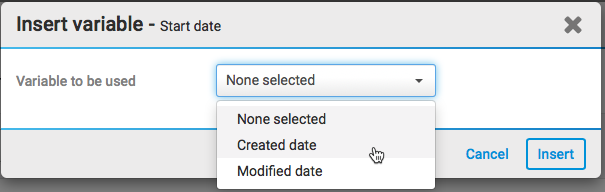
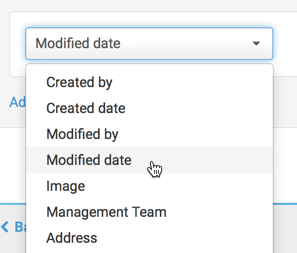
In the
Variable to be used
drop-down, you can see all of the variables available in this field. In this example, we have Created date
and Modified date
.Select the variable you want to use, (we have chosen 'Created date' for this example) and select
Insert
. For example, the Start date
field will now look like this:
In this example, the field will be populated with a date equal to when the record was added in an iSheet, or when a file was added to a folder.
Use the modifier drop-down to add or subtract time from the date provided by the variable.
Changing the units
Click the drop-down on the right to change the base unit used to set the final value. Select
days
, weeks
, months
or years
.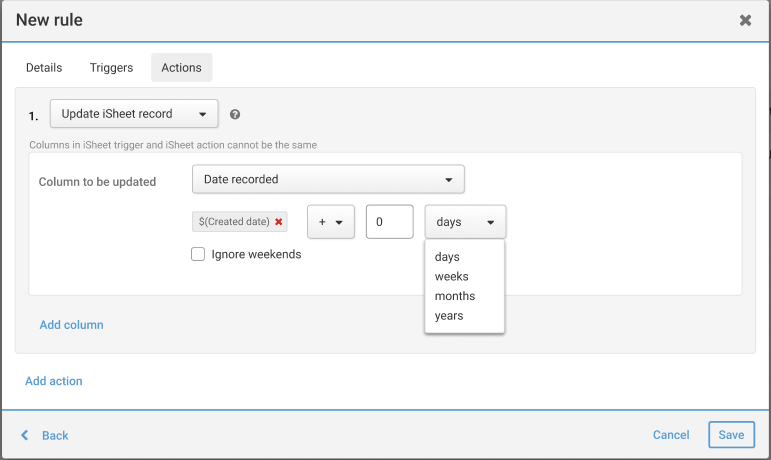
- ignore weekendsis only available ifdaysis selected. If you select a date, add 10 days, but exclude weekends; the new date will be 12 or 14 days later (depending on how many Saturdays and Sundays are included in the 10 days).
- Ifweeksis selected, then this adds multiples of seven days
- Ifmonthsis selected, then the calculation will fall on the same day of the month; for example, six months from the 25th of December is the 25th of June
- If there is no equivalent date, due to shorter months, the date is moved to the next month; for example, six months from the 31st of December is the 1st of July
- Ifyearsis selected, then the calculation matches the day of the year
Remove a date
As of May 2022, you can set up a rule to remove a date when, for example, a matter is completed.
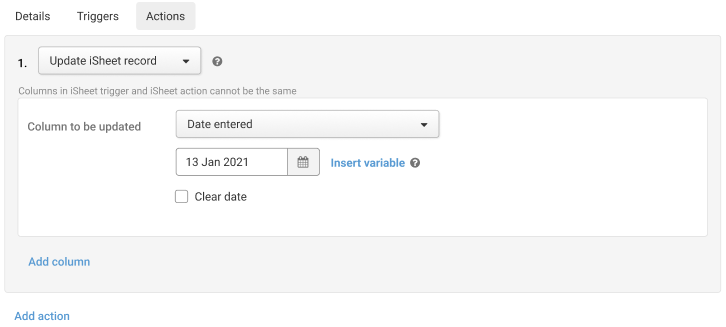
Select
Clear date
to remove a date from the record when this action is triggered.note
If the date is set by a variable, the
Clear date
option is not available; remove the variable to enable the option. Also, if Clear date
is selected, the Select date
and insert variable
options are not available.Select
Save
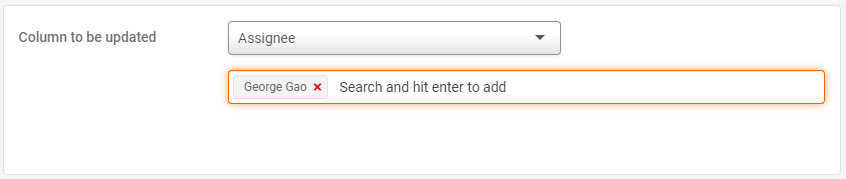
to save your actions.Creating or updating a User lookup column
You can update a
user lookup column
so that you can track who created an item or made changes.Select a user lookup column, then enter and select the name of the user:
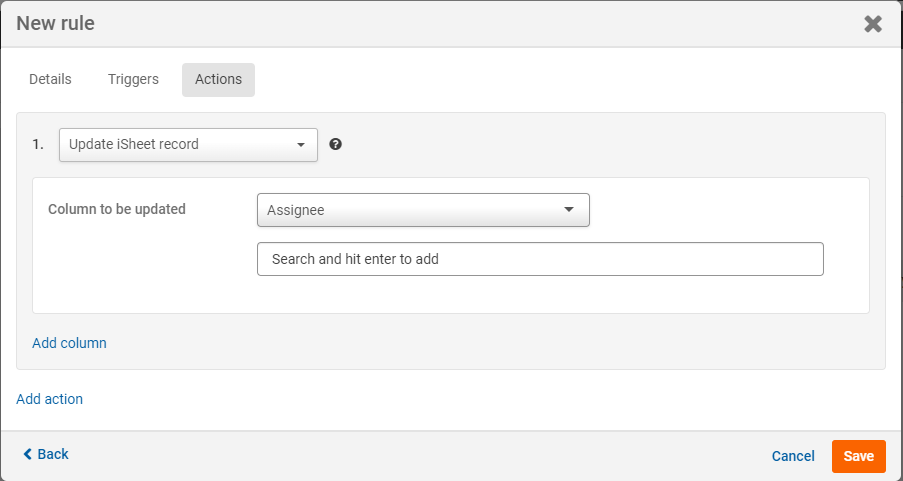
For example:
Select
Save
to save the rule.Updating a user lookup column with a variable
As of August 2022, you can update a user lookup column with a variable when you update an iSheet record, as in this example:
You can then record the user that triggered the update. Click Insert variable and select
Modified by
: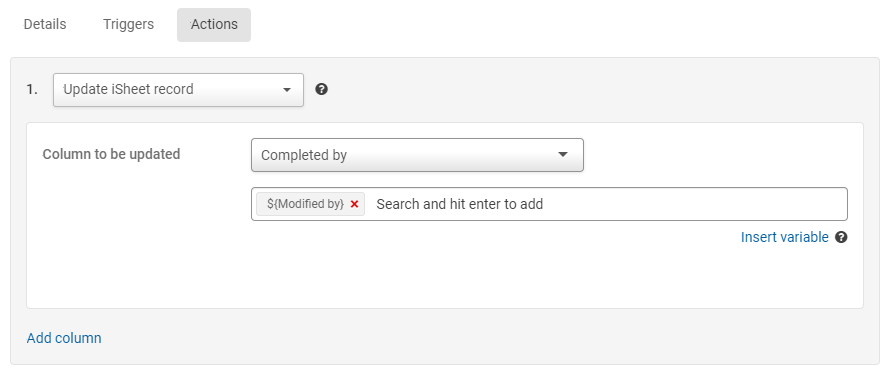
In this case, the user that modified the iSheet record is recorded in the 'Completed by' column. This record is not overwritten when the record is updated unless the rule is triggered again.
Select
Save
to save the rule.Using variables in a Single line text column
You may use a combination of free text and variables to populate a
Single line text
column.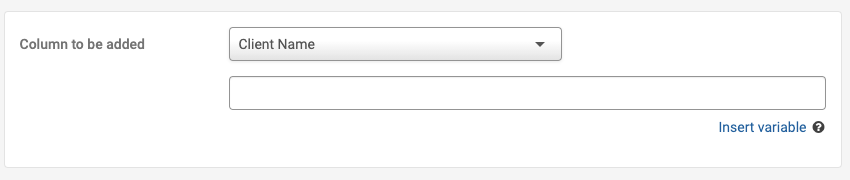
Type text as plain text; select
Insert variable
to add variables at any point in the text.note
By default, you may use a maximum of 255 characters. The action will fail if the total length, including variables, exceeds this limit.
Setting different numbers in a number column
You may populate a single number in a number column - if you want to set different numbers for different conditions, you may use multiple rules triggered by values in another column.
Save and activate
When you save your rule, it is saved and you are redirected to the rules screen:
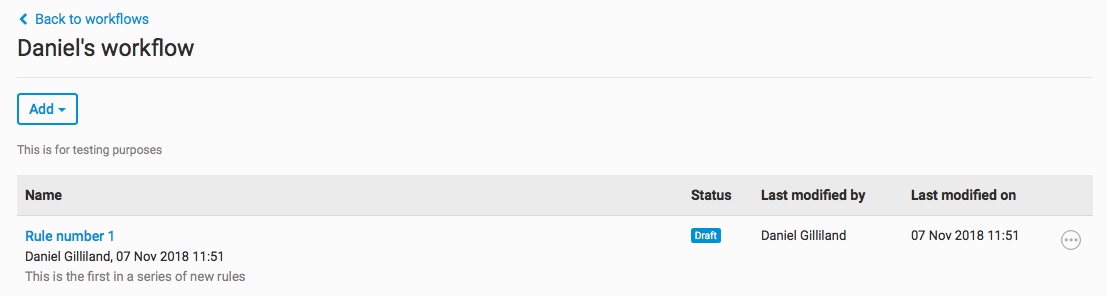
In this screen, you can view the name, status and last modified date and time of your rule, and also who modified it.
Additionally, you have access to the
More actions
menu: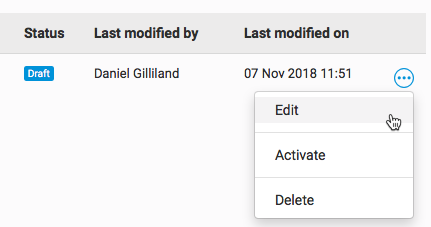
The options are as follows:
- Edit- allows you to edit the rule
- Activate- lets you activate your rules and changes the status fromDrafttoActive. If you selectMore actionson an active rule, you can insteadDisablethe rule.
- Delete- allows you to permanently delete the rule
Activating your rules
Once you have created your rules, they must be activated if you want them to trigger. Click
More actions
> Activate
to do so. If you activate rules but your workflow is not active, you will receive a warning message.