Insert balance sheet workpapers
Most balance sheet workpapers from the prior period Classic calculation are inserted automatically in the NextGen calculation immediately after roll forward.
However, you may need to insert some remaining workpapers manually. This ensures that closing balances from the prior period have a suitable workpaper in the current NextGen calculation into which to roll forward. Verifying that opening balances have rolled forward correctly is a key step in the transition process.
Compare Classic and NextGen calculations
Compare the list of balance sheet workpapers in the prior period Classic calculation with those in the current period NextGen calculation. This will identify which workpapers exist in the Classic calculation but not in the NextGen calculation that you need to insert.
note
Some workpapers are always inserted by default in a NextGen calculation. This is regardless of whether, for example, it was inserted in a prior period, has a brought forward opening balance, or has a current year GL value mapped to it.
tip
To assist the comparison between your Classic and NextGen calculations, you can open both calculations in separate browser tabs or windows to view them side by side. To do this, open one of the calculations in a browser, duplicate the browser tab (or copy the URL and paste it into a new browser tab or window). In that new browser tab, return to the Calculation Management Screen and open the other calculation. For example, in Chrome, right-click on the browser tab and select
Duplicate
. In the new tab, open the other calculation. Insert the workpapers
Once you identify the additional workpapers to insert into the current period NextGen calculation, insert those workpapers. These are optional workpapers because they are not inserted by default into the system.
There are 2 types of optional workpapers. You insert each type using a different method.
Unique Optional Workpapers
- Open a NextGen calculation.
- In the ribbon toolbar, selectInsert, thenInsert Sheet.
- The Insert Sheets window shows the list of unique optional workpapers that you can insert. Switch toShow Template Referencesto identify balance sheet workpapers, which have a reference starting withB.
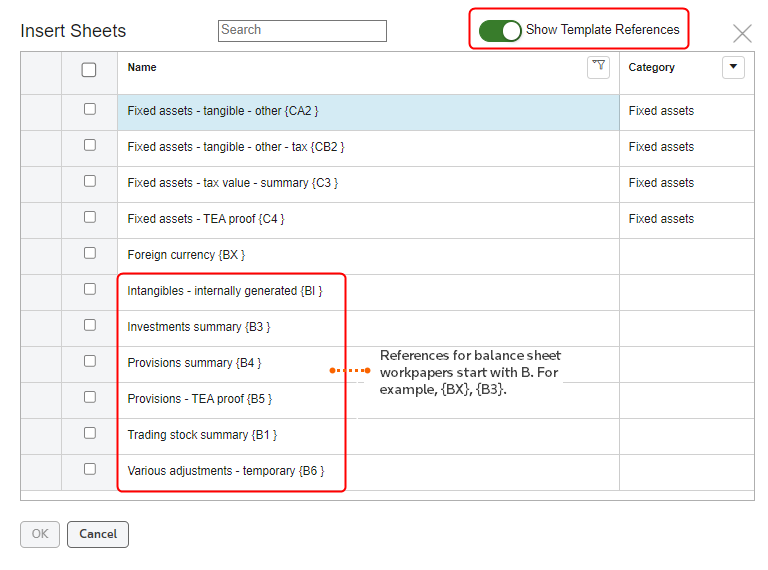
- To insert a workpaper, check the checkbox to the left of the workpaper and selectOK.
- Make sure that the workpaper is inserted into the calculation and selectSave.
Optional Row Support Workpapers
Row-support workpaper refers to any workpaper that is inserted manually against a row in the balance sheet. In a Classic content calculation, row support workpapers can be identified by a workpaper reference with 2 letters (for example, BB or BC), rather than a letter and number, such as B1, B28, B37.
Proforma workpapers are generic templates with pre-defined layouts that you can insert against balance sheet and income statement rows or line items to create row support workpapers for these items. Each pro-forma has a different layout with particular mechanics and data presentation.
- Open the {B} Balance Sheet.
- On the balance sheet row for which you want to insert the workpaper, right-click and selectInsert, thenSheet.
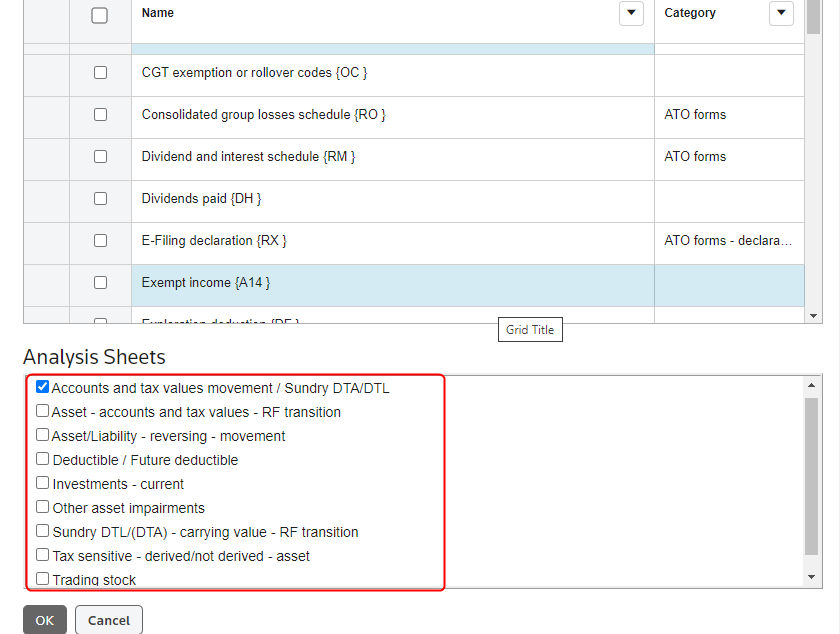
- TheAnalysis Sheetssection shows the selection of pro-forma workpapers that you can insert to create the row support workpaper. Check the checkbox for the pro-forma and selectOK.
Roll forward workpapers
For certain inserted analysis sheets, you'll need to insert additional roll forward (RF) transition workpapers. These RF transition workpapers facilitate the closing balance from the Classic calculation being rolled forward correctly into the NextGen calculation.
Refer to the {RF$CONFIG} workpaper for a full list of names and references of workpapers from Classic versus NextGen.
Analysis sheet inserted | RF transition workpaper is also required |
|---|---|
Accounts and tax values movement/Sundry DTA/DTL {BV} | {RFY} Proforma for Asset - accounts and tax values - RF transition
*If the prior year worksheet was {BC} |
Accounts and tax values movement/Sundry DTA/DTL {BV} | {RFZ} Proforma for Liability - accounts and tax values - RF transition
*If the prior year worksheet was {BG} |
Asset/liability - reversing - movement {BU} | {RFU} Proforma for Liability - reversing, movement - RF transition |
Accounts and tax values movement/Sundry DTA/DTL {BV} | {RFM} Sundry DTL/(DTA) - carrying value - RF transition
*If the prior year worksheet was {BM} |
Accounts and tax values movement/Sundry DTA/DTA {BV} | {RFL} Sundry DTA/(DTL) - carrying value - RF transition
*If the prior year worksheet was {BL} |
- Once you have selected the required sheets from theAnalysis Sheetswindow, theInsert Sheets and Analysis Sheetswindow will close.
- Make sure in theNavigation Panethat the workpaper has been inserted into the calculation. SelectSave.
- Open the {RF$CONFIG} Roll forward transition configuration workpaper.
- In the top section of the {RF$CONFIG} workpaper, enter details of the row support or analysis sheet per the Classic calculation and per the NextGen calculation. This matches the prior year workpaper to the current year workpaper so that the opening balances roll forward. Get these required details from the reference and name of the row support workpapers in the Classic and NextGen calculations.Accounts payable/trade creditors and Other current assets workpapers are matched from their Classic versions to their NextGen versions.

 noteThe accrued expenses workpaper is included in the top section of the RF$CONFIG workpaper. However, its details should be pre-filled automatically so need not be manually entered.
 - When inserting RF transition workpapers alongside an analysis sheet, refer to the following example for step-by-step guidance on completing the {RF$CONFIG} workpaper, to ensure that the opening balances roll forward correctly.
- Repeat the steps in the Optional Row Support Workpapers section for each row support workpaper in the calculation.
- In the ribbon toolbar, select the dropdown next toRefresh, thenManage Sources.
- In the Actions column of the Manage Sources screen, selectFull Refresh.

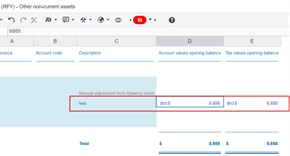
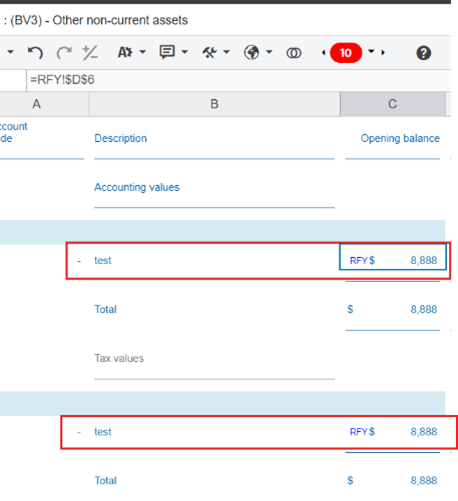
This example illustrates a scenario where a roll forward workpaper was inserted with an analysis sheet.
- Select the analysis sheet and the supporting RF transition workpaper.

- Open the {RF$CONFIG} workpaper and enter or verify the prior sheet, current sheet, and parent row fields. The current sheet needs to be the RF transition sheet (for example, RFY). It is essential that the parent row description matches the Classic workpaper name.
- In the ribbon toolbar, select the dropdown next toRefresh, thenManage Sources.
- In theManage Sourcesscreen, selectFull Refreshin the Actions column.
- Verify that the RF transition sheet has successfully populated the opening balance values and is properly linked to the NextGen analysis sheet.