
Meeting Planner Configuration
To use the Meeting Planner Data Visualisation panel, configure one or more Office 365 email accounts as the Meeting Planner invite user or meeting user. These users can be existing HighQ users or any other users.
To manage calendars from Outlook, ensure that the configured Office 365 email accounts have access to a shared mailbox and its associated calendar. If a shared mailbox does not already exist:
- In the Microsoft 365 admin center, go toTeams & Groups>Shared mailboxes.noteTo create or manage shared mailboxes, an administrator account with the required Microsoft 365 permissions is needed. If the Shared Mailboxes page is unavailable or an access error is displayed, contact your Microsoft 365 administrator.
- SelectAdd a shared mailbox.
- Enter a name and email address for the shared mailbox, and save the changes.
- SelectAdd members to this mailbox.
- Add the users who require access to the shared mailbox.
- After the changes are applied, the shared mailbox and its calendar become available to the selected users in Outlook.
Configure Tenant ID and Grant Admin consent
To configure Meeting Planner, we must first configure the
Client Tenant ID
. The same Tenant ID is used when granting administrator consent.You can find your Microsoft Entra ID (formerly Azure AD) through the Azure portal or the Microsoft Entra ID Admin center.
To configure the Client Tenant ID via the Azure portal:
- Sign in to the Azure Portal.
- Use the top search bar to search for and selectMicrosoft Entra ID.
- On theOverviewpage, locate theBasic Informationsection.
- Find yourTenant ID(a GUID string) and click theCopy to clipboardicon next to it.
- Alternatively, in the left-hand menu, selectProperties, and locate theTenant IDthere.
Grant Admin Consent
For the Meeting Planner panel to function correctly, it needs access to the relevant mailboxes. To enable this access, you must grant admin consent when configuring the Panel.
- SelectGrant Admin Consent. This uses the configured tenant ID.
- A Microsoft Entra ID administrator must complete the consent process by signing in.
Configure and Assign Meeting Assistant users
To add a user to Automated Meeting Assistants, Click the user picklist to choose from a list of active HighQ users when configuring the panel. The selected user's email address will be used as the shared calendar.
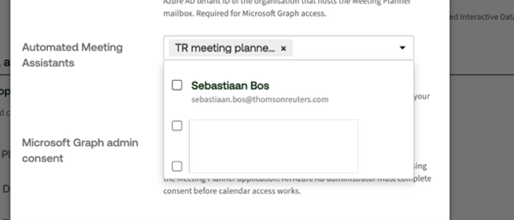
To configure a non-HighQ user account, click
Add new assistant
and provide a full name and email address.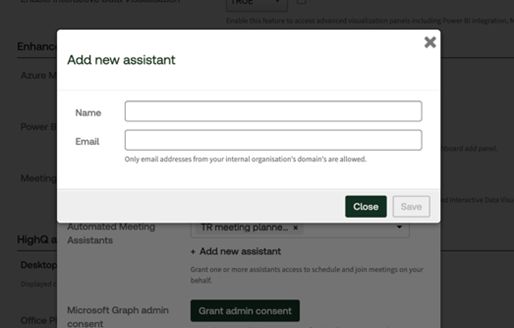
note
- The configured user must be a standard Office 365 user with access to a mailbox, Teams, and a calendar to enable full functionality.
- Email groups or distribution lists cannot be used.
Configure Meeting Planner panel
Next, to configure the Meeting Planner (as a System Admin):
- Navigate toSystem admin>System settings>Enhanced Interactive Data Visualisation>Meeting Planner.
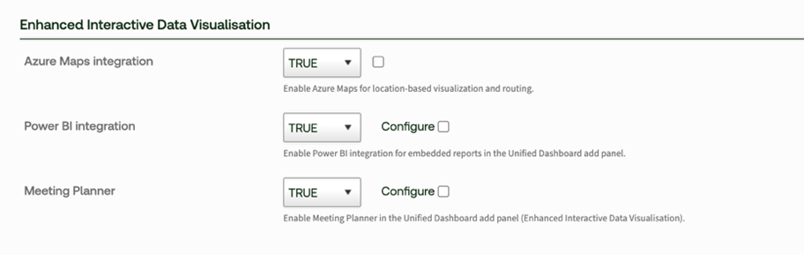
- ClearConfigureto enable editing of the Power BI configuration settings.noteWhenConfigureis selected, the Power BI configuration fields are read-only. ClearConfigureto make the fields editable.
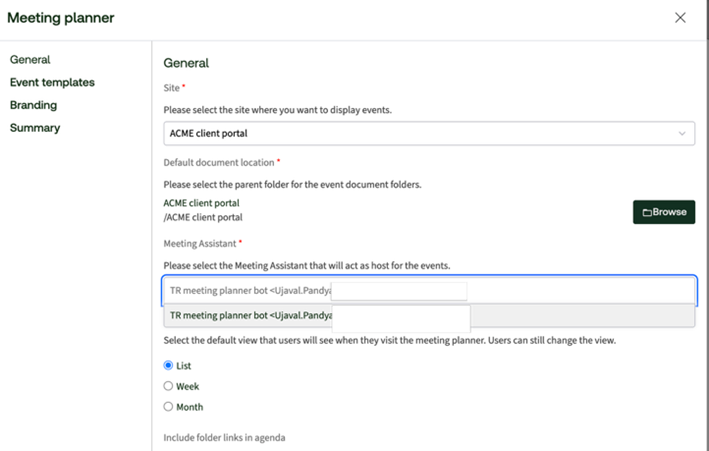
- Enter the required information and selectSaveto confirm the configuration. Below is an example of how the configuration window looks like.
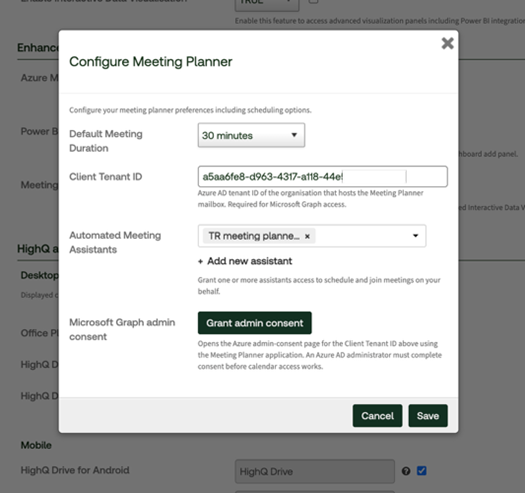
Assign a user to a Meeting Planner panel
When adding a new Meeting Planner to a site, you can select from the list of configured user accounts. Each Meeting Planner panel can be connected to one user account.
You can create multiple user accounts (for example, per matter or per client) and assign different accounts to different Meeting Planner panels as needed.
Outlook Calendar Sharing
The Meeting Planner panel visualises the Outlook calendar of the Office 365 user configured in the Meeting Planner. To manage events directly from Outlook, ensure that the configured user account has a shared calendar (set up by your Office 365 admin). You can then subscribe to that calendar directly in Outlook.
Authentication and security overview
Meeting Planner uses the OAuth 2.0 client credentials grant flow to authenticate with Microsoft Graph API. A Microsoft Entra ID application (service principal) uses a Tenant ID, Client ID, and Client Secret to obtain an access token scoped to Microsoft Graph. This is an application-level authentication method, so no end-user credentials are used or stored by HighQ.
The service principal accesses a designated Exchange Online mailbox (bot mailbox) that is used to create and manage calendar events for Meeting Planner. Meeting Planner configuration is deployment-wide, using a single service principal and bot mailbox, while individual panel settings are configured per instance.
All calendar event data is stored within the customer's Microsoft 365 tenant in Exchange Online. HighQ acts only as an orchestration layer between the user's browser and Microsoft Graph and does not store, cache, or retain calendar event content. When users create, update, or view meetings, HighQ authenticates with Microsoft Graph and forwards requests to the designated mailbox.
Calendar event data, including subject, attendees, location, meeting times, and attachments, remains within Microsoft 365. Event data is sent from the browser through HighQ to Microsoft Graph, where it is stored. Calendar queries follow the reverse path, with Microsoft Graph returning event information to the browser through HighQ.
Each calendar event includes a Microsoft Graph OpenTypeExtension containing the HighQ site ID. This metadata enables site-level isolation, ensuring users can access only events associated with their HighQ site, even when multiple sites use the same Exchange mailbox.
The only Meeting Planner information stored in the HighQ database is panel configuration data, such as the default time zone, meeting duration, and buffer time. No calendar event data is stored in HighQ.
Related Content
-
Meeting Planner Panel
Format: Article