
Choice column
The Choice column allows an admin to define a list of values for the column; by default, only these values may be selected when a user adds a record.
note
As of December 2025, an admin can create a set of Dynamic Choice rules that filter the values available for each Choice column, based on the values already selected. Users will only see relevant values when selecting values in an iSheet.
Choice columns allow you to filter choices to predefined values to either ensure consistent data entry or reliably trigger actions based on the value.
note
Actions could hide or display another column, or send an email, based on a specific value.
note
Values in a Choice column, including numbers, are stored as text strings.
To use
numerical
values in a choice column, define the column as a score column; this allows values to be used in calculation columns. You can either add a new Score column or 'upgrade' a Choice column. Click
Manage Columns
in the iSheet and then select the Choice column. Change the Column Type to Score
.Enter choices
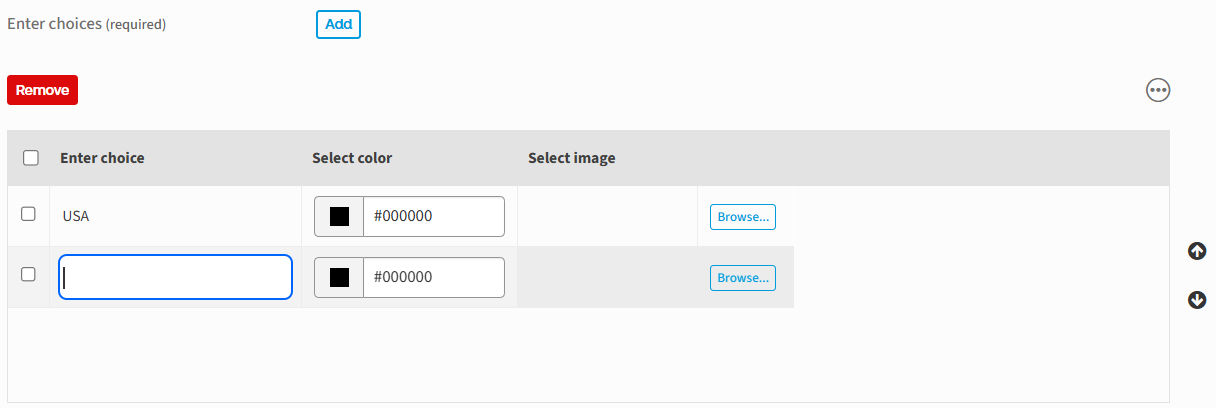
The first step in creating a Choice column is to add the values your users can select.
Click the
Add
button to add a choice. Each choice is added as row in the table, as seen below. Enter text for choice values in the Enter choice
column. tip
At least one choice is required; you may add as many choices as needed. A cannot be entered twice in the list of choices.
Remove choices
Select the checkbox next to the value and click
Remove
to remove one or more values from the list of choices. note
A value cannot be removed if any existing iSheet items include that value. Those items must be deleted, or the value in that column for those items must be changed first.
Values in the list of choices can be modified; for example, to correct a spelling error in the original list. Changes propagate to all items that used the original value.
note
Modifying a choice value can affect column conditions, view filters or triggers based on the changed value. Any such conditions must be modified to match the new value.
Formatting choices
Formatting can be applied to each choice to highlight or easily distinguish between certain values.
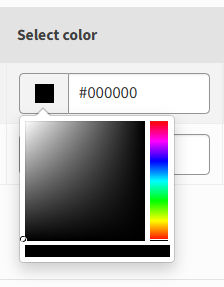
Select color
Each choice can be assigned a colour, which is applied to the text displayed in the iSheet module.
Select the square to access the colour picker; alternatively, click in the text field next to it to enter a hexadecimal colour value or an HTML colour name (without spaces).
Select image
In addition to colours for choice text, you can also add images that are displayed next to text in the iSheets module. Images serve as a visual indicator when reviewing data in the iSheet.
note
Images are selected from the iSheets image library.
A system admin can add images to the library in
System admin
> iSheet admin
> Image library
. After a system admin has added the desired images to the iSheet image library, site admins can click
Browse
to the right of each choice, and then select the image to assign. Select Done
to confirm the action.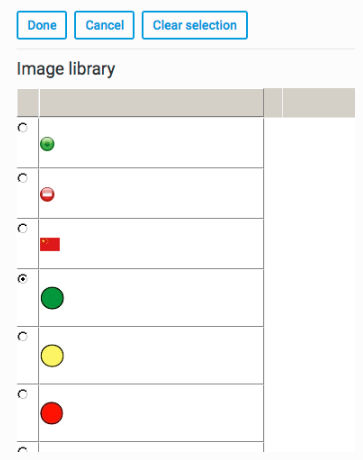
note
Images should generally be small, no larger than
44 x 44 pixels
to prevent any disruptions to the formatting of the iSheet table. If you assign images to choice values, you may need to increase the column width to accommodate both the image and the choice text.
note
Cached images in choice columns
Image choices are cached until the browser is refreshed manually, ensuring the rapid and accurate display of all multiple-choice column images.
note
To add numerical values to a choice column, you can define it as a score column. These values may be manipulated and displayed in calculation columns.
You can either add a new Choice column or 'upgrade' a current Choice column. Click on
Manage Columns
in the iSheet and then click on the Choice column. Change the Column Type to Score
.Sorting choices
Select the checkbox next to the item and use the up or down arrows to move the choices up or down in the list.
Display method
Once you have created the choices, you can choose one of three methods to display them to your users:
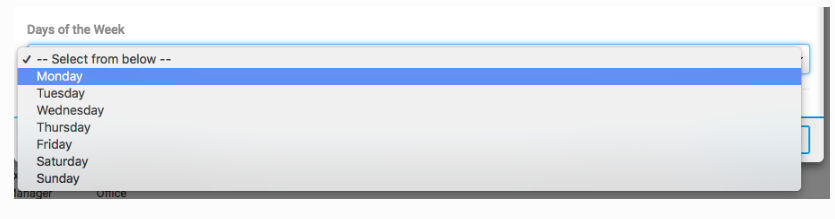
- Drop-Down Menu
- Radio Buttons
- Checkboxes (allow multiple selection)
note
Dynamic choices are not available if you select
Checkboxes
.Choice options are displayed in a drop-down list - users can make a single selection. This option should be used if you have many values to display, as this is an efficient use of space in the input form.
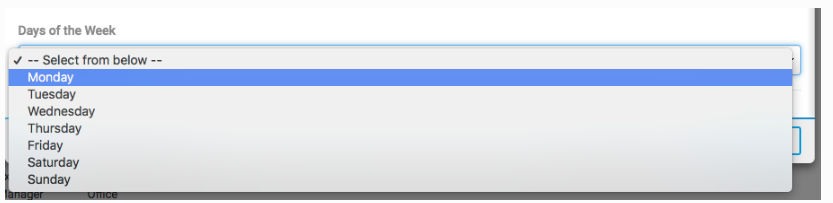
Radio buttons allow you to display each choice in a vertical list. As with the drop-down menu, users can select only a single value.
note
Once a selection has been made, a user can change the selection, but not deselect all values. If this is required, use a drop-down list.

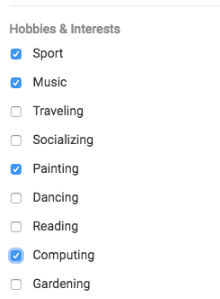
Checkboxes
Checkboxes allow a user to select multiple values from the choice list.
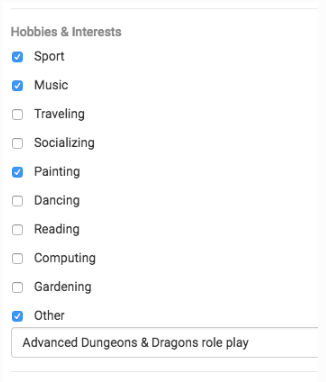
Include 'Other' option
Select the
Other
option to add a text field that allows the user to type a custom value. note
If you build conditions that relate to this column, then you may not wish to allow users to enter their own value. It may mean certain conditions are not triggered.
Default value
Default value
appears for most column types, but can be effective in a Choice column: tip
For example, if a Choice column stores a task status (i.e., Requested, In progress, Complete), you may want to make that column visible to users, but not editable, as an admin determines the status based on the current stage of the task.
Normally, if a user creates a new record, the status choice column would not have a value. With a default value, the value is set when the record is created, and can trigger column conditions or actions.

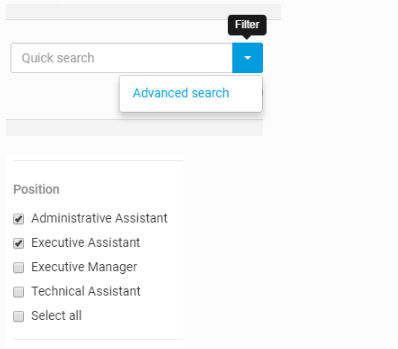
Search configuration
You can decide if a choice column is included in iSheet searches, and the options users have when they search choice column values. By default,
Allow search
and Multiple selection in search
are selected.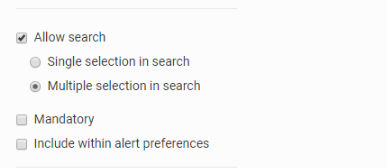
If
Multiple selection in search
is selected, users may run an advanced search from the iSheet module and select one or more choice values for their search results. In this example, the user would retrieve any items that had either
Administrative Assistant
or Executive Assistant
as the value selected for Position
.
If
Single selection in search
is selected, users may only search for one value at a time.
Related Content
-
Column types
Format: Article
-
iSheet image library
Format:
Article,
3 min read
-
Dynamic choice column
Format:
Article