
Add and configure Views
Adding a View
To add a new
View
, navigate to the iSheets admin
page in Module Settings
and select Manage Views
from the More actions
menu.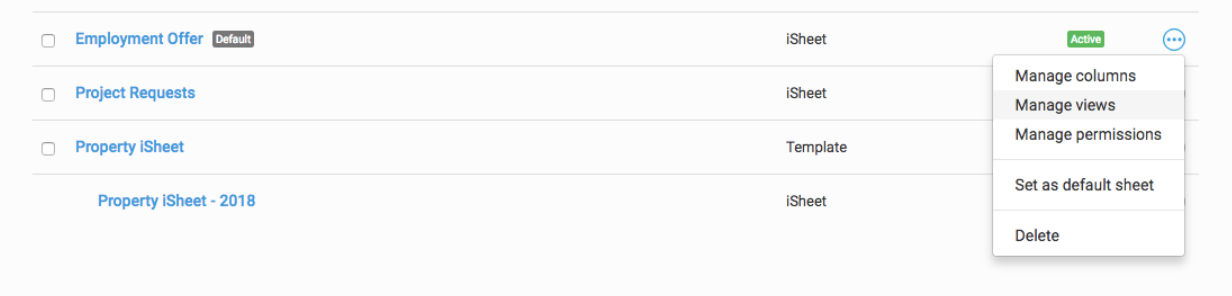
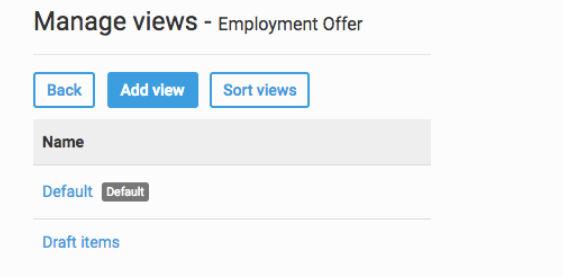
In the
Manage Views
screen, select Add View
.
Cloning a View
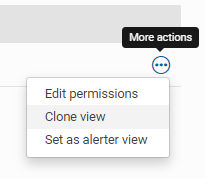
As of March 2023, you can copy an existing view In the
Manage Views
screen. Select More actions
for the view to copy and select Clone view
.
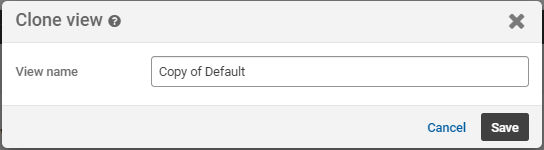
Enter a name for the new view and select
Save
:
A copy of the view is added to the
Manage views
screen.note
The configuration of the cloned view is copied to the new view, however, the new view does not inherit any status as a Default or Alerter view.
Click the name of the new view and follow the instructions in Edit Views.
Configuring a View
Multiple configurable options are available in the
Add View
screen:Name
Enter a
View name
, which must be unique in that iSheet.note
View names can have a maximum of 80 characters.
Columns
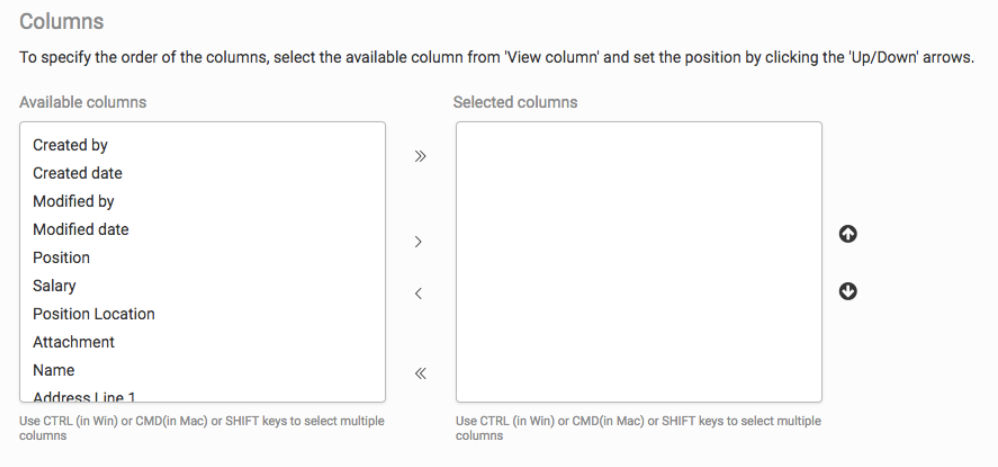
Select one or more columns from the available
Available columns
to include in a view, by clicking to highlight them and using the arrows to move the fields into the Selected columns
list. The Selected Columns
list will be visible when viewing the table in the iSheets module. Use the Shift
and Ctrl
keys to select multiple fields to be moved. The double arrows will allow you to move all Columns between the two lists.note
You may add system-generated File status columns to a View, such as approval template status (approved, rejected or awaiting approval), Contract Express status (ready or incomplete), or DocuSign signature status (sent for signature or signed).
You can rearrange the columns listed in the
Selected columns
list to define the order in which the columns display in the view. Select one or more columns in the list and use the up
and down
arrows to change their order.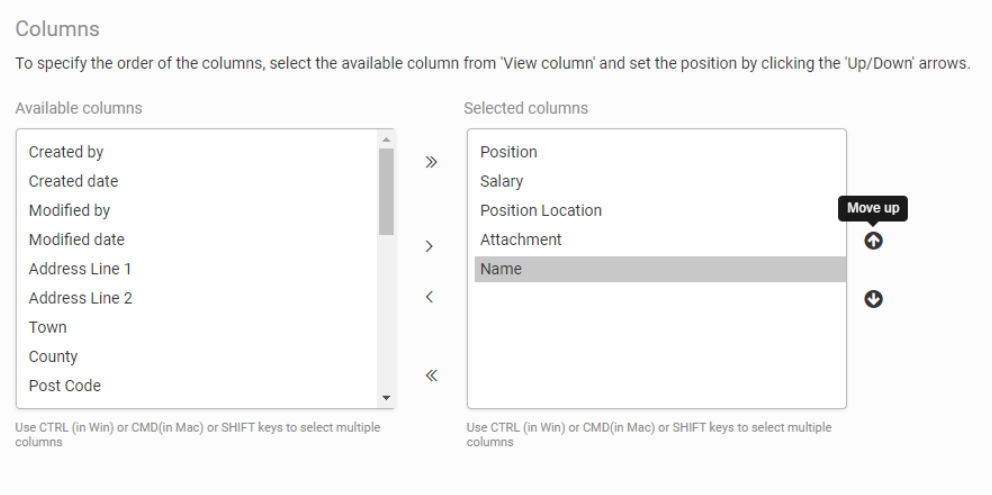
note
Views will respect any permissions applied to a column. If a user has access to a view which includes a restricted column, it will not appear in the view for the user.
You can also enable inline editing in the Columns section. Any compatible columns added will automatically have inline editing enabled by default. However, you also need to enable inline editing on the View. When viewing the list of iSheets click on
More Actions
and then choose Manage Views
. In the Columns
section set Enable inline editing
to Yes
.
note
This has been set up at the View level because if you have conditions set up on a view, you may not want users to edit this while viewing the iSheet; the view may not automatically get refreshed and then the condition would be broken.
Mandatory/required columns
As a view can unintentionally hide a mandatory/required column, please ensure the view contains all mandatory/required columns.
note
To enable this option, open
Admin
> iSheets
(under Module settings). Click the name of the iSheet and enable Set Add/Edit forms to only display columns from the selected View
:If enabled,
Add record
, Edit record
and shared forms only display and request data for columns defined in the selected View.In the
Available columns
list, and the Manage views
window, a Required column
note indicates that a view is missing one or more mandatory columns: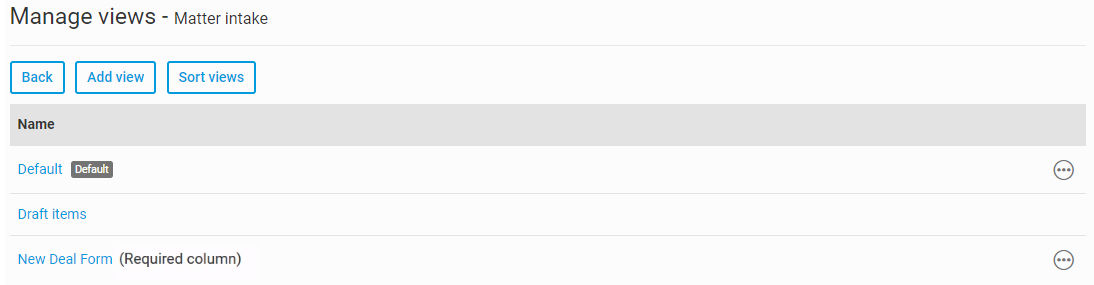
note
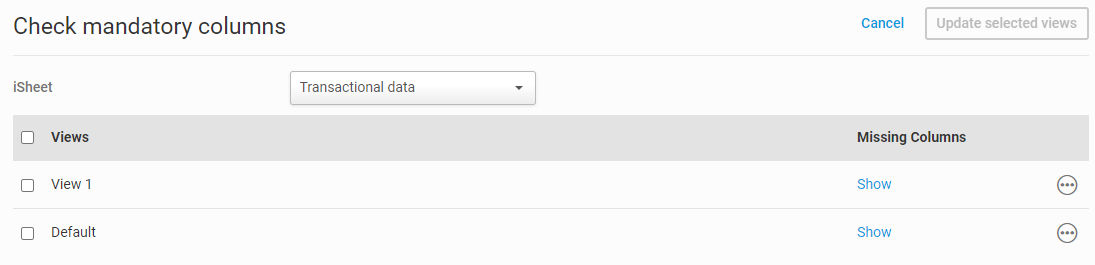
You can check if a view includes all mandatory columns. Open
Admin
, iSheets
, then select Check mandatory columns
.If necessary, select the iSheet to check. A list of views is displayed.
Select
Show
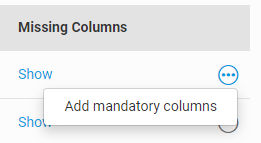
to see a list of mandatory columns that are missing in the view. Select More actions
then Add mandatory columns
to automatically add all missing mandatory columns to the view.Alternatively, select all views you need to update, then select
Update selected views
in the top-right corner.Sort
You may set a default sort order for each view.
note
Users may sort views by clicking on a column heading in an iSheet view, if desired.
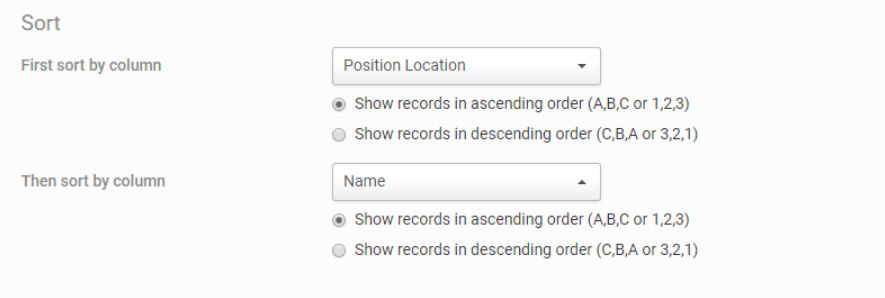
The default sort for the view can be set on any column, subject to the column type limitations listed below, in ascending or descending order. For every new view created, the default sort is from the oldest to the newest, based on item creation date.

Up to two columns can be defined to determine the default sort order. The first column sort will apply first, then the second column sort will apply.
note
Columns need not be included in the view to be used for sorting.
The following column types cannot be used to sort a view:
- Multiple line text
- Image
- Join
- Calculation
- Auto-increment
- Lookup, if the lookup source column type is multiple line text, calculation or auto-increment. Other lookup source column types may be used for sorting.
Filter
Filters can be added to views to determine which iSheet items should be displayed. For example, if an iSheet tracks litigation matters in various jurisdictions in the United States, a "New York" view could be created to display just cases filed in New York.
View filters are similar in their configuration to column conditions:
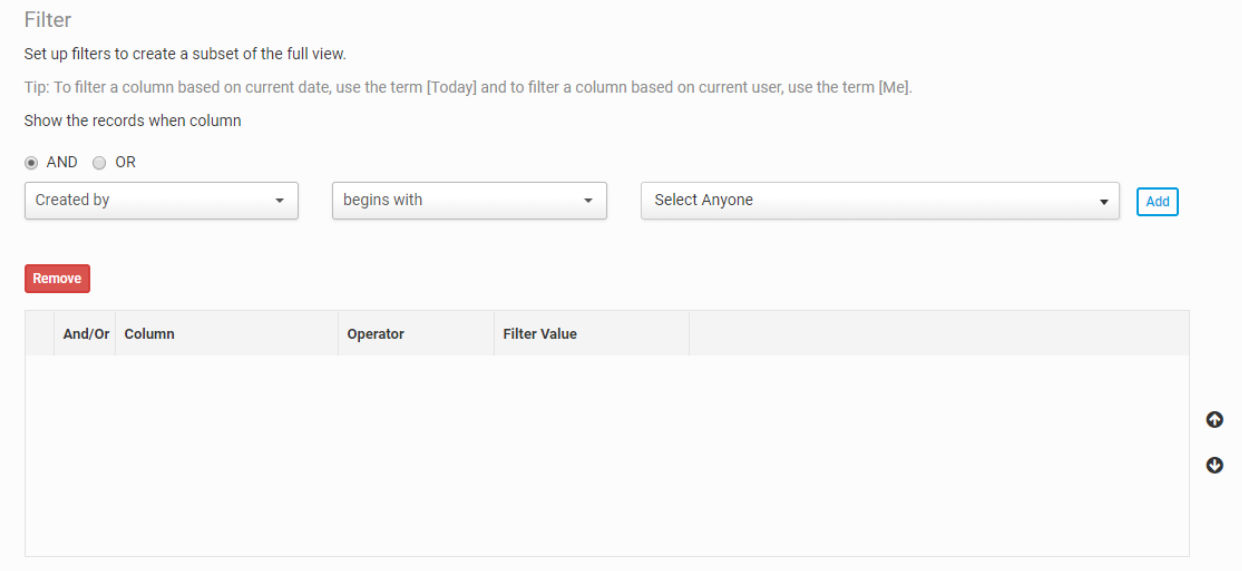
To create a filter condition, select a column from the first drop-down menu, select a comparison operator, enter a value to be used for the comparison and then select
Add
.Filter conditions
As with column conditions, the comparison operators available are based on the type of column used for filtering.
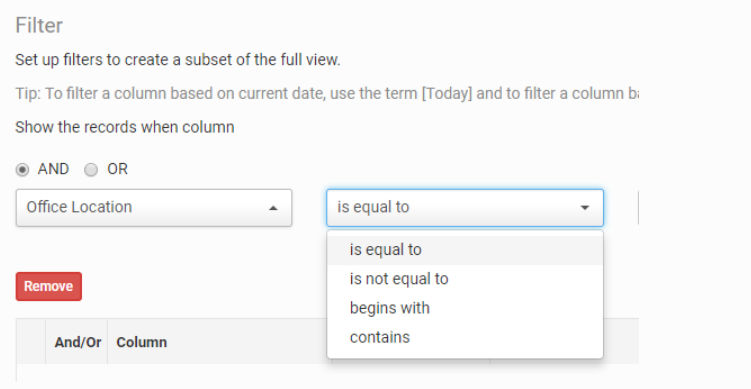
Text-based column types, which include
Single line text
, Multiple line text
, Choice
and Lookup
(where the lookup source column is one of these text-based column types), may use these comparison operators:- is equal to
- is not equal to
- begins with
- contains
note
The text match for all of these operators is case insensitive.
User lookup
column types (including Created by
and Modified by
) use the same comparison operators as text-based column types, and can be compared against any single user selected from:- the radio button picklist
- any ad hoc text, or
- the logged-in user, by selectingMe.
note
'
Me
' is a dynamic placeholder that stands for the current user. If a view is limited to display rows where Created by equals Me
, then a user will only see the items they created.The list of users available in the pick list will depend upon the scope defined in the user lookup column configuration. If the user lookup pick list is limited to "All Site Users", the list of site users may be selected in the filter for that column.
You may select
Other
to enter text to match.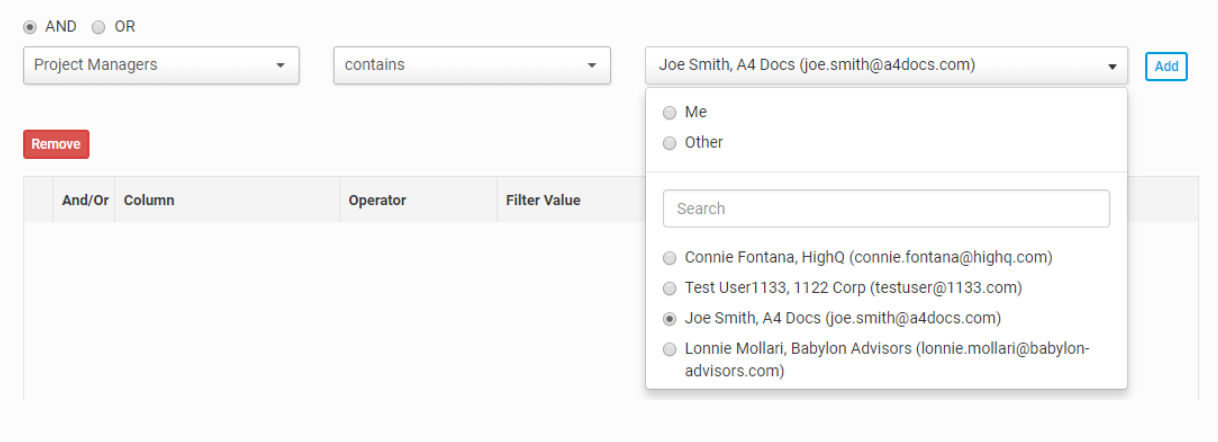
Numeric column types, which include
Number
, Calculation
and Lookup
(where the lookup source column is one of these numeric column types), may use these comparison operators:- is equal to
- is not equal to
- is greater than
- is less than
- is greater than or equal to
- is less than or equal to
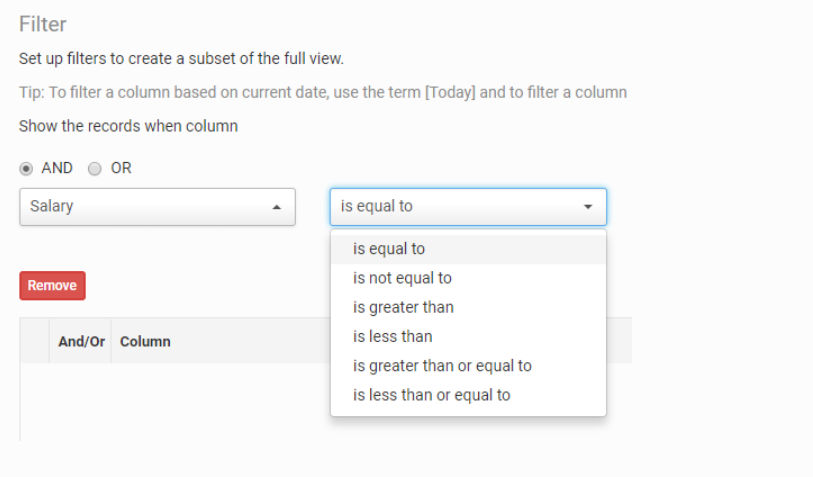
The comparison value can be any numeric value.
Date column types, which include
Date and time
(including Created date
and Modified date
) and Lookup
(where the lookup source column is a date and time column type), may also use the comparison operators for numeric column types. Date column types can be compared against the current date using Today
, a range of days before or after Today
, or against a fixed date.For example, you could create a 'Recently modified' view to display items modified in the last 7 days by adding the following filter: Modified date is greater than or equal to Today-7 days
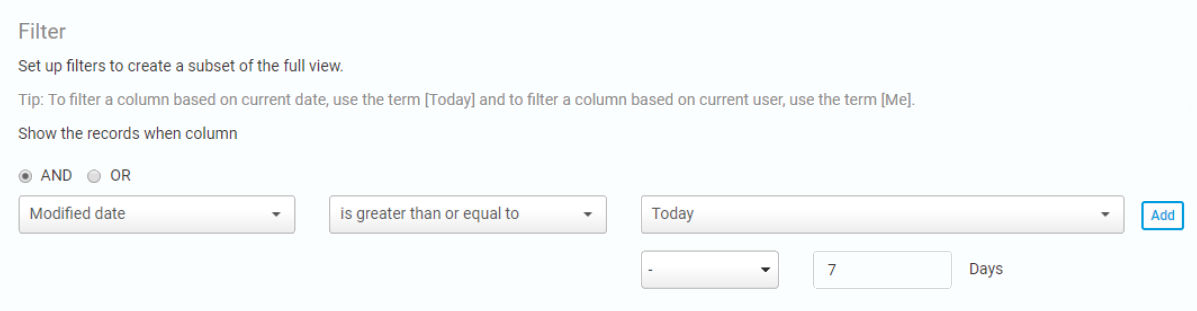
Multiple filters may be added and combined using AND and OR operators. If more than two filters are included with a combination of AND and OR operators, be mindful of the order of the filter conditions. See the article on Configuring column conditions for more information.
Columns need not be included in the view to be used for filtering.
Note that the following column types cannot be used to filter a view:
- Hyperlink
- Image
- Attachment
- File link
- Folder link
- iSheet link
- Join
- Auto-increment
- Lookup, if the lookup source column type is auto increment. Other lookup source column types may be used for filtering.
note
Filters are optional - if none are applied, all items in the iSheet will appear in the view.
Once you have completed all configurations on the view, click the
Save
button to save the view. All configurations available in the Edit view
page may be subsequently changed if needed.Related Content
-
Views - display and filter your iSheet data
Format: Article