
Manage Organisations
All users belong to an organisation. When a System Administrator creates a new User, they will be assigned to either an existing organisation (from the Users email address) or a new Organisation can be created. See the Users article for more information about creating a User.
To manage organisations, select
Your profile
, then System admin
: 
Select
Organisations
from Users, organisations & groups
to display the Organisations
screen: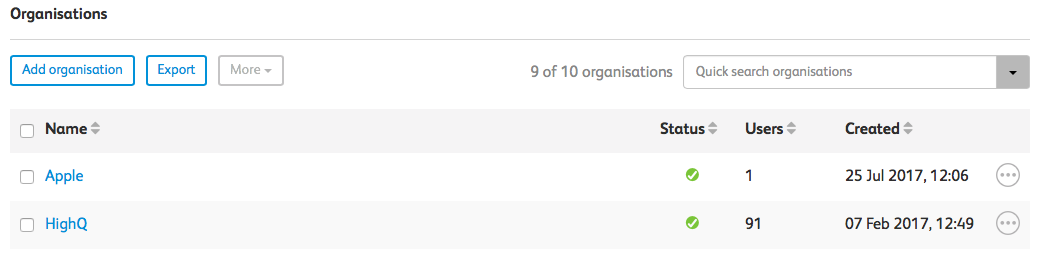
note
For more information on editing an organisation's details, see Organisation details.
Adding organisations
To add a new organisation, select
Add organisations
:
The
Add new organisation
screen opens:Give the organisation an
Organisation name
and a Domain
.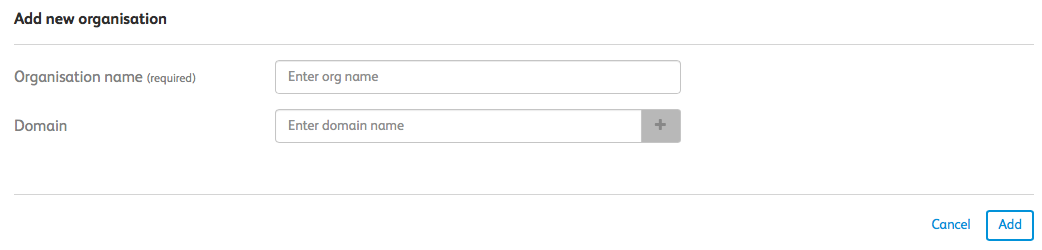
The
Domain
is the email domain that belongs to the organisation. For example, if the domain name is highq.com
any user added to the instance with an email address that ends with this domain is added to the organisation. Each organisation can have multiple domains associated with it.Select
Add
to add your new organisation. If the organisation was added successfully, you'll get a brief confirmation message. 
Your new organisation is now listed in the list of organisations.
Adding a user to an organisation
- SelectAdd userin the organisation that you want to add them to.

- On theAdd new userscreen, enter aFirst name,Last nameLast name and anEmail addressfor the new user.

- If the email address entered has a domain that is not associated with this organisation, you'll get aNew domain foundscreen, with options to do the following with the domain:
- Associate with an existing organisation.
- Add as a new exception domain and associate with an organisation.
 noteThe exception domain feature does not allow 'general' domains (like @gmail and @hotmail) to be automatically allocated to an organisation. However, a user with an exception domain email address may be added manually to any organisation.
 - When you choose an option, a box is shown for you to choose from all available organisations that you can associate with the new domain.
- SelectAdd.
- You'll get a brief confirmation messaage if the the user has been successfully added:

Managing users in an organisation
As a system administrator, you can manage users in an organisation.
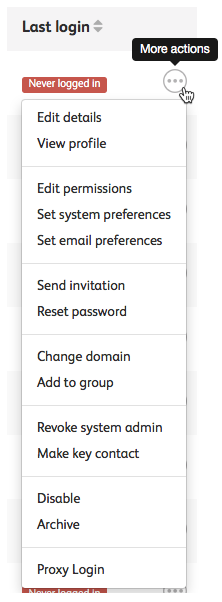
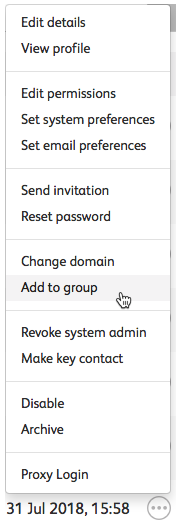
Select
More actions
for the user you want to manage, then Edit details
:
The
User details
screen is shown. Field | Description |
|---|---|
Email address | Edit the email address of the user. |
Organisation | You can view the organisation that the user belongs to. This is a non-editable field. |
Group profile | This field is related to a legacy feature and will be removed in a future version. |
External ID | This ID is linked to your active directory account. If you are bulk uploading users, this field must be populated. |
Department | This is the department that the user is a part of. This list can be managed from Metadata. |
Practice Area | This is the area of law that the user practices. |
Public website profile ID | This allows a user to display a third-party URL in their profile. |
Roles | You can select whether you want to give this user System admin permissions and/or make them a key contact. Key contacts are discussed in more detail here. |
Status | The status of the user, Active , Archived or Disabled . |
Invited | This is the date and time that the user was invited to the instance. |
Last login | This is the date and time that the user last logged in. |

Additionally, you can change a user's picture, name and job title.
View profile
Select
View profile
to view that user's profile. Edit permissions
To edit a user's permissions, select
Edit permissions
. The Manage permissions
screen opens. You can use the
User admin
, Internal user
, Editor
, Approver
, and Module admin
checkboxes on the Modules
, Channels
and Campaigns
tabs to manage permissions. For more information on these roles and permissions, click here.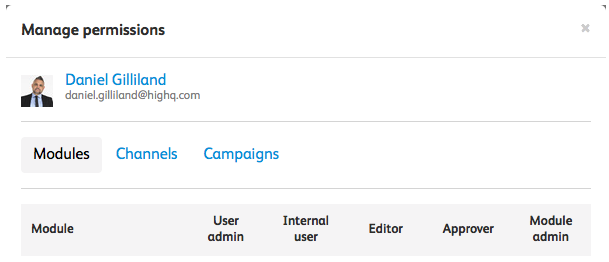
Set system preferences
To set a user's system preferences, select
Set system preferences
. The System preferences
screen has opens. On this screen, there are sections for System preferences and Dashboard preferences.
The System preferences can be changed by a System Administrator, or they can be changed by the user in order to manage their own system preferences.
Use the Language dropdown list in System preferences to choose from English (Default), French, German, or Spanish as the language of the system.

In the Dashboard preferences section, you can use the
Countries
, American States
, Expertise
, Content type
and Sectors
tab to control what content the user's dashboard will contain.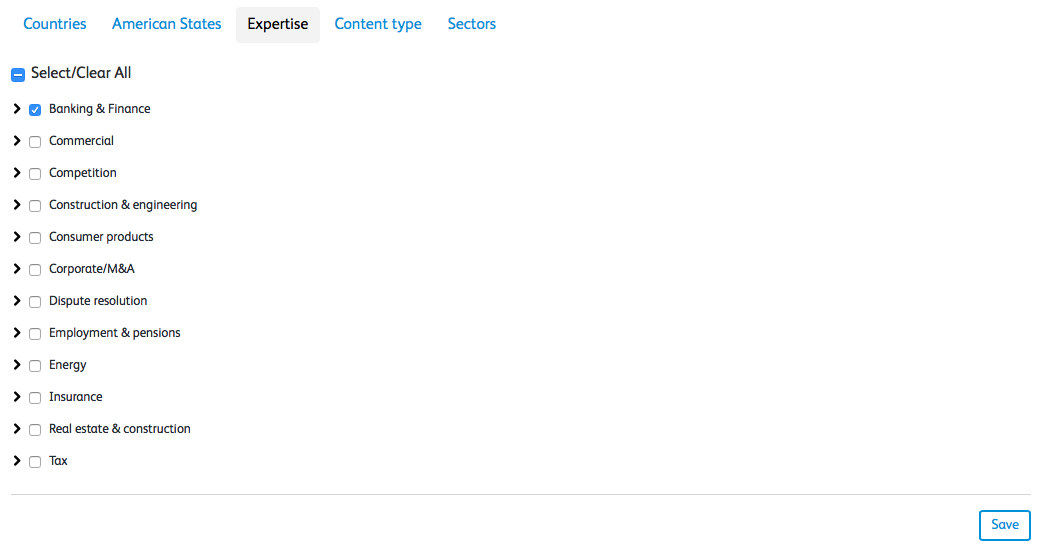
Select
Save
to save your changes.Set email preferences
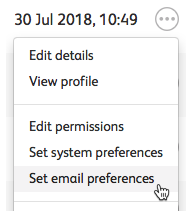
To set a user's email preferences, select
More actions
, then Set email preferences
.
The
Email preferences
screen opens, showing Email preferences, Metadata, and Modules sections.
The email preferences can be changed by a System Administrator, or they can be changed by the user to manage their own email preferences.
In the Email preferences section, you can use the
Email frequency
dropdown list to choose a Daily
, Weekly
, Fortnightly
, Monthly
, Quarterly
or Never
frequency that you wish the user to receive emails: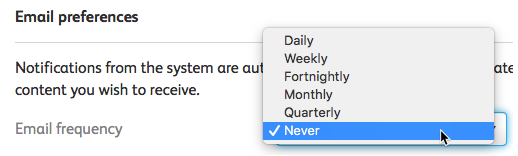
In the Metadata section, You can use the
Countries
, American States
, Expertise
, Content type
, Sectors
, and Hot topic
tabs too choose which content the user will receive in their emails. You can also let the users choose this themselves.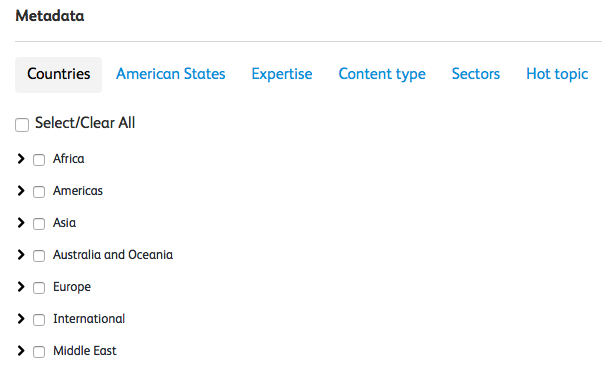
Depending on the metadata selected, the user will receive email alerts with content related to that metadata.
In the Modules section, you can set a user's preferences so that notification from each module can be included in system updates emails, customised and delivered in its own email, or turned off.

Each module available to you will be listed. In the Email prefernces column, you can use the dropdown list to select
Off
, Include
, or Custom
.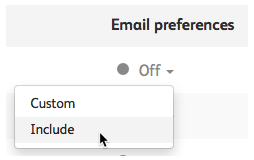
If you choose
Custom
, you can also select the Edit
to specify the email preferences for that module: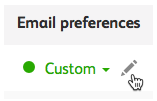
This
Insights
screen works in a very similar way to the Email Preferences
screen with an Email frequency
dropdown list and a Metadata section to for this specific module.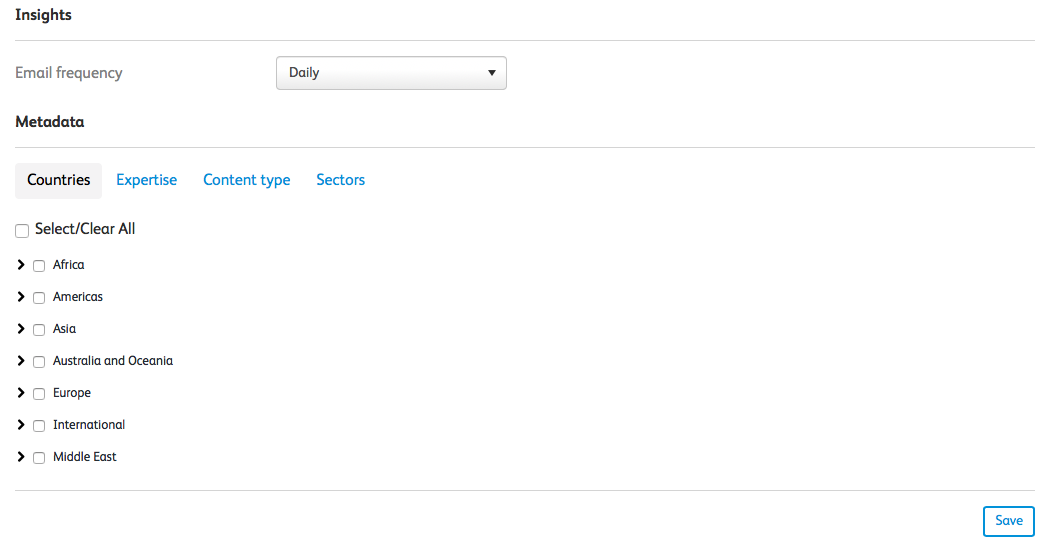
Select
Save
to save all of your changes.Send an invitation
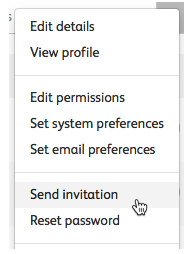
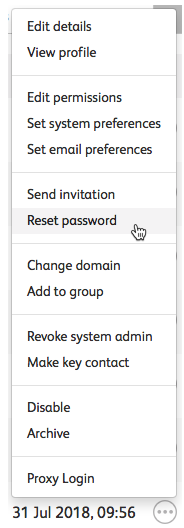
You can send an invitation to a user at any time - if they are a new or existing user. Select
More actions
, then Send invitation
:
The
Send invitation
screen has a default Email subject
and Email body
, but these can be edited and changed. Additionally, you can choose whether to send the invitation now or schedule the invitation for a future date and time.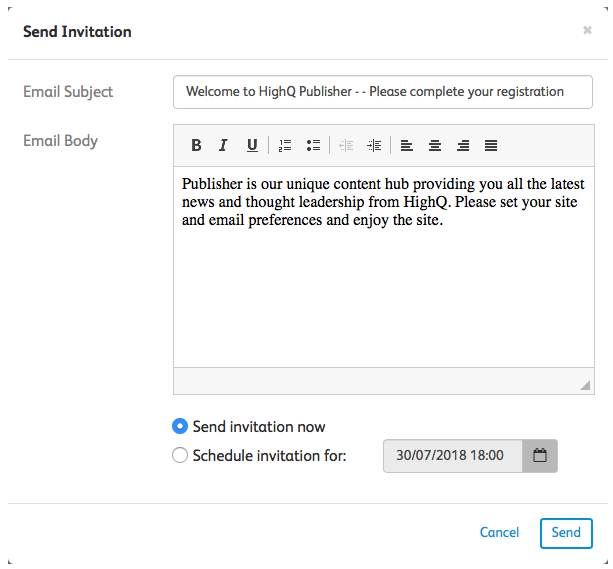
Select
Send
to send the invitationReset password
To send a user an email to reset their password, select
More actions
, thenReset password
.
Select
Reset password
to send a reset password link via email to the user. If the message was sent successfully, you'll get a brief confirmation message.
The email message will be similar to the following, with custom images displayed if turned on:
Dear [name],

To reset your password please click here.

The above link contains sensitive details that are specific to your account. Please do not forward this email to anyone. If you have not requested this then please ignore.

If you need assistance, please contact the HighQ Publisher team.

Kind regards,
The HighQ Publisher team

Powered by HighQ
Change domain
To change a user domain, select
More actions
, then Change domain
. 
If a user's domain is changed to a domain that belongs to another organisation, that user will be moved to that organisation.
The
Change domain
screen will be displayed: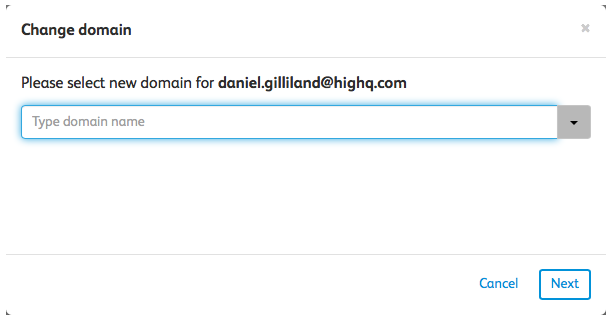
Enter text in the filed to search for an existing domain or add a new domain:

Select
Next
. You'll get a Confirm
window, where you can select Move
to confirm the change.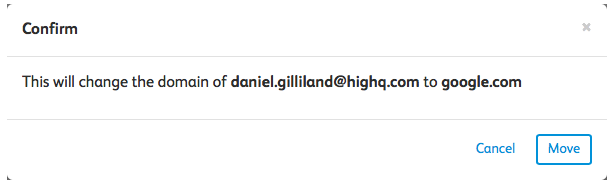
You get a confirmation message if the move is successful.
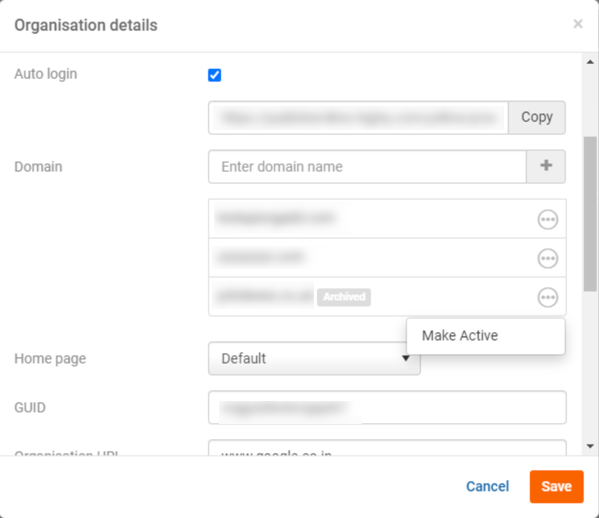
Archiving a domain
System and user administrators can archive a domain in Publisher. Once a domain is archived, a user with this domain remains active, but is unable to log into the system, or receive any emails etc.
note
Please note that in linked instances, the same applies for access to Publisher
In the Domain section of the
Organisation details
screen, select More actions
on the domain you want to archive, then Archive domain
.Select
Archive domain
. The domain will now be archived. The archived domain will still show in the list, but with an Archived label next to it.To reactivate a domain, select
More actions
on an archived domain, then Make Active
.
note
Publisher does not support the 'Pending' archive status found in Collaborate. This means the domain is seen as active in Collaborate until it is fully archived.
Add to group
To manage the group that a user belongs to, select
More actions
, then Add to group
.
The
Add user to groups
screen opens.Select the checkboxes next to the groups where you want to add the user, then
Add
. If the list is long, you can filter it with the search field, or scroll down on the page.
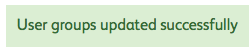
Once the users are successfully added, you'll get a brief confirmation message.
Revoke system admin
To revoke a user's system admin status, select
More actions
, then Revoke system admin
:
If you select
Revoke system admin
, the user's System admin status is revoked. To reinstate the user's System admin status, select Make system admin
in the More actions
menu:
Make key contact
To make a user a key contact, select to
More actions
, then Make key contact
:
Once the user is successfully set as a key contact, you'll get a brief confirmation message.

To revoke a user's key contact status, select
Revoke key contact
in the More actions
menu:
Disable
To disable a user, navigate to
More actions
, then Disable
: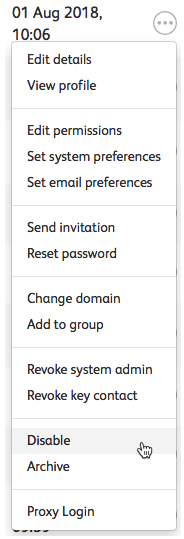
The user is now unable to log in or use their account.
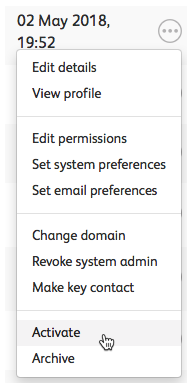
To re-activate a user, select
Activate
in More actions
:
Additionally, the user's status changes depending on whether they are disabled or active.
Archive
To archive a user, go to
More actions
, then Archive
.
This archives the user and changes their status to archived.
To re-activate a user, select
Activate
in the More actions
menu, as shown above.Proxy login
The Proxy login option enables you to view the system through the eyes of a specific user, you see what they can see, and you can also perform actions as they would.
To proxy login as another user, go to
More actions
, then Proxy login
.