
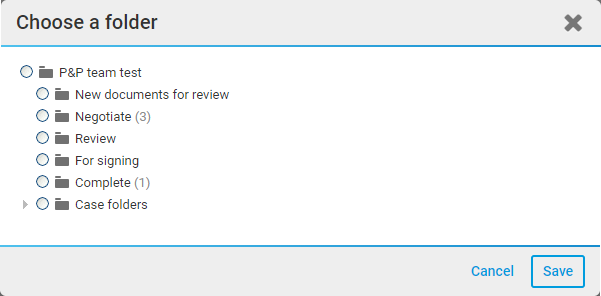
Workflow rule - Add folder and sub-folders
The
Add folder
action automatically creates and names a folder when the selected trigger conditions are met. An additional option can create up to twenty subfolders in the same action.note
The Add folder action is available for all triggers.
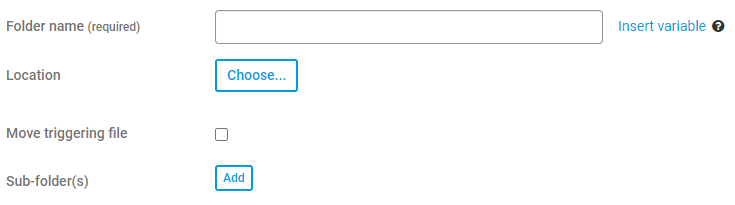
Once you have selected
Add folder
as your action, the following fields are displayed: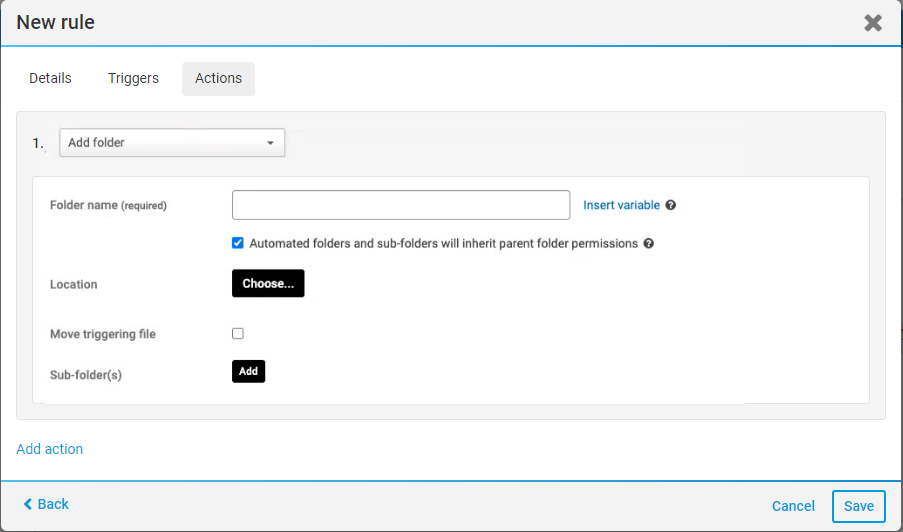
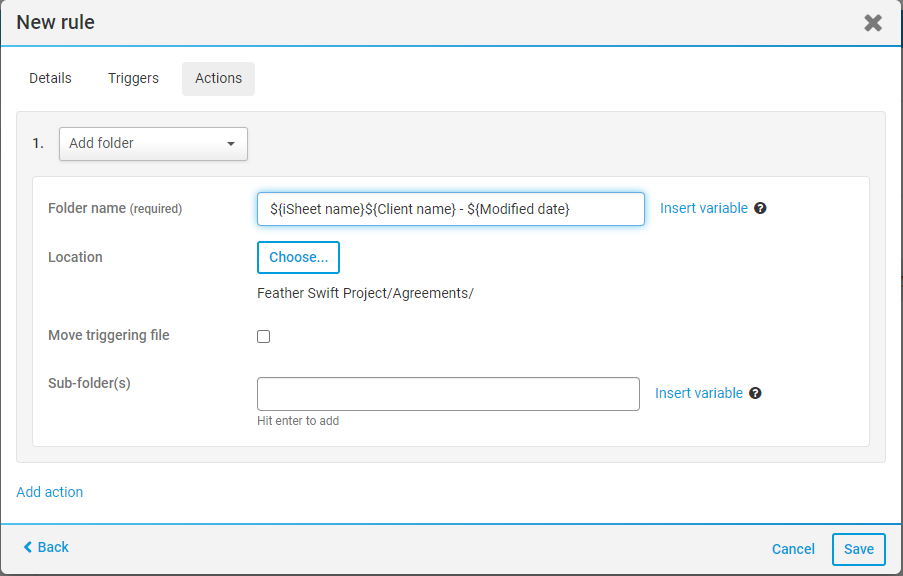
- Folder name- This is the name of the folder. Depending on the trigger, you may useInsert variableto assign a name based on the source that triggers the Action (a file or file metadata iSheet).
note
As of April 2023, if you know the name of the variable, you can use the Search field to quickly find the variable from a long list of variables.
- Automated folders and sub-folders will inherit parent folder permissions- By default, the folder inherits permissions from the parent folder. Deselect this option to make it possible to edit theFolderandFilespermissions; these can be granted or removed for each user or user group.
note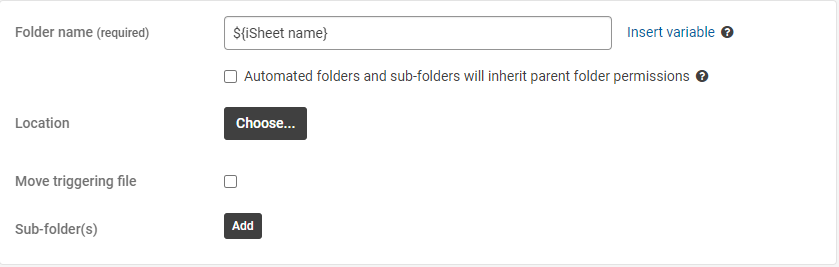
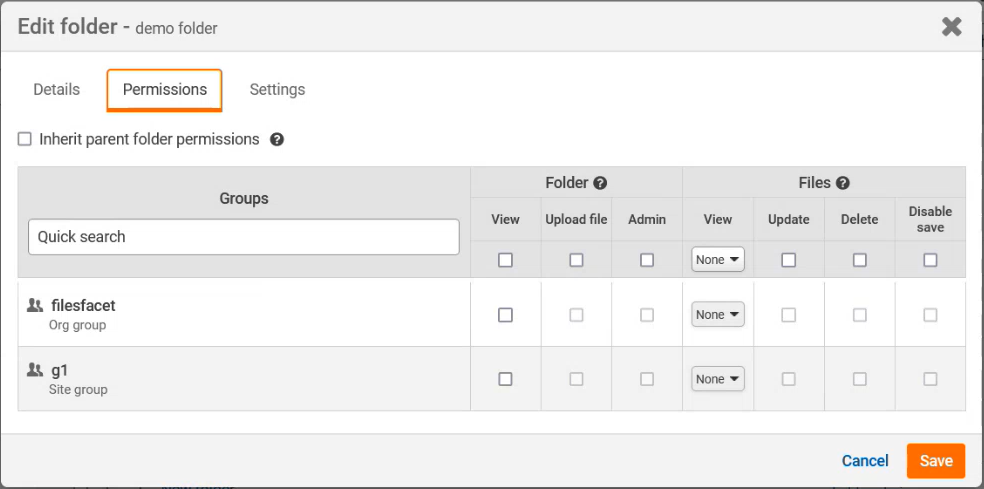
Permissions assigned to new folders depend on the
default inherit settings
or the permissions option selected in the New rule
window.As of May 2024, if 'inherit parent folder permissions' is
disabled
the new folder has no
permissions.It is possible to create a folder where you do not have view permissions i.e. if the folder does not inherit the parent permissions and you do not have access to the default settings. This is possible if, for example, you are a Folder admin,
Inherit parent folder permissions
is NOT selected and
no custom group or user permissions were set.- Location- Where the folder is created.
- Move triggering file- if a file or file metadata iSheet is your rule trigger, select this to move the trigging file to the created folder. If a folder with the same name already exists, then the triggering file is moved to that folder.
- Link folder to- as of October 2022, if the rule is triggered from an iSheet with one or morefolder link columns, then you may add a link to an automated folder in a folder link column.

- Move file from- as of November 2022, if there are one or more attachment columns in the triggering iSheet you may select attachments and move them to the automated folder.

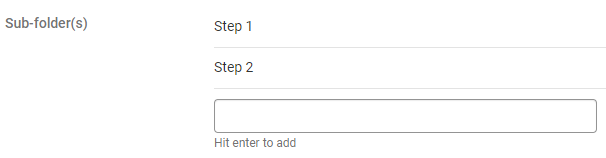
- Sub-folder(s)- An option to add up to 20 sub-folders in the parent folder. You may also useInsert variableif the trigger supports this. Sub-folders inherit parent folder permissions.
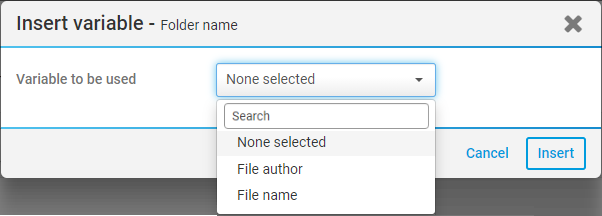
Variables
You can add variable content to the Folder name field. Variables are used to dynamically retrieve data from the trigger source.
For example, you may want to automatically add a folder with a name based on data from the iSheet record that triggered the action.
Select
Insert Variable
next to the Folder name
field to display the Insert variable - Folder name
window.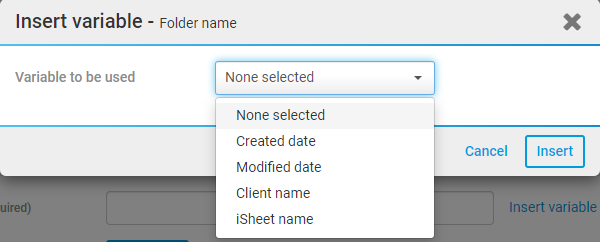
In the
Variable to be used
dropdown, you will see all variables available to you. In this example, we have Client name
.Select the variable that you want to use and select
Insert
. 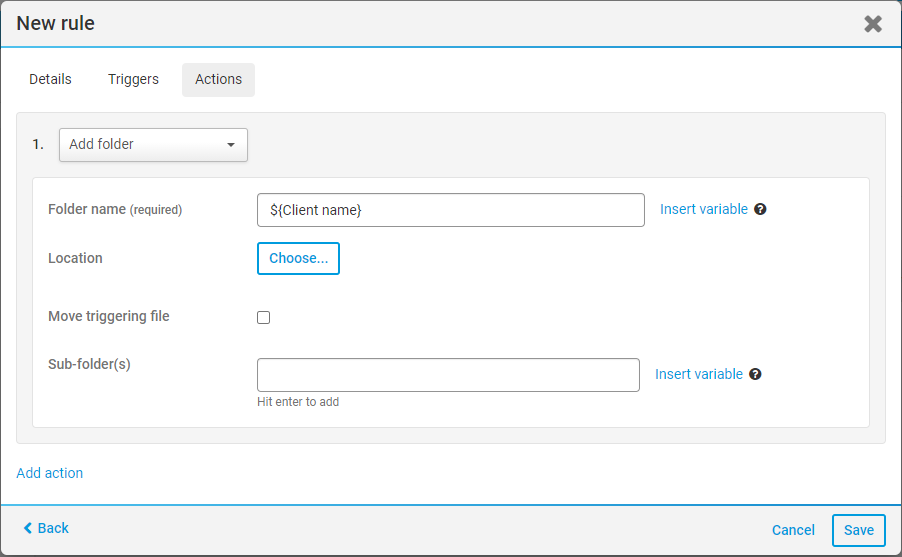
So in this example, when the folder is created it will use the value stored in the Client name column of the triggering iSheet record.
You can use multiple variables, and text, to create a folder that has references to multiple characteristics.
note
If the folder name already exists, then a new folder is not created.
Select
Add action
to trigger multiple actions, such as adding a task or sending an email.Select
Save
to save your actions.Automatically move a triggering file to an automated folder
You can automatically move a file to an automated folder, this avoids having to manually sort many files.
When you create a new rule, you must first enter the details of the rule.
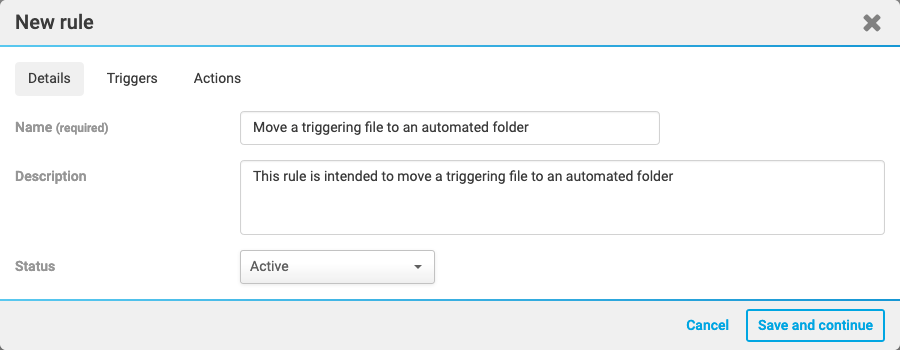
Enter the relevant details, then select
Save and continue
. The Triggers
tab opens.note
To set up this rule, you must select either File or iSheet (File metadata iSheet) as the rule trigger.
Ensure that your rule trigger is set up correctly, and add in the details for the rule trigger.
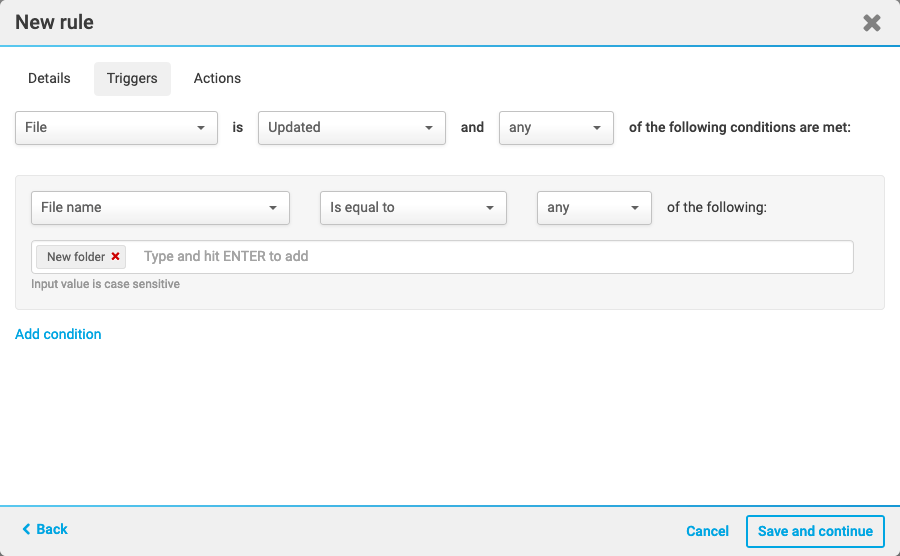
Select
Save and continue
once you have entered all of the relevant information. The Actions
tab opens.note
For this workflow to work, you must select
Add folder
as your action.In the
Actions
tab, select Add folder
as your action. The Move triggering file
check box is available.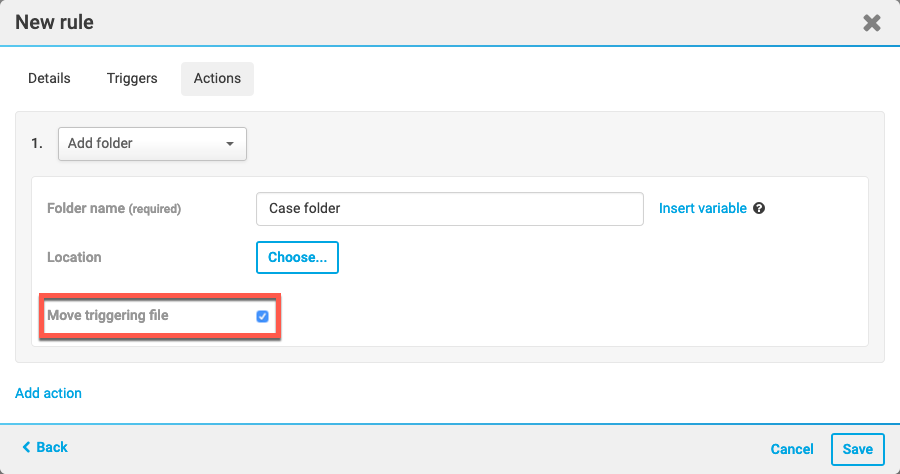
Select the
Move triggering file
checkbox to enable this functionality. When this workflow is completed, the triggering file is automatically moved to the selected folder.Add a link to the automated folder
As of October 2022, if the rule is triggered from an iSheet which also contains a
folder link column
, then you may automatically add a link to an automated folder.note
See
File or folder link column
and Add columns in iSheets
for more information.If the rule action automatically adds a folder and, if the triggering iSheet has one or more
folder link
columns, you can select which folder link column is updated with links to the created folder.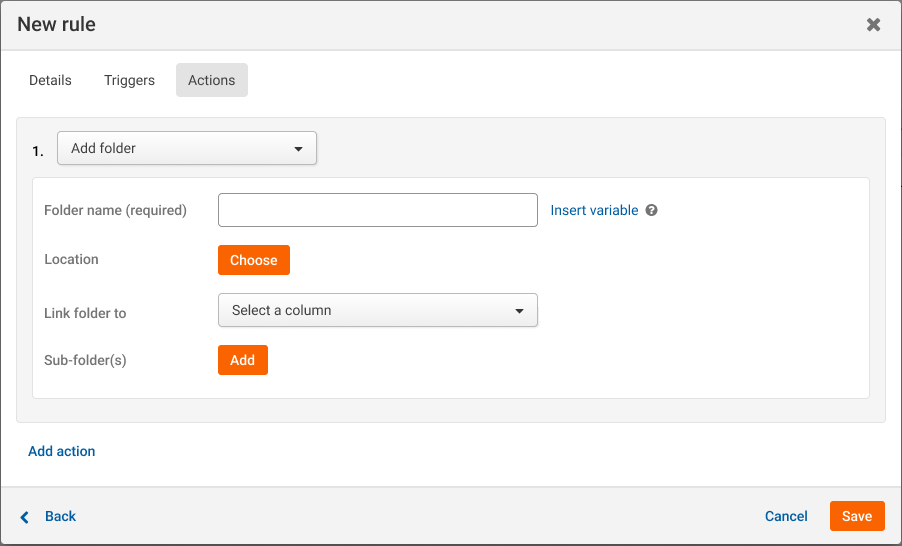
Select the name of the folder link column from
Link folder to
. If more than one folder link column is available, you may select multiple columns.Select
Save
to confirm your changes.note
Only one folder reference can be added to one folder link column in a single rule.
If the target folder link column already includes links, then the new link is added to the existing links; no links are removed.
Duplicate folder names cannot be created with Workflow.
Move a file from an attachment column
As of November 2022, if there are one or more attachment columns in the triggering iSheet you may select attachments and move them to the automated folder.
note
The attachment column must be configured to use a custom location. Files are moved from the custom location to the automated folder; the attachment column still contains the file.
In the
Actions
tab, select Add folder
as your action.Enter a folder name, or select
Insert variable
to create a dynamic folder name.The
Move file from
drop-down menu provides a list of attachment columns.Select up to ten attachment columns. Attachment files are moved to the automated folder.
Save and activate
When you save your rule, you are redirected to the rules screen.
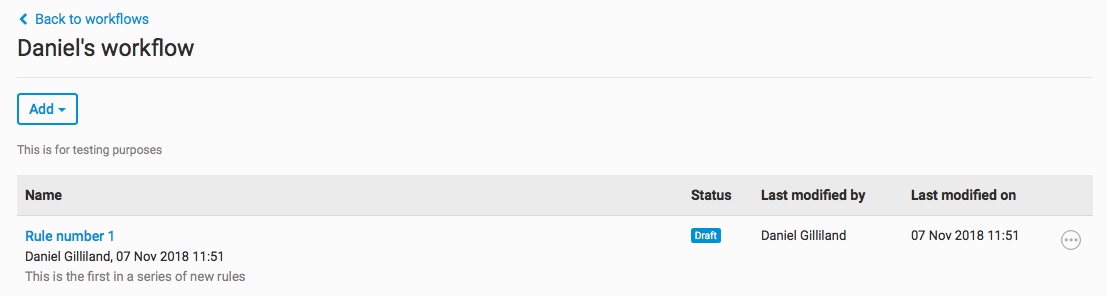
In this screen, you can view the name, status and last modified date and time of your rule, and also who modified it.
Additionally, you have access to the
More actions
menu.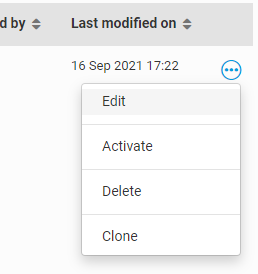
The options are as follows:
- Edit- allows you to edit the rule
- Activate- lets you activate your rules and changes the status fromDrafttoActive. If you selectMore actionson an active rule, you can insteadDisablethe rule
- Delete- allows you to permanently delete the rule
- Clone- allows you to duplicate a rule or workflow
Activating your rules
Once you have created your rules, they must be activated if you want them to trigger. Click
More actions
> Activate
to do so. If you activate rules but your workflow is not active, you receive a warning message.