Solutions
Law firms
Tax, audit & accounting firms
Success stories
-
A true competitive advantage
Law firm Zarwin Baum’s embrace of generative AI as the natural next step in the evolution of legal work and their adoption of CoCounsel Legal has helped them achieve remarkable efficiency gains and improved client relationships.
-
Workflow transformation drives impact
Brinks, a global leader in secure logistics and security solutions, used CoCounsel to reimagine what was possible with AI tools, turning legal challenges into a competitive advantage.
-
The forefront of audit tech
A better auditing workflow solution was the answer to multiple challenges faced by The Mercadien Group. Find out how they achieved greater efficiency by embracing Cloud Audit Suite.
Products
Legal
Trade & supply
Tax, audit & accounting
- 1040SCAN
- Audit Intelligence Analyze
- CoCounsel Audit
- CoCounsel Tax
- Ready to Advise
- Ready to Review
- View all
Corporate tax
Recommended products
-
CoCounsel Legal
Transform your work with the only AI legal solution uniting research, drafting, and document analysis in a single experience. Designed by legal experts and built on trusted content and advanced AI, CoCounsel Legal accelerates multistep work so you can better serve your clients and grow your business.
-
CoCounsel Tax
Transform your tax practice with CoCounsel Tax, an AI-powered assistant that combines trustworthy answers, automation, and firm knowledge into one seamless platform. Enhance efficiency, reduce risk, and improve client confidence with CoCounsel Tax.
-
CLEAR
Powerful software designed for law enforcement, compliance, risk, and fraud investigators. Conduct thorough investigations with ease using our intuitive online investigation software. Efficiently, prevent, detect, and solve crime.
Purchase
Buy solutions
Resources
Insights
Events
Product training
Product communities
Developers
Highlights
-
2026 SKILLS showcase
Join weekly sessions to experience in-depth demonstrations of the leading legal AI products while connecting with strategic law firm leaders in knowledge management, innovation, and AI.
-
Ghosts on the ledger
Payroll fraud is a major compliance risk. Learn how payroll analytics and AI-powered tools can help exorcise phantom employees and employers.
-
Future of professionals report 2025
The Thomson Reuters Future of Professionals Report 2025 reveals how AI continues to shape professional work — and what it takes to get ahead. This year’s report shows that increased efficiency, productivity, and cost savings top the list of benefits professionals attribute to AI, making it indispensable for organizations facing rapid change.

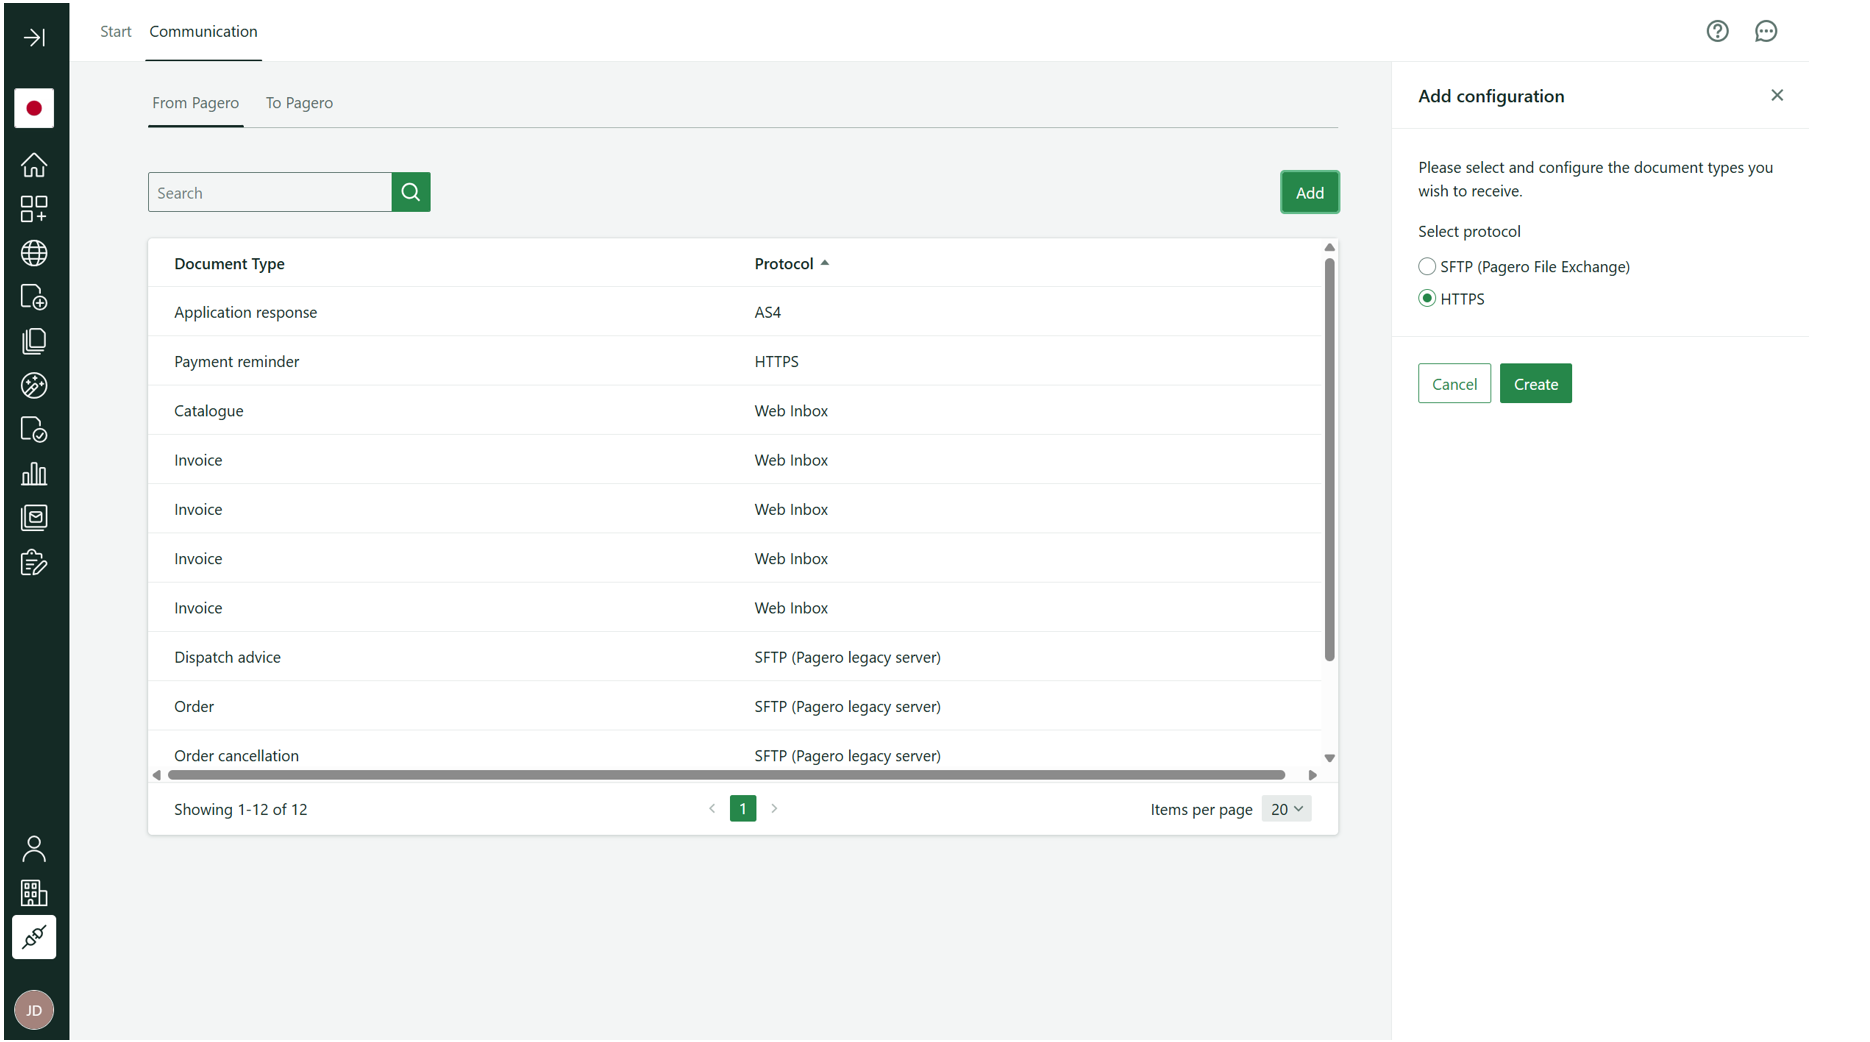
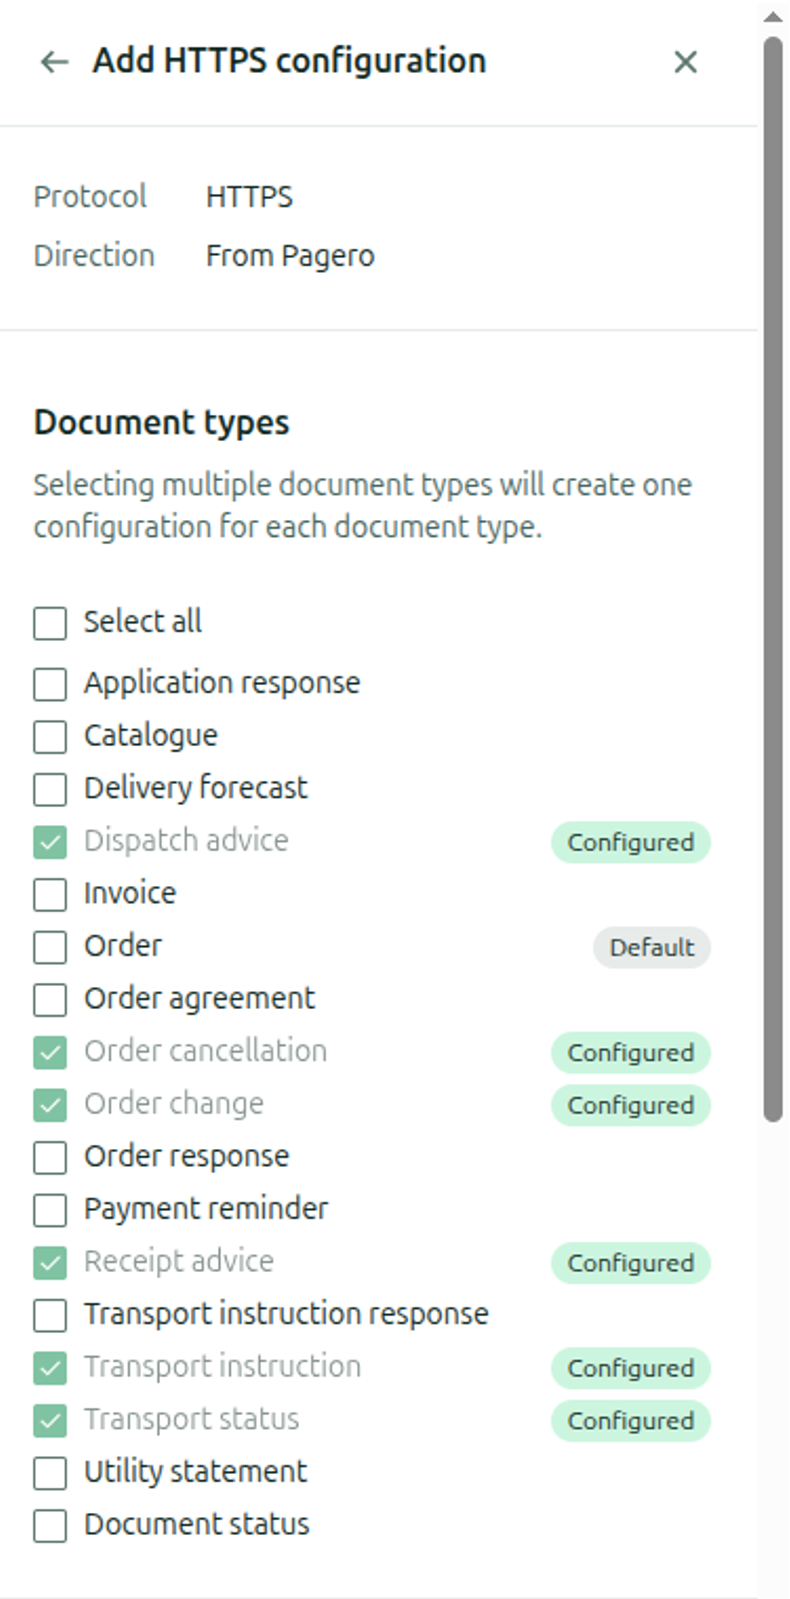
Configure HTTPS connectivity


This article applies to:
- Product: Pagero Online
Related Content
-
Configure SFTP connectivity
Format: Article,
3 min read
Article,
3 min read