
![]()
Triva isn't available right now.
Check out the support page for our phone number and hours
![]()

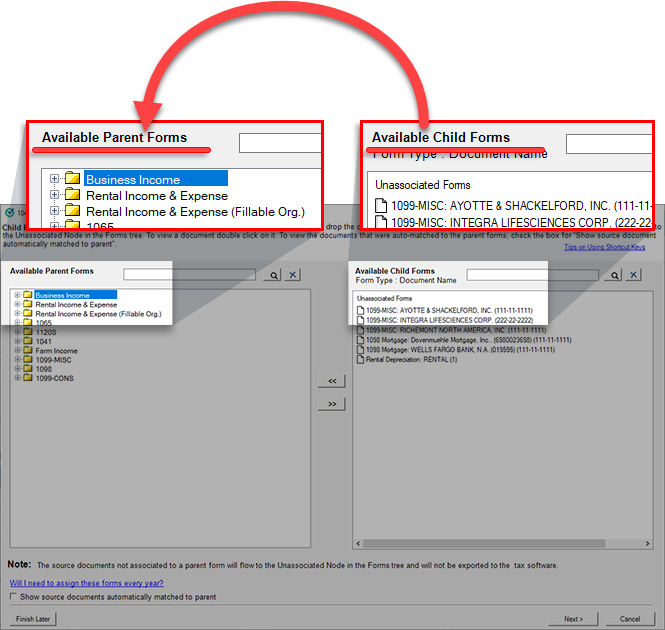
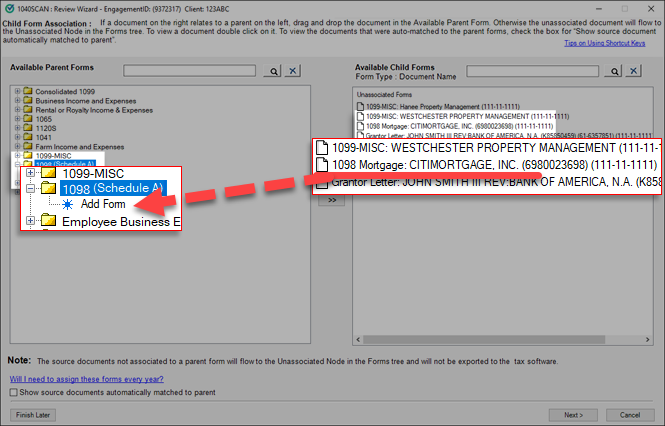
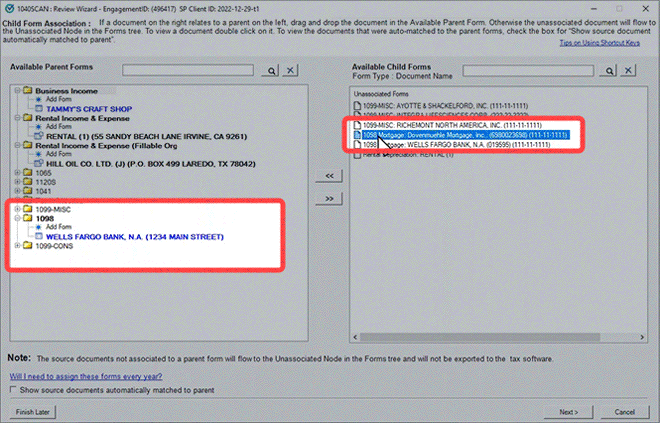
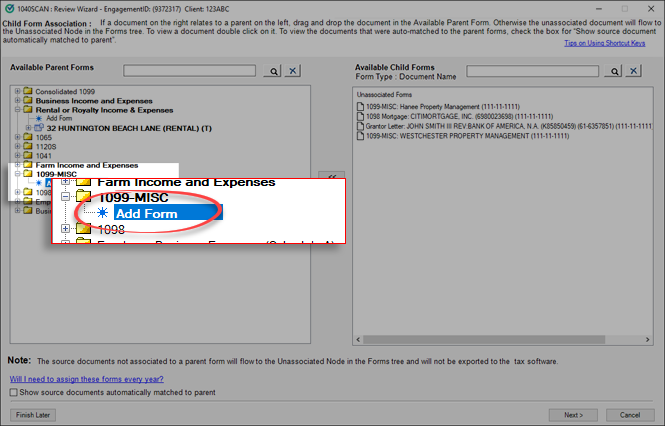


 to remove the page and move it to the
  .
.

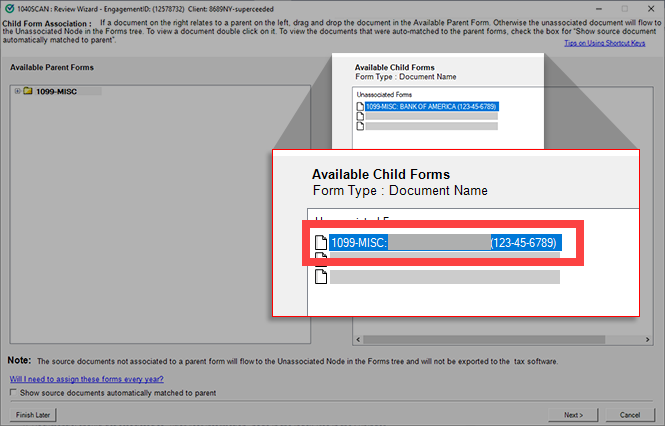
Form type | Auto-associated based on |
|---|---|
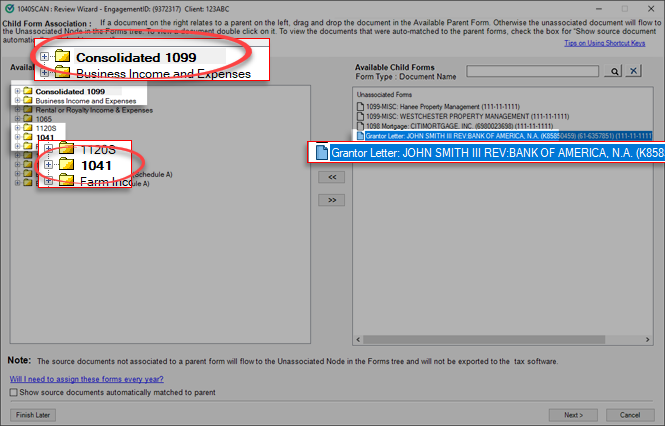
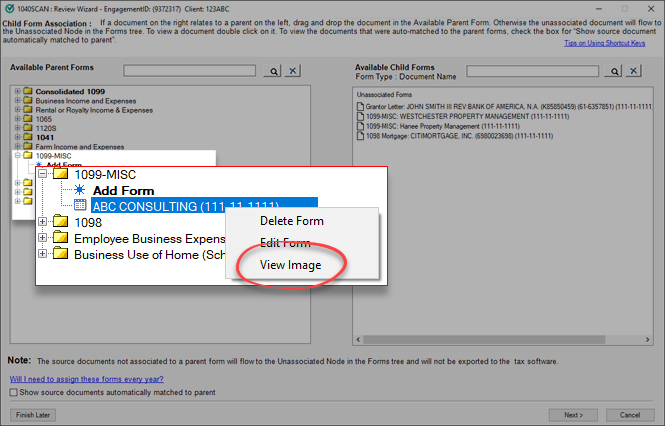
Grantor Letter | Auto-associated based on primary and secondary identifiers - depending on the proforma data. Either in Schedule K-1 1041 or in the Consolidated 1099 category. Example: If the EIN present on the Grantor Letter matches with the EIN of Parent Form Schedule K-1 1041, then it should get auto-associated. |
Schedule K-1 PTP | Auto-associated on the basis of primary and secondary identifiers, and PTP Check Mark. If the PTP K-1 is proforma'd then it will get associated with it, or else it creates a new entity. In this respect, the system will determine PTP K-1 based on PTP Check Mark (if checked) and will be auto-associated if the proforma'd information is available. The association of PTP K-1 is based on EIN and PTP Check Mark (if checked) as per the proforma'd information. If the proforma'd information is not available then it creates a new entity in the Schedule PTP K-1 category under Available Parent Forms section and associates all the related pages in it. |


Form Name | UltraTax GoSystem Tax RS Lacerte | CCH Axcess Tax |
|---|---|---|
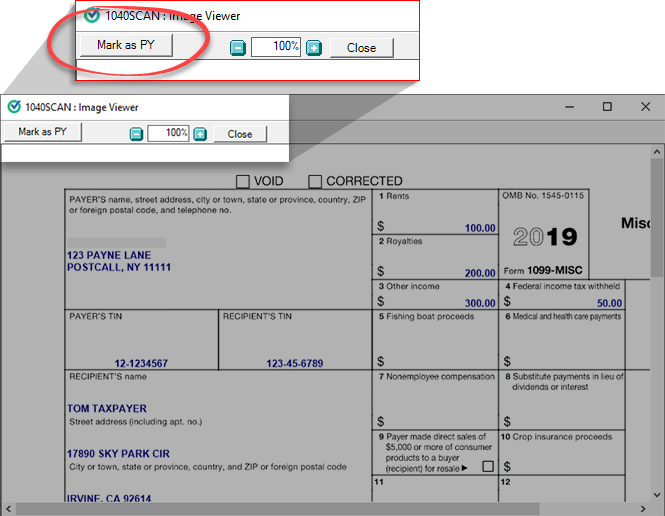
Form 1099-MISC: Miscellaneous Income | Unassociated Form Folder | Miscellaneous Income (IRS 1099-MISC) |
Form 1099-K: Merchant Card and Third-Party Network Payments | Unassociated Form Folder | Payment Card and Third-Party Network Transactions (1099-K) |
Form 1098: Mortgage Interest Statement | Unassociated Form Folder | Mortgage interest (IRS 1098-MIS) |
Form 1099-NEC | Unassociated Form Folder | Nonemployee Compensation (IRS 1099-NEC) |
Form 1099-G | Certain Government Payments (1099-G) - Apply for entire Form 1099-G except Box 2 OR Refunds of State and Local Income Taxes - Apply for Box 2 | Certain Government Payments (1099-G) - Apply for entire Form 1099-G except Box 2 OR Refunds of State and Local Income Taxes - Apply for Box 2 |
Form 1099-PATR | Unassociated Form Folder | Unassociated Form Folder |
 Article,
8 min read
Article,
8 min read