
![]()
Triva isn't available right now.
Check out the support page for our phone number and hours
![]()

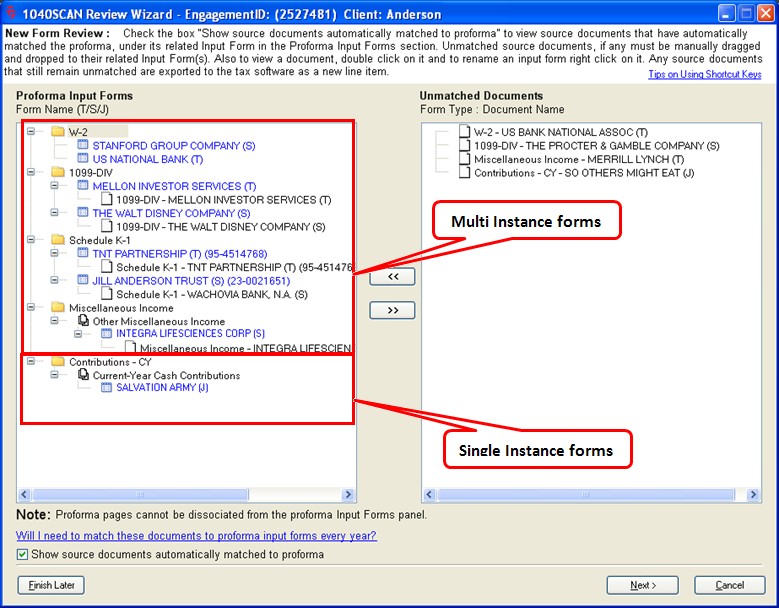


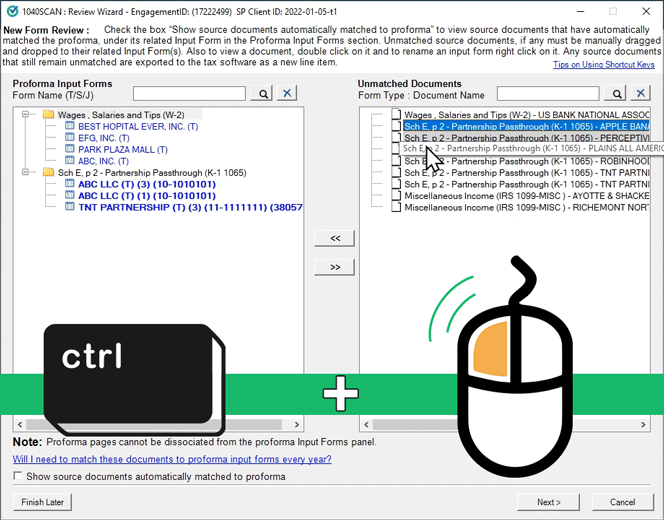
Situation | Manual matching required? | NFR outcome | SPbinder and tax return |
|---|---|---|---|
Documents are 100% matched to proforma based on a few parameters (like TSJ, Account number, EIN) | No | 1040SCANverify: NFR will not come to SurePrep verifier nor at clients end.1040SCAN PRO: NFR will not come at firms verifier end.NO NEED TO REVIEW what is already done | Documents will have correctly matched to the proper proforma form and data exports to the correct line in the tax return. |
New tax return file with no proforma forms. | No | Documents will be created as new lines in Index Tree and tax return as nothing in proforma. | N/A |
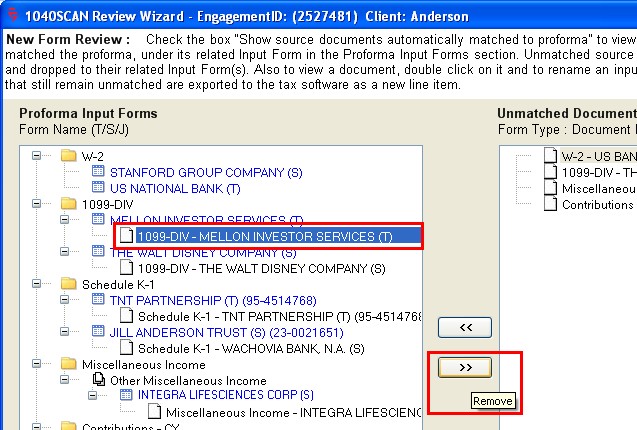
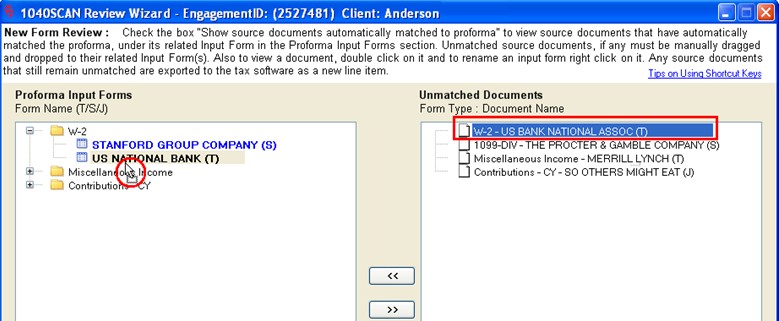
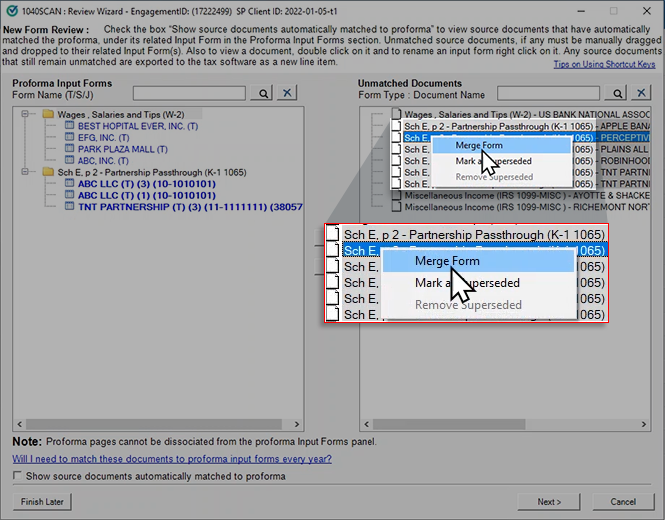
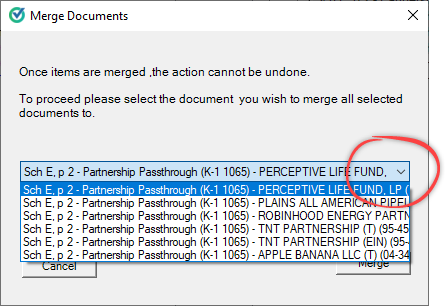
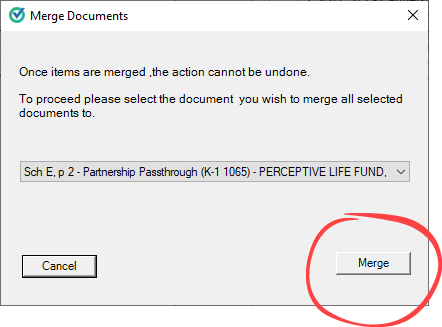
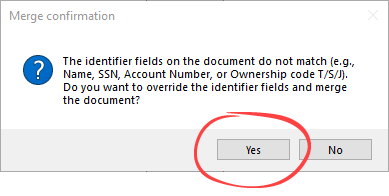
Documents couldn’t be matched automatically using the applied parameters (like TSJ, Account number, EIN) | Yes | 1040SCANverify: NFR will be completed by SurePrep verifier and the firm user will need to review the matchings.1040SCAN PRO: NFR will need to be completed by firms verifier | 1040SCANverify: If SP verifiers matching is not reviewed, the firm preparer will have to make changes in the binder and/or tax return. 1040SCAN PRO: If a firm verifier doesn’t complete the matchings correctly, the preparer will have to make changes in the binder and/or tax return. |
Documents couldn’t be matched by SurePrep verifier | Yes | 1040SCANverify: Required matchings will need to be completed by firm preparer . | 1040SCANverify: If unmatched documents are not matched, if needed, the firm preparer will have to make changes in the binder and/or tax return. |


 Article,
8 min read
Article,
8 min read