
![]()
Triva isn't available right now.
Check out the support page for our phone number and hours
![]()


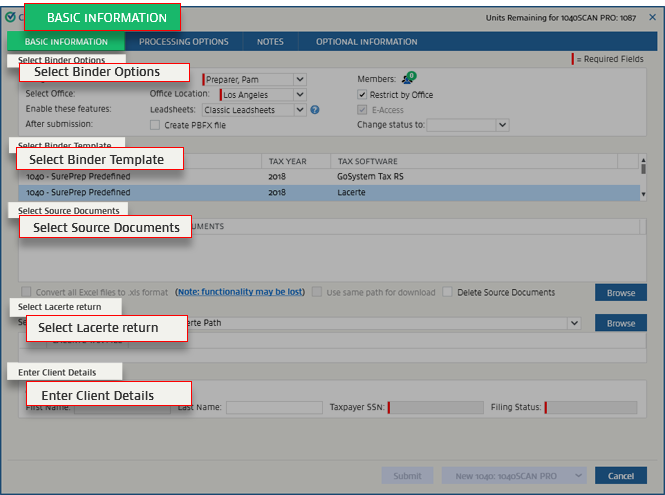
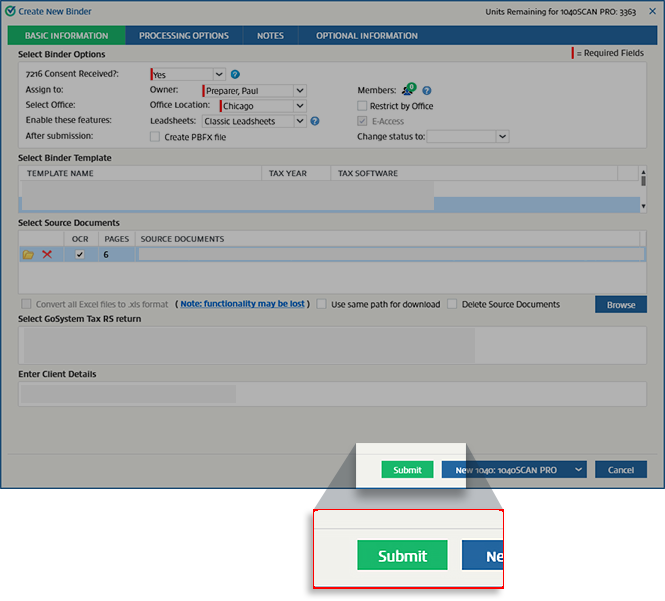
Create new binder section | Description |
|---|---|
Select Binder Options | Apply the settings to your client's binder. For example, you can decide which firm user will be in charge of the client (that is, the Owner ), and to which office location the client belongs.Review the selected options carefully, some options can't be changed once the binder is submitted (for example, Leadsheets ). |
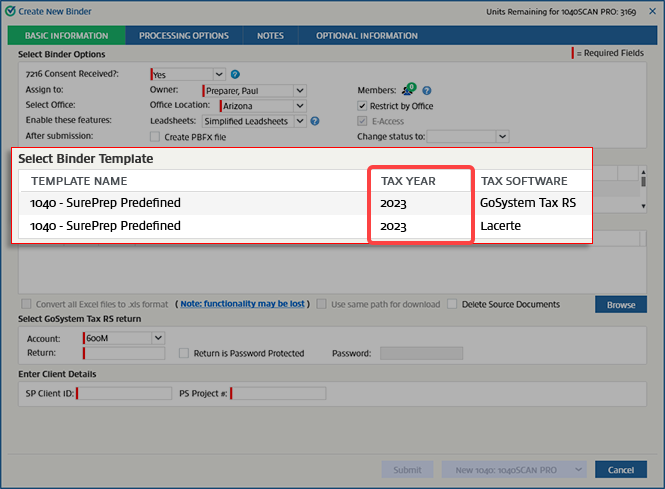
Select Binder Template | Select a template name to select a template that matches the tax return. Make sure you have the correct template selected by looking at the TAX YEAR and TAX application columns. |
Select Source Documents | Select Browse to select the source documents that you want to upload to your client's binder. For example, this can be a PDF of your client's tax documents. |
Select... return (for example, Select “tax application name” return) | This section may vary based on your tax application. You may either need to enter a Tax Client ID or select your client's tax file. tip
Rename the 1st PDF the same as your Tax Client ID in the tax application. Example, if Tom Taxpayer's tax client ID in the tax application is '123“, then the first source document should be named '123.PDF”. If the name of the 1st selected source document matches the return (Tax Client ID), then the Return ID and SP Client ID fields will automatically populate based on the source document name. Saving you time from manually entering the remaining information. |
Enter Client Details | Your client's information will be populated here after you complete the previous step of selecting the tax return. |

 Article
Article
Article
Article
Article
Article
Article
Article
Article
Article
Article
Article
Article