
CCH Axcess Tax
Creating a binder is a starting point from where you can submit your client's tax documents and have them processed through OCR, get verified, and go into SPbinder for preparation. You can create a binder for your client by providing basic information about the type of binder you want to create. At this stage, you can set which firm user should be the Owner, the office location, binder access permissions, and binder tax year.
When you create a binder in FileRoom, SurePrep gets your client's information from the tax application and creates a binder specifically catered for that taxpayer client. The information fetched from your client's tax application file is used to create placeholders called "proforma" (for example, W-2 proforma placeholder for 'ABCD, Inc.'). In SPBinder, you can organize documents to their respective (proforma) categories and export the data to the correct entities in the tax application.
You will need to upload the client's most recent tax application file details. Before creating a binder, make sure the client is created or proforma (roll forwarded) to the current tax year.
Before you begin
Make sure the client's basic information is provided in CCH Axcess Tax. In CCH Axcess, open the client's return, go to the
Worksheet
tab, then double-click the
Basic Data
worksheet. Enter information for all the fields that are marked as
Required
.
note
Required fields may vary based on the return type (for example, 1040, 1041).- Binder submission process may fail if the required fields are missing.
Create new binder for CCH Axcess Tax
-
If you're creating an in-house binder, point to theCreate New Bindercaret, point to1040, and select1040SCAN PRO,1040SCAN ORGANIZE, orSPbinder.
 If you're creating an outsource binder, point to theCreate New Bindercaret, point to1040, and selectOutsource Onshore,Outsource Offshore,1040SCANverify Onshore, or1040SCANverify Offshore.
-
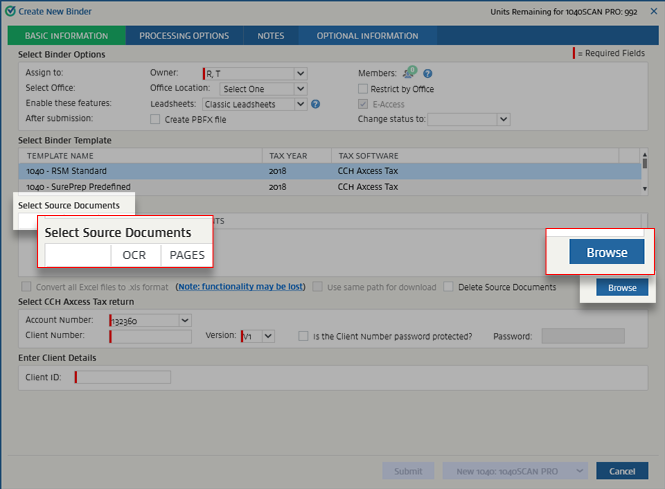
TheCreate New Binderwizard will open. UnderSelect Binder Template, select the template with the tax year and the tax applicationCCH Axcess Tax. You might have to scroll to find this template.

-
You will now see theSelect CCH Axcess Tax returnpanel.

-
UnderSelect Source Documents, selectBrowseand choose the documents you want to submit.
-
UnderSelect CCH Axcess Tax return, the account number for the CCH Axcess sign in information will be provided per the information entered in .

-
If more than 1 account numbers exist for your firm, select the account number. The last selected account number will be remembered.

-
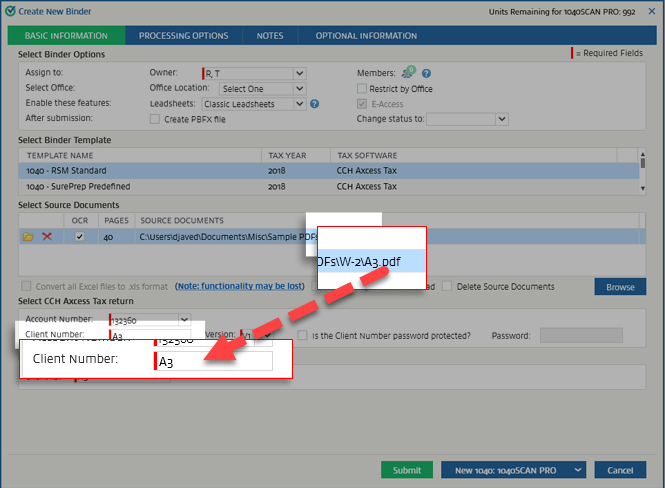
Preferably, the name of the 1st source document attached should be the same as the client number.Client Numberwill automatically populate based on the source document name.
-
If the source document's file name isn't the same as the client number, type the correct one inClient Number. This field is restricted to 21 characters.

-
If your client number uses a password, check the
 checkbox. On checking this checkbox, the
Passwordfield
checkbox. On checking this checkbox, the
Passwordfield will be turned on. Type the password in the
Passwordfield to grant SurePrep access for return preparation.
will be turned on. Type the password in the
Passwordfield to grant SurePrep access for return preparation. -
If there are multiple versions of the CCH Axcess Tax file for this client, select theVersion.
