![]()
Triva isn't available right now.
Check out the support page for our phone number and hours
![]()
Field | Entry |
|---|---|
Full Name | Enter the user's full name |
License Type | Dedicated |
FirmFlow User | Mark the checkbox |


Field | Entry |
|---|---|
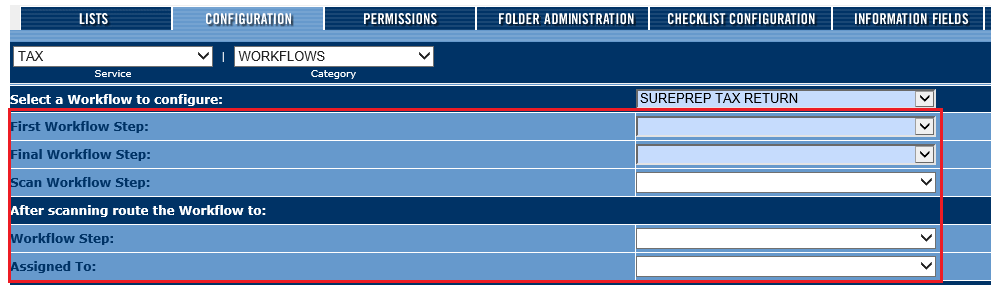
Service | TAX |
Category | WORKFLOWS |
Select a WorkFlow to configure | Select the workflow configuration you created. |