Export issues and solutions
Exported data taking longer than expected time to appear
Some firms using UltraTax CS (Virtual Office or SaaS) may have multiple office locations assigned in the tax software. If you're experiencing delays exporting data from SPbinder to UltraTax CS (Virtual Office or SaaS), then you may need to disable SurePrep Integration and re-enable it again.
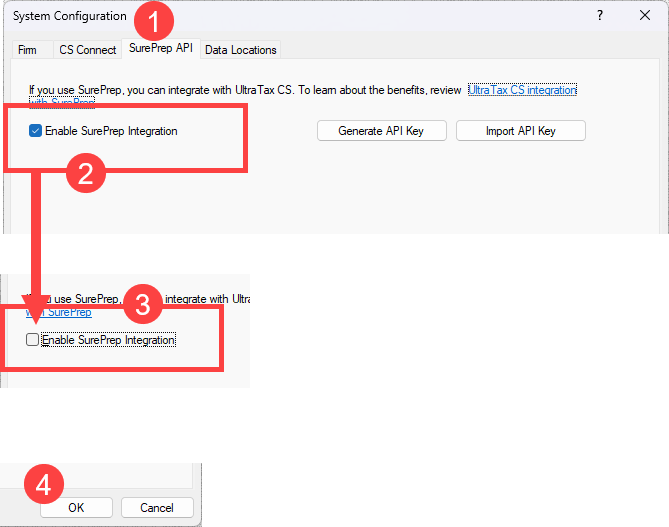
Follow these troubleshooting steps if you're experiencing delays in getting the information to appear in UltraTrax CS (VO/SaaS)
Go to
Setup
,
System Configuration
, then
SurePrep API
tab.
Clear the
Enable SurePrep Integration
checkbox > select
OK
.
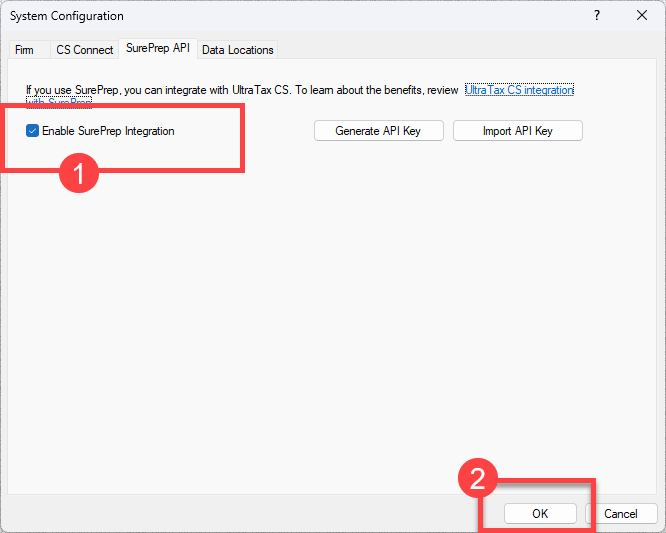
Open the
System Configuration
window again, reselect the
Enable SurePrep Integration
checkbox to enable SurePrep Integration again, then select
OK
.
Wait 1 minute then open the tax return to check if the exported information is now available.
Data not matching in UltraTax after subsequent export
Issue: If you delete data that was already exported to UltraTax, then on a subsequent export, the data will not sync in the correct order (shows duplicated data or certain information won’t appear deleted in UltraTax).
To delete non-proforma data:
Delete the data from the binder.
Next, manually delete the data from UltraTax.
To delete a proforma data:
On the
FORMS
tab, select the
Add

icon, then place a reference on a page.
Select the
Delete

icon to remove the reference from the row (that is, field group).
Export the data.
Then delete the row from the
FORMS
tab and then delete the same data from UltraTax.
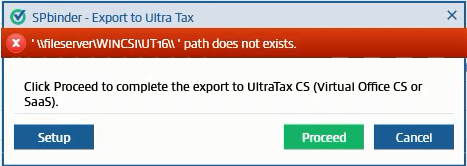
No new data has been identified for export
After Exporting data into the tax software, if the user tries to export again without entering any new data in the binder, the following window appears:
Any data entered in your UltraTax CS file after uploading the return in SPbinder will be overridden on completion of the Export process. UltraTax CS Import\Export features would be compatible with UltraTax CS Version 14.3.0.
Once the export process is complete, the user will have to restore the
.ENCR
file from the selected path (i.e. J:\Ultra Exported Files).
Open UltraTax CS. Go to
File
menu and select
Restore
.
The
Restore
window appears.
Select the
Client XML
option from the dropdown.
In the left-hand window pane, select the client which you want to restore and select the Select Button.
The client will be moved to the right-hand window pane. Select the
Restore
button.
You can now check the exported data in the UltraTax CS (Virtual Office CS or SaaS).
In case you have checked out the UltraTax CS (Virtual Office CS or SaaS) file, then the tax file must be restored back into UltraTax to clear the checkout before the XML data can be restored. Otherwise, you’ll receive a message similar to this:
UltraTax CS organizer pages for depreciation will bookmark only
The Organizer Pages for 'Depreciation – Asset List' and 'Depreciation – Asset Acquisitions' will only be bookmarked. There will be no transfer of data between SPbinder and UltraTax for the asset details reported on such Organizer Pages.
Settings to view data exported from Organizer Pages (8829, Auto, Sale, 8824, 4684B)
Requirement of settings in UltraTax CS to view data exported from Organizer Pages of 8829, Auto, Sale, 8824, 4684B
The data from the Organizer Pages of 8829, Auto, Sale, 8824, 4684B that is exported from SPbinder into UltraTax can be viewed in UltraTax CS only if a certain setting is turned off.
Follow these steps to turn this feature off:
In the
Client Properties
, go to
Advanced Properties
.
Select the tab
Enter Asset Detail
.
If the field
Enter asset detail information
is checked, you won’t be able to view the forms 8829, Auto, Sale, 8824, 4684B in UltraTax CS.
Uncheck this option.
This displays the forms 8829, Auto, Sale, 8824, 4684B.
You can then view the data exported from SPbinder in these forms.
Exported SurePrep Data Delays in UltraTax (Applicable for the latest version of UltraTax)
If you are experiencing delays in SurePrep data exporting to UltraTax CS, please confirm you are on the latest version of UltraTax CS. Once confirmed:
Open UltraTax.
Navigate to
Help
>
Repair
.
Choose the appropriate client and select
Request SurePrep data
to manually initiate retrieval.

 icon from the SPbinder toolbar. Alternatively, select
 on that binder. Select