
Manage data within a Table
When a table panel is added to a dashboard, several interactive components become available depending on the options enabled during configuration (see the Table Configuration article). These components allow users to search, filter, edit, and manage records directly from the table.
Search and Filtering
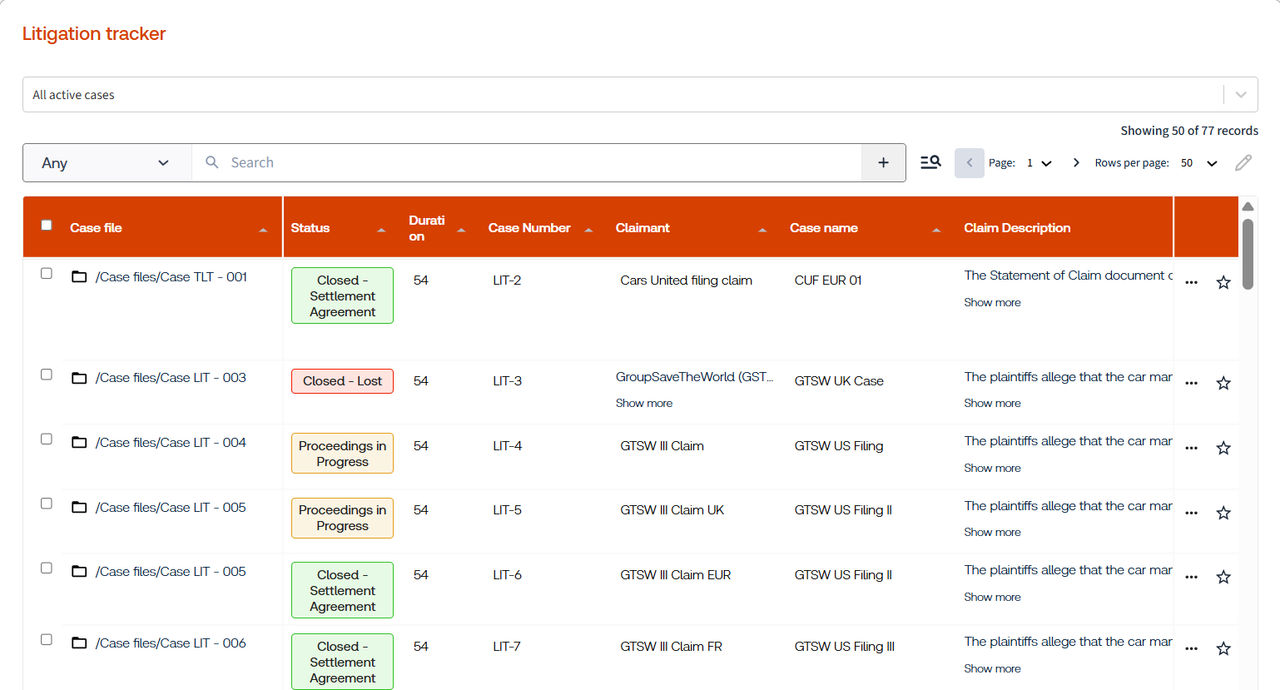
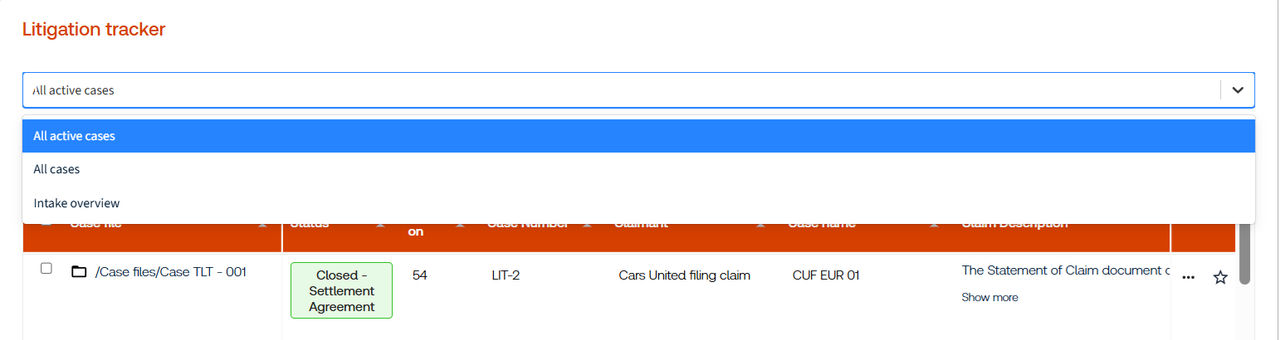
Start filtering by selecting a view from the available options, which can be controlled through the configuration setup. Selecting a view will filter the iSheet records displayed in the table accordingly.
Search Records
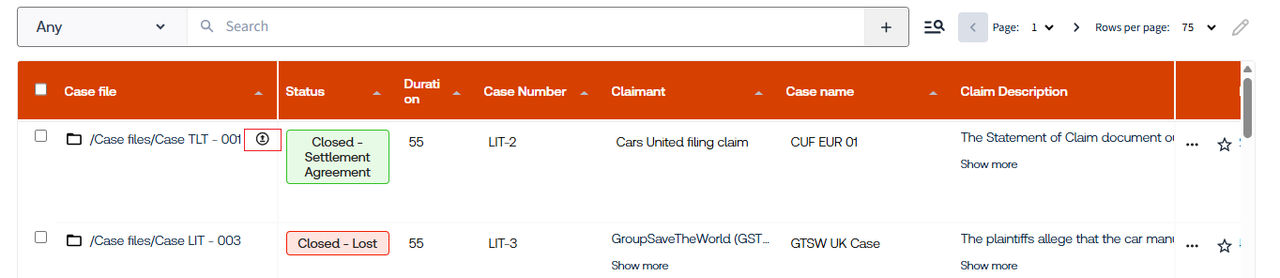
To search for records, use the column picker to search within a specific column, or search across all columns (default). Enter keywords in the search bar, matching records will be highlighted based on the panel configuration.
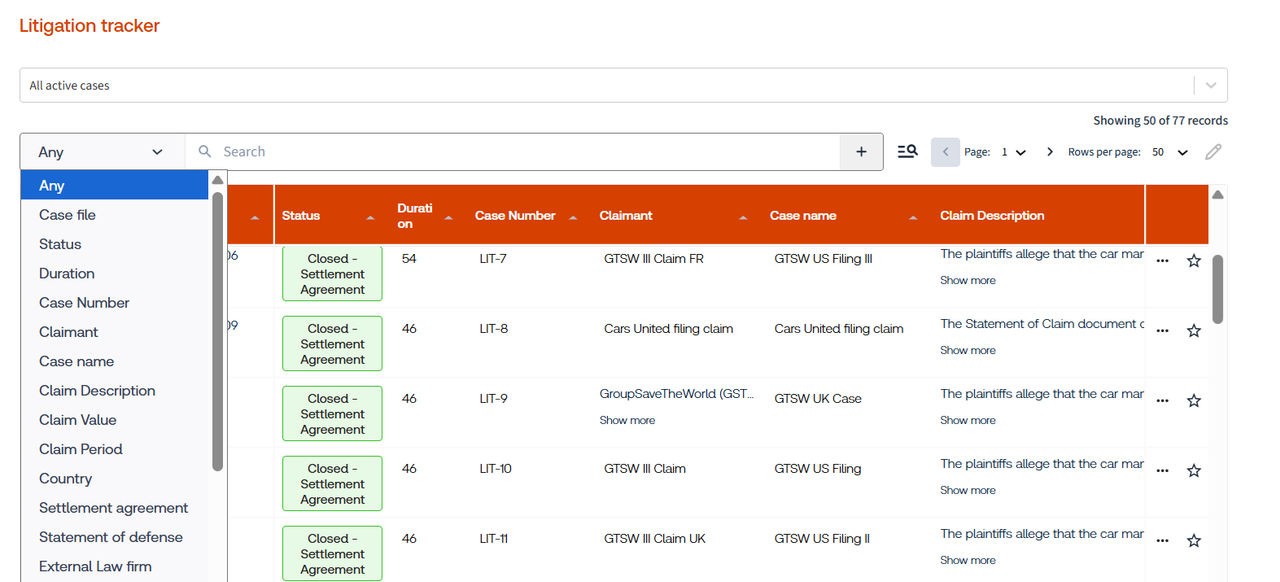
To refine your search, you can apply multiple filters. After entering your first search term, press
Enter
to add it to the list. You can then add additional filters for all columns or for specific columns using the column picker. 
To remove a filter, click the delete icon next to it. To clear all active filters at once, use the
Clear
option. Saving Searches
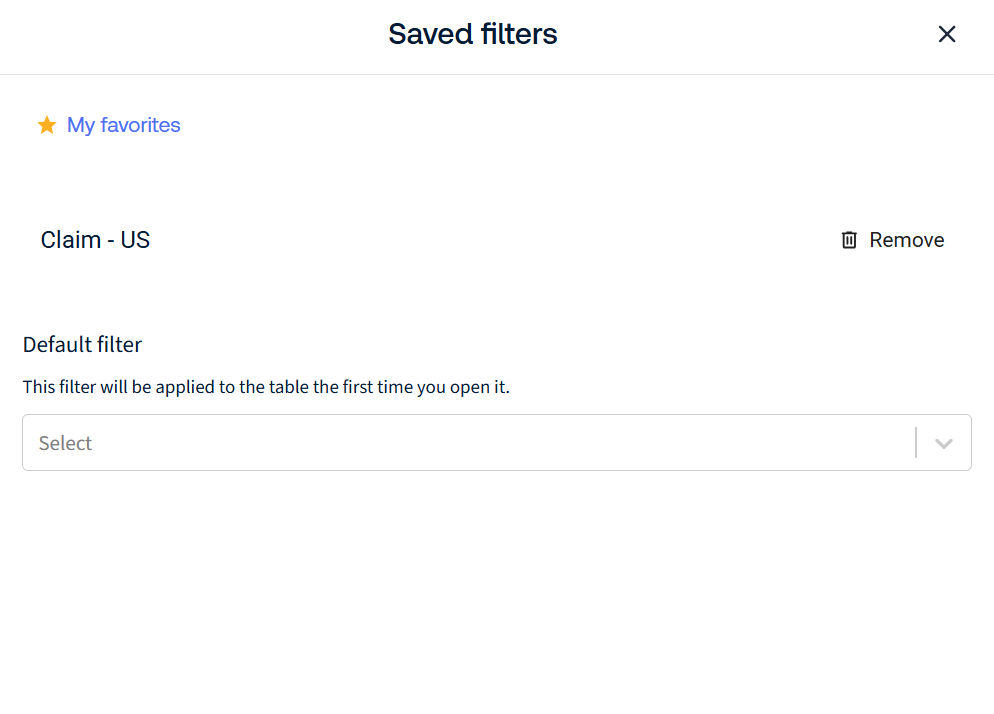
To reuse a search, save it using the
Save
option in the top-right corner. Provide a clear and meaningful name to make it easier to locate later. To access saved searches, click the saved filters icon to the right of the search box. From here you can set a search as your default view or reload a previously saved search.
Favorites
You can also filter records by marking them as favorites using the star icon next to a table record. Use the
My Favorites
option to display only your favorited records. 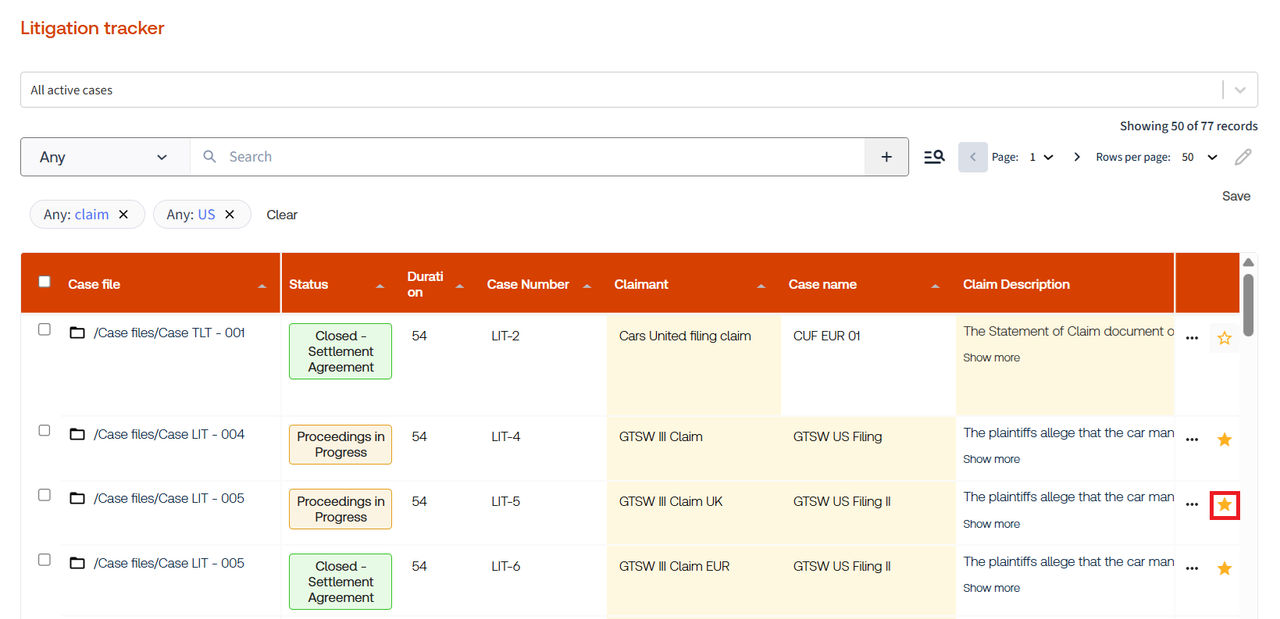
note
The search and favorites options are optional and can be enabled from the configuration setup.
Edit Records
note
Editing a record depends on whether it is enabled in the Table panel configuration.
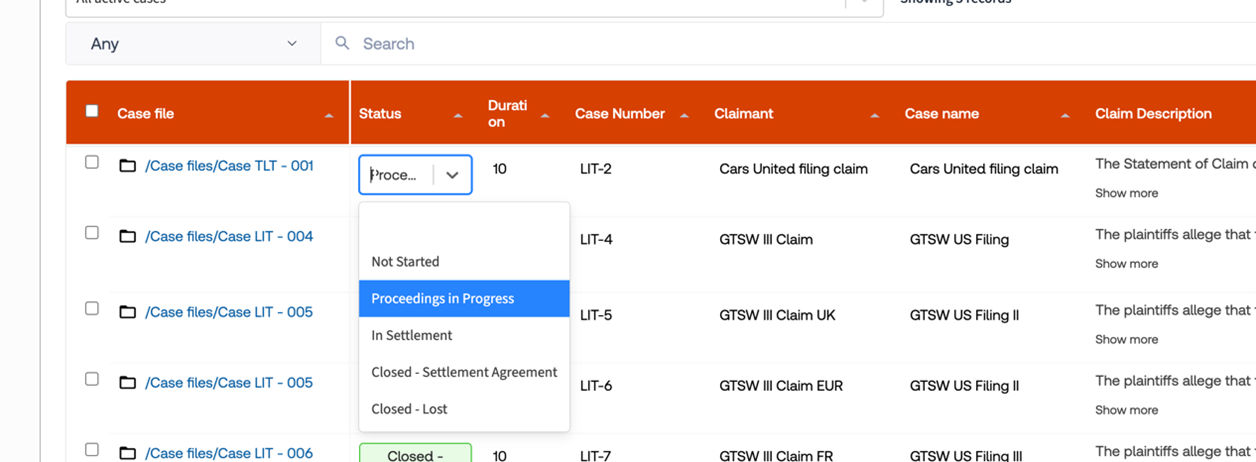
Inline editing
To edit a specific record, select a supported column and update the value directly. The behavior varies depending on the column type:
- Choice columns- Displays a picklist for selection.
- Text fields- Allows direct text input. Note that rich text and HTML formatting are not supported for multiline text fields.
- Non-supported columns- User Lookup, iSheet Lookup, Join, and Link columns cannot be edited inline.
Bulk editing
note
Bulk editing must be enabled at the configuration level. Contact your HighQ support team for assistance.
To perform a bulk edit, select the records you want to update to select all records in the current view, use the top-level select indicator.
Click the edit  icon and choose the column you want to update.

Click
Edit
, enter the new value(s) based on the column type(s), and click Save
to apply your changes.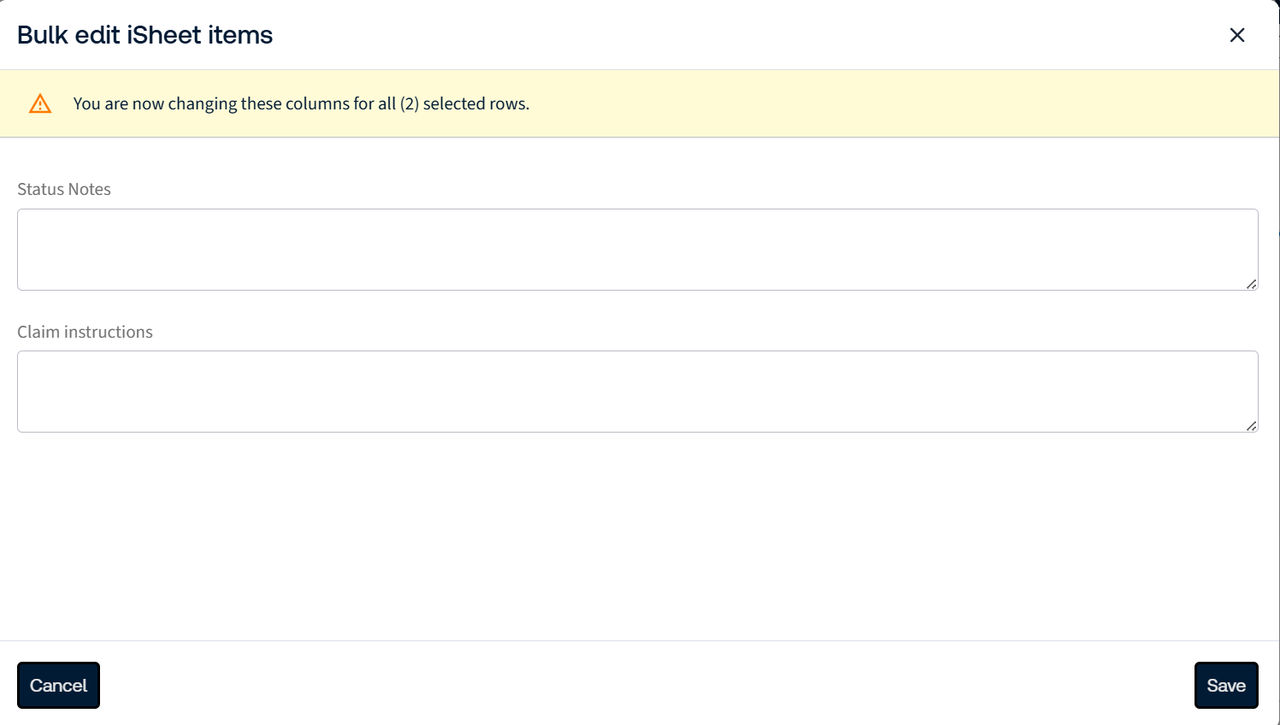
note
Bulk edits cannot be undone. Review your selection and changes carefully before saving.
Adding Documents
note
This feature must be enabled in the Table configuration. Ensure your iSheet includes an attachment column, a folder link column, or both.
Attachment columns are created automatically. You can add documents as new attachments or upload additional files by selecting
Add more
or Upload here
to choose files manually, or by dragging and dropping files directly into the table.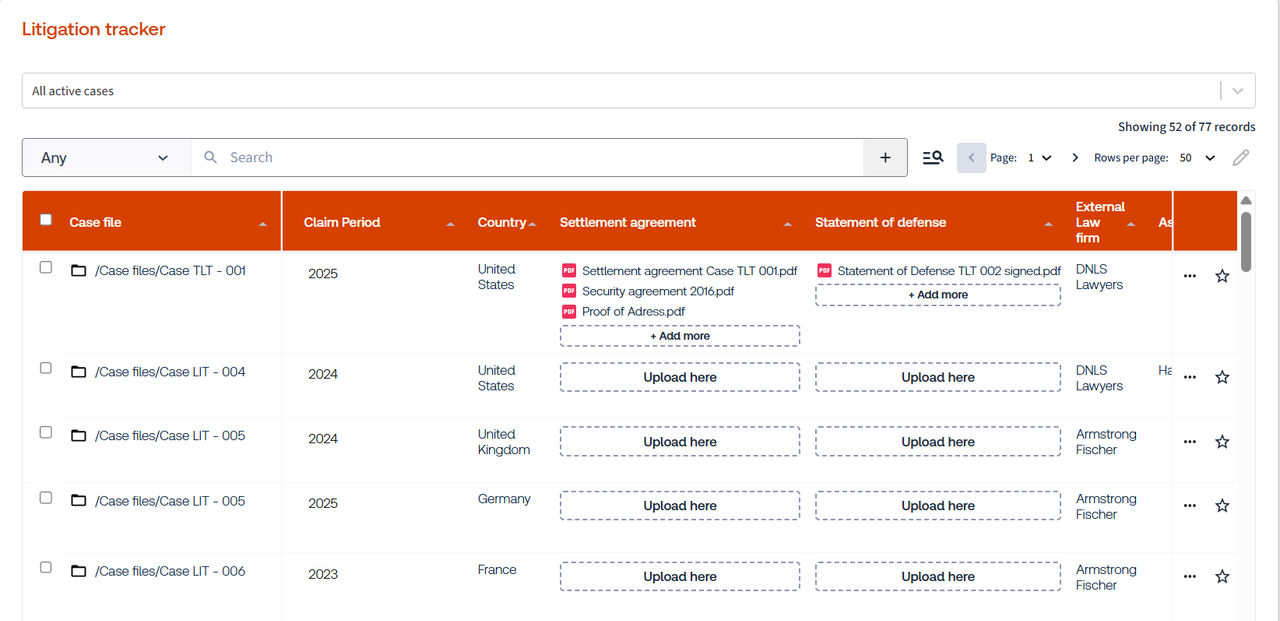
When using a Folder Link  column, an upload icon appears next to the folder name when you hover over it. You can select this icon to upload files, or drag and drop folders directly into the table.
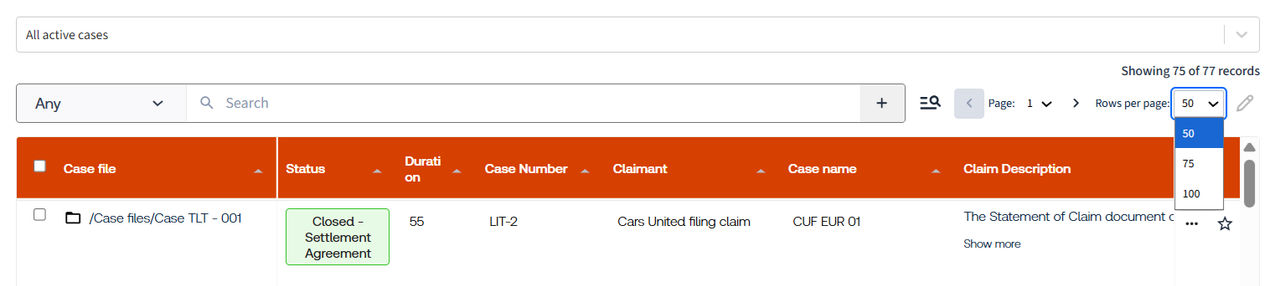
Pagination
When working with larger datasets, you can configure the number of records displayed per page (50, 75, or 100) in the Table setup.
Once the record count exceeds the configured page size (e.g., 51 records for a page size of 50), the table will automatically display:
- Page navigation indicators
- The total record count
- A selector to switch between 50, 75, or 100 records per page
note
Page indicators and the total record count are not displayed when the number of records does not exceed the configured page size.
Table Record Options
note
The following options are only available when configured in the Table setup.
Share Record
To share a record, select the iSheet record and click the  , then choose the appropriate sharing options. For more information, see iSheet Sharing article.
Share
icon , then choose the appropriate sharing options. For more information, see iSheet Sharing article. 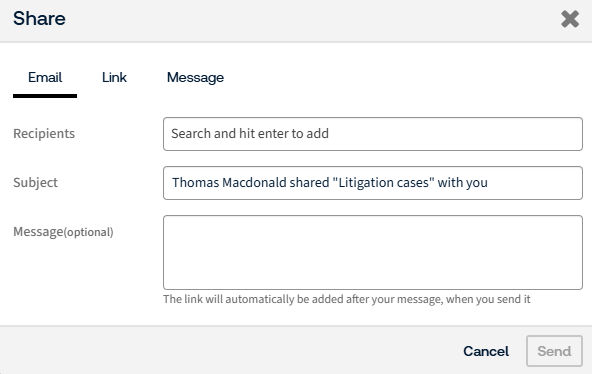
Export Record
To export a record, select the iSheet record and click the  icon.
icon.
Export
icon.The
Export
dialog allows you to choose a file format for exporting iSheet data. Select one of the available options (XLSX
, CSV
, XML
, or Import template
), then click Export
to download the data, or Cancel
to close the dialog without exporting.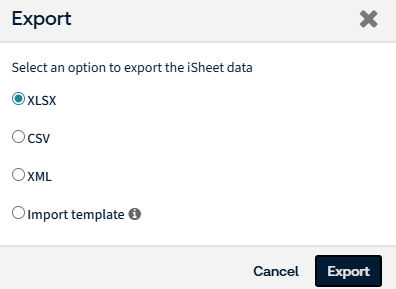
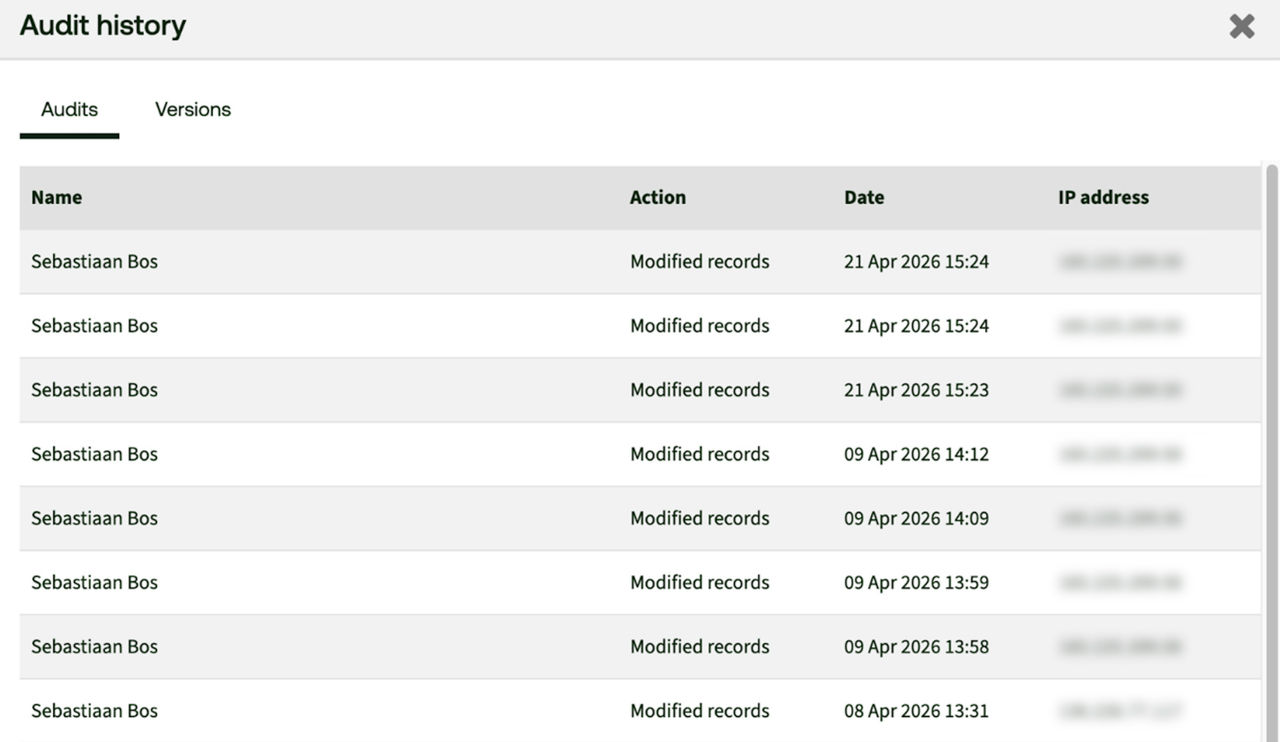
Record Audit
To record an audit, click
More Actions
and select Audit
to view the full audit trail for the selected record.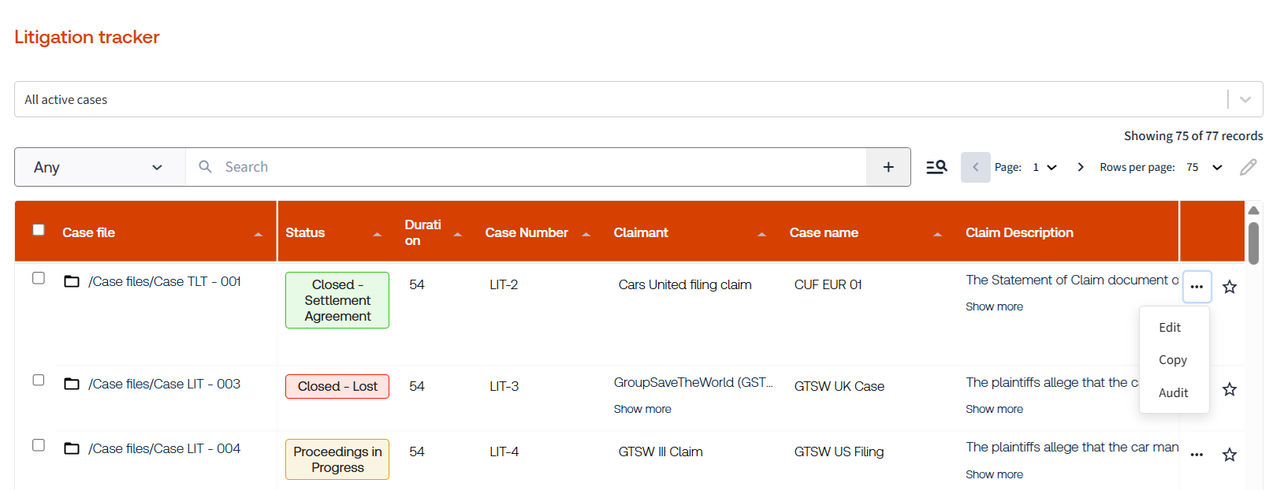
note
The Record Audit option is only visible to
Site Admins
and Content Admins
. The Audit history dialog displays a list of record changes, including the user name, action performed, date and time, and associated IP address.
Related Content
-
Table Panel
Format: Article