
Timeline Panel
The Timeline panel displays key events in a clear, chronological view based on Tasks or iSheet data. Use it to track milestones, upcoming work, or date-driven records in a single, easy-to-scan view.
note
This panel is available only for System-level and Custom Page dashboards and is available to all
HighQ Premium
clients but is not enabled by default. Please contact your Account or Customer Success representative to enable it.Creating a Timeline panel
To add a Timeline panel, navigate to your custom page dashboard and select
Edit
dashboard. Click the +
icon, then choose Timeline
from the Interactive Data Visualization panel options. 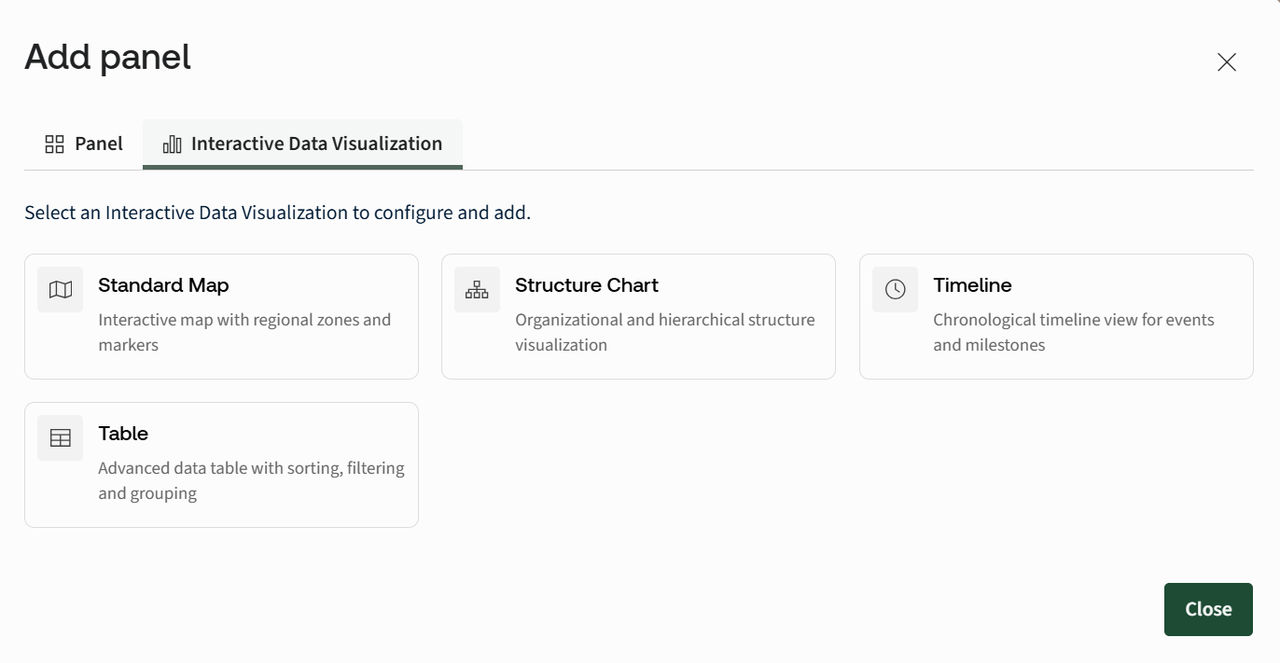
Title
- Enter a title for the timeline. The title appears at the top of the panel.Site
- Select a site from your HighQ instance that contains an iSheet and/or has the Task module enabled.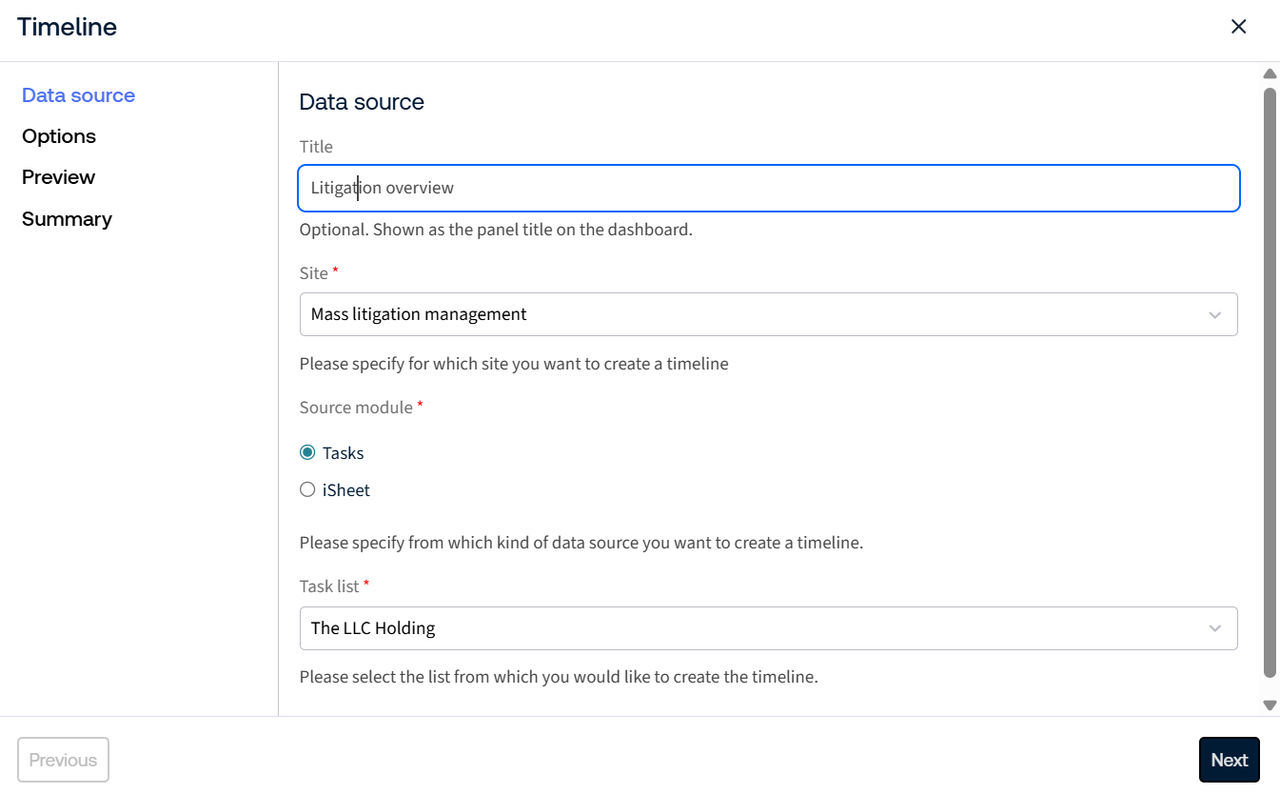
note
The available source options load only after a site is selected.
Source module
Choose whether the timeline is based on Tasks or an iSheet.
Task-Based Timeline
When
Task
is selected as the source module, the following option becomes available:Task List
- Select the task list to use for generating the timeline. The available options in the list depend on the selected site.note
- You can create multiple timelines for multiple task lists if required.
- Task-based timelines automatically use the task name as the title, the task start date as the timeline date, and the task status to indicate completion. These fields cannot be customised.
Click
Next
to go to the Options tab.Options

- Color- Sets the visual colour used for the timeline icons. Enter a hex colour code prefixed with#(e.g. #2E41E4) in the field or click the colour icon to use the colour picker.
- Click action- Defines what happens when a user selects an item in the timeline.
- Go to task in task module: Opens the task in the HighQ task module.
- No action: No action is performed.
- Style options- Optional settings that control the visual appearance of the timeline.
- Highlight overdue and approaching items: Adds warning indicators to items that are overdue or approaching their due date, helping users quickly identify items that need attention.

- Hide highlight between items: Reduces or removes visual separators between adjacent items for a cleaner, less busy view.

iSheet-Based Timeline
When
iSheet
is selected as the source module, the following options become available: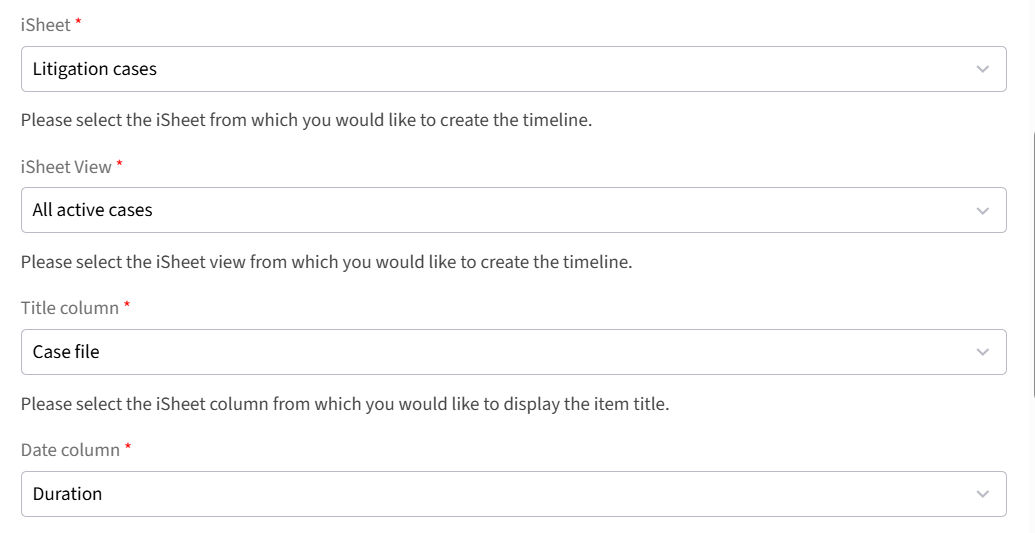
- iSheet- Select the iSheet containing the data to be displayed in the timeline.
- iSheet view- Choose the view that determines which records appear on the timeline.
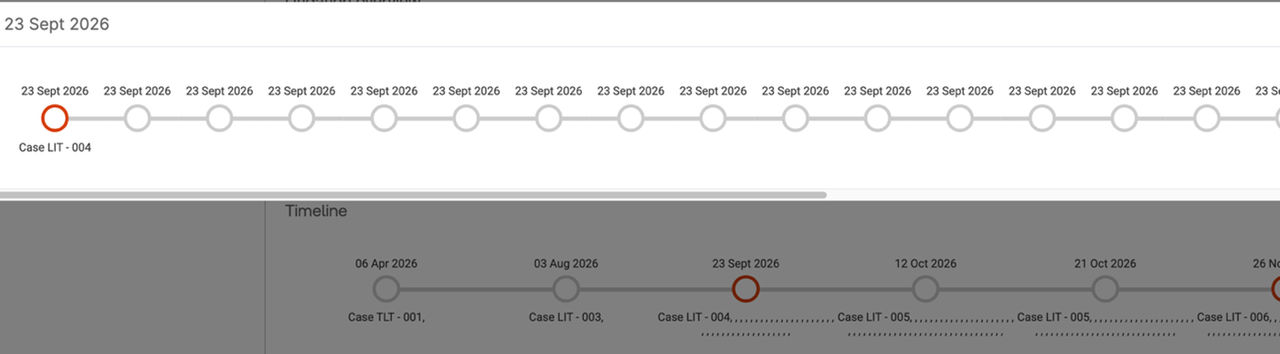
- Title Column- Select the column whose value appears as the timeline item title (e.g. CASE TLT-001).
- Date Column- Select a date-type column from the iSheet. This determines the chronological order of timeline items.
- Include status- Enable this option to define icon colours and visually indicate item completion status in the timeline. When enabled, the following fields become available.
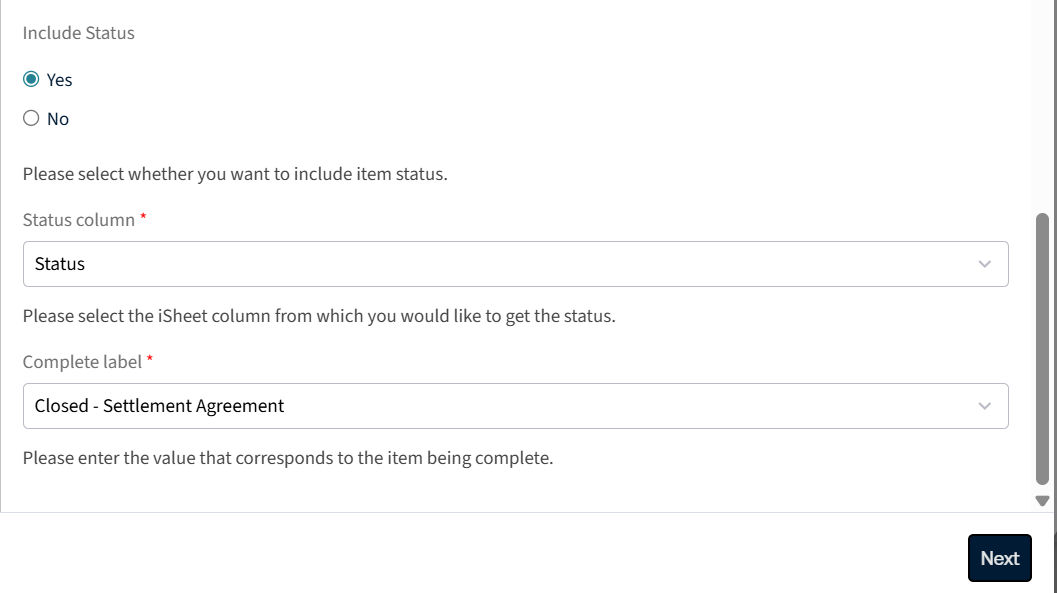
- Status Column: Select the choice-type column used to determine item status.
- Complete Label: Define which value in the Status column marks an item as completed.
note
You can also create Task Metadata iSheets to combine both Task and iSheet options. (Link to Task Metadata iSheets article.)
Click
Next
to go to the Options tab.Options

- Color- Sets the visual colour used for the timeline icons. Enter a hex colour code (e.g. #2E41E4) in the field or click the colour icon to use the colour picker.
- Click action- Determines what happens when the user clicks an item in the timeline.
- Open item details: Opens the iSheet record details page.
- Open item edit form: Opens the iSheet add/edit form, allowing the user to view and edit the full record.
- Open item comments: Opens the comments section for the iSheet record.
- Go to source: Opens the iSheet module in a separate window.
- No action: No action is performed when clicking a timeline item.
- Undated items- Determines how items without a date appear in the timeline.
- Show undated items at start of timeline: Displays undated items at the beginning of the timeline.
- Show undated items at end of timeline: Displays undated items at the end of the timeline.
- Do not show undated items: Hides items without a date, so only dated items are displayed.
- Style options- Optional settings that control the visual appearance of the timeline:
- Highlight overdue and approaching items: Adds warning indicators to items that are overdue or approaching their due date, helping users quickly identify items that need attention.
- Hide highlight between items: Reduces or removes visual separators between adjacent items for a cleaner, less busy view.
- Collapse items with the same date: Groups all items that share the same date into a single timeline entry. Clicking the entry expands it to show all items for that date.
Click
Next
to see a preview and configuration summary. Review all settings carefully to verify they are correct before proceeding.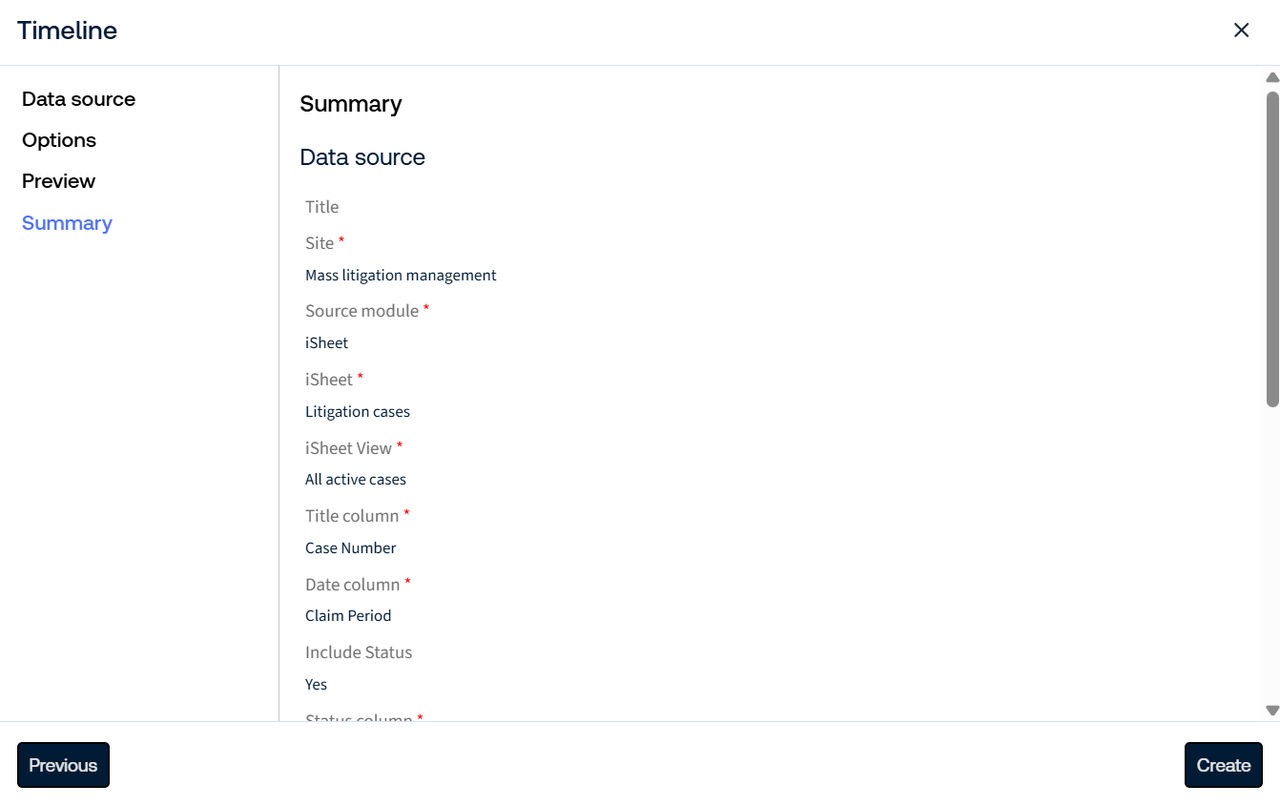
note
With the current HighQ release (5.11), the Timeline panel cannot be edited once it is added to the dashboard. Ensure all configuration settings are correct before selecting
Create
.Click
Create
to generate the Timeline panel. The panel is automatically added to the dashboard panel and is immediately available for use.
For details on managing timeline tasks, see View and Manage Timeline tasks.
Related Content
-
View and Manage Timeline tasks
Format: Article