
Working with different task views
There are multiple ways to view your tasks. In the Tasks module, you can view tasks in List View, Card View, Timeline View (if enabled) and Hierarchy View. Select between views by clicking
View
in the Tasks module.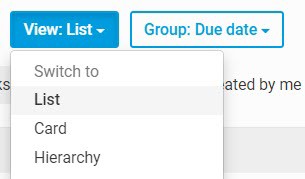
You can get a snapshot of your Tasks from the dashboard. In addition, you can view all of your tasks, as well as tasks assigned to you across every site where you are a member, from the My Tasks section.
note
Tasks can also be viewed in the Events module or on your smartphone.
See below for more information about these options.
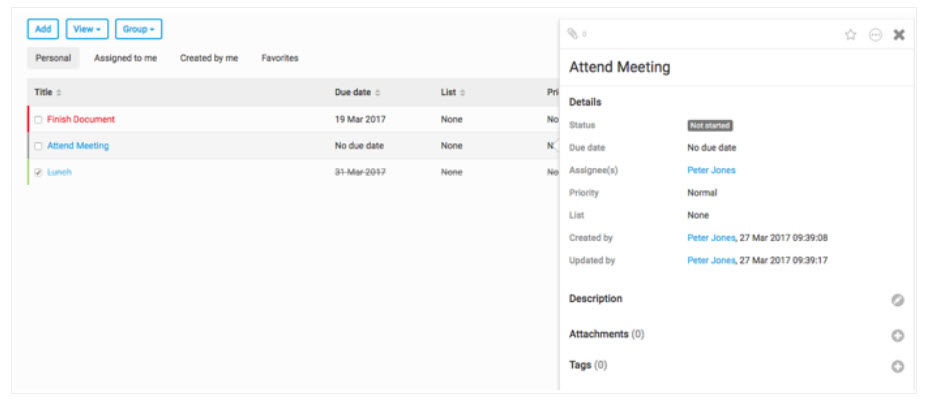
List view
In the
List
view, each task is represented by one row, and each column represents a different field for each task. This is the most flexible view for grouping and sorting.Group tasks in List View
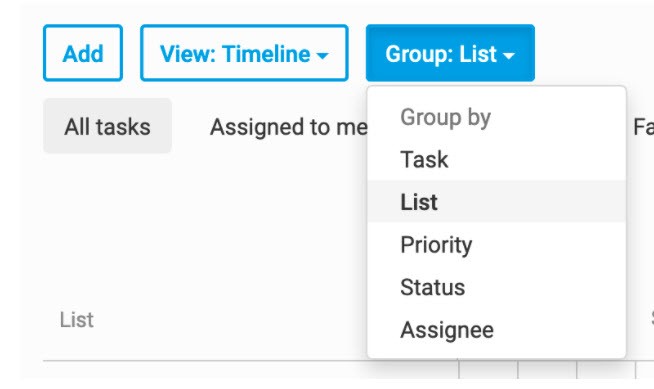
When in List View, you can group tasks by Task ID, Due date, List, Priority, Status and Assignee using the
Group
button. Once grouped, click the triangles next to each column title to sort the tasks.

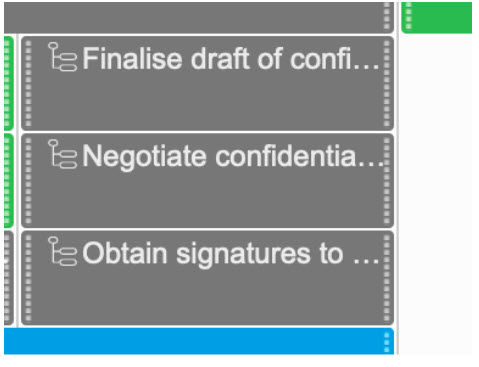
Show sub-tasks
By default, sub-tasks are grouped under their parent tasks and hidden. A task has sub-task(s) if it has a sub-task progress icon.
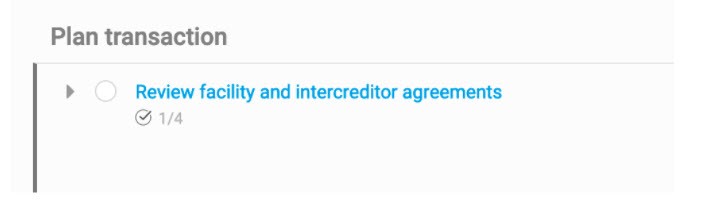
You can toggle the task to reveal the underlying sub-tasks.
You can also view sub-tasks as separate tasks by selecting
View then Sub-tasks - Show as separate tasks
. This shows all sub-tasks as independent tasks, displayed in line with parent tasks.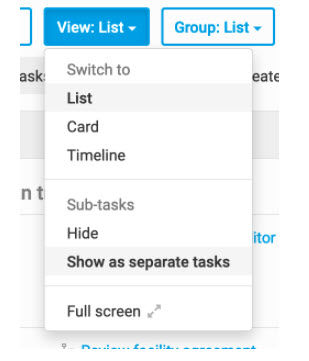
Depending on the grouping and sorting applied, a sub-task may not be listed next to its parent task, but it can be identified as a sub-task by the icon next to the task title.
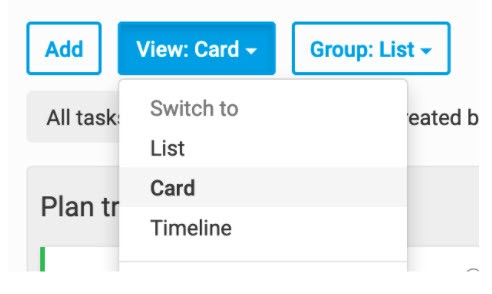
Card view
With Card View, you can view tasks in a 'Kanban' style board view. To access this view, navigate to
View then Card
.
Group tasks in Card View
The tasks are displayed as cards, organised into columns. The columns are grouped by either 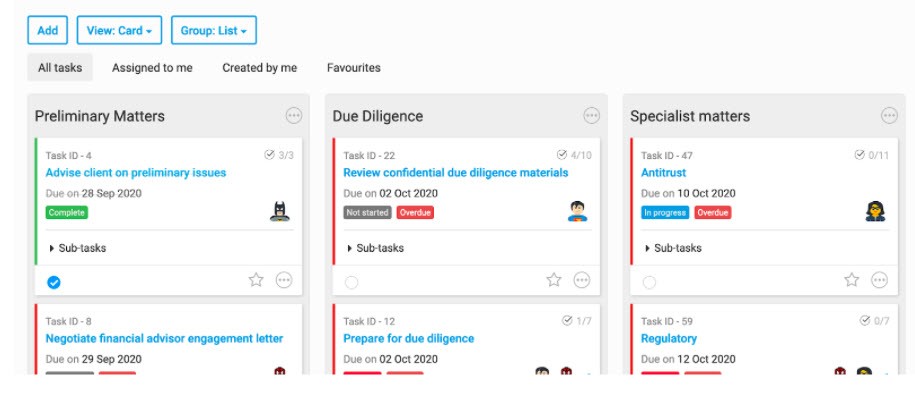
Status
or List
. To change the group, select
Group
and select either Status
or List
.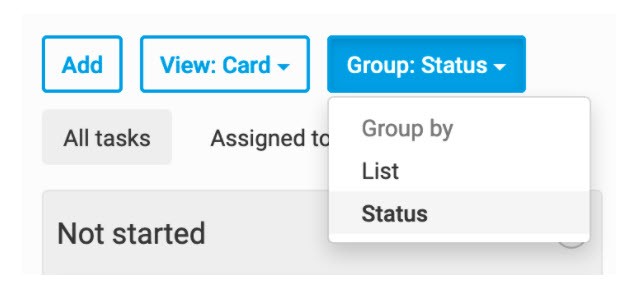
When grouped by Status, the lists are displayed on each card, e.g. 'In Documentation'; when grouped by List the status is displayed on each card as a label, e.g. 'Not started'. All other information remains the same regardless of grouping.
Order tasks by due date
You can order the cards in each column by the due date, with the most urgent tasks (tasks with the nearest end date) at the top.
Select the
More actions
icon in the column, then select Sort by Due Date
.
Drag and drop tasks
You can drag and drop tasks when in Card view to create a custom order in a column.
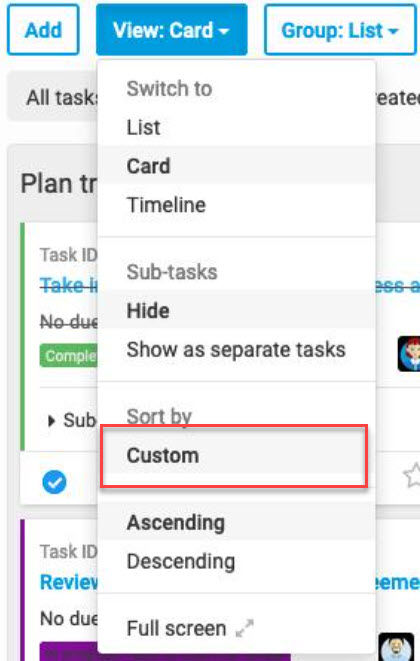
You can drag a card from one column to another:
- If tasks are grouped by status, when you drag a task to another status column, it also changes the status of the task.
- If tasks are grouped by list, when you drag a task to another list column, it adds the task to the new list.
note
You can also drag and drop columns to reorder them.
note
If you do not have the applicable permissions (e.g. only view permissions for a section) you cannot drag and drop tasks to that section.
Drag and drop is also enabled when accessing via a web browser on a device or tablet.
Show sub-tasks
By default, sub-tasks are grouped with their parent tasks and hidden. A task has sub-task(s) if it has a sub-task progress icon.

You can toggle the
Sub-tasks
section to reveal the underlying sub-tasks.You can also view sub-tasks as separate tasks by selecting
View then Sub-tasks - Show as separate tasks
. This shows all sub-tasks as independent tasks, displayed on a separate card.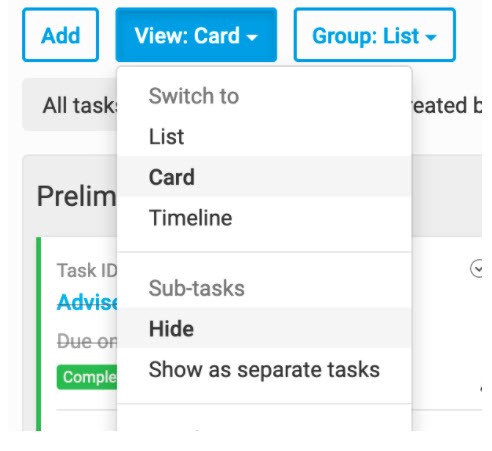
Depending on the grouping and sorting applied, a sub-task might not be positioned next to its parent task, but it can be identified as a sub-task by the icon next to the task title.

Timeline View
The Timeline view is a Gantt chart-style view of the start and due dates of tasks. Only tasks with a start date
and
due date are shown in this view.Enable Timeline View in Tasks
The Timeline view must be enabled in
site admin
. To do this, navigate to Admin
then Tasks
and select the Enable Timeline view
checkbox.
Once you have selected the
Enable timeline view
checkbox, you can select Timeline View as the default view for the site, but this is not required.Select
Save
to apply your changes. You can now access the Timeline View in the Tasks module. To change the view to Timeline View in the Tasks
module, navigate to View: Timeline
.
The Timeline view opens.
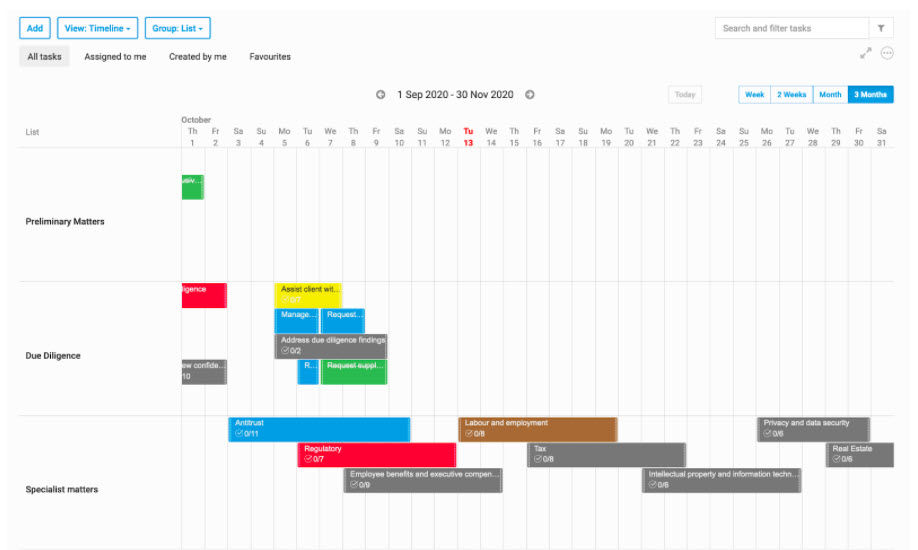
note
The bar for each task is colour-coded to match the Card and List Views and corresponds to each task status.
note
Only tasks with a start date and due date are displayed in the timeline view.
Start dates in Timeline View
If Timeline View is enabled, each task and sub-task has a
Start date
and Due date
field. It is possible to add only a start date, only a due date, or both a start date and a due date to a task. Group tasks in Timeline View
You can group tasks in Timeline View by Task ID, List, Priority, Status or Assignee.
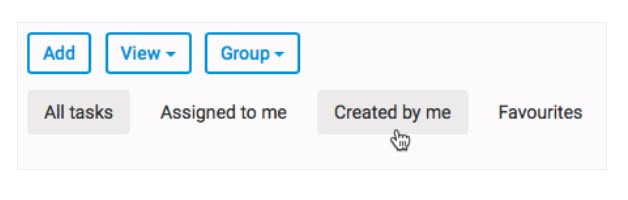
Additionally, you have access to filters that allow you to filter your tasks by
All tasks, Assigned to me
, Created by me
and Favourites
.
Viewing timelines
In Timeline View, you can view tasks in a weekly, fortnightly, monthly or quarterly view.
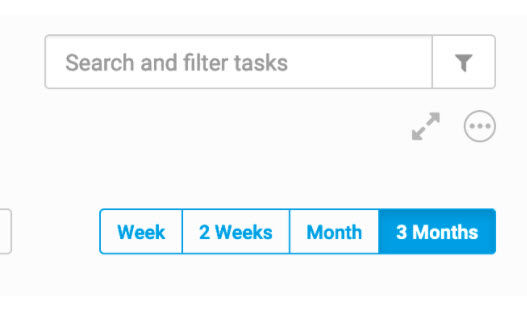
Click the arrows next to the date range, or scroll horizontally, to scroll through the weeks or months.

Show sub-tasks
By default, sub-tasks are grouped with parent tasks and hidden. If a task has associated sub-task(s) it has a sub-task progress icon.

Click on the task to view the underlying sub-tasks.
You can also view sub-tasks as separate tasks by selecting
View then Sub-tasks - Show as separate tasks
. This shows all sub-tasks as independent tasks, displayed in their own row.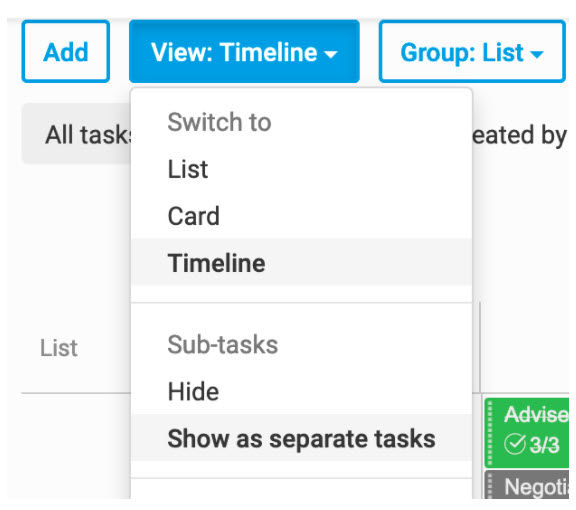
Depending on the grouping and sorting applied, a sub-task might not be listed next to its parent task, but it can be identified as a sub-task by the icon next to the task title.
Hierarchy View
The Hierarchy view displays the full hierarchy of the Tasks module; from lists, sub-lists, tasks to sub-tasks. This view can be used for complex cases and matters involving multiple parties and jurisdictions, where tasks are broken down into more detail. In the Hierarchy view each list, sub-list, task and sub-task is represented by one row, and each column represents a field for each item. The columns displayed in the hierarchy view are
Title
, Progress
, Status
, Assignee
, Start Date
, Due Date
and Priority
.If you have permission to edit content in the Tasks module you see a
More Action
icon next to each list, sub-list, task and sub-task. Depending on the item selected the following options are available:- Add task- this opens theAdd taskwindow; the list/sub-list is pre-selected for the new task.
- Add sub-list- this opens theAdd listwindow, the list location is pre-selected for the new sub-list.
- Edit- this opens theEdit taskwindow for tasks and sub-tasks, or theEdit listwindow if the list details change.
- Save as task template- this saves the list as a task template
- Archive- you can archive lists.
- Delete.
note
The Hierarchy view also allows you to easily Reorder tasks and make bulk changes.
You can also create your own custom views to show the fields relevant to your tasks.
Outline numbers
The relationship between lists, sub-lists, tasks and sub-tasks is governed by their corresponding outline numbers. These are shown next to the Title column.
List progress
In the hierarchy view, you can track the progress of each list by referring to the progress bar in the Progress column. The progress bar shows the percentage of tasks marked as 'Completed' in each list.
note
The progress bar does not take into account the number of sub-tasks completed.
Group and sort tasks in the Hierarchy view
Tasks in the Hierarchy view are ordered by their outline number down the left-hand column.
note
Tasks cannot be Grouped or Sorted by any other field in the hierarchy view.
Search and filter tasks
You can search all existing tasks with search criteria in the
Search and filter tasks
field; press enter to start the search.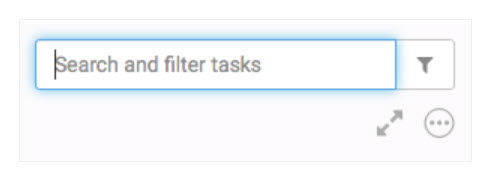
Additionally, you can also filter by
List
, Priority
, StatusAssignee
and Tag
.
note
You can save filters for future access.
Default view, grouping and sort order
On the
Admin then Tasks
page, you can set the Default view
, the Default grouping
and the Default sort order
(for List View only) for the Tasks module: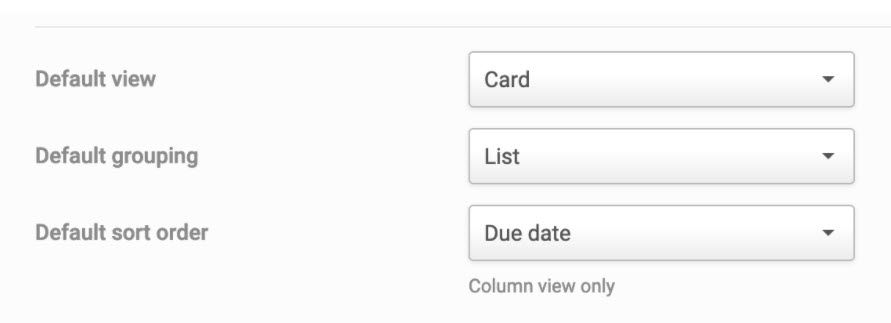
These settings ensure the default view opens when you open the Tasks module.
View tasks from the dashboard
There is a Tasks section on the site dashboard. By default, the tasks are organised by due date, starting with overdue tasks (in red), then tasks due this week, then tasks due in the future or with no due date. A maximum of 11 tasks are listed. To see hidden tasks select
See all tasks
which takes you to the My Tasks page.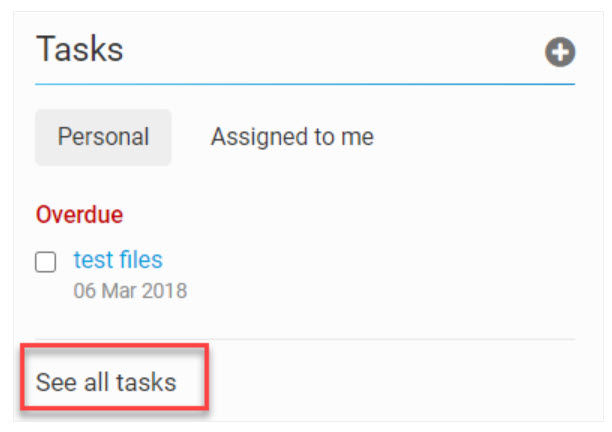
You can take one of three actions for tasks on the Dashboard:
1. Create a personal task.
2. Mark a task as complete - click the task's checkbox.
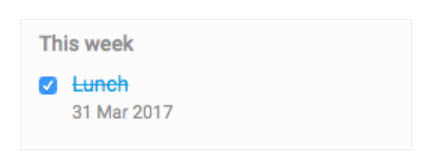
Once a task is marked as complete, the task appears with a strikethrough through it.
3. Select the name of a task to view more information about it.
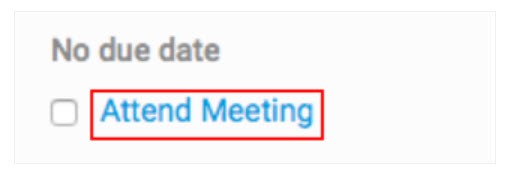
The task window for that task opens in the My tasks page.
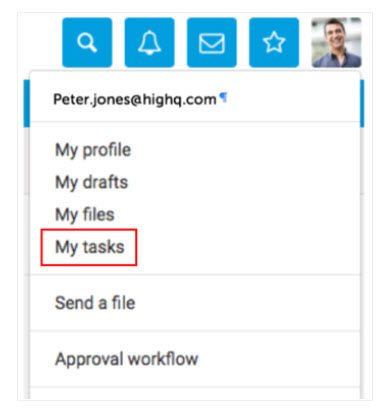
My Tasks
It is possible to view all of your tasks, including your personal tasks and tasks assigned to you across every site you are a member. From the profile menu on the top navigation bar, select
My tasks
.
This displays the 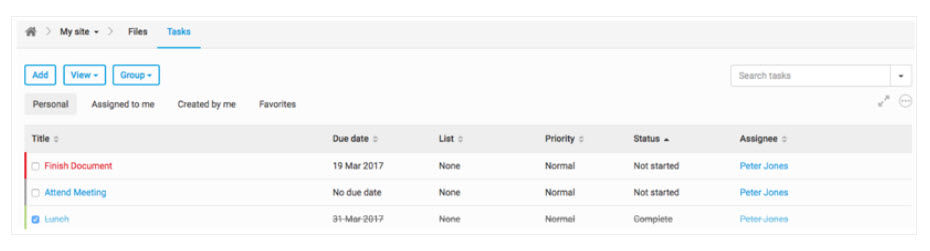
My tasks
section of your profile, listing all of your tasks. This page is similar to a typical Tasks module found on a site, with task filters on the left. In addition to showing details like Due Date, Priority and Status, this page also lists the site associated with a task.
When tasks are grouped by List, you see all your tasks grouped by task lists from the sites with your assigned tasks.
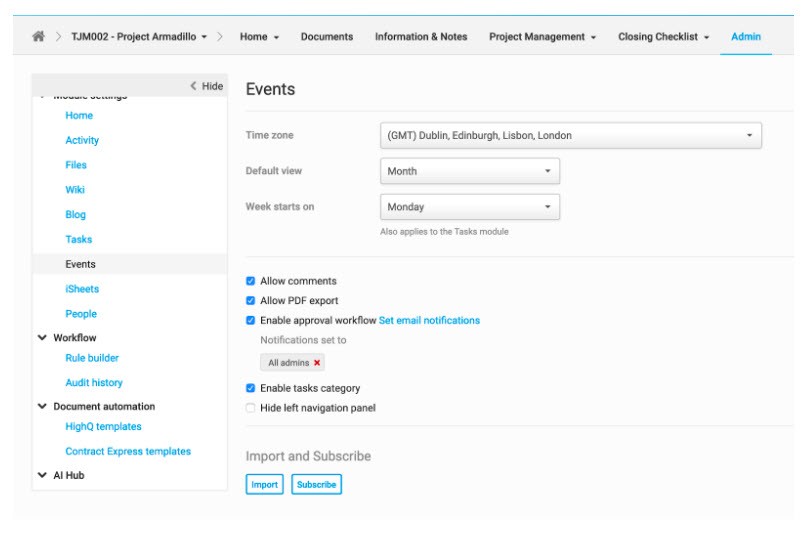
Display tasks in the Events module
You can display tasks as an all-day event in a
Tasks
category. This allows you to see Tasks that are due in the calendar view of the Events
module.To enable the Tasks category in the
Events
module, navigate to Admin, Events, then Enable Tasks Category
.
Select the
Enable tasks category
checkbox and then select Save
. Your changes are applied and the Tasks category is enabled.The name and colour of categories are customisable in
Admin, Events, then Categories
. Select More actions
then Edit
in the Tasks category.
This opens the
Edit category
screen, where you can customise the category.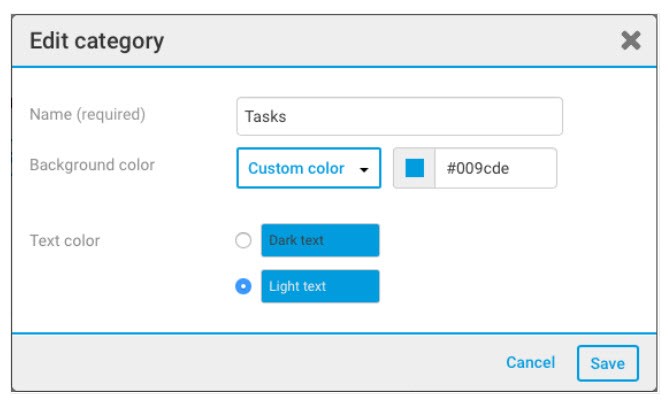
Navigate to the
Events
module where the new Tasks
category is displayed.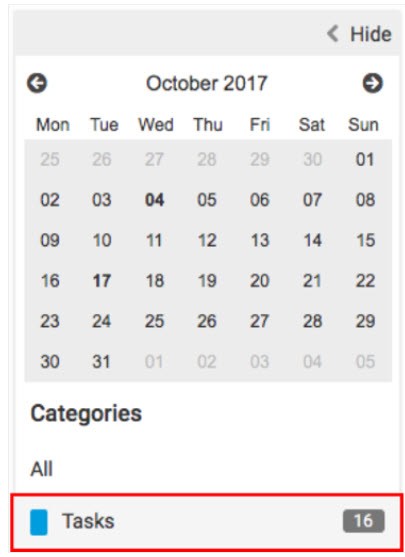
The number of current tasks is displayed, including completed, upcoming and overdue tasks.
note
The tasks must have a due date.
Select the
Tasks
category to display all tasks in the calendar.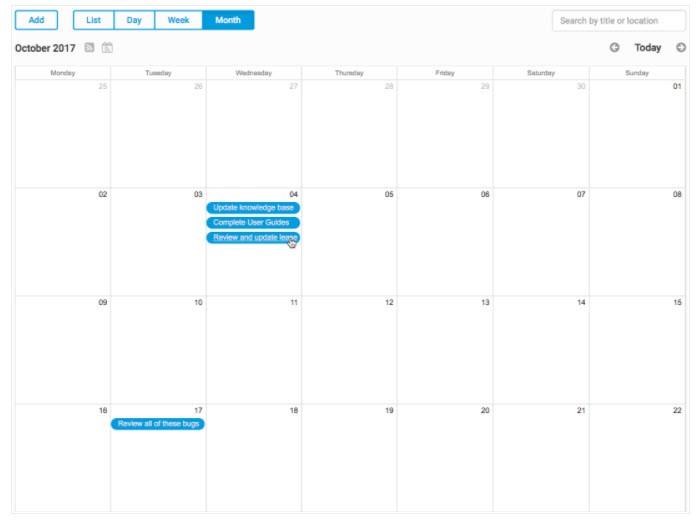
This information can be displayed in a Month, Week, Day, or List view. To change to one of these views, select
Month
, Week
, Day
or List
.
Click on a task in the calendar to display more information about that task; if you have permissions, you can edit the task details from the task window.
Accessing Tasks on a mobile device
On a mobile device, click on the menu icon in the Top Navigation Bar to access the menu, and select
My tasks
.
This displays the
My tasks
page, where you can view personal tasks, tasks assigned to you, tasks created by you, and youfavourite tasks.