How to automate eSignatures in Author Online
Author Online lets you automate eSignatures directly within your templates. With the markup, you can define eSignature recipients and anchors through a guided setup.
To learn more about the eSignature field, see eSignature Field.
Adding the eSignature Field
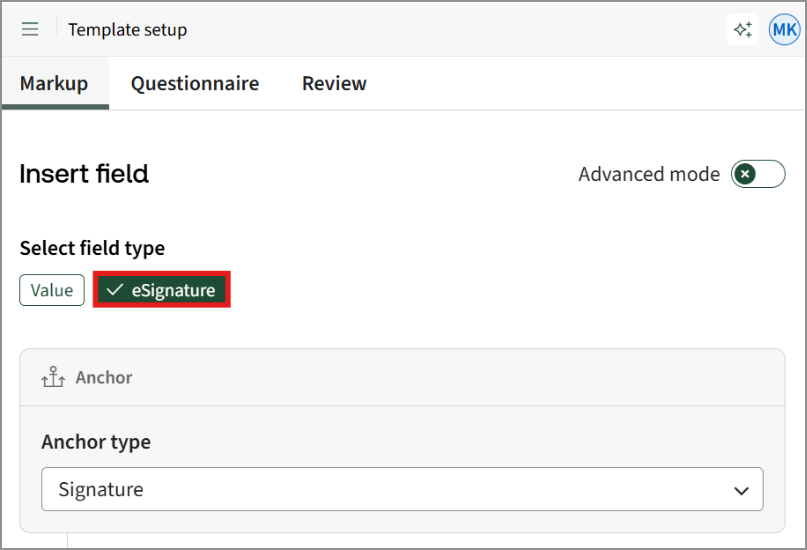
To insert an eSignature field, highlight the text or place the cursor in your template where the signature should appear, then select Insert Field.
In the Markup tab, choose the eSignature field under the Select Field Type option. In the Anchor type field, select Signature or any other type from the list. The anchor determines where the signature appears in the document.
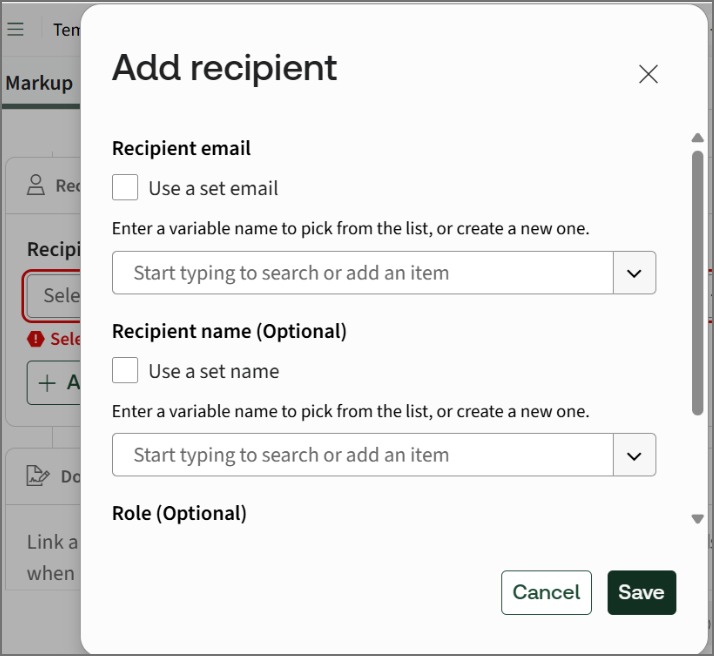
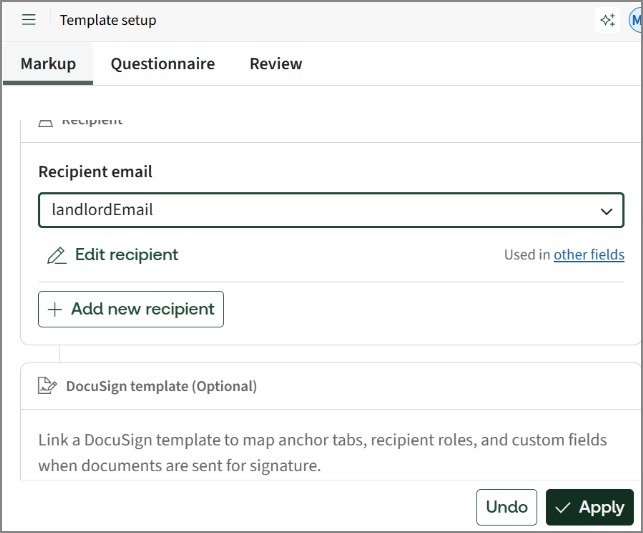
Next, add the recipient information. Select Add New Recipient to open the recipient form, where you enter the recipient’s email address, along with an optional name and an optional role.
The Recipient email field supports two approaches:
- If the Use a set email option is checked, you type an email address manually.
- If it is unchecked, you can select an existing variable from the list or create a new one, which allows the recipient to be determined dynamically when the document is generated.
Enter the recipient’s name and role in the same way, then select Save.
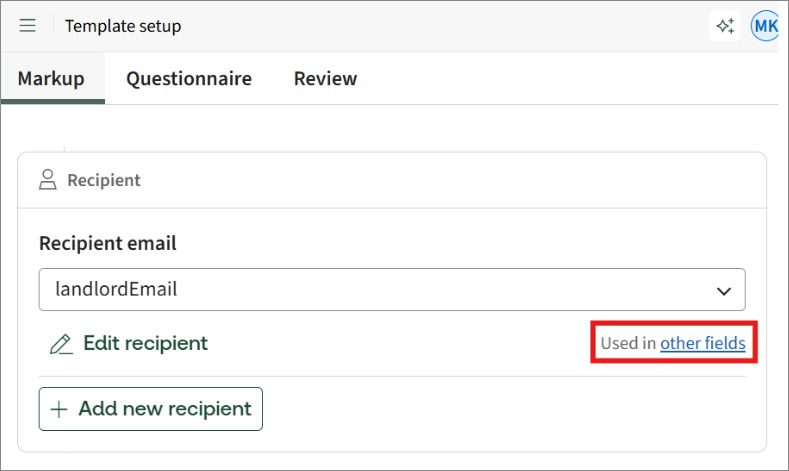
Once you save the recipient, it appears in the Recipient email dropdown, and you can edit its details at any time from there.
A single recipient can be assigned to more than one anchor in a template. To see where a recipient is used, click the Used in other fields option. This lets you move between every field associated with that recipient, making it easy to confirm how many signature points they have and where they appear.
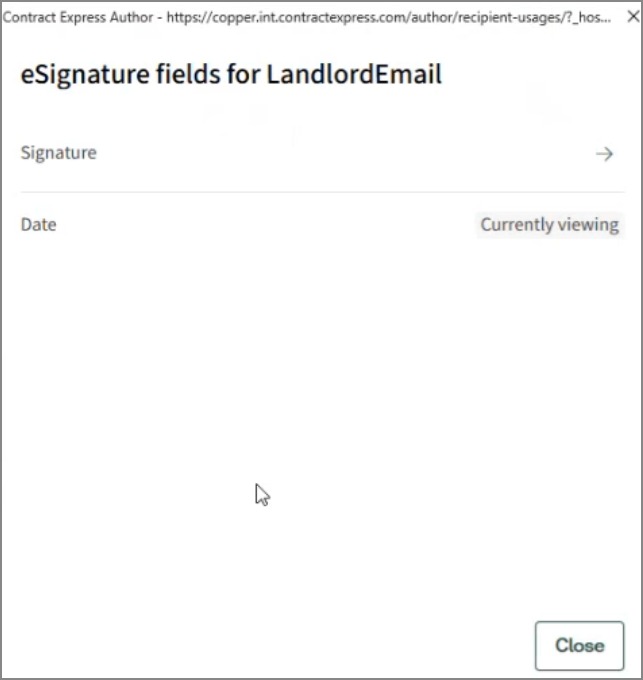
After you finish configuring the recipient, select Apply to add the eSignature field to the template.
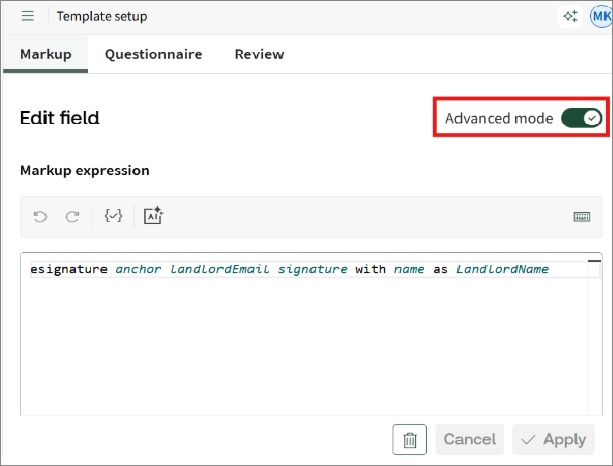
Reviewing the Generated Expression
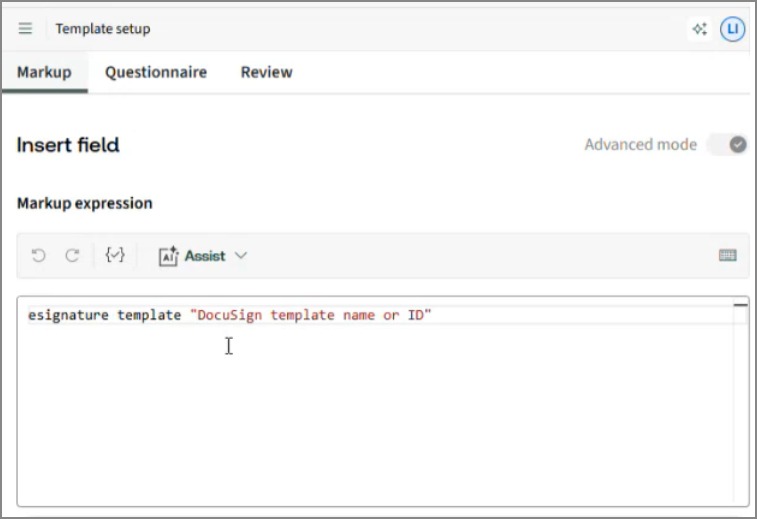
To see the full markup expression, enable Advanced mode. This displays the expression that combines the complete recipient information with the anchor.
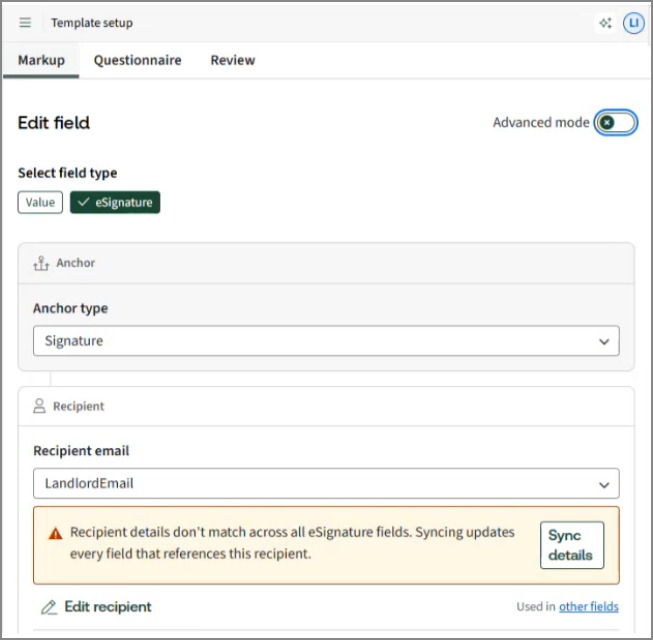
Modifying the Expression and Syncing Changes
If the markup expression is modified manually in the Advanced Mode, it can cause the expression to fall out of sync. When this happens, Basic mode displays a warning message with a Sync Details option. Selecting this option syncs the details with the current value saved in the expression you are editing.
Linking a DocuSign Template
In addition to standard eSignature anchors, you can also link a DocuSign template to map recipient roles, and custom fields when documents are sent for signature.(See DocuSign Integration Manual for more info)
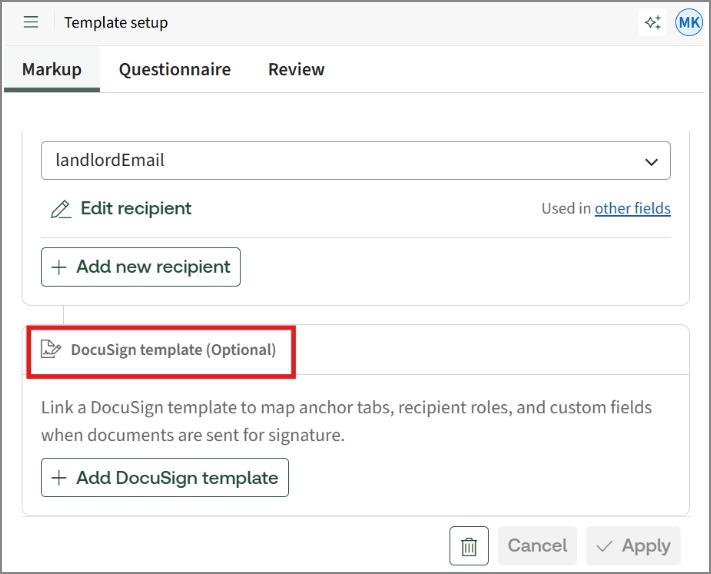
To set this up, select Add DocuSign Template. The DocuSign template is added as a separate field, and its markup expression includes a suggested syntax. Replace the placeholder value in that expression with the name or ID of your DocuSign template.