
Work with HighQ in Contract Express
If you use HighQ for client collaboration, you can import iSheet data into Contract Express to generate documents and export documents back to HighQ as part of your drafting workflow.
This guide outlines the steps to import HighQ data to generate Contract Express Documents, how to export documents back to HighQ and how to work with documents after export.
note
Your Contract Express Administrator must set up the connection to HighQ before you can use it.
Import HighQ data to create documents
You can import data from HighQ iSheets to bulk generate multiple documents. Each row of data in the iSheet will generate a separate Contract Express document based on the template selected.
Choose your HighQ data source
- Go to theDocumentstab.
- Click the More button (
/three_ellipses.png/_jcr_content/renditions/original) ) at the right of the page and select Import iSheetfrom the dropdown.
) at the right of the page and select Import iSheetfrom the dropdown.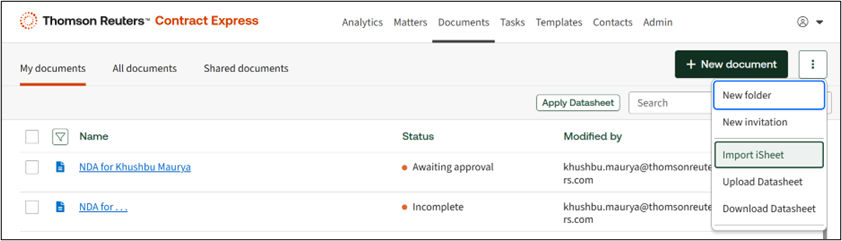
- Choose the appropriate Contract Express Template for the document(s) you wish to generate.
- Select your HighQ site, the iSheet that contains your source data, and the iSheet view.
note
The Import button will become active (blue) once you have completed step 4. We recommend you review the data mapping before initiating import.
Check the data mapping
When you select your HighQ data source, Contract Express will map the iSheet column headings to the variable in the selected Contract Express Template with the exact same name.
Reviewing the data mapping will ensure that the HighQ data is used in the correct place when generating your documents.
- Click theCheck Mappingbutton.
- Review the data pairings and amend if needed.
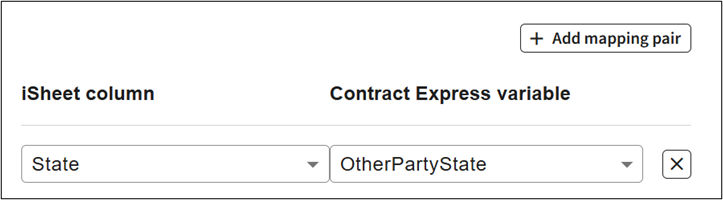
- Click theImportbutton to generate your documents.
Review the generated documents
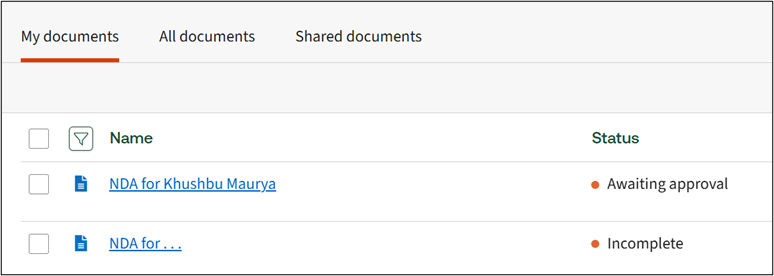
After import, documents generated from imported data will be listed in your My Documents tab.
Click on the document name to finalise the document, completing any outstanding questionnaire answers.
Export Contract Express documents to HighQ
You must have Write or Full sharing permissions on the document to export documents to HighQ.
Export a single Contract Express document
The steps below outline how to export files to a HighQ site.
Choose the export location
- From within theDocumenttab, select the Document you wish to export.
- When the document's status is an accepted state for export, anExportbutton will appear at top left of page.
- Click theExportbutton.
- Select the files to be exported.
- In the Select Location drawer chose Connection if it is not already selected as the only option.
- Select your HighQ site and the destination folder. If the relevant site is not listed in the dropdown list, enter a search term at the top of the list to bring up the relevant results.
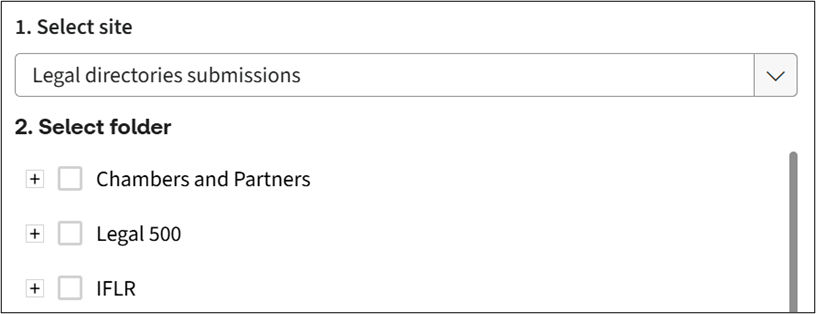 noteIf the Export location has been defined in the template settings for this template, it will be prepopulated for all documents generated and will not need to be selected manually.
 - Click theSavebutton.
Initiate export
note
Ensure you have selected export locations for all files that you need to export. The Export action can be performed only once.
Once all the files you need to export are listed in the Export files section, click the
Export
button.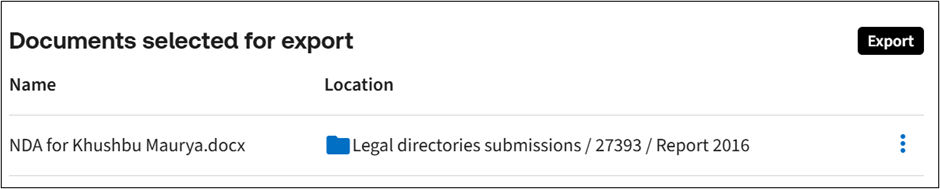
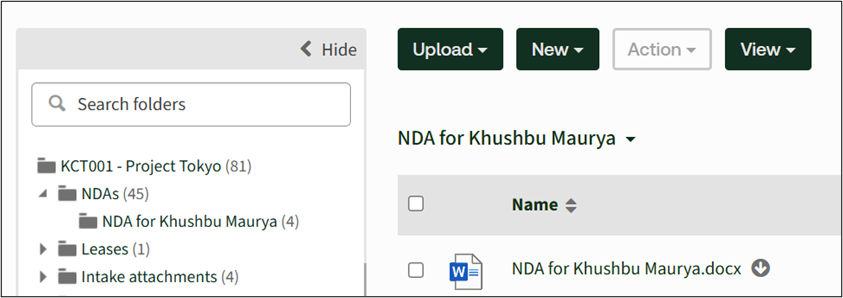
After export, the files will be available in HighQ in the folder selected during export.
Bulk export of documents
For bulk document export:
- Select two or more documents on theDocumentstab.
- Click onBulk Exportbutton.

- On the export page you will see a list of documents with the associated files that are available for export. Any documents that cannot be exported will be filtered out. You will see a message if any items have been removed from the list.If any of the selected documents have different predefined export connection or export location settings, the destination of the first document will be used for this export. Any documents with conflicting settings will be filtered out.noteBulk export limit is set to 20 documents from the Documents tab. Each of these documents can have multiple files associated with it.If the maximum allowed number of documents is exceeded, the first 20 documents will be selected for export and a message will be presented about the items filtered out.
- Once documents for export have been selected, follow the same steps as for single document export to complete the export action.
Working with exported documents in Contract Express
Once a Document has been exported to HighQ, it is stored in Contract Express with a status of Exported and can no longer be edited.
note
Exported Documents can be cloned to create a new Document with the same questionnaire answers. You can then update the questionnaire answers as needed and export the cloned Document to HighQ.
View the export location of documents
The export location is saved to the Document history in Contract Express during the export process.
To view the export location, go to the Document page and click on
History
tab. An entry with the description 'Document Exported' will exist. Expand this entry to confirm the export location.