Legal
Recommended products
-
CoCounsel
Move faster and accomplish more with a professional-grade, generative AI assistant that transforms the way you work. Thomson Reuters CoCounsel is with you every step of the way, backed by authoritative content and industry-leading expertise.
-
Westlaw
Conduct legal research efficiently and confidently using trusted content, proprietary editorial enhancements, and advanced technology.
-
Practical Law
Accelerate how you find answers with powerful generative AI capabilities and the expertise of 650+ attorney editors. With Practical Law, access thousands of expertly maintained how-to guides, templates, checklists, and more across all major practice areas.
Tax & Accounting
-
Top products for corporations
-
Top products for accounting firms
Recommended products
-
CoCounsel Tax, Audit, Accounting
Move faster and accomplish more with a professional-grade, generative AI assistant that transforms the way you work. Thomson Reuters CoCounsel is with you every step of the way, backed by authoritative content and industry-leading expertise.
-
ONESOURCE
ONESOURCE tax software solutions work together across corporate tax and trade lifecycles.
-
1040SCAN
Automate work paper preparation and eliminate data entry
Trade & Supply
Recommended products
-
Foreign Trade Zone Management
Software that keeps supply chain data in one central location. Optimize operations, connect with external partners, create reports and keep inventory accurate.
-
Indirect Tax
Automate sales and use tax, GST, and VAT compliance. Consolidate multiple country-specific spreadsheets into a single, customizable solution and improve tax filing and return accuracy.
Risk & Fraud
Recommended products
-
CLEAR
Search volumes of data with intuitive navigation and simple filtering parameters. Prevent, detect, and investigate crime.
-
Fraud Detect
Identify patterns of potentially fraudulent behavior with actionable analytics and protect resources and program integrity.
-
ID Risk Analytics
Analyze data to detect, prevent, and mitigate fraud. Focus investigation resources on the highest risks and protect programs by reducing improper payments.
News & Media
Recommended products
-
Reuters Connect
Around the globe, with unmatched speed and scale, Reuters Connect gives you the power to serve your audiences in a whole new way.
-
Reuters Plus - Content Studio
Reuters Plus, the commercial content studio at the heart of Reuters, builds campaign content that helps you to connect with your audiences in meaningful and hyper-targeted ways.
-
Reuters.com Platform
Reuters.com provides readers with a rich, immersive multimedia experience when accessing the latest fast-moving global news and in-depth reporting.
Books
Recommended products
-
What's new in legal products
Shop our latest titles
-
Shop tax customer favorites
ProView Quickfinder favorite libraries
Developers
-
APIs by industry
-
Related sites
-
United States Support
-
International support
-
New releases
-
Join a TR community
-
Free trials & demos

Markup Tab
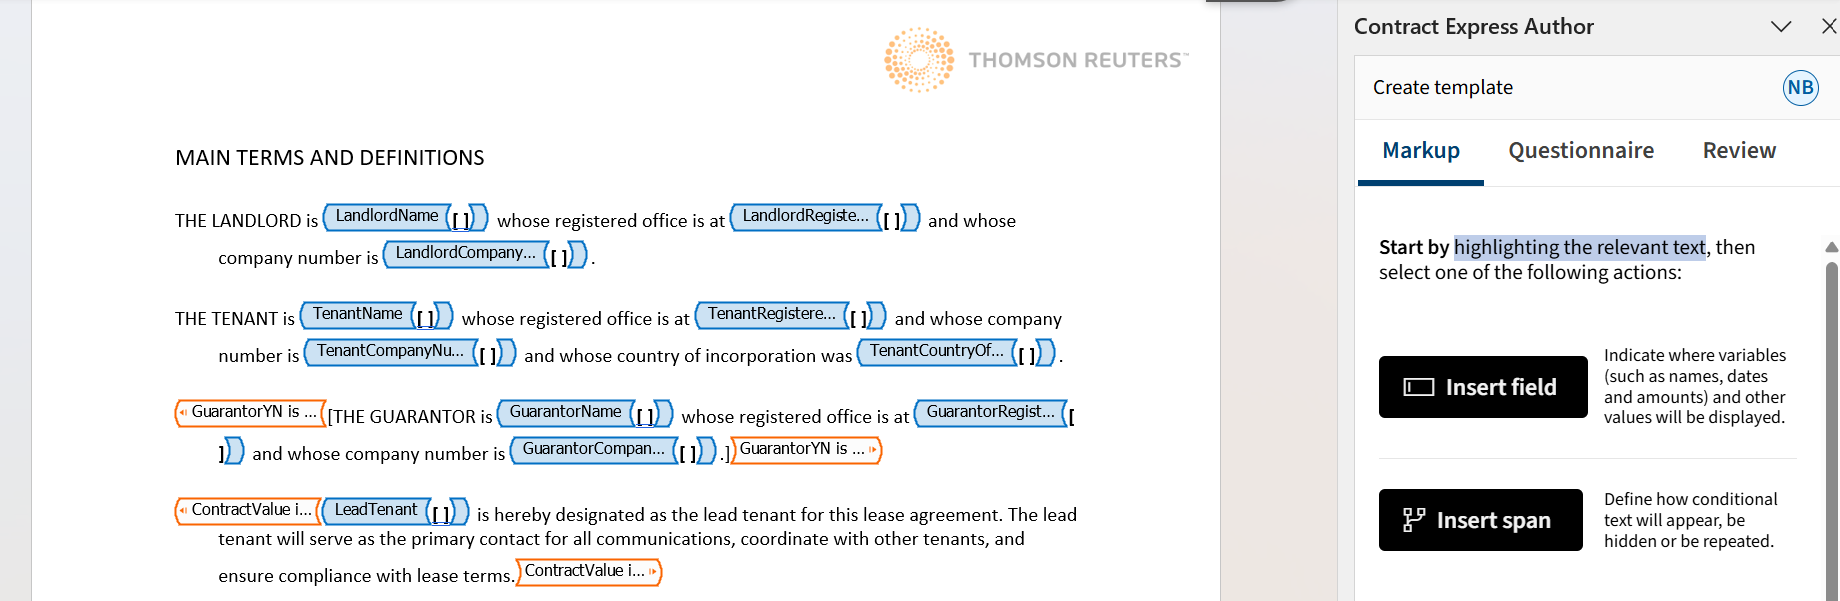
- Fieldis an insert point in the document where the dynamic information will be inserted, for example, you want to insert the names of the parties, the dates, the product names or amounts. Most commonly the information for these inserts is collected by asking questions on the questionnaire. However, it is also possible to use computations where the value of the insert is calculated based on other answers or to insert information from an external data source.
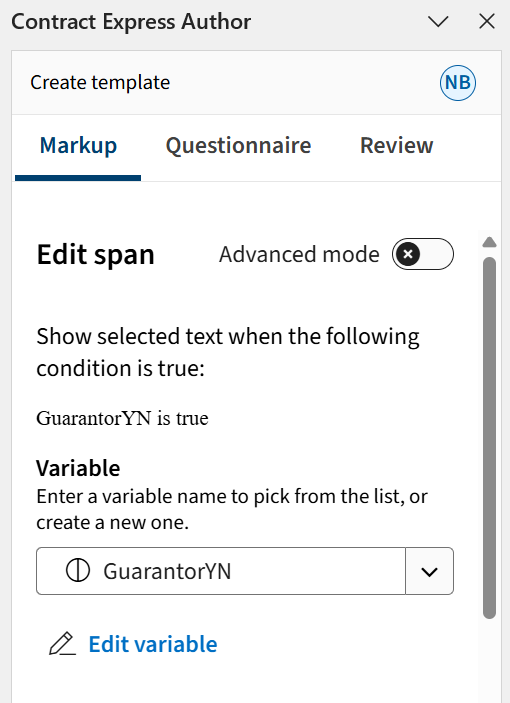
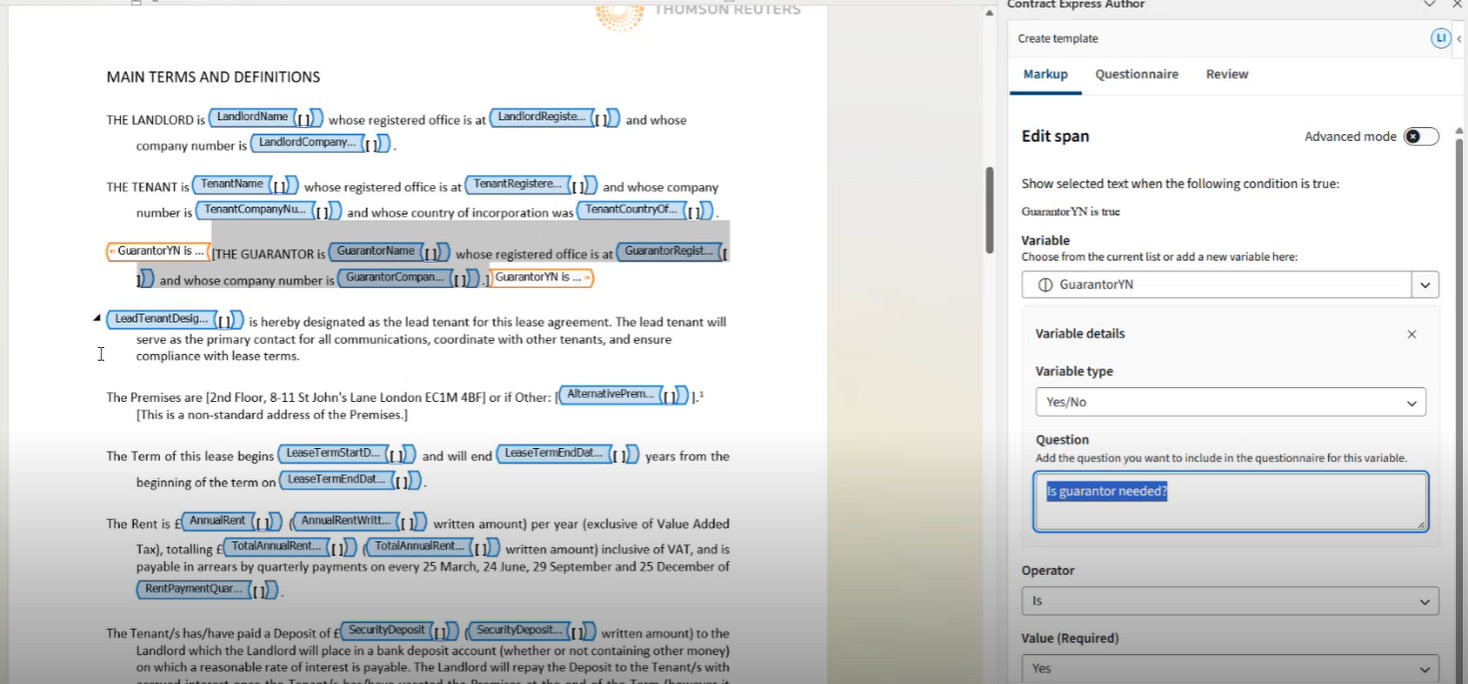
- Spanis conditional logic applied to the document text which can cover one or multiple paragraphs or just a couple of words or even letters. The most common span type is the show/hide span where the text inside the span is only included in the document if the condition specified for this span is satisfied and hidden if it is not. Another useful span type is repeat pans where some information in the contract must be repeated for multiple entities or units. For example, if your contract may have one or more tenants, you will repeat the section of the document which lists their names and details.
Navigation of the Markup
Run AI Markup Suggestions
- Once you select "Suggest Markup" in the bottom right of the page, the system will display a summary screen showing how many fields and variables have been detected.
- On this screen, you can choose to Accept all or Reject all or can click "Start Review" to begin the review process to inspect each suggestion one by one. Remember that you can always return to the summary screen on the Markup hope page by clicking outside of content controls in your document.
- During the review, accept suggestions which have been inserted in the correct placed and reject the ones that should not be marked up as fields or spans. Review the datatype and question of the proposed variable and adjust them as needed before accepting. You can also replace the variable with another existing variable or create a new variable with a different name if the field is placed in the correct position, but you do not agree with the suggested variable.
- If you have accepted a field or span but you change your mind later, you can always click on the markup content control in the document to return to it in the work pane. Click between the lozenges, review the variable details and update as needed or click on the delete icon to remove it from the document. Once review is complete, review the template to see if it needs any additional fields or spans which can be added manually.
Insert Field

Insert Span
- Clicking inside a field (e.g., TenantRegisteredOffice) highlights the content and shows the relevant automation for that field.

- Similarly, switching inside a span (e.g., GuarantorName) highlights the content control and displays the specific automation details for that span, it shows you the closest (innermost) content control, which is GuarantorName.
- If you click outside a content control, the system shifts focus and displays the markup for the nearest applicable span
How to Apply Formatting to a Field
Working with Variables

Switch to Advanced mode

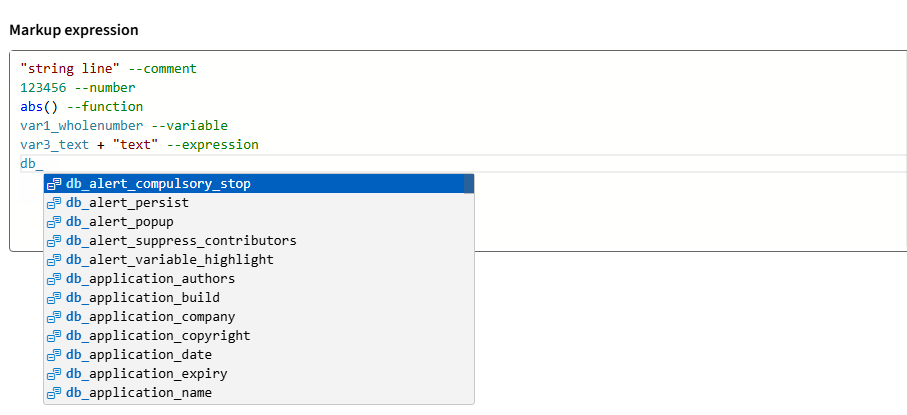
- Use simple arithmetic operators to add calculations to your fields. For example, if you need the price of the product with the VAT, your advanced mode expression can be ProductPrice*1.2 where ProductPrice is the decimal number variable containing the net value of the product.
- To adjust the case or format of your field, you can add the details of the format into your expression. For example, to insert the company name in uppercase, add CompanyName format upper where CompanyName is a text or text selection variable. You can also use special formats available for each datatype to manipulate the way information will appear. For example, to insert the rent amount in words, add RentAmount format “currencywords” where RentAmount is a decimal number variable. Note that the datatype-specific formats are entered with double quotes. For more information on format options, check help information about Formats.
- If you want to combine two conditions in a span expression, you can do so in the advanced mode. For example, you can use operator “and” for these two conditions: ContractPrice ismorethan 1000 and Jurisdiction is “England and Wales”.
This article applies to:
- PRODUCT: Contract Express