Solutions
Law firms
Tax, audit & accounting firms
Success stories
-
A true competitive advantage
Law firm Zarwin Baum’s embrace of generative AI as the natural next step in the evolution of legal work and their adoption of CoCounsel Legal has helped them achieve remarkable efficiency gains and improved client relationships.
-
Workflow transformation drives impact
Brinks, a global leader in secure logistics and security solutions, used CoCounsel to reimagine what was possible with AI tools, turning legal challenges into a competitive advantage.
-
The forefront of audit tech
A better auditing workflow solution was the answer to multiple challenges faced by The Mercadien Group. Find out how they achieved greater efficiency by embracing Cloud Audit Suite.
Products
Legal
Trade & supply
Tax, audit & accounting
- 1040SCAN
- Audit Intelligence Analyze
- CoCounsel Audit
- CoCounsel Tax
- Ready to Advise
- Ready to Review
- View all
Corporate tax
Recommended products
-
CoCounsel Legal
Transform your work with the only AI legal solution uniting research, drafting, and document analysis in a single experience. Designed by legal experts and built on trusted content and advanced AI, CoCounsel Legal accelerates multistep work so you can better serve your clients and grow your business.
-
CoCounsel Tax
Transform your tax practice with CoCounsel Tax, an AI-powered assistant that combines trustworthy answers, automation, and firm knowledge into one seamless platform. Enhance efficiency, reduce risk, and improve client confidence with CoCounsel Tax.
-
CLEAR Investigate
Intelligently surface critical connections and insights in actionable format through AI-driven research workflows seamlessly integrated with the trusted and transparent CLEAR platform. Accelerate investigations and empower your team to make strategic decisions with confidence.
Purchase
Buy solutions
Resources
Insights
Events
Product training
Product communities
Developers
Highlights
-
2026 SKILLS showcase
Join weekly sessions to experience in-depth demonstrations of the leading legal AI products while connecting with strategic law firm leaders in knowledge management, innovation, and AI.
-
Ghosts on the ledger
Payroll fraud is a major compliance risk. Learn how payroll analytics and AI-powered tools can help exorcise phantom employees and employers.
-
Future of professionals report 2025
The Thomson Reuters Future of Professionals Report 2025 reveals how AI continues to shape professional work — and what it takes to get ahead. This year’s report shows that increased efficiency, productivity, and cost savings top the list of benefits professionals attribute to AI, making it indispensable for organizations facing rapid change.

Managing Inactive Drawers
Back up and delete drawers
Archive and delete drawers
Using the Focus Listing to only display active drawers.
- In theFolderslist, select the drawer for which you want to update the status.
- Choose, or select theFileDrawer PropertiesDrawer Propertiesbutton in the toolbar.
- Select the new status from theStatusfield.
- SelectOK.
- Mark theFocus drawer listcheckbox.
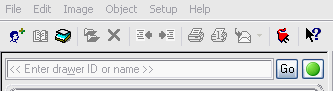
- Select theSort/Focusbutton (green circle) next to the drawer search field.
- Mark the status asActive,Inactive, orDefunctto display drawers of that status in the List of Drawers.
- SelectOK.
Adding a new data location for inactive folders
- Choose.SetupSystem Configuration
- Go to theData Locationstab.
- Select theAdd/Modify Data Locationbutton.
- Select theEnter Pathbutton in theAdd Data Locationdialog.
- Navigate to the location to store your inactive drawers, and then selectOK.noteThe folder in which the inactive data is stored must exist prior to setting up the path – FileCabinet CS does not automatically create the folder.
- Name the data location.
- SelectOK.You can use theTransfer Configurable Filesbutton and move the document folders from the existing location to the new location. Document folders can also be created automatically when a drawer is restored to a new data location. This takes longer when you restore, because the application must search for, and create any missing document folders.
- Choose.FileCopy Drawers
- Select the new data path in theCopy Drawersdialog from the drop-down list in theDestination locationfield.
- Highlight inactive drawers from theDrawers available to copypane, and then use theSelectbutton to move them to the right pane in the dialog.
- Mark theAutomatically create folderscheckbox.
- Select theCopybutton.
- Choose.FileDelete Drawer
- Highlight the inactive drawers from theDrawers availablepane to delete pane to move them to the right pane.
- Select theDeletebutton.
- theYesbutton to confirm that you want to permanently delete these drawers from the current data location.
This article applies to:
- Product: FileCabinet CS