
Import Fixed Asset data
Once you've set up your data and state depreciation, you're ready to begin your import.
Activate the Fixed Assets CS export option
- Open Fixed Assets CS and the client file you want to import into GoSystem Tax.noteNote the Client ID number. You'll need it later in the process.
- SelectSetup, thenOptions, thenMiscellaneoustab.
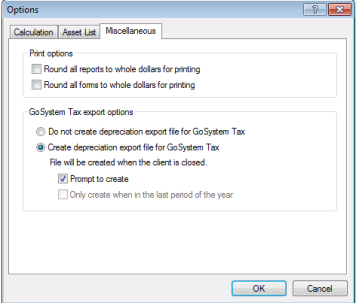
- SelectCreate depreciation export file for GoSystem Tax. Once you turn on this option for your client, you don't need to perform this step again unless you want to make changes. Each time you close your client file, Fixed Assets CS creates a GoSystem Tax export file.
- SelectingPrompt to createdisplays a prompt each time you close the client file that lets you create or not create the new file. SelectOK.
- Close the client file, and selectYesto create the GoSystem Tax export file.noteContact a Fixed Assets CS tech support if the GoSystem Tax export options don’t appear. Call 1-800-968-0600 and listen to the phone prompts for Support on UltraTax CS and Fixed Assets CS or help on UltraTax CS for Windows or Fixed Assets CS for Windows.
Create your batch import in the RS browser
Importing your Fixed Assets CS data is similar to other imports and data conversions in GoSystem Tax. Begin with the
Returns Processing
option in the RS Browser to create a batch and then import.- Sign in to GoSystem Tax.
- SelectReturns Processing, thenImport/Export, thenImport.

- Select the Account number, Tax Year, Return Type, and other sorting criteria to locate the return that you want to import Fixed Assets CS data, and selectContinue.
- The RS Browser shows a list of the returns that meet the criteria you identified. Select the relevant return, and selectContinue.noteCan’t find the return you are looking for? Make sure you select Fixed Assets CS or greater as your tax Year. Also, the RS BrowserSort List byoption defaults toLocatornumber. If you want to search for your return by name, select theNameoption in theSort List bycategory, and then enter the taxpayer name in theMatch Characterscheckbox.
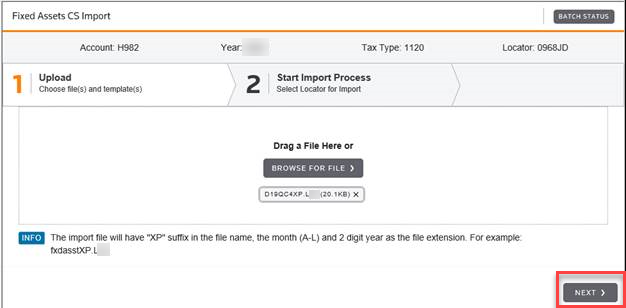
- Once the Fixed Assets CSImport(file selection and execution) page appears, selectBrowse for Fileand go to the location of the Fixed Assets CS file that you want to import.
- Go to yourWinCSIfolder on your hard drive. Open theDeprDatafolder. Find the file name containing the export (XP) file name identifier to be imported. Select theXPfile name, thenOpen.noteFixed Assets CS usesWinCSI\DeprDataas the default location for your depreciation data, if you store your data or export file in a different location, you'll need to go to that location to open your client files.
- Select theNextbutton after the upload is complete.
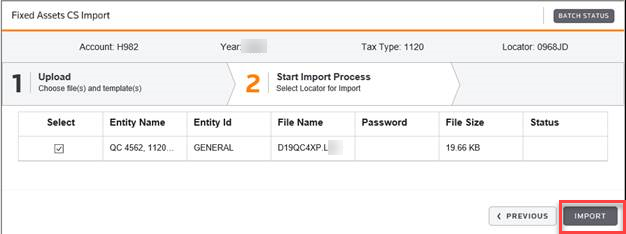
- SelectImportto initiate the file import.
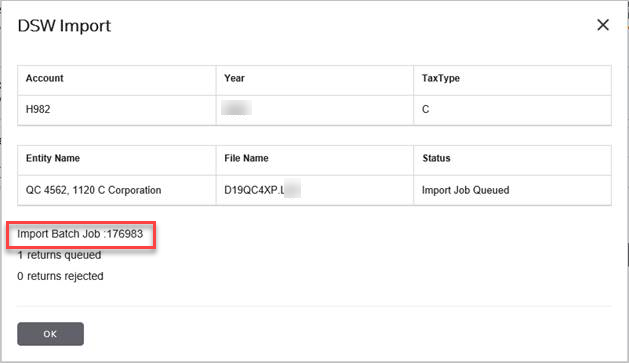
- When the import process has been started, the DSW Import window shown following will display. It shows the assigned Batch job number and indicates that the return has been queued for import.
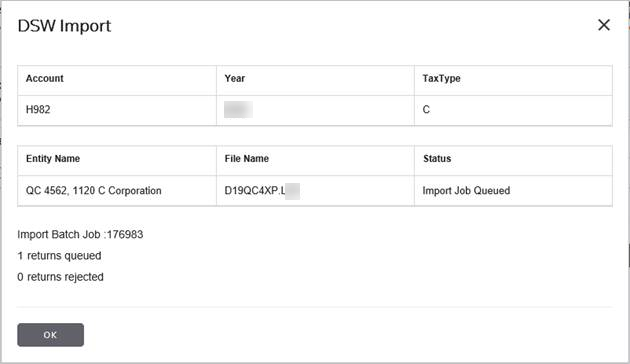
- Note theImport Batch Job number, selectOK, and thenBatch Status.
- Enter the date range of the batch job you submitted, and selectContinue.
- A list of batch jobs for the criteria you established appears. SelectBatch IDto view a detailed status of the batch you created.
- On the Fixed Assets CSImport Batchdetails page, once theImport StatusreflectsFile Import Complete, you are then ready to open the return to review the results of your import. SelectReturnson the top menu and enter the criteria to locate the return.noteThe length of time required to complete your import varies depending upon the amount of data imported and the speed of your Internet connection.

