
Adding a Custom Reason
Use this screen to add the address of the issuing office or the office the insured would contact for more information.
- On theMain Menu, selectUtilities > Data Setup.
- Select eitherPersonalorCommercial Lines Data Setup.
- SelectCustom Reason

- SelectAdd New
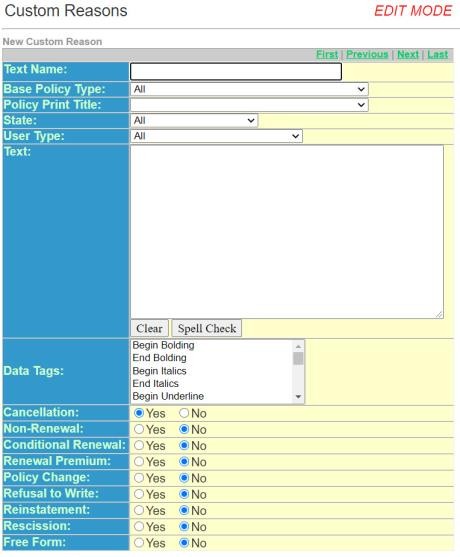
- Enter theText Name. An identifying code for this specific custom reason.
- Select theBase Policy Typefrom the drop-down list.
- Select thePolicy Print Titlefrom the drop-down list.
- Select theStatethat applies from the drop-down list.
- Select theUser Typefrom the drop-down list.
- Enter theTextfor the Custom Reason. The standard wording you wish to pre- fill in the reason of the notice.
- SelectClearto start over with the text.
- SelectSpell Checkto check the spelling of the wording in the text box.
- SelectData Tagsfor formatting the text.
- Available asFree Formtext – Yes or No – Allows this text to be used when producing a Free Form Notice.
- Available asReinstatementtext – Yes or No – Allows this text to be used when producing a Reinstatement Notice.
- Available asTerminationtext – Yes or No – Allows this text to be used when producing a notice of cancellation, nonrenewal, conditional renewal.
- SelectSave/Return