
Tools
FIFO MASS UPDATE
The FIFO
Mass Update
screen allows you to identify a large amount of transactions needing to be updated and universally apply the same update to all identified transactions. This screen can be opened by choosing FIFO Mass Update
from the Tools
menu. Transactions from staging to production to assignment (and their respective documents) are available.
The fields in the
FIFO Mass Update
grid are configurable and will be set up for the client company during implementation. For any further configurations, contact Support.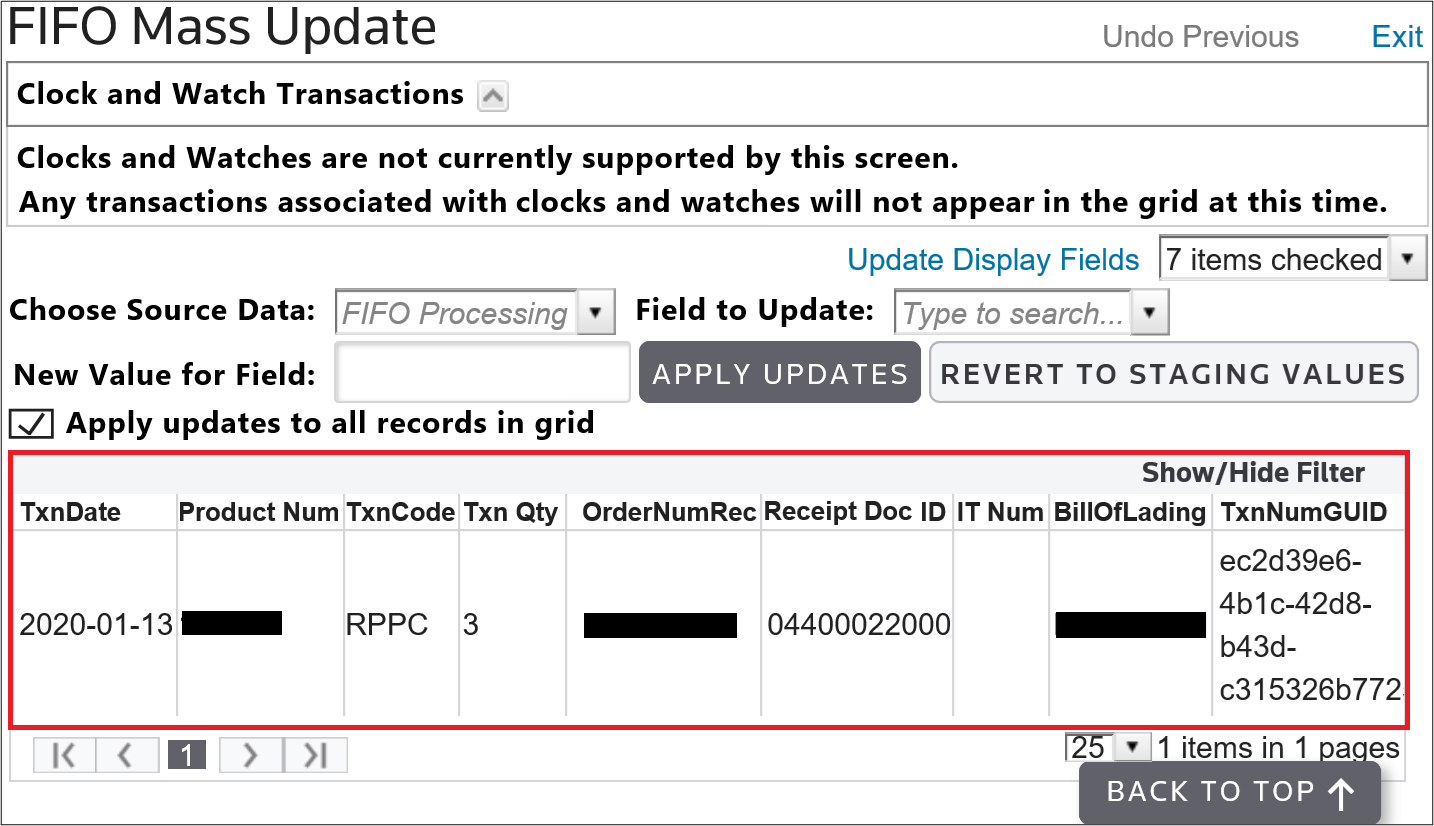
Use the drop-downs to modify which fields will display. Once the desired field and desired value have been selected, click
Update Display Fields
.
Once the desired field is displayed, the transactions to can be filtered by clicking
Show/Hide Filter
, then entering the value to be searched, and finally selecting the appropriate filter criteria. This can be done for each field displayed.
Click on the
Field to Update
textbox and begin typing the name of the field to be modified. Since the box has type-ahead capabilities, all fields matching what was typed will appear as options. Select the field to be updated.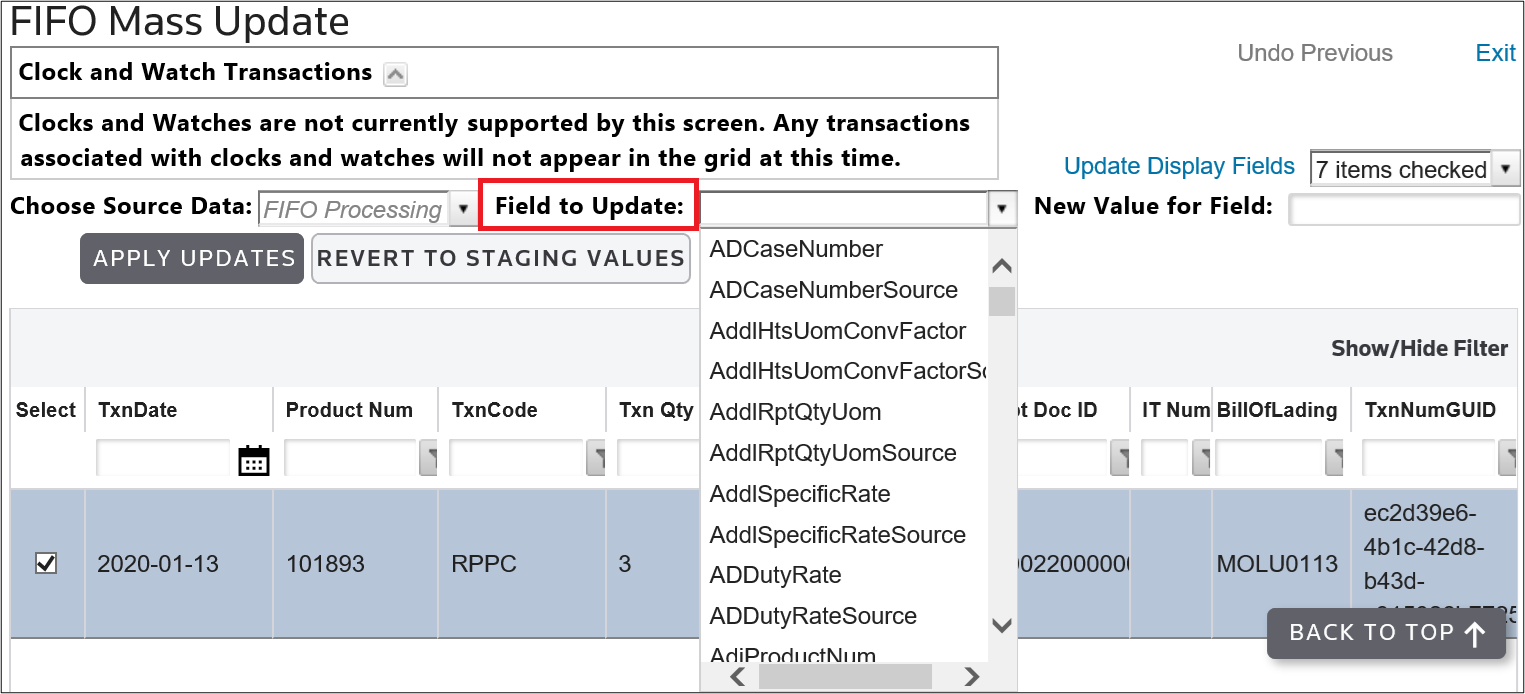
Before applying the update, select the transactions to be updated by checking their corresponding boxes on the far left.

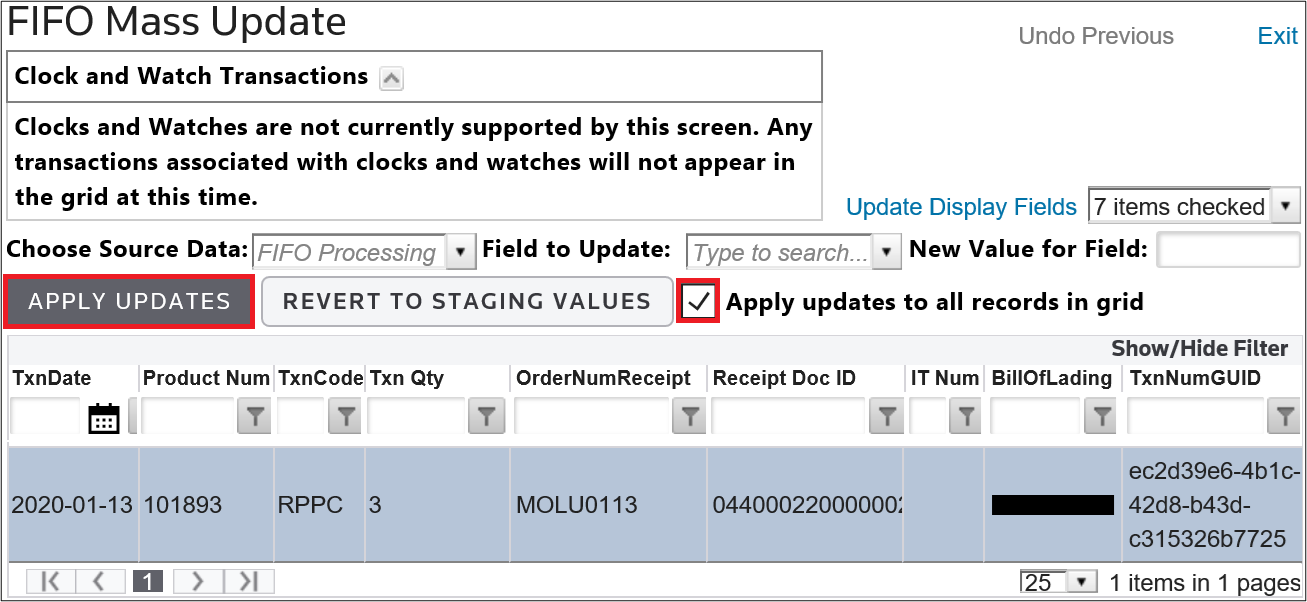
If the update applies to all transactions, check
Apply updates to all records in grid
and the boxes will be removed from the grid for individual selection. To apply the change, click Apply Updates
.
A prompt will then appear on the screen. Click
Continue
to proceed.
If for any reason the transactions were updated with the wrong value, click
Undo Previous
at the top of the screen to revert to the most recent update.
A prompt will be displayed showing the current and previous value. Click
Continue
to revert to the previous value. If multiple updates are applied, Undo Previous step can be performed sequentially reverting changes in the order they were performed.
If for any reason the transactions are to be reverted to their original staging value, select the appropriate records or all in the grid and click
Revert to Staging Values
and accept the prompt.important
All transactions selected must have staging history details to use this option.

CREATE PERIOD BALANCES
The
Create Period Balances
screen is used for saving period balances throughout the year so you can run mandatory scheduled reports (e.g. Annual Board Report, Annual Reconciliation Report). This screen can be opened by choosing Create Period Balances
from the Tools
menu.important
In order to run the Annual Board Report and Annual Reconciliation Report at the end of December, you must create period balances at the end of September.
All scrap reports must be run prior to saving period balances.
If one or more of these documents have not been run and finalized prior to creating a period balance, an error message (The shipped components table must be cleared before balances can be computed. Please clear table and try again) will appear on the screen.
To create a period balance, set the Save Date and click
Save
.
EUCR SEARCH
The
EUCR Search
screen is used for creating custom queries for some of the main EUCR Management tables. This screen can be opened by choosing EUCR Search
from the Tools
menu.
To perform an EUCR search, first choose a source from the
Choose Source
drop-down.
EUCR Search Columns (Source vs. Display)
The next step is to specify which columns should display. Source columns are the potential columns that can be chosen for a search. Display columns are the columns that will appear on the search.
To move a source column to the
Display Columns
section, click a column name from the Source Columns
section, then use the single right button to move the column. The single left arrow will move the column back to Source Columns
.To move all source columns to the
Display Columns
section, click the double right arrow. The double left arrow will move all columns back to Source Columns
.To change the order of display columns, use the up and down arrows on the far right.

Current Search Criteria (Parameters)
After the column order is finalized, scroll down to the next part of the
EUCR Search
screen.To add a parameter, click
Add New Parameter
. Complete the following fields listed below.Current Search Criteria: Parameter Fields | Description |
|---|---|
Search Parameter | The options available in this drop-down match the list of column headers located in the Display Columns section above. |
Comparison | A comparison qualifier for the search (e.g. Equal To, Less Than, Contains, Ends With, Is Empty, etc.) |
Value | The value to be searched against. Click Insert after these three fields are complete. |
Edit | Edit the Parameter. Make necessary changes, then click Update. |
Remove | Remove the Parameter. |

Current Search Analysis (Functions)
After the Search Parameters are finalized, scroll down to the next part of the
EUCR Search
screen. To add a function, click Add New Function
. Complete the following fields listed below.Fields | Function Fields |
|---|---|
Column | The options available in this drop-down match the list of column headers located in the Display Columns section above. |
Function | A comparison qualifier for the function (e.g. Sum, Mean, Count) |
Result | The numeric result of the function once applied to the search. |
Edit | Edit the Function. Make necessary changes, then click Update . |
Remove | Remove the Function. |

EUCR Search Results
Once all Parameters and Functions are set, click
Save Search
. Name the search and return to the EUCR Search
screen.Search results meeting all specified parameters and functions will appear in a grid at the bottom of the screen. Perfect matches to the specified search criteria will be highlighted.
Columns will be arranged as they are laid out (top to bottom) in the
Display Columns
section of the screen. To reorder the columns, drag a column header to the left or right.
To extract current search results to an Excel spreadsheet, click
Extract
.
Saved Searches
If you find yourself using the same search several times on the
EUCR Search
screen, you may want to save your search by clicking Save Search
. Clicking Save Search
will open the Save Search
pop-up. Enter a name, description, and other details regarding the search to be saved.
Select Search
To open a saved search, click
Select Search
.
This action will open the
Saved Searches
pop-up. Choose and click a search name.Edit Search
To edit a saved search, click
Select Search
and click the Search Name
inside the Saved Searches
pop-up. Make any necessary changes to the columns, parameters, and/or functions; then click Edit Search
.
This action will open the
Edit Search
pop-up. Click Update Search
.
Copy Search to New
To create a new search based off a copy of the currently selected search, click
Copy Search to New
.
Close Search
To close the currently selected search, click
Close Search
at the top of the screen.