
FTA: Customer Request Generation (Customer Request Creation)
The
Customer Request Generation
menu item will navigate you to the Customer Request Creation
screen. This screen is used for the following purposes:- Creating new customer requests for a Certificate of Origin from scratch
- Copying existing requests
- Modifying existing requests
- Extract capabilities for loading products to the requests from an MS Excel Spreadsheet
- Requesting a Certificate of Origin

Create a Request
To create a new request:
- ClickCreate New Requestto open theCreate New Requestpop-up.

- Enter the appropriate Name, Company, Start Date, End Date, and Request Type in their respective fields. Companies will be listed in alphabetical order.
To create the request, click
Create New Request
.To drop all changes and return to the
Customer Request Creation
screen, click X
or Cancel
.
If
Create New Request
was clicked, the following notification will appear at the top of the screen:
After a request is created, you can either manually add products to the request or perform this task via the spreadsheet upload function. The next two sections cover both scenarios.
Add Products to Request (Manual Entry)
To manually add products to a request, click
Add Products to Request
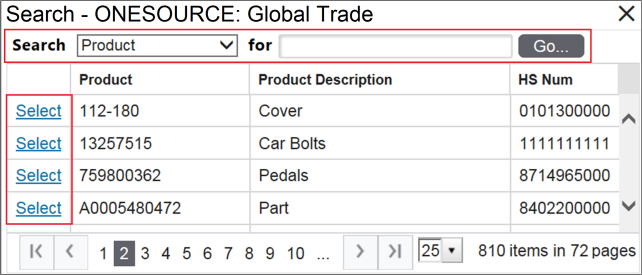
to open a pop-up with all available products for selection.
To find a specific product faster:
- Use theSearchandForfields at the top of the screen. Products can be filtered by Product, Product Description, or HS Number.
- Choose a product in the grid.
- Click its correspondingSelectlink on the far left. This will add the product to the request.
- Repeat as needed until all necessary products have been selected.
Add Products to Request (Extract Spreadsheet)
To add products via the extract (spreadsheet upload) function:
- ClickExtract Products.

- When prompted toOpenorSave, clickOpen.

- After Excel opens the downloaded file, go to File > Save As, and pick .xls or .xlsx as the file type.
New Requests
For a new request:
- Add any additional data to the spreadsheet. Do not delete the header row and do not insert columns.
- Review and confirm the following prior to upload:
• The
ProductNum
is correct in all new rows.• Every row has a listed
ProductNum
.Existing Requests
For an existing request, edit the data in the spreadsheet. Do not insert or delete columns.
Adding a New Product
To add a new product:
- Add a new row.
- Enter the product number in theProductNumfield.
- Leave all other fields in the row blank.
- Prior to upload, review and confirm that theProductNumfor any new rows is correct.
- Save the spreadsheet.

Uploading the Spreadsheet
To upload the edited spreadsheet:
- Return to theCustomer Request Creation.
- ClickUpload Spreadsheetto open theUpload Item Data from Spreadsheetpop-up.

- Click theBrowse… button.
- Choose a file to upload.

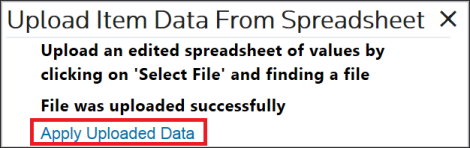
- After a file has been selected, wait forFile was uploaded successfullyto appear on the pop-up.
- ClickApply Uploaded Data. This will update the product data in the existing request.
Creating a New Request from an Existing Request
To create a new request from an existing request:
- Retrieve the existing request from theRequestsdrop-down.
- ClickCopy Requestto open theCopy Requestpop-up.

- Choose a name for the duplicate request.
- Enter it into theNamefield.
- Complete the other required fields.
- ClickCopy Request.The new version of the request will appear in the
 Customer Request Creationscreen. The following message will appear at the top of the screen:
- Make any additional changes as necessary.
To add products to the request:
- See theAdd Products to Request (Manual Entry)orAdd Products to Request (Extract Spreadsheet)section of this help.
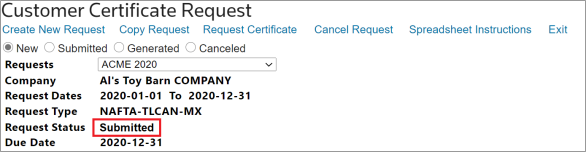
- After all products have been added, clickRequest Certificate.

The request status will change to
Submitted
.
Related Content
-
Free Trade Agreement (FTA) Management
Format: Article