
FTA: MCS Generation - MCS Report Management
The
MCS Report Management
tab is used to create MCS documents for data from a BOM Analysis. The BOM Analysis process is described in more detail in the BOM Analysis
section of this help.From this tab, you can retrieve previously generated MCS documents and view the details of the associated BOM(s).
Most columns in the
MCS Generation
grid have filtering capabilities so a specific MCS can be quickly located.To open an MCS Report:
- Choose an MCS from the grid.
- Click theMCS Reportlink. The report will open in a separate browser tab.

To generate an MCS document from the
BOM Analysis
screen, complete the steps listed in the BOM Analysis
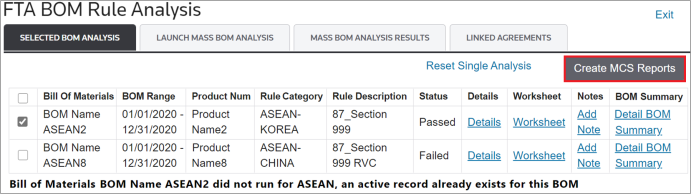
section of this help.After the grid has been fully populated, click
Create MCS Reports
.
Whether
Create MCS Reports
in the BOM Analysis
screen is clicked, or MCS Generation
was clicked from the FTA
menu, the MCS Report Management
tab will be the first one to open.Creating an MCS Report
If the
MCS Report
link is unavailable on a line in the MCS Report Management
grid, a Create MCS
link will appear in the Create
column on the far left.
Clicking
Create MCS
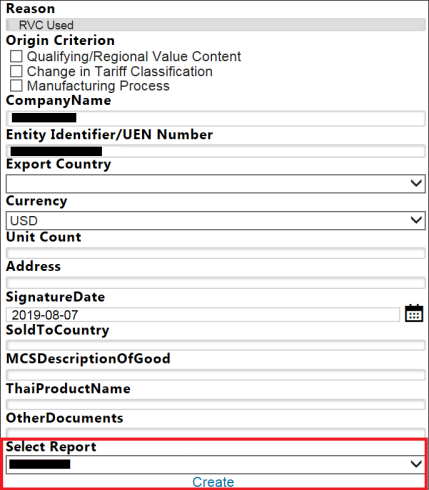
will open the Create MCS Document
pop-up. This pop-up contains prepopulated information from the Bill of Material.- Update or enter any additional necessary information to create the MCS report.
- Select the report to be generated. A single report can be selected orALLcan be selected to generate all reports.
- After that is completed, clickCreateto generate the report (s).
Clicking
Create
will close the pop-up and return the user to the MCS Generation
screen. The generated MCS document will now be visible in the MCS Report
column. Click the link to view the document in a new tab.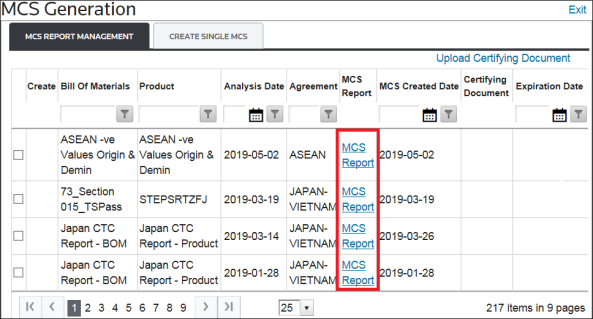
Uploading a Certifying Document
After a certifying document has been received from a government authority, the steps listed below can be performed to upload the document.
In the
MCS Generation
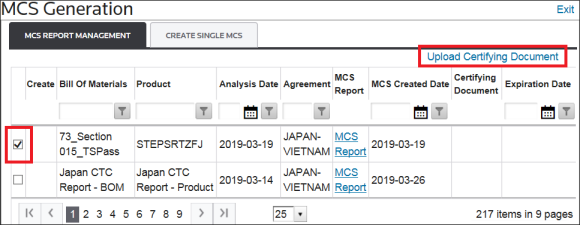
grid:- Locate the BOM the certifying document belongs to.
- After the BOM is identified, check its corresponding box on the far left.
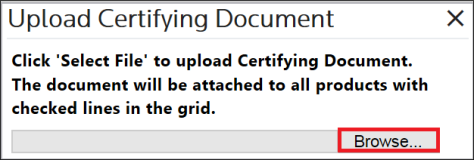
- ClickUpload Certifying Documenton the top right to open theUpload Certifying Documentpop-up.
- ClickBrowse… and choose a file to upload to the system.After a file is selected, two additional fields will appear on the pop-up for the date parameters of the uploaded certifying document.
- Apply a start and end date for the covered range.
- ClickSave document and create qualified record for checked itemsto close the pop-up and to return to theMCS Report Managementscreen.

The certifying document will now be viewable by clicking the
Certifying Document
link.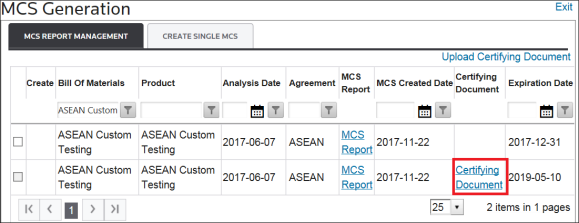
Uploading a Letter of Authority to Certify MCS
The
MCS Report Management
grid can also be used to create and manage FTA product records associated with the Bills of Material.To upload a Letter of Authority to Certify an MCS:
- Review the grid to determine which products are to be certified.
- Check the products’ corresponding boxes on the far left.
- ClickUpload Certifying Document.

- Use theUpload Certifying Documentpop-up to browse.
- Upload the document.

After the document is uploaded, a link to the document will appear in the
Certifying Document
column in the grid. When the link is selected, the uploaded document will open in a separate browser tab.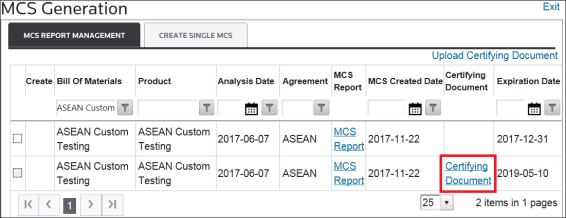
Defaults or pre-determined drop-down values can be available for the following free text fields:
- Company Name
- Name of Managing Director
- Name of Accountant
- Phone Number of Generator
- Unit Count
- Entity Identifier
- Export Country
- Currency
After the MCS information has been verified and/or updated, click
Generate
. The relevant MCS
and MCS BOM
(the component breakdown continuation page) will become available.To open a document in a separate browser tab, click the document name.
Related Content
-
FTA: MCS (Manufacturing Cost Statement) Generation
Format: Article