
Fees
The
Fees
tab contains additional values related to an invoice but are not shown at the line item level. Fields shown under this tab are configurable to meet client needs. This tab also features tools for easier navigation across fees and charges records.
Add Fees
To add a fee, click
Add New Record
.
Clicking
Add New Record
will open a blank pop-up with fee fields. Choose a Fee Type
from the drop-down menu and enter information in the other required fields.Click
Save
to store the record and keep the pop-up open for further editing.Click
Save and Close
to store the record and return to the Fees
tab.Click
X
to close all changes and return to the Fees
tab.
Currency Conversion
If the Currency Conversion functionality is enabled, the following fields will be available when entering data on the
Fees
tab:
These currency fields can be used by Customs analysts to enter the currency and exchange rate for specific fees. This additional visibility makes it easier to determine which fees are dutiable and need to be reported on Customs or other business documents that may be generated by the system.
At the time of saving and processing an invoice, the Fee amount is automatically converted and displayed in the converted currency.
While currency conversions in other parts of the system use exchange rates maintained by ONESOURCE Global Trade Content; all conversions in the
Fees
tab are manually entered by the user. Manual entry supports the flexibility of fees types that may or may not be dutiable and hence may require the exact conversion based on the exchange rate used when the invoice was settled. This conversion will take place automatically during the Validate step.Edit Fee
To edit an existing fee, choose a fee to edit and move the cursor over the fee’s corresponding downward arrow.

Once the options menu appears, click
Edit
.
Clicking
Edit
will open the pop-up with the fee record’s current information prepopulated into the fields. Make all necessary changes.To save the fee and keep the pop-up open for further editing, click
Save
.To save the fee and close the pop-up, click
Save and Close
.To drop all changes without saving, click
X
.
Copy Fee
To copy an existing fee, choose a record to copy and move the cursor over the fee’s corresponding arrow.

Once the options menu appears, click
Copy
.
A confirmation pop-up opens, prompting for confirmation of the copy action.
Click
Cancel
or X
to return to the Fees
tab without a copy.Click
OK
to confirm the copy, creating a duplicate record in the Fees
tab.
Delete Fee
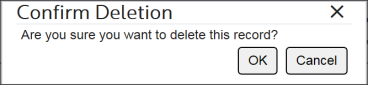
To delete an existing fee, choose a fee to delete and move the cursor over the fee’s corresponding arrow.

Once the options menu appears, click
Delete
.
To remove the fee, click
OK
in the confirmation pop-up.To cancel the deletion and close the pop-up, click
X
or Cancel
.
Sorting Fees
To sort fees and charge records, choose a column to sort and click the column header. Click once to sort in ascending order.

Click twice to sort in descending order.

Click a third time to return the table to its original order.

Numerical values will precede alphabetical values.
Filter Fees
To use the advanced filter options, click
Show/Hide Filter
.
A field will appear in the bar above each column header. Choose a column to filter by and enter a value into the field. Click the filter button to the right once a value is entered. Choose a filter option. Filter options may vary depending on the column type (alphanumeric, numeric, etc.).

Multiple columns can be filtered at the same time to further refine a search.

Related Content
-
Import Management
Format: Article