
Create and manage scenarios
Add a Scenario
- SelectAdd Scenarioto open the add/edit page.
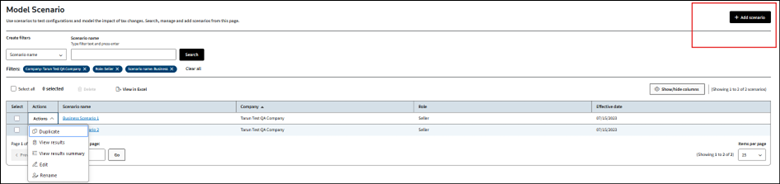
- Choose a company from the dropdown in theScenario Setupsection.
- Enter mandatory details: Scenario Name, Effective Date, and Company Role or Document Type.
- Optionally, enter additional transaction details in theHeader InformationandLine Informationsections.
- SelectSave Scenarioto store your scenario.
Edit a Scenario
- SelectEditfrom the actions dropdown next to the desired scenario.
- Modify the necessary details starting from step 3 in the "Adding a Scenario" section.
Copy a Scenario
- SelectDuplicatefrom the actions menu.
- Choose a company for the new scenario.
- Enter a new name and selectDuplicateorDuplicate and Open.
Rename a Scenario
- SelectRenamefrom the actions menu.
- Enter a new name and follow the steps starting from step 3 in the "Adding a Scenario" section.
Delete a Scenario
- Select the checkbox next to the scenarios you wish to delete.
- SelectDeletefrom the menu bar.
- Confirm by selectingDelete Scenarioin the pop-up window.
View results
- SelectView Resultsfrom the actions menu.
- Review tax results under theResult Detailstab, including calculation breakdown and messages.
- Select theXMLtab to view filtered XML input and output data.