
Client experience: Organizers
Show all hidden content.
This article shows the organizer client view on a desktop. Refer to the Client Mobile View article to get the process on a mobile device.
Select on each of the following sections to expand the steps and to get the client experience for accessing, signing, and completing an organizer.
Initial Email
The initial email comes from noreply@safesendreturns.com.
- SelectLet's Get Startedto open the organizer OR

Start Page
- SelectContact Personto contact the firm if you have any questions.
- SelectGet Startedto proceed toAuthentication.
Authentication
One of 2 pages displays based on firm settings:
- Email Access Code - An 8-digit access code is sent to the same email address the initial email was sent to.
- Mobile Access Code - A 6-digit access code is sent to your cell phone via text message.
- Select theRequest Access Codebutton.
- Enter the 6 or 8-digit access code in the code field.
- SelectContinueto proceed to theWelcome Page.
Welcome Page
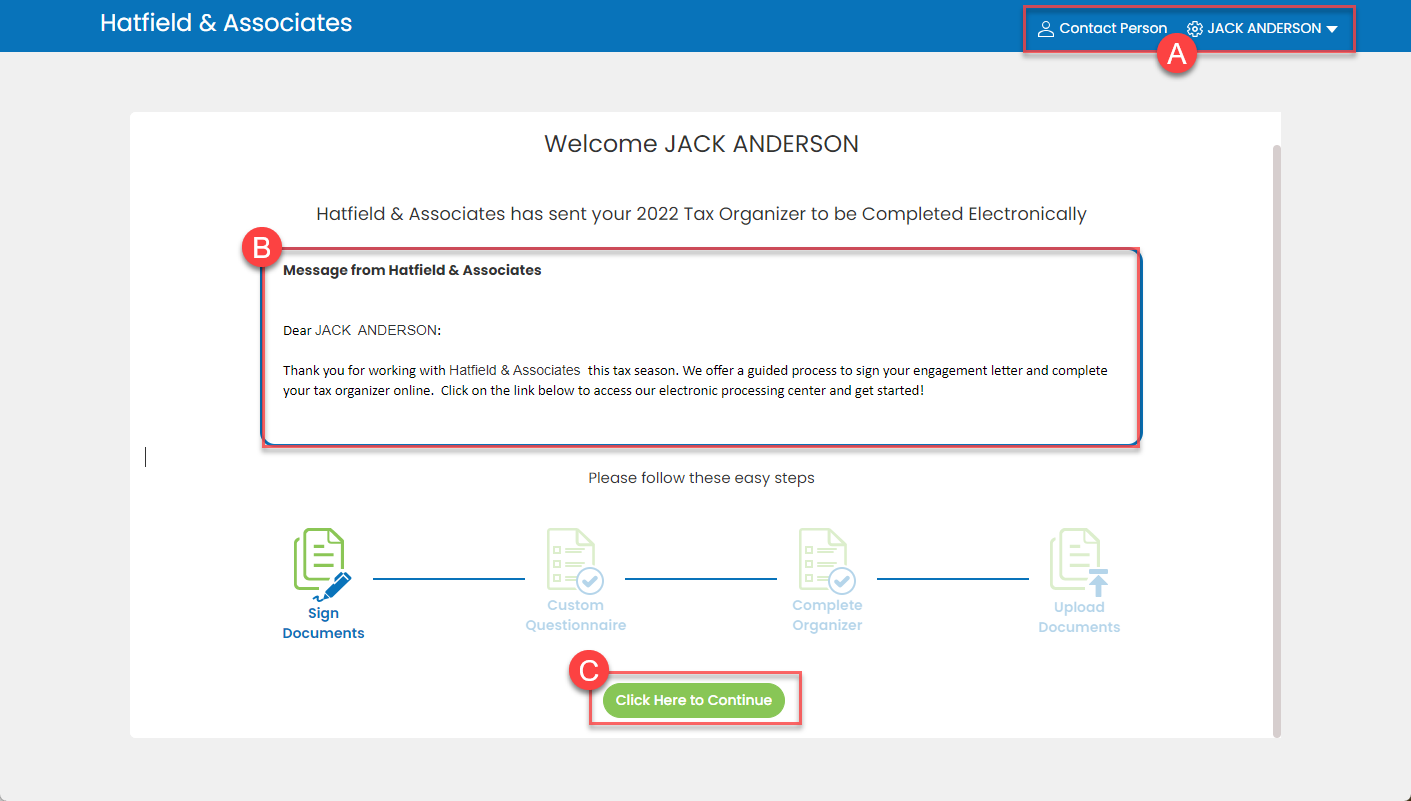
This is the main dashboard for your organizer.
- The title line displays:
- Contact Personwill provide the designated contact in case you have any questions.
- Client Settingspanel where you can sign out.
- Review the message from your tax preparer.
- Selectselect Here to Continueto move to the 1st step.
- Some steps may be grayed out or not appear if not required by your CPA.
- If you have a spouse and all the options are grayed out, your spouse needs to sign before you can continue.
Sign Engagement Letter
note
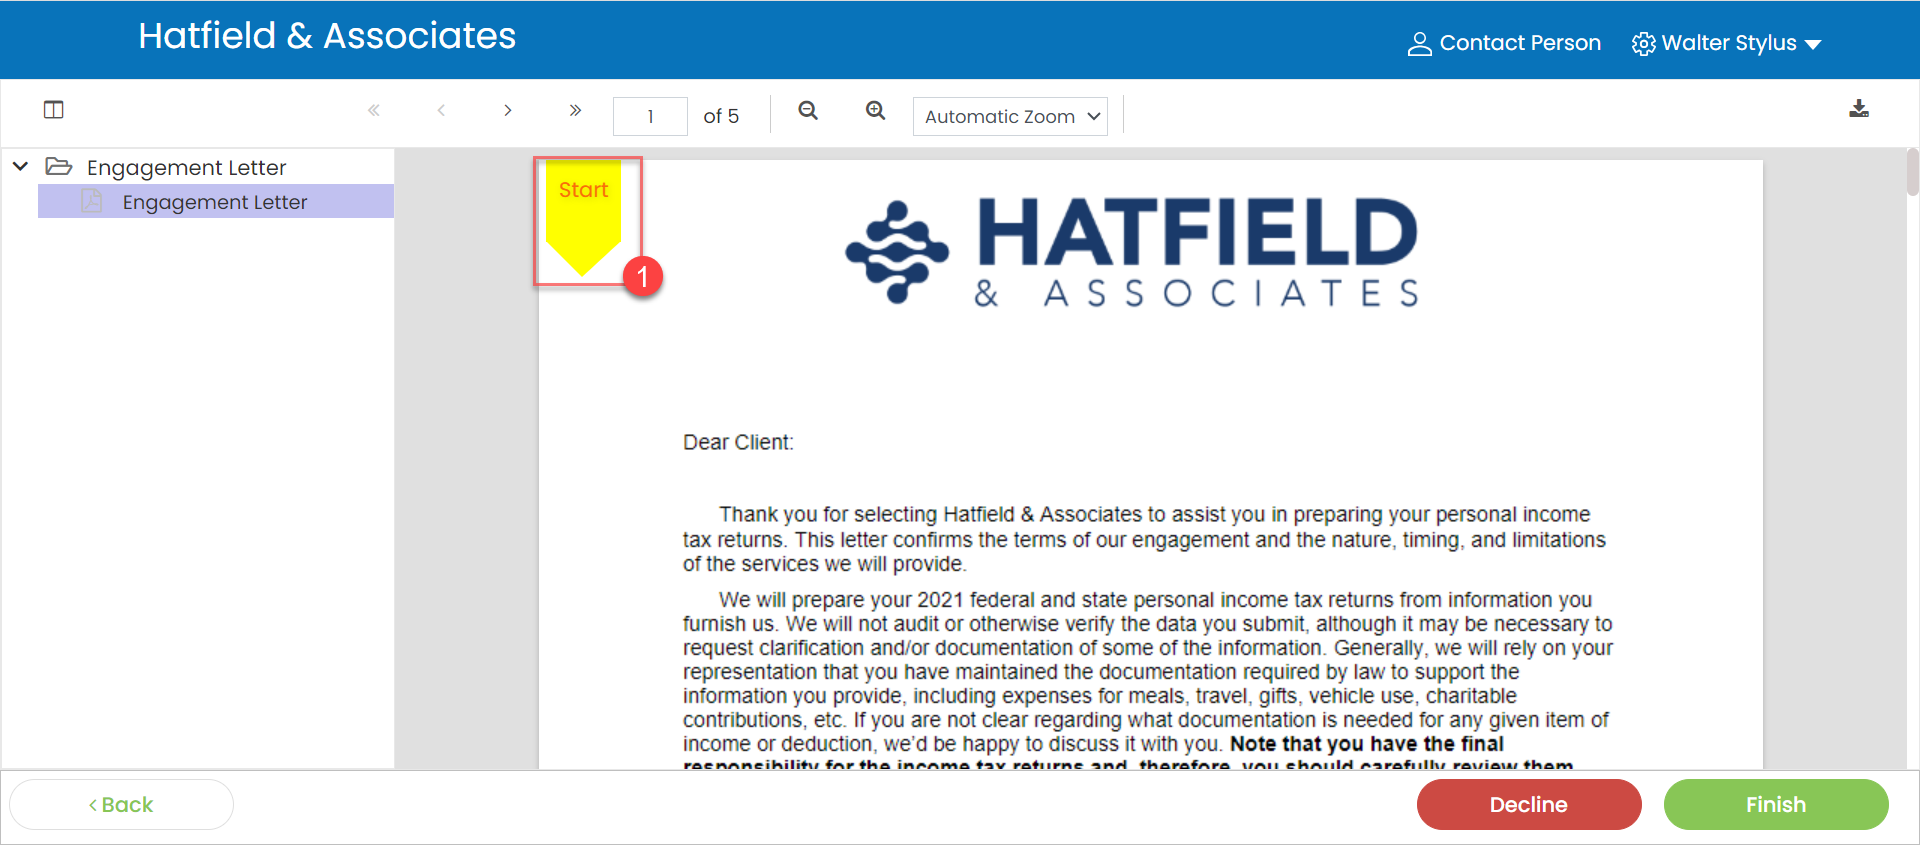
- If signing is required by the firm, theFinishbutton won’t be available.
- To bypass signing, select theDeclinebutton.
- A consent checkbox will appear asking you to verify you have reviewed the document.
- Select theStartbutton to begin signing.
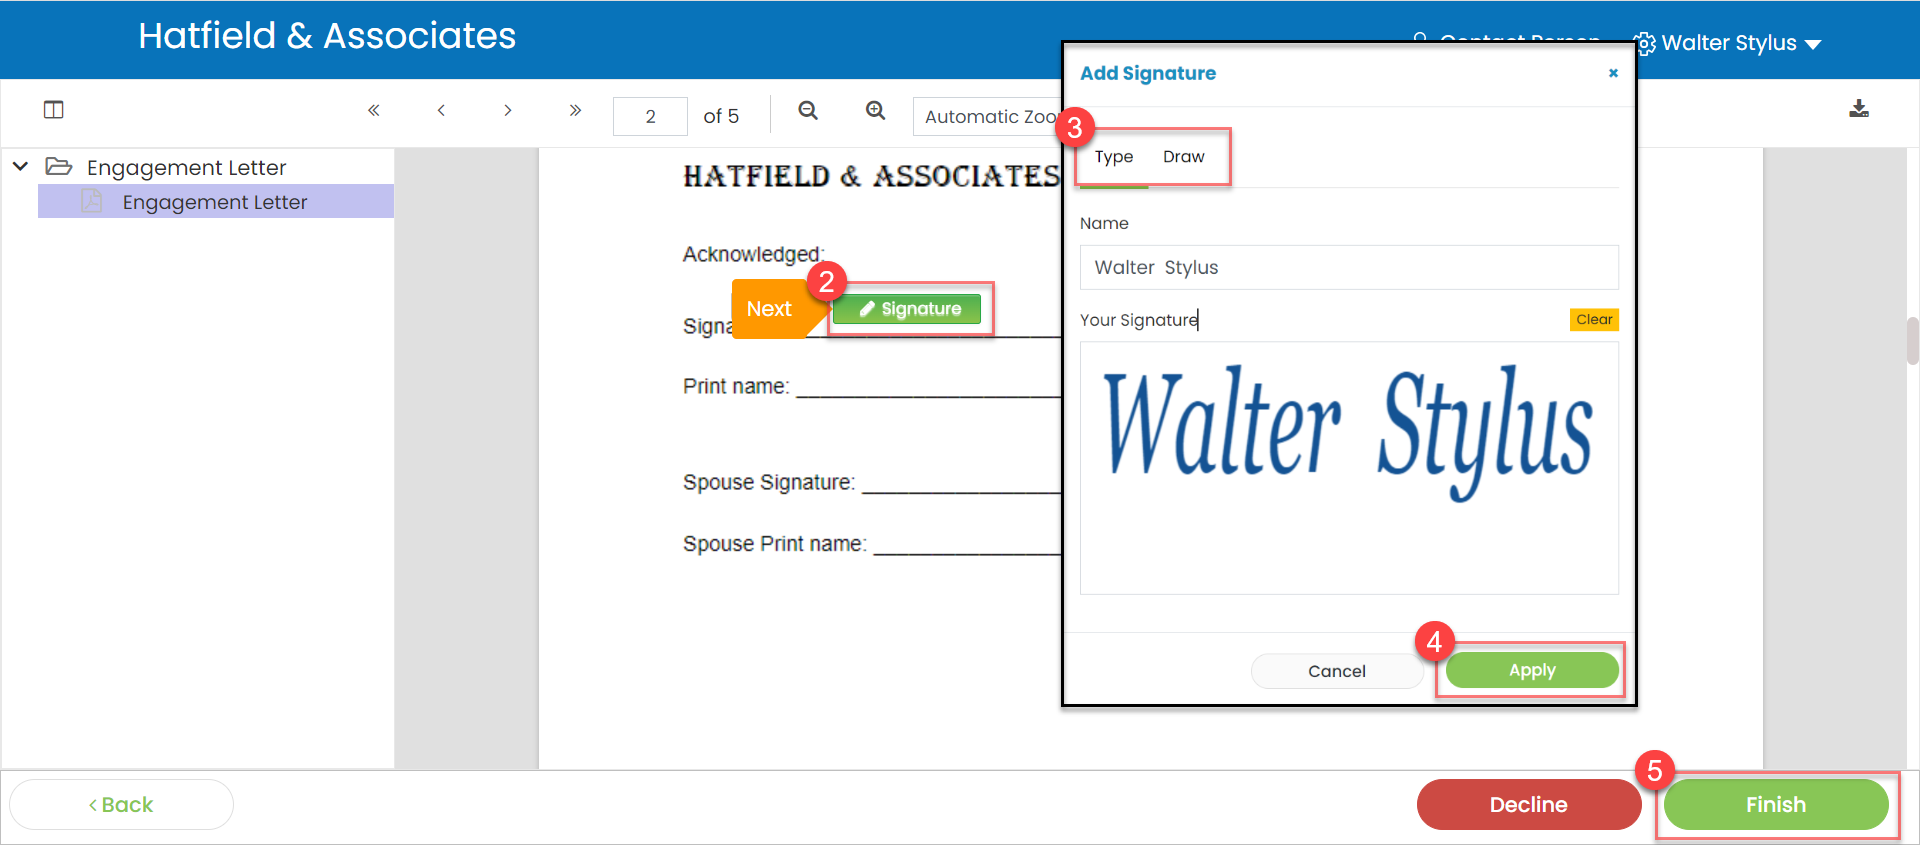
- Continue to select the arrow as you proceed through all signature lines.
- Select theSignature Box.
- SelectTypeorDrawto write your signature.
- SelectApply.
- SelectFinish.
Organizer Steps
After signing your documents, you will be directed back to the
Welcome Page
. 
From this page, you can do the following:
Download Signed Documents
- SelectDownload Signed Documentsto automatically download the documents to your workstation.
Custom Questionnaire
- SelectCustom Questionnaire.
note
The Custom Questionnaire must be completed before you can complete your organizer. Select the
Finish
button to finalize the questionnaire. - Answer the questions provided by your tax preparer.
- You may refer to the following question types:
- Yes/No - These may have follow-up questions as well.
- Short Answer
- Multiple Choice
- SelectSave & Closeto close the questionnaire and continue later.
- SelectFinish.
- The questionnaire can't be re-opened if this option is selected.
You can also view the following:
- View a message from your tax preparer.
- View the completion status of the organizer.
Complete Organizer
- SelectComplete Organizer.
Follow these steps to fill out your organizer.
- Select a bookmark name in theBookmarks Panelto move to a specific page.
- Navigation
- Select the navigation arrows to move through the organizer pages OR
- Select the Blue Arrows at the bottom
- Type into theNotes to Preparerto enter any notes you need to provide to your CPA.
- Type into the green fillable fields of the organizer.
- Text can be entered over the original text
- If your organizer is sent to you and your Spouse, edits made will be identified with color coding to distinguish who completed it.
- Selectselect Here to Uploadto upload source documents. You can drag/drop files or select to open your file explorer.
- This option only appears on certain pages.
- In theBookmark Panel, icons are added to those pages that may require source documents.
- Select Save & Continue Later to be directed back to the Welcome Page.
- SelectFinishto mark the organizer as complete.

Finishing the Organizer
After you select the
Finish
button, you will receive a pop-up notification to confirm you are done.If a spouse was not included on the organizer, the following steps will appear.
- SelectReview Missing Informationif the organizer is not completed.
- This option will bring you back to the organizer to continue filling out.
- SelectOrganizer Completeif the organizer is completed.
If a spouse was included on the organizer, the following steps will appear.
- SelectSend to My Spouseif you would like to send the organizer to your spouse for review.
- SelectFinishif the organizer is completed.
Upload Documents
If your firm allows, you will have the option to upload tax source documents within your organizer.
- SelectUpload Documents.
note
- Supported file types include PDF, DOC, Excel, PNG and JPEG. Other file types cannot be uploaded.
- File names must be 200 characters or less.
- Encrypted or password-protected documents should not be uploaded and cannot be previewed.
- Drag/drop into the box OR selectselect to Upload.
- Upload one or more documents.
- SelectDownloadto download the documents you have already uploaded.
- Select theEyeicon to preview your document.
- Select theDeleteicon to remove the document.
- SelectContinue Laterto save your document uploads and send an email to the firm.
- This will allow you to upload more documents at a later time.
- SelectFinishwhen you have uploaded all tax source documents.
- This will remove the upload option from your organizer.
- The firm that prepared the organizer can unlock the upload option for you.
- Must selectConfirmto complete.