
Editing fields
Review Wizard allows you to verify the data that was captured by 1040SCAN in a separate step (1040SCAN PRO and 1040SCAN Organize services only). On the Verification step, you can fix any information that may have been captured incorrectly by the application.
Data will be highlighted in the document images when opened in the Review Wizard steps
- source document images will show highlights where the data was captured.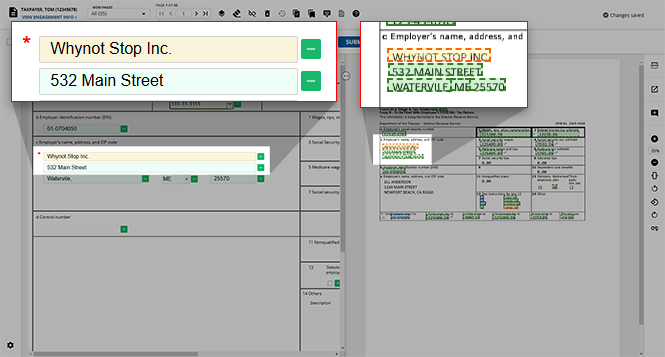
You can point to the highlighted data to view the details of the captured data, providing information from the source document:
- FORM
- NAME
- FIELD
- BOX
- VALUE
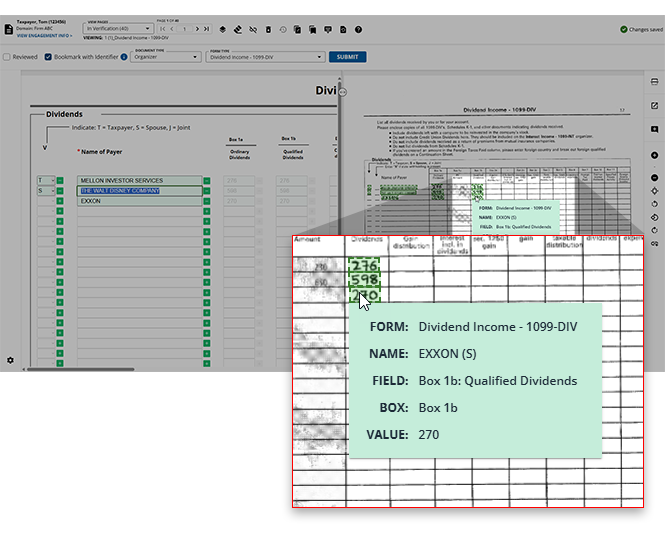
On the Verification step, you can highlight to focus on the amount/value on the form template.
Add fields
You can add fields that were not captured. To capture the information:
- Select theAdd Referenceicon on the form template.
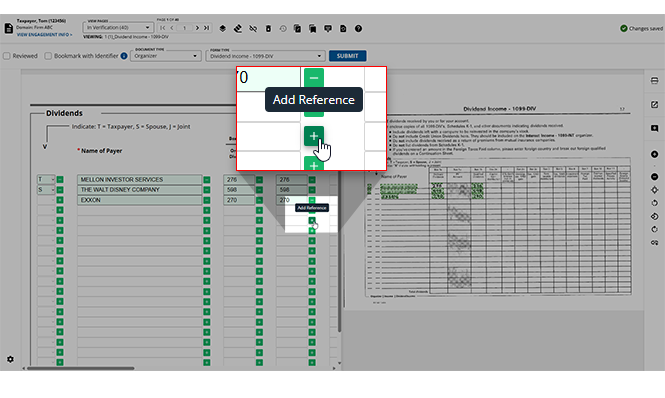
- Go to the scanned document image where the information is located, your cursor will change to theAdd Referenceicon. Use one of these 2 methods to place a reference:
- (Recommended: Full highlight method) Select and drag your cursor to highlight the full text on the image. This method is recommended because it uses live capture technology to automatically capture what you highlight on the page.
- (Short highlight method) Select once at the end of the text to add a small reference highlight at the end.
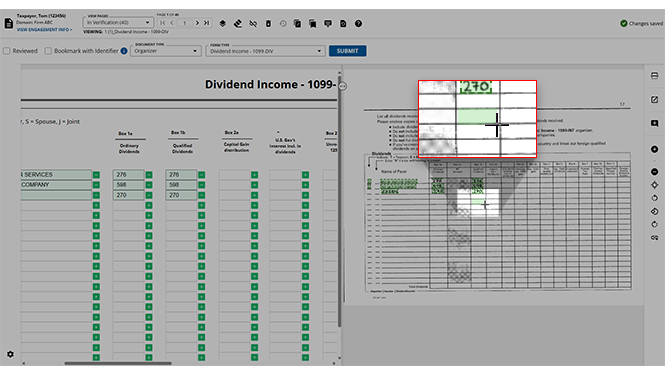
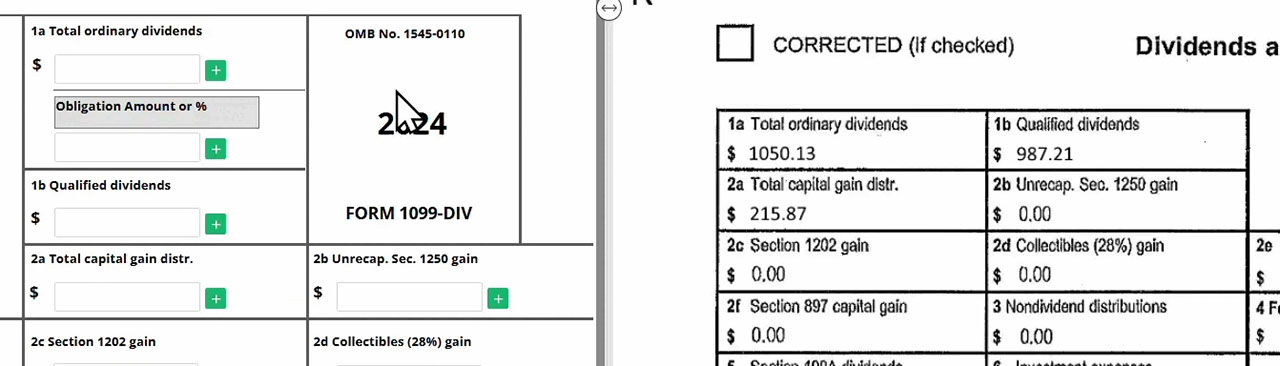
- Go back to the field on the form template, and enter the data (amount, name, etc.). You can select a field on the forms template and edit the value as needed.
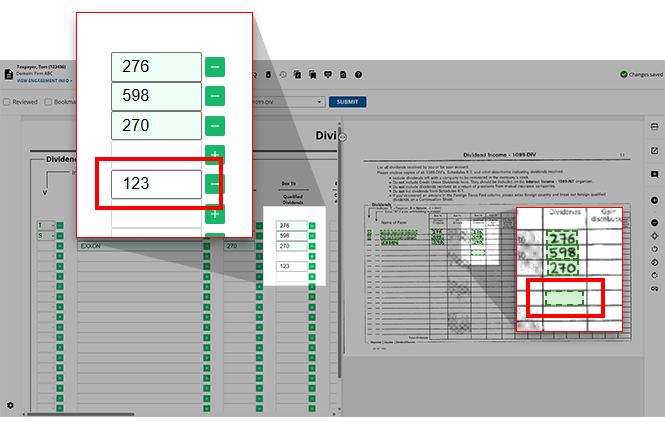
Some fields may be unavailable based on firm settings.
Edit Fields in all Review Wizard Steps
You can edit data from Image Viewer for the following wizards:
- Superseded Documents
- Child Form Association
- Duplicate Wizard
- New Form Review Wizard
- Tax-Exempt Interest Income Wizard
In case you haven’t verified any description or amount properly in the Verification step and you realize your error in any of the subsequent wizards, then you can rectify those mistakes.
For instance, if you didn’t verify the accuracy of the data and made an error in the Verification wizard, for example: Box 1: Ordinary Dividend amount, which has been read by OCR as $22 as opposed to $150.
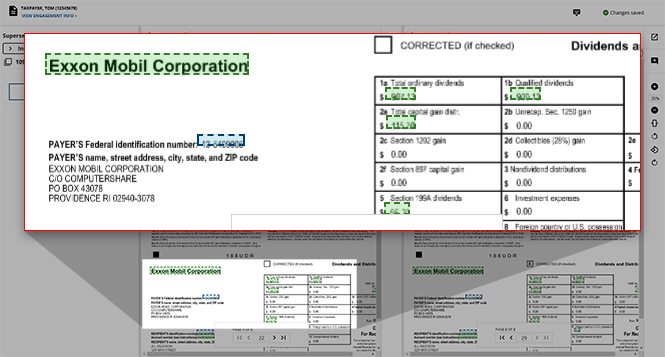
If the amount is incorrect, you can edit it. To edit the amount, right-click the highlighted amount. The shortcut menu gives you 2 options as given below:
- Edit:It allows you to change the value of a particular field.
- Help:It gives a detailed explanation of theEditfunctionality.
Select the
Edit
option. You can also double click to edit a field a highlighted field.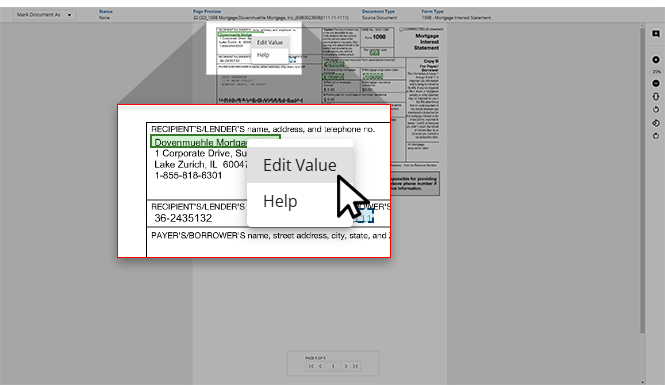
When the
Edit Value
window appears, enter the correct value.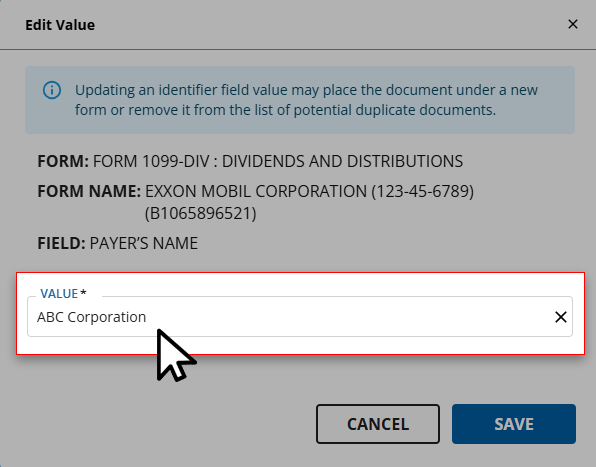
On the
Edit
window, when there are multiple options for a value, they are displayed in a drop-down list and you can choose the required option from the dropdown.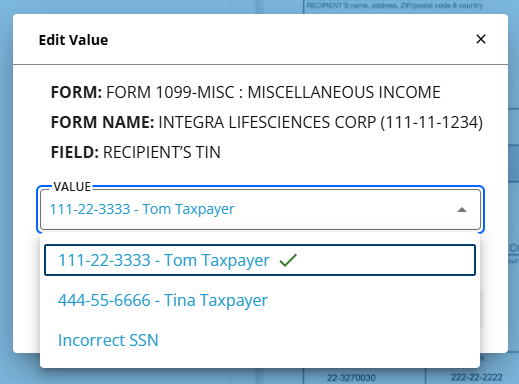
Select
SAVE
to update and save the edited data.Select
CANCEL
to cancel the changes.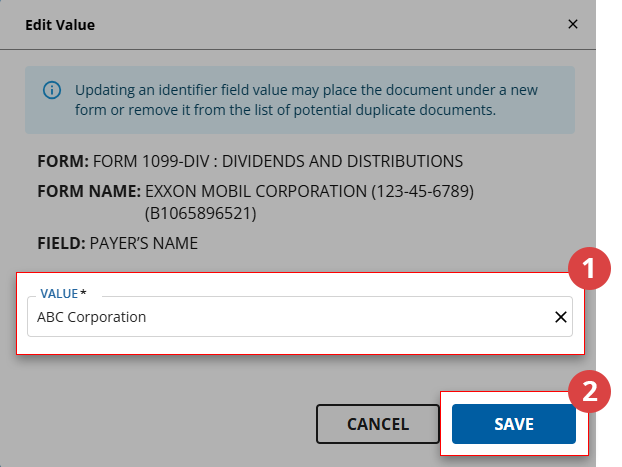
Once you save the changes and close the window, the corrected data will be reflected in the selected Wizard.
Edit Value
You can't edit the identifier fields like
Name of Payer
or SSN number
. These fields will be disabled and grayed out.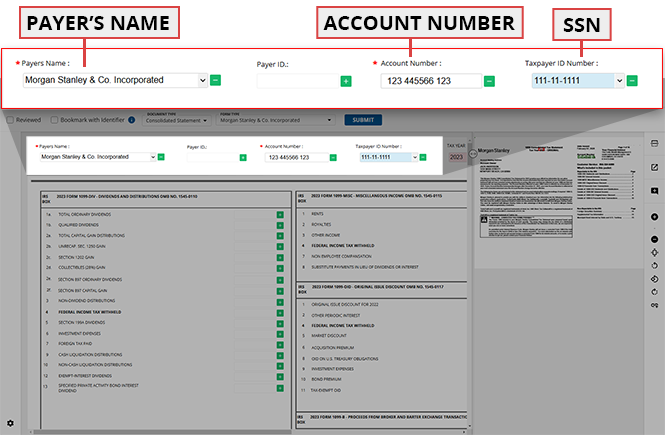
Related Content
-
Step 2 - Verification
Format: Article

