
Linking Pages
Linked pages will be indexed (or matched) in the same folder in SPBinder, unless a linked page has its own Index folder in the Index Tree. When using Review Wizard, users can link the page that they're currently viewing to either previous or future pages in the source document. However, linked pages must all have the same identifier fields; pages with different identifier fields (such as SSN, EIN, Name, etc.) can't be linked together.
For example, ABC Charity sent a two-page letter acknowledging your client's donation. Linking page 1 with page 2 will ensure that both documents are placed in the same ABC Charity folder. Without linking, page 2 will be left unassociated/unmatched.
You can also use this link Schedule K-1 Supplemental pages if they are not already connected with the rest of the Schedule K-1 set.
Linking Pages
Follow these steps to link a page in the Verification Wizard:
- Navigate to the page that you would like to link, then select theLink Page(s)icon in the Verification WIzard toolbar.
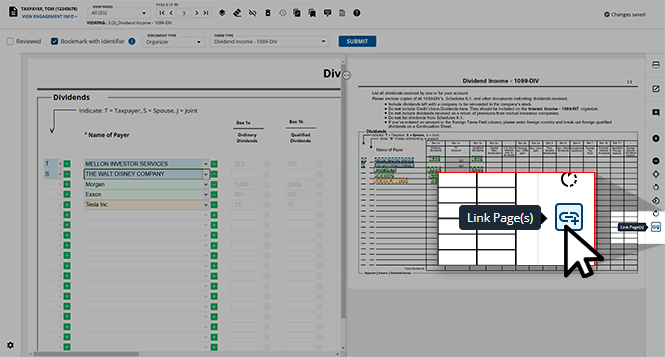
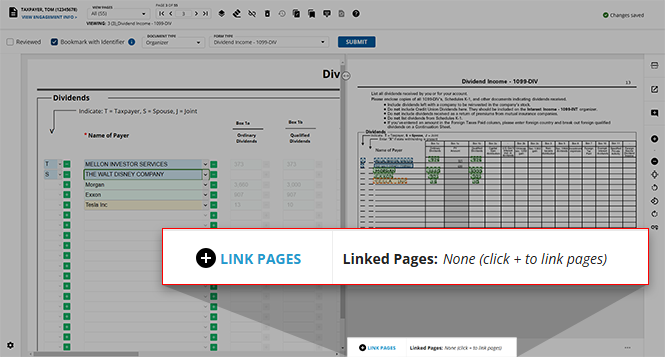
- TheLINK PAGESmenu will appear at the bottom of the document viewer panel. Unlinked pages will haveNonelisted underLinked Pages.
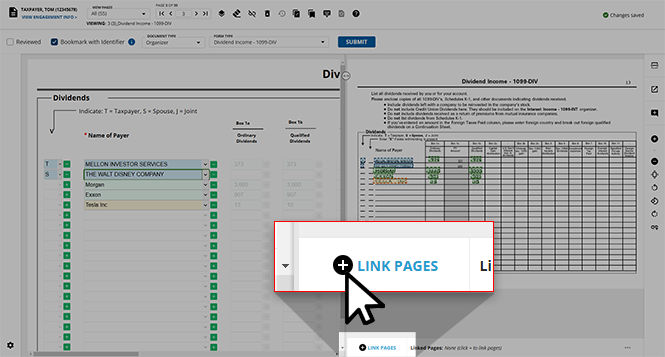
- Select theLINK PAGES
 icon to begin linking pages to your current page.
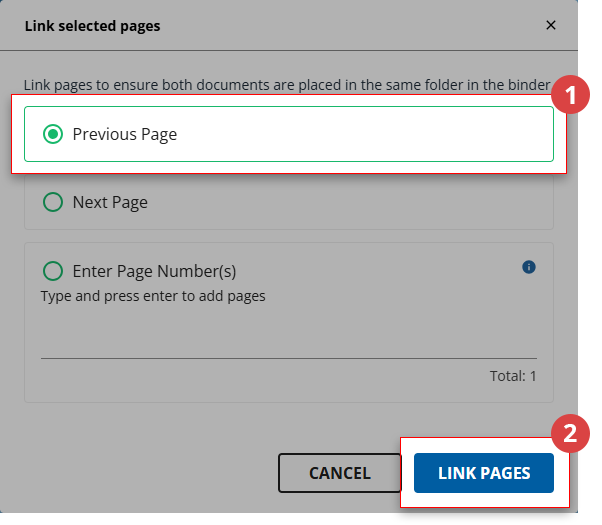
- TheLink Pagesdialog box will appear listing your link options:
- Previous Page
- Next Page
- Enter Page Number(s)
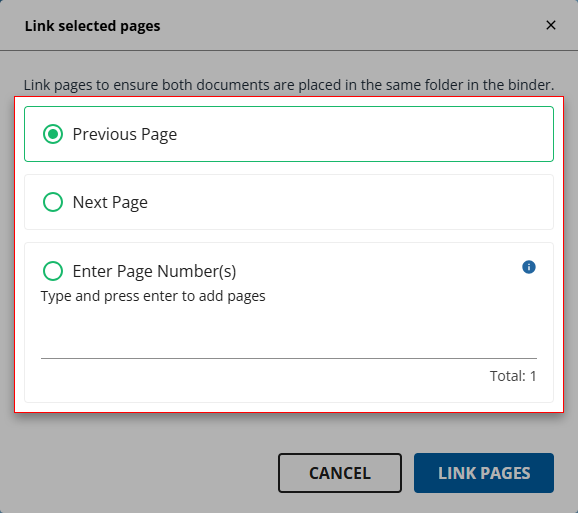 noteWhen using theEnter Page Number(s)option, the page numbers are relative to the option selected in theVIEW PAGESdrop-down menu. For example, when viewing pagesIn Verification, page 5 will refer to the fifth page in verification, not the fifth page in the entire binder.
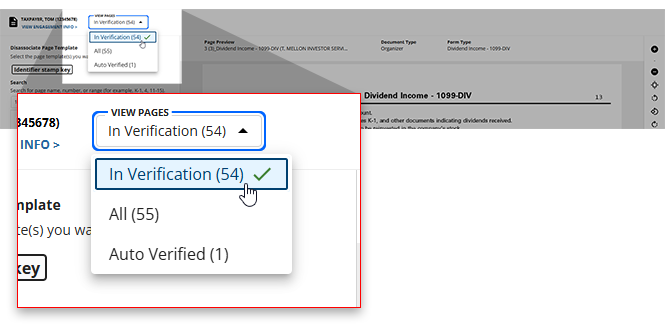
- Once you've made your selection, selectOKto save your linked pages. If you'd like to return to the Verification Wizard without linking any pages, selectCANCELto close theLink Pagesdialog box.
- If you tried linking pages that can't be linked (due to different identifier fields), you will see an error message appear in theLink Pagesdialog box indicating so. SelectOKto return to the link options.

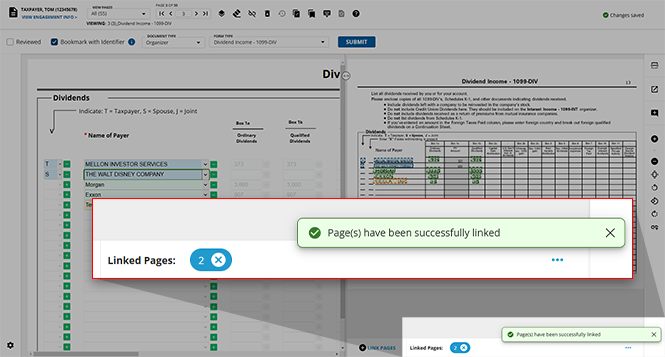
- Once you've successfully linked two or more pages together, a toast notification will appear in the bottom-right of your screen indicating so, and the linked pages will be listed asLinked Pages.
Unlinking Pages
If you've erroneously linked pages in a binder, you can remove the link between these pages to avoid unwanted pairings in SPBinder.
Unlinking a single page
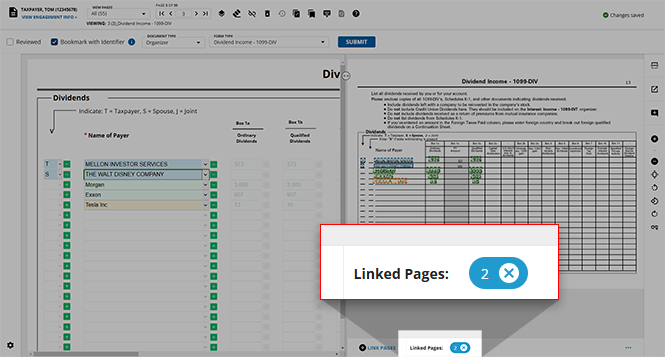
- Navigate to the incorrectly linked page in the document viewer panel. Linked pages are denoted by theLinked Pagesinformation at the bottom of the page.
- If you'd like to unlink a single page from your current page, select theX
 icon for the page you would like to unlink.
noteYou can first select the page number itself to navigate to this page and review the content before choosing to unlink.
icon for the page you would like to unlink.
noteYou can first select the page number itself to navigate to this page and review the content before choosing to unlink.
- Once you select theX icon on this page, it will no longer be linked to the currently viewed page and it will disappear from the list of Linked Pages.
Unlinking all pages
If a page has numerous linked pages that you would like to remove, you can do so all at once.
- Select theMenu
 icon appearing in the bottom-right corner of page you would like to remove linked pages from.
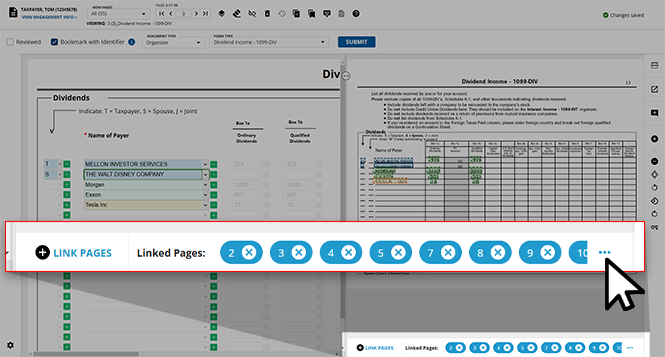
- TheLinked Pageslist will expand, listing all of the pages linked to the one that you're currently viewing. SelectREMOVE ALLif you'd like to unlink all of these pages.
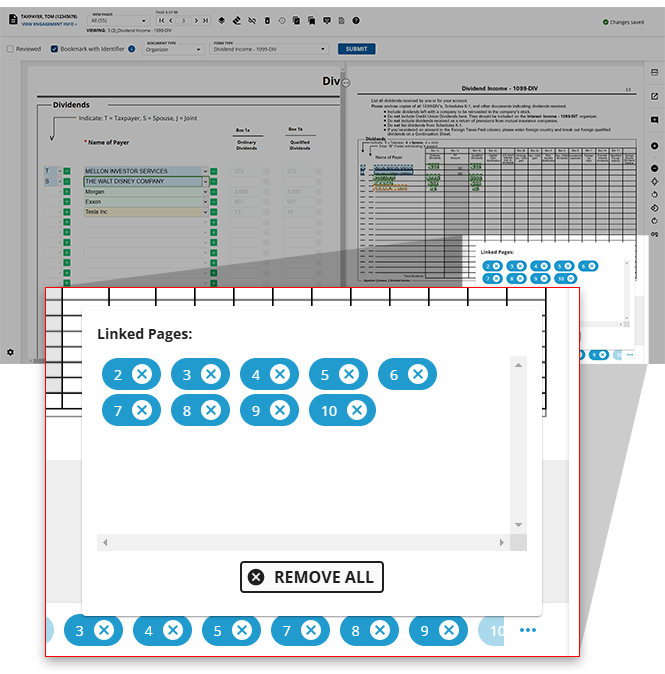
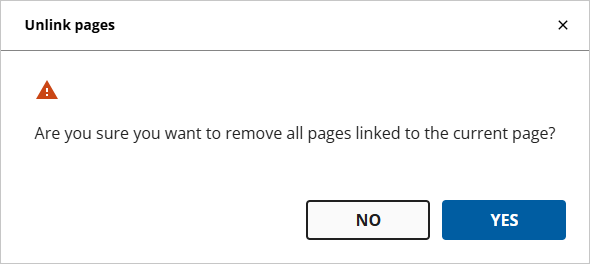
- TheRemove Allwindow will appear asking you to confirm your decision to unlink these pages. If you'd like to proceed, selectYESto unlink these pages. SelectNOif you'd like to close this dialog box without unlinking any pages.
Related Content
-
Step 2 - Verification
Format: Article