
![]()
Triva isn't available right now.
Check out the support page for our phone number and hours
![]()
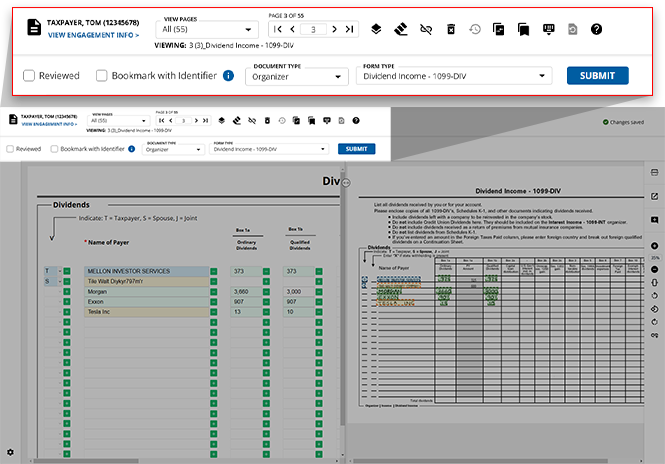
Icon | Feature | Description |
|---|---|---|
VIEW PAGES | Select the type of page you'd like to view based on how OCR captured the data. | |
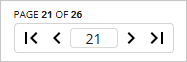 | Navigate pages | select the page number you'd like to view next or type the desired page number into the GO TO field to jump directly to that page. |
Replicate Template(s) | Replicate the Document Type , Form Type , and identifier fields to copy a template from one page to another. | |
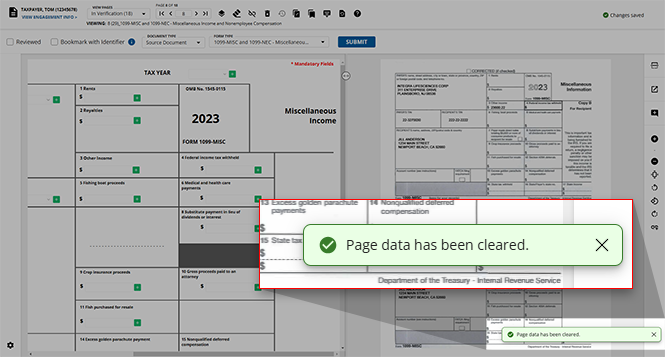
Clear Page Data | Clear all OCR values in the input fields while also removing all highlights the OCR has placed on the source document. | |
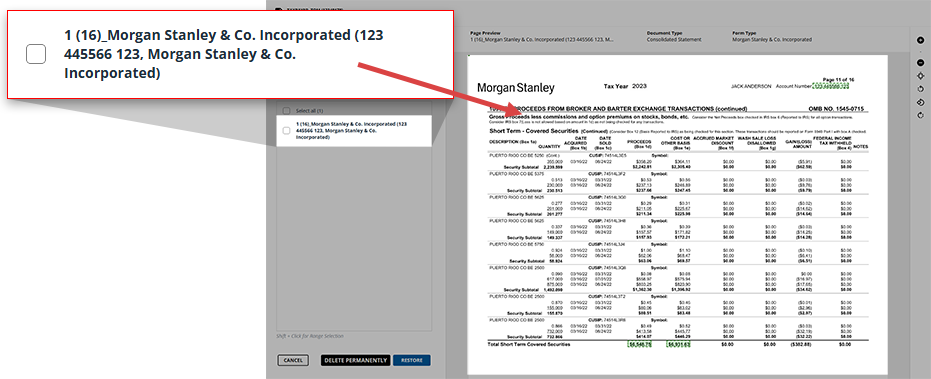
 | Disassociate Pages | Disassociating documents from templates deletes all the data from the page and the template associated with the page. You can disassociate a document individually by deleting data on the page then changing the Document/Form type. |
Delete Page(s) | Delete pages that are not relevant to this client's binder. | |
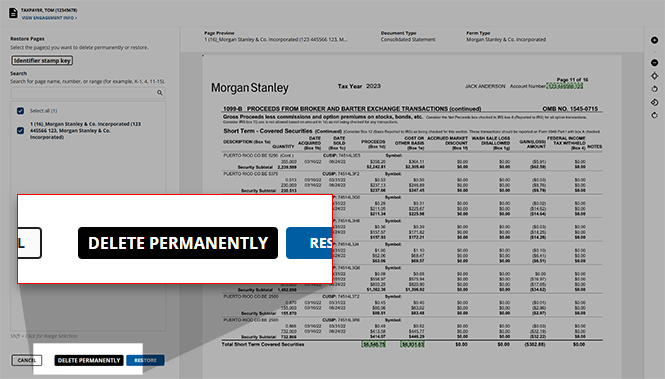
Restore Page(s) | Restore pages that have previously been deleted from this client's binder. | |
Bulk Superseded | Mark a duplicate version of a document as superseded to allow the original copy to remain intact. | |
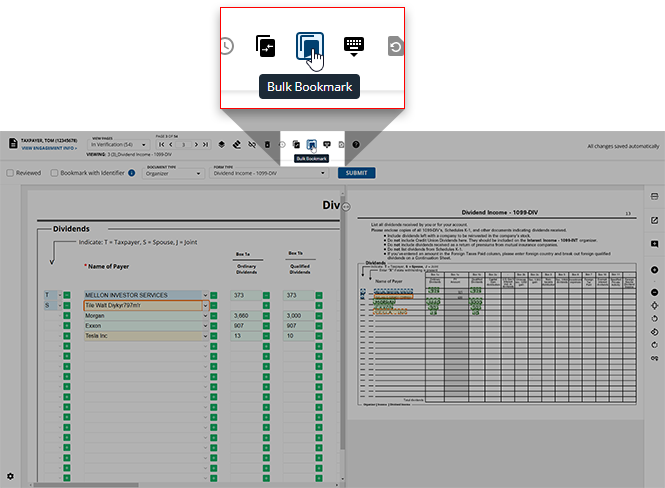
Bulk Bookmark | Bookmark multiple pages in this engagement at once to remove their references. | |
Keyboard Shortcuts | View the list of available keyboard shortcuts to streamline your verification process. | |
Restore OCR Data | Restore the input fields to the values captured by the OCR. This icon will be unavailable if no changes to the OCR data have been made. | |
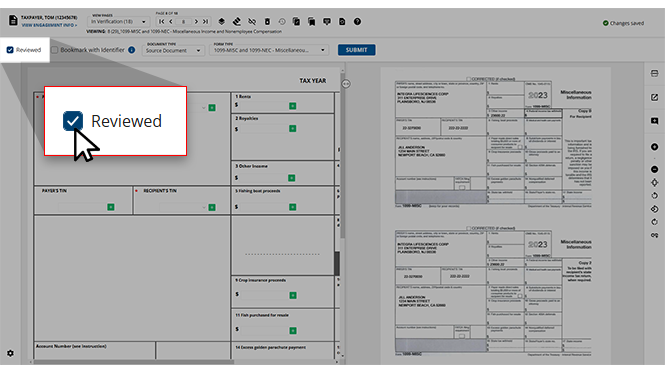
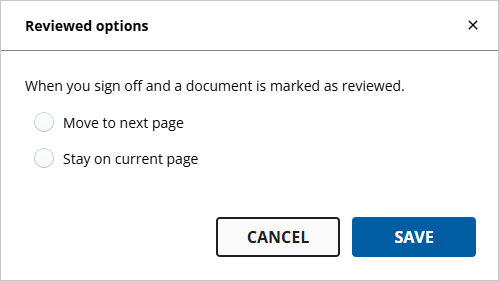
 | Reviewed | Select the Reviewed check mark to mark the particular page as reviewed. |
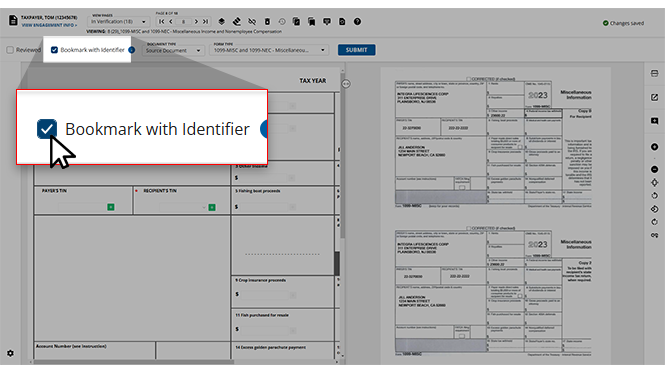
 | Bookmark with Identifier | Bookmark the page you're currently viewing to remove its references. |
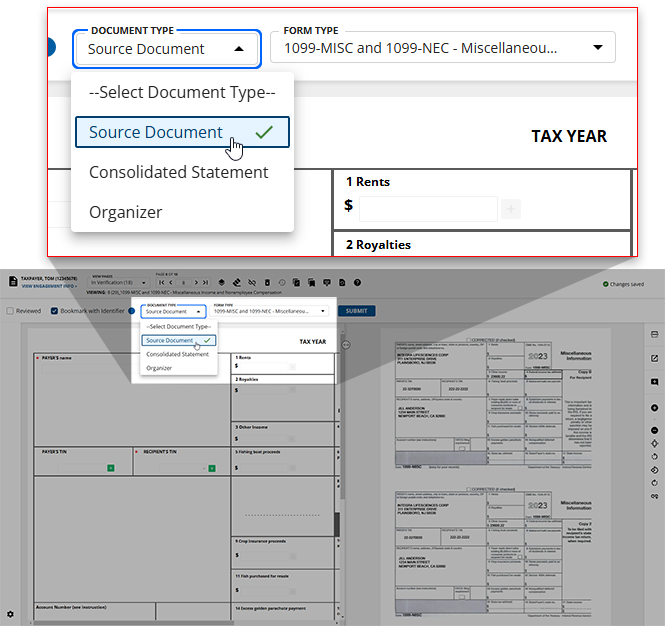
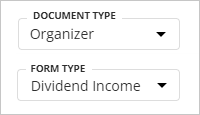 | Document and Form Type | Select the Document and Form Type you'd wish to display. Form Type options are based on the selected Document Type. |
 icon on the Verification Wizard toolbar.
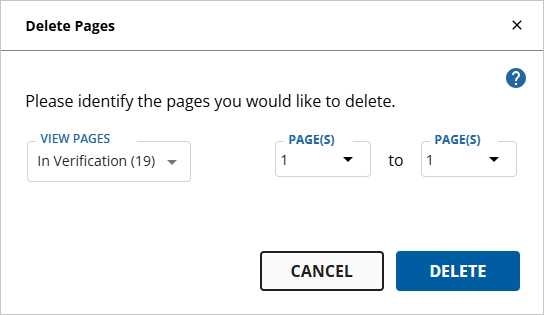
 Article