
Verification Wizard toolbar
When in the Verification Wizard, the Verification Wizard Toolbar offers features to streamline your review process.
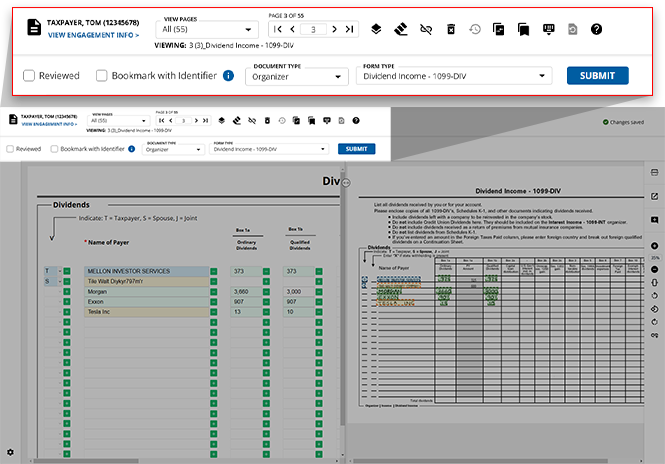
Feature overview
The Verification Wizard toolbar allows you to perform the following functions:
Icon | Feature | Description |
|---|---|---|
 | VIEW PAGES | Select the type of page you'd like to view based on how OCR captured the data. |
 | Navigate pages | select the page number you'd like to view next or type the desired page number into the GO TO field to jump directly to that page. |
 | Replicate Template(s) | Replicate the Document Type ,Form Type , and identifier fields to copy a template from one page to another. |
 | Clear Page Data | Clear all OCR values in the input fields while also removing all highlights the OCR has placed on the source document. |
 | Disassociate Pages | Disassociating documents from templates deletes all the data from the page and the template associated with the page. You can disassociate a document individually by deleting data on the page then changing the Document/Form type. |
 | Delete Page(s) | Delete pages that are not relevant to this client's binder. |
 | Restore Page(s) | Restore pages that have previously been deleted from this client's binder. |
 | Bulk Superseded | Mark a duplicate version of a document as superseded to allow the original copy to remain intact. |
 | Bulk Bookmark | Bookmark multiple pages in this engagement at once to remove their references. |
 | Keyboard Shortcuts | View the list of available keyboard shortcuts to streamline your verification process. |
 | Restore OCR Data | Restore the input fields to the values captured by the OCR. This icon will be unavailable if no changes to the OCR data have been made. |
 | Expand Template | Expand the template panel to occupy the entire browser window. |
 | Reviewed | Select the Reviewed check mark to mark the particular page as reviewed. |
 | Bookmark with Identifier | Bookmark the page you're currently viewing to remove its references. |
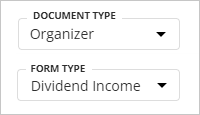 | Document and Form Type | Select the Document andForm Type you'd wish to display.Form Type options are based on the selected Document Type. |
View Pages
You can select pages based on how OCR performed verification:
- In Verification: Shows pages that need to be verified by the user (yellow, green, and blue highlighted values).
- Auto Verified: Shows pages that have been completely auto-verified by OCR using the text layer on a PDF. PDF text layer highlights appear in pink.noteTheVIEW PAGESdrop-down menu will be disabled if the binder has no pages auto-verified using the source PDF’s text layer.
- All: Shows all the pages uploaded in the binder for verification.
Replicate Template
You can replicate/copy the icon to copy/add a template to a page.
Document Type
, Form Type
, and identifier field (Name, SSN, Account Number) to copy a template from one page to another. This can be useful when capturing 1099 Consolidated Statements or Schedule K-1, if a page is missing a template then you can copy the template information from another page to the current page without manually selecting the Document Type
, Form Type
, and identifier field. Select the Replicate Template(s)
icon to copy/add a template to a page.note
Data already captured on the copied page will be deleted.
Clear Page Data
You can clear all of the information that has been collected from the source document or directly provided to the template. This will render the template empty, allowing users to provide any values they see fit directly to the fields they specify. select the icon to clear the data from the page.
Clear Page Data
icon to clear the data from the page.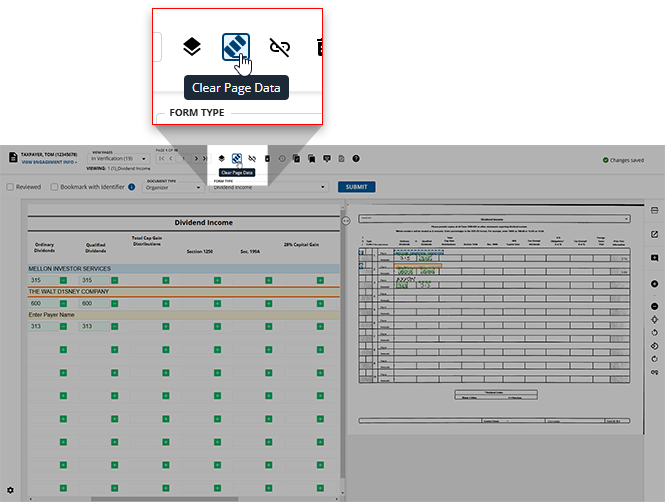
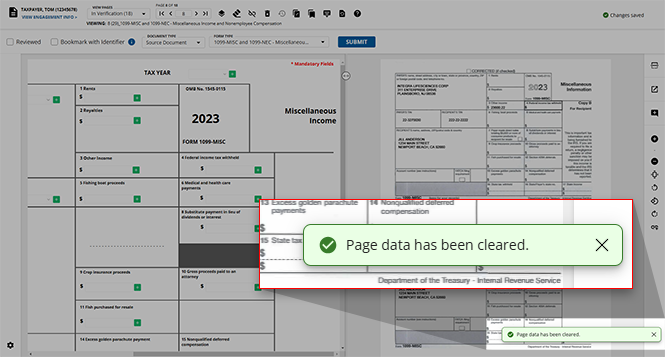
Once selected, the selected page's data will be cleared and you will be notified through a toast notification appearing in the bottom-right of your screen.
note
If you erroneously clear a page's data, you can select the icon in the Verification Wizard Toolbar to restore the cleared data.
Restore OCR Data
icon in the Verification Wizard Toolbar to restore the cleared data.Disassociate Pages
Disassociating documents from templates deletes all the data from the page and the template associated with the page. To disassociate documents individually or in bulk, select the icon on the Verification Wizard toolbar.
Disassociate Pages
icon on the Verification Wizard toolbar.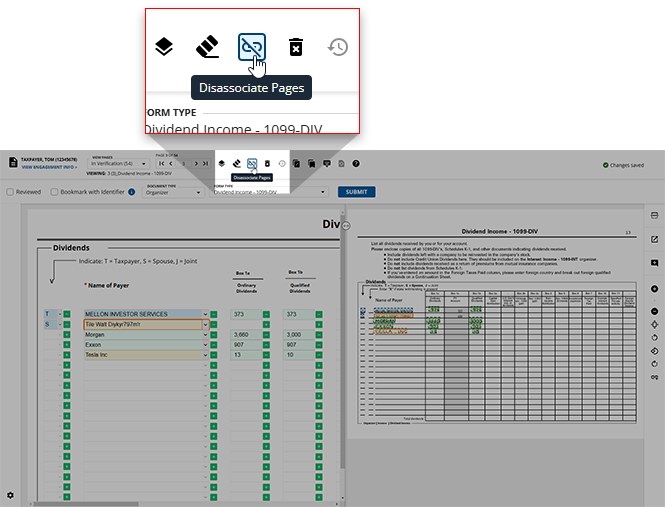
Delete Page(s)
To delete an unwanted page(s), select the icon on the Verification wizard toolbar.
Delete Page(s)
icon on the Verification wizard toolbar.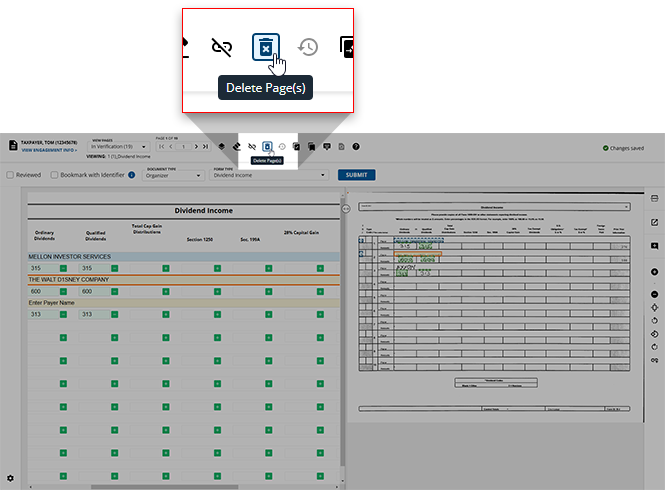
When the
Delete Pages
dialog box appears, select the type of pages you'd like to delete (In verification, Auto-verified, etc.) and the range of page numbers you'd like to delete, then select DELETE
. All pages in the provided range will be deleted. 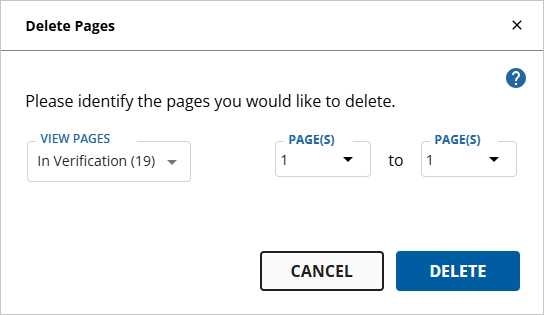
Restore Pages
When a user deletes pages from a binder, the deleted pages are stored in icon in the toolbar.
Restore Page(s)
. select the Restore Page(s)
icon in the toolbar.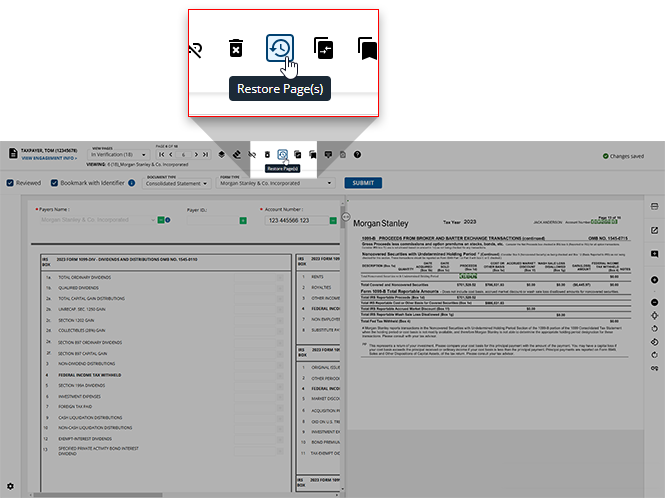
The
Restore Page(s)
window displays the list of deleted pages on the left side and their preview in the Document Viewer to the right. 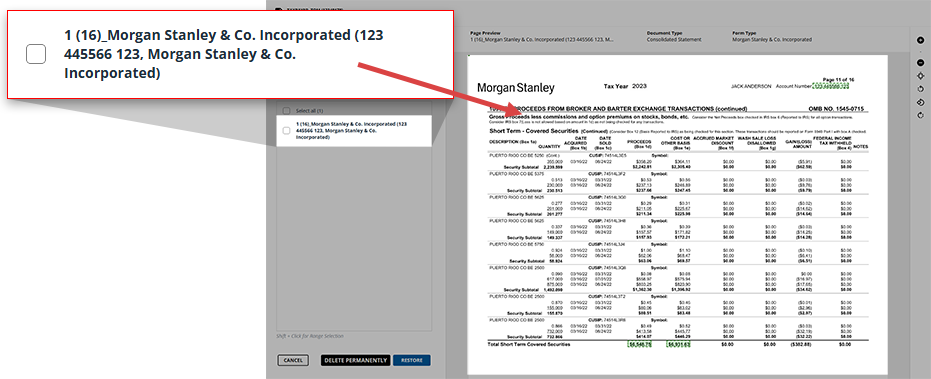
Select the checkbox of each page you'd like to restore, then select
RESTORE
to reintegrate these pages back to their original places in the binder. To select all listed pages, select the Select All
checkbox.To delete pages permanently, select the page(s) then select
DELETE PERMANENTLY
. The pages will be permanently deleted from the Verification Wizard and not included in the binder.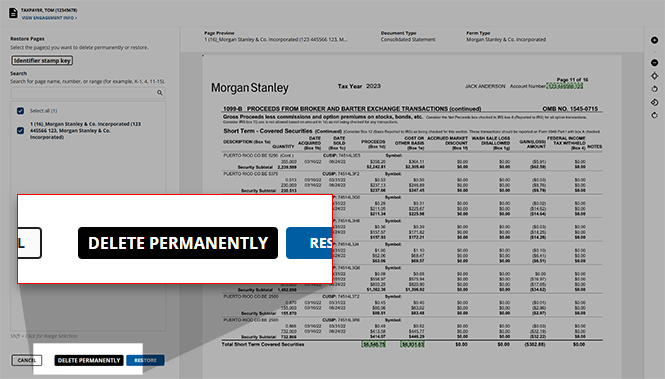
Bulk Superseded
If you find duplicate copies of a document, you can use the icon on the toolbar.
Bulk Superseded
feature to mark the duplicate copy as superseded while leaving the original copy intact. To supersede documents, select the Bulk Superseded
icon on the toolbar.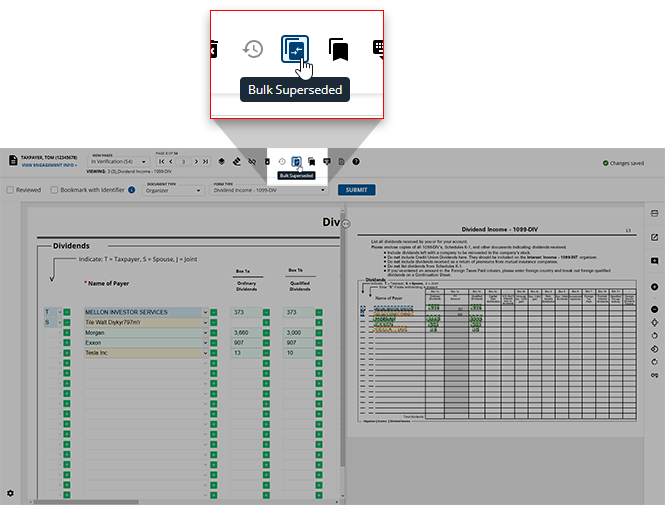
Bulk Bookmark
If you would like to bookmark multiple organizer pages in this client's binder, select the
Bulk Bookmark
icon in the toolbar.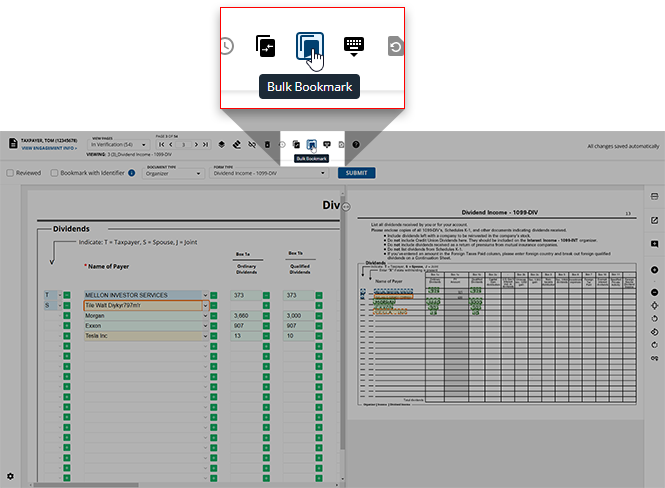
Keyboard Shortcuts
The Verification Wizard offers users various keyboard shortcuts to help streamline the verification process. select the icon to view a list of shortcuts available to you.
Keyboard Shortcut
icon to view a list of shortcuts available to you.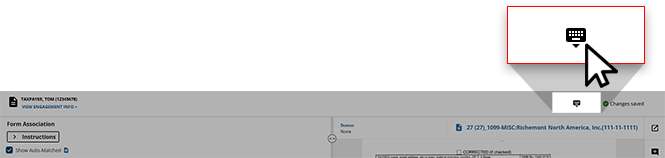
Restore OCR Data
If you've previously altered or cleared any OCR data from a source page's template, you can restore the data to it's original scanned state. Select the icon to revert a template to its original OCR data.
Restore OCR Data
icon to revert a template to its original OCR data.
Reviewed
After you verify all the data on a particular page and bookmark it correctly, select the
Reviewed
checkbox to mark the current page as reviewed.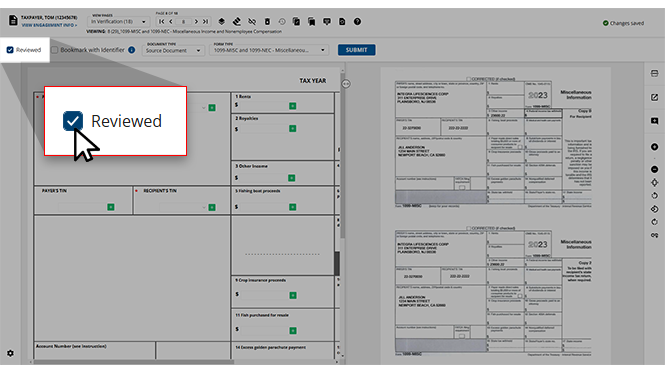
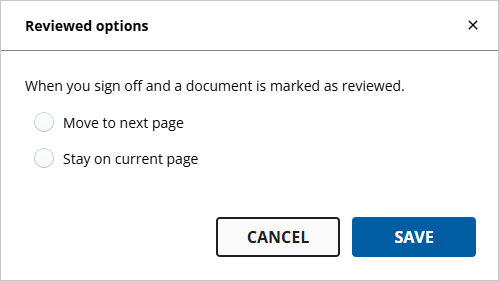
The
Reviewed options
window will appear upon selecting the Reviewed
checkbox for the first time. Select whether you would prefer if Review Wizard on Web:- Automatically proceed to the next page after selecting theReviewedcheckbox.
- Remain on the current page after selecting theReviewedcheckbox.
tip
This preference can be updated anytime in the Review Wizard  .
.
Settings
.Bookmark with Identifier
Bookmarking a page removes all references (except identifier fields like Payer's name, EIN, and SSN) from the source document, preventing the removed references from being exported to the tax software. If you'd like to bookmark an individual page in a client's binder, you can select the
Bookmark with Identifier
checkbox to bookmark the page that you're currently viewing.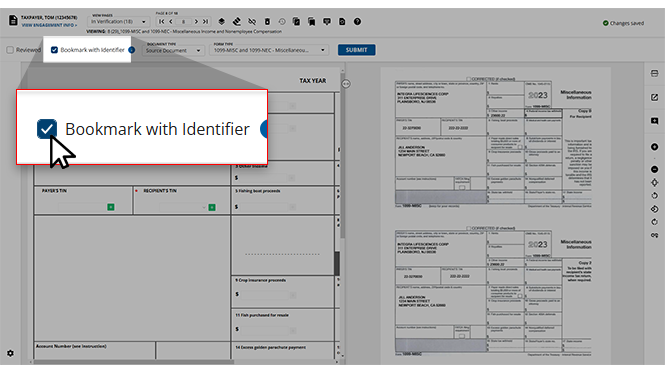
Document and Form Type
If a page in a client's binder has been erroneously given the incorrect
Document
or Form Type
, users can navigate to the necessary page and select the correct types from their respective drop-down menus.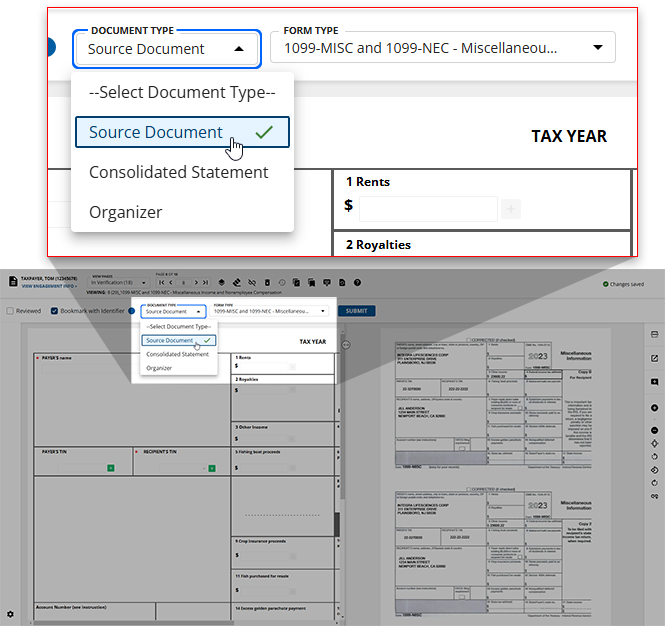
Related Content
-
Step 2 - Verification
Format: Article

