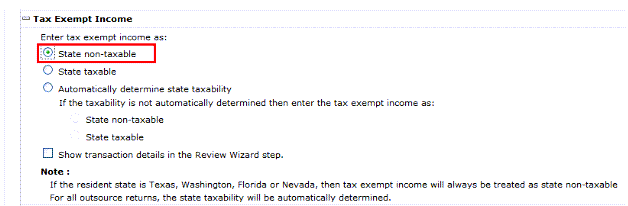
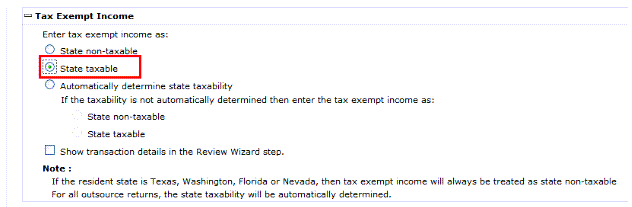
If you select
Automatically determine state taxability
, then 1040SCAN follows these steps. It matches the security descriptions with a predefined list during the Pre-Verification process.
The process that automatically determines state taxability for a new binder begins around February 15 of the calendar year.
The Verification Wizard displays the security descriptions according to the following criteria:
The security description matches the predefined list
Recognizes the security description based on the state
Security description matches with the predefined list
.
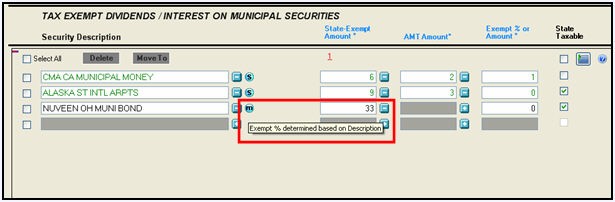
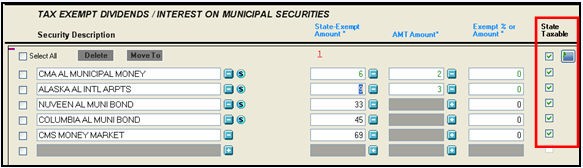
The system places an

icon next to the security description when it matches the source document description provided in the predefined list. This icon indicates that the system has automatically calculated the percentage in the
Exempt% or Amount
column, based on the amount captured by the OCR in the
State Exempt Amount
column.
Hover over the
icon to see the tooltip:
Exempt% determined based on Description
.
This icon disappears if the verifier manually edits the field of
Exempt % or Amount
.
The
Security Description
gets replaced automatically with the security description found in the predefined list.
If the
Security Description
matches with more than 1 security description from the predefined list, the highest matched security description among the two or more matches found will be considered for calculating the Exempt % or Amount.
Recognition of Security Description based on State
.
1040SCAN will check for the proforma resident state code (Home State) and consider that as a base state. It when then search for the base state name, state abbreviation, or state short form in
Security Description
captured during the OCR process (for example, California, CA).
Home State = California
Search for
California
or
CA
in
Security Description
.
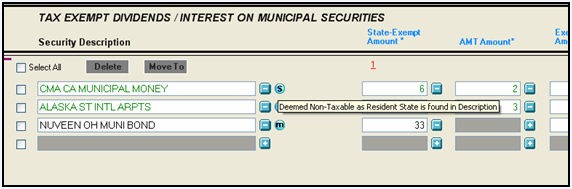
When 1040SCAN finds the state name, abbreviation, or short form, it displays an

icon near the
Security Description
field. This icon indicates that the taxability is determined based on the state.
Hover over the
icon to see the following message: Deemed Non-Taxable as Resident State is found in the Description or Deemed Taxable as Non-Resident State is found in the Description.
You'll need a space after or before a match, and it should not have any spaces or special characters between them.
Deemed non-taxable as resident state is found in the description
.
The taxability is determined based on the resident state. The
Security Description
is marked as state taxable or state exempt based on the resident state.
If the security description is matched with the proforma'd resident state then:
State Exempt Amount
= State Non-Taxable
Exempt % or Amount
= 1 (to indicate state non-taxable)
The
State Taxable
checkmark won’t be cleared.
For
Puerto Rico, Guam, Virgin Islands, and Samoa
, the
Security Description
field will be considered State Non-Taxable:
State Exempt Amount
field =
State Non-Taxable
Exempt % or Amount
field = 1 (to indicate state non-taxable)
In the
State Taxable
option the checkmark won’t be cleared.
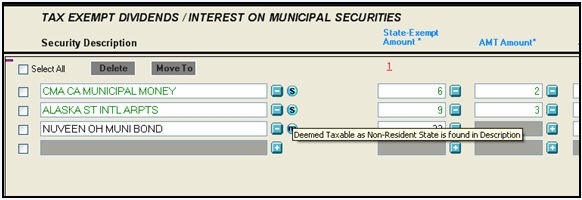
Deemed Taxable as Non-Resident State is found in the Description.
The system determines the taxability based on the non-resident state if the security description doesn’t contain any resident states. It then marks the security description as either state taxable or state exempt.
If the system finds any state name, short form, or abbreviation other than the resident state name in the security description, it considers the
State Exempt Amount
as
State Taxable
. The system populates 0 in the Exempt % or Amount column, and it automatically checks the
State Taxable
checkbox.
The resident state will be considered first for determining the taxability if more than 1 state name or abbreviation is found in the security description.
If the proforma'd resident state found is NJ and the OCR-captured security description contains 2 state abbreviations, NJ and NY, then NJ will be considered since it matches the resident state. Consequently, the State Exempt Amount will be calculated as Fully Exempt.
For some specific resident states like FL, TX, NV, WA where determining the state taxability is not required, the amount in
Exempt % or Amount
will always be considered as State Non-Taxable.
The security descriptions that neither match with the predefined security description or isn't read as certain by OCR will directly appear in the Verification wizard
.
If no state name, abbreviation, or short form is found in the security descriptions and no proforma'd state information is provided, then the security description will be displayed under the verification wizard. The amount will be shown under the State Exempt Amount as State Nontaxable.
The system starts matching the corrected description with the security descriptions in the predefined list when the verifier corrects the description and presses the tab key or select
Enter
. The process ends once the verifier enters any value in the
Exempt % or Amount
or proceeds to the next security description.
Exempt % or Amount
is editable. If the security description is state taxable then 0 appears automatically in that field along with a check mark in the
State Taxable
checkbox. Once you edit
Exempt % or Amount
, the checkmark for
State Taxable
will be removed.
If you enter [0.1 to 1.0] in
Exempt % or Amount
, it will be treated as an Exempt percentage and more than 1 will be treated as an Exempt amount. If you enter a negative amount, a message 'Invalid amount or %' is displayed.
By verifying the certain or uncertain description in the verification wizard, the
Calculate State Taxability

icon will get turned on.
If you don’t make any changes in this wizard,
Calculate State Taxability
will remain inactive. However it will let you move to the next sheet, page, or form without sending the certain security description for determining the state taxability.
After verifying security descriptions and State Exempt Amount (certain or uncertain) and clicking the State Taxability
icon, the process for determining taxability of only edited security descriptions will start and it will end after all the previous-mentioned steps are run in the verification wizard.
Those security descriptions matched with the predefined list will have a
icon on the right side of the security description and those which are determined based on state will have a

icon on the right side of the security description.
If the verifier selects
Submit
without verifying the uncertain security description, a message pops up for verification 'There are some uncertain fields to verify. Would you like to skip verification and continue?'
If the verifier selects
Yes
, then all the uncertain security descriptions will get converted to certain, but won’t be processed for the determination of taxability. Selecting
No
will take the verifier to the uncertain security descriptions.
Alternatively, you can also change the security transactions as
State Taxable
or
State Exempt
manually by entering 0/0.1 in
Exempt % or Amount
to make the whole State Exempt Amount as
State Taxable
or
State Exempt
or can also enter the calculated exempt amount or percentage (should not be a negative amount) and the balance will be considered as
State Taxable
.
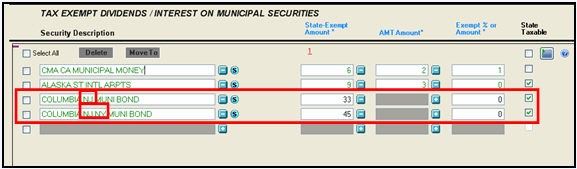
If in some cases, descriptions appear in more than 1 line then the determination of taxability won’t be applied.

 Article,
2 min read
Article,
2 min read