
Account Usage History
Account Usage History
lets you view details on how the credit purchases were used on the firm's account. You can generate and export customized billing reports to show the columns you selected. You can also filter each client and firm data according to your specifications. To view account balance, go to
Admin
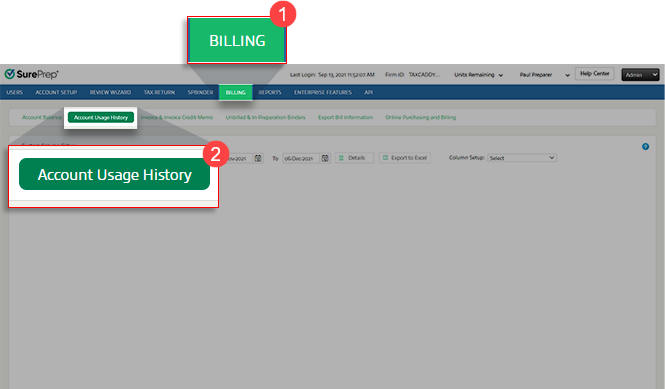
, Billing
, then Account Usage History
.
View Account Usage History
To view Account Usage History, specify the tax year, dates, and service type.
- (SKIP STEP)Account Usage Historynow shows data for all tax years within a selected date range. TheTax Yearmenu is no longer relevant. Skip to the next step.
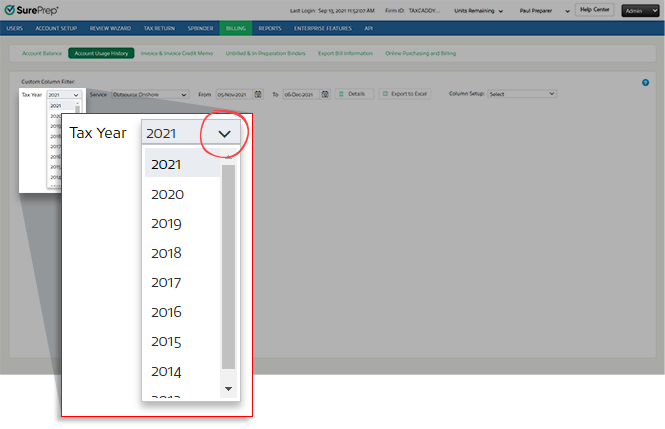
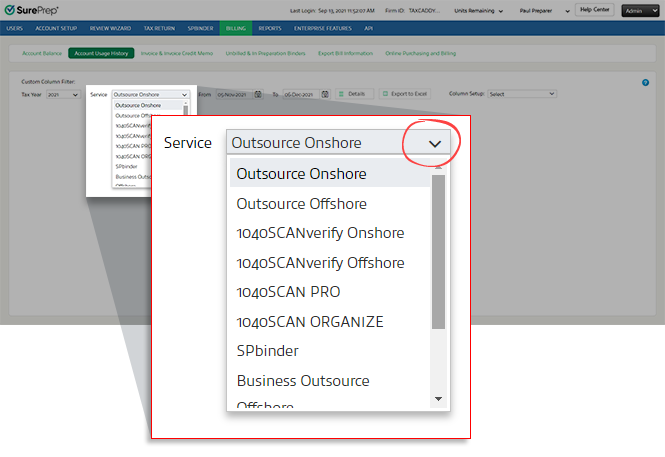
- Select theServicepicklist, then select the service used for that binder.
- Select the date range. Select the Date
 icon next to FromandTo. Select the billing date from the dropdown calendar for each icon. You may also enter dates manually in the text fields.
 noteTo change the current month on the calendar, select the month and year displayed on top of the calendar (for example, May 2021). This will display a list of months. Select the month you need. When the months appear, you select the tax year on top of the calendar once again to select a different year.
- After you select the tax year, dates, and service type, selectDetails
 .
.
- The Account Usage History appears by the date of the created billing invoice. You can view the billing date on theDATE CREATEDcolumn.
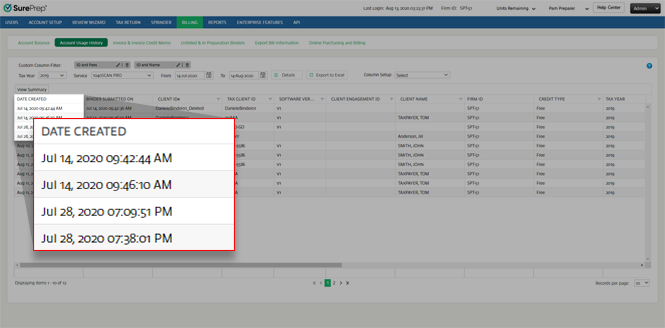
View Details
Once you select
Details
, multiple columns and rows will appear. Here you can view the past account usage history.You can further filter these results by using the filter feature. Select the  , on the column you want to filter. A filter window will appear. Select
Filter
icon , on the column you want to filter. A filter window will appear. Select Filter
after you finish selecting your parameters.
View Summary
Select
View Summary
, to switch from the details view to a simplified summary view.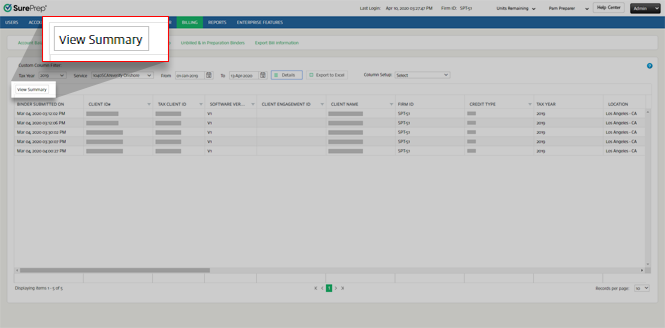
You will see a condensed summary showing you the Firm Name, Firm ID, Service, number of returns, and total amount.

Other Form Fees column (Outsource service)
The
Other Form Fees
column lets you view the number of forms in a particular return and its billing calculation.note
This column is only available for
Outsource Onshore
and Outsource Offshore
services.
To view details about the amount, select a value under the
Other Form Fees
column. 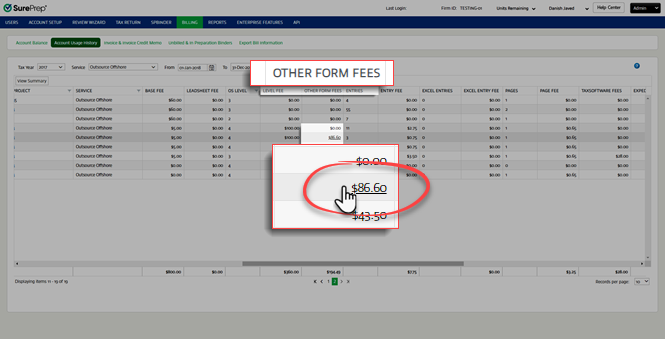
A window will appear with a detailed description of the forms associated with the amount.

Expedite Column (1040SCANverify & Outsource services)
You can view expedite fees charged for
1040SCANverify Onshore
, 1040SCANverifyOffshore, Outsource Onshore, Outsource Offshore
service under the Expedite Fee
column.
Refunded and Deleted columns
If a binder is deleted,
Deleted On
and Refunded On
column for that particular record (that is, the record which was created when the binder was charged) will be updated with a timestamp. 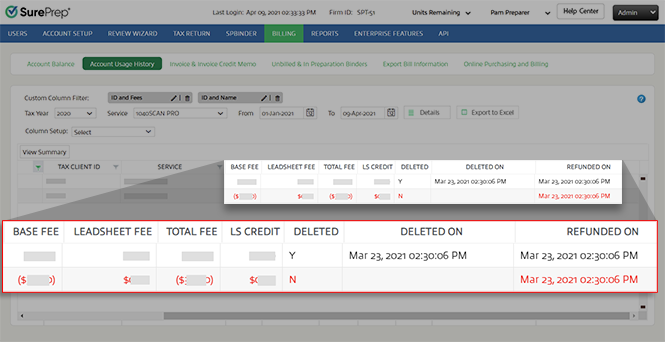
If a binder is deleted and the fee is refunded, then a second entry will be added in red color that shows charges that were reversed/refunded for that binder.
TaxCaddy Gather and TaxCaddy Deliver
Under the
Services
menu, you can select TaxCaddy Gather
or TaxCaddy Deliver
to view account usage history related to a performed action of TaxCaddy. The EVENTS
column shows you the actions that utilized the TaxCaddy Gather
or Deliver unit.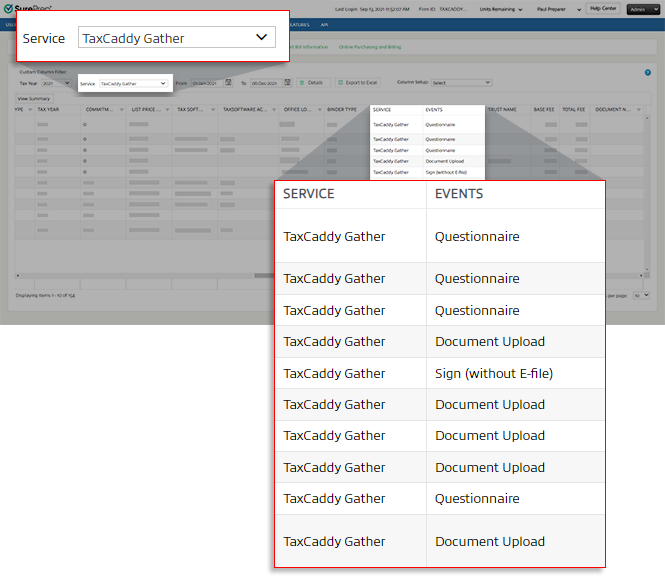
The
CREDIT TYPE
column shows you the following details based on your firm's balance.Paid
: Usage of pre-paid TaxCaddy services with TaxCaddy Gather
or Deliver units being utilized. 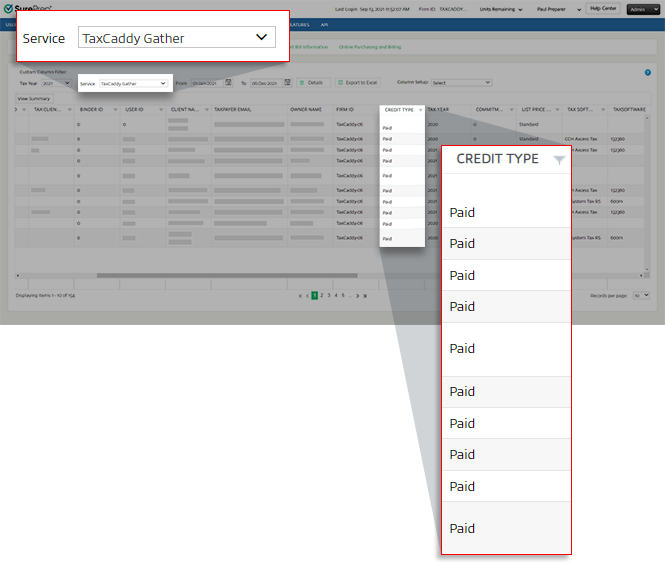
Firm users won’t be able to perform an action if there are no
TaxCaddy Gather
and/or Deliver units available to consume. note
To purchase
TaxCaddy Gather
or Deliver units, contact your SurePrep Sales representative.Custom Column Filters (Column Setup)
You can create customized billing reports according to your personal preferences.
The
Column Setup
feature lets you:- Filter the table to show the wanted columns.
- Create/save multiple filter templates to generate different types of billing reports.
- Export filtered columns to Excel.
Filter Columns
On  icon to view the dropdown menu.
Column Setup
, select the picklist icon to view the dropdown menu.
Select the checkbox to view the selected columns. Clear the checkbox to remove the columns. Once you select the columns, select
Save
then select Details
to update the table.
note
The selected columns will remain saved for subsequent visits. Letting you to fetch billing reports/acount usage history with the same columns each time.
To restore the columns back to default, select
Clear All
then select Save
. Select Details
to reload the table.
Customize Column Setup (Saved column filters)
You can save filter templates that let you switch between different column sets. Saving filters will let you generate different types of billing reports without having to select/clear columns each time.
To create a custom column filter template. select
Customize Column Setup.
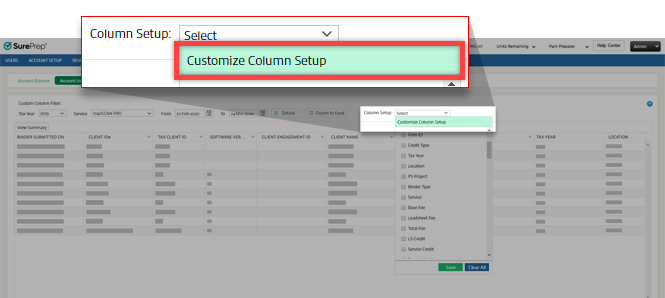
On the
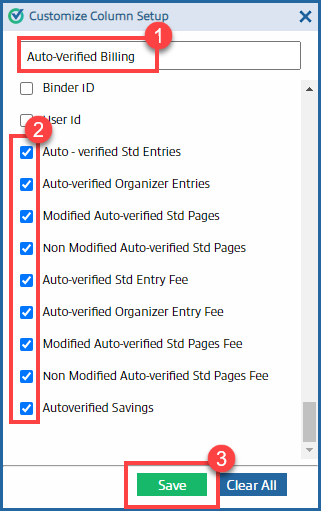
Customize Column Setup
window, enter a filter name that will help you identify the filter. Select/clear columns checkboxes to show/hide columns then select Save
.
Tip: You can follow the same steps again to add multiple filters.
You will see the new filter appear on the upper left corner next to
Custom Column Filter
. 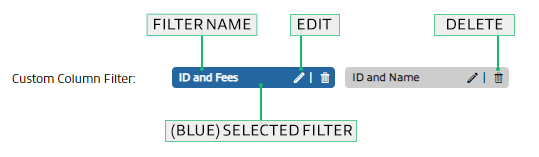
To modify the filter columns, select the
Edit
icon.To delete the filter, select the
Delete
icon.To apply the filter selection, select the filter name, then select
Details
to view columns associated with that filter.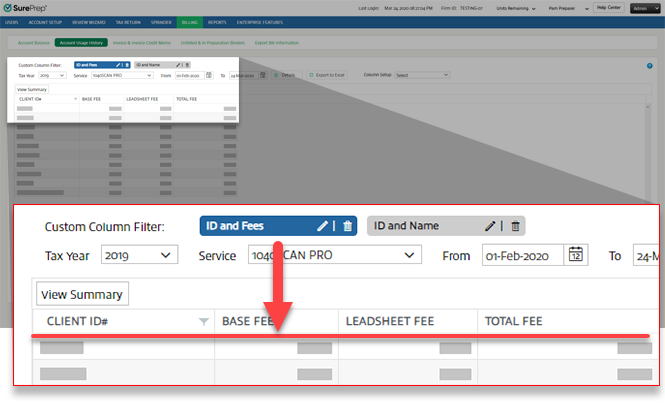
When the column filter is enabled,
Export to Excel
will only export columns that are currently selected by the filter. You can select the filter name to select/clear the filter, then select Export to Excel
to export the report.Export Account Usage History to Excel
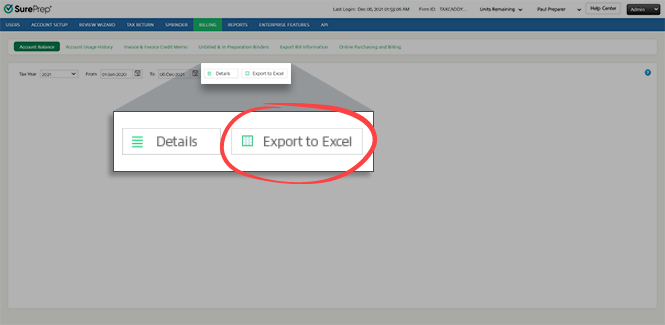
Before you export details, select the date range you want from the
From
and To
options. Select Export to Excel
.
Open the Excel file after it completes downloading. By default, all columns are exported.
note
Fees exported to the Excel file only reflect the fees currently in the specified date range. Any additional services performed in that date range will invalidate the exported Excel file as outdated.
When the column filter is enabled,
Export to Excel
will only export columns selected by the filter.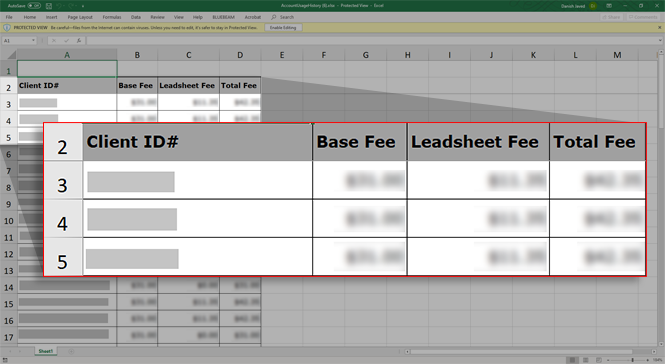
Related Content
-
1040SCANverify - due date calculations
Format: Article
-
SurePrep Outsource
Format:
Article
-
Bookmark Canadian forms
Format:
Article

