
Create binders in GoFileRoom
Before creating a new binder, follow the preparation steps in GoFileRoom by creating folders and adding documents.
After creating folders and adding documents, the
Create New Binder
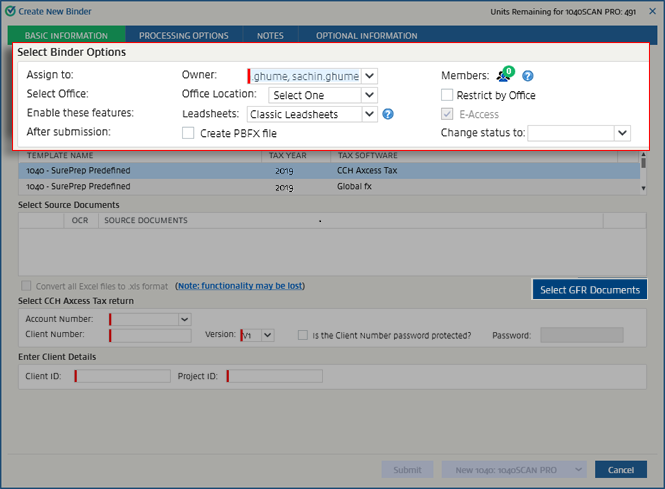
window will be available for you to do the following:- Go to theSelect Binder Optionssection and select basic settings such as the owner of the binder, the office location, and more.
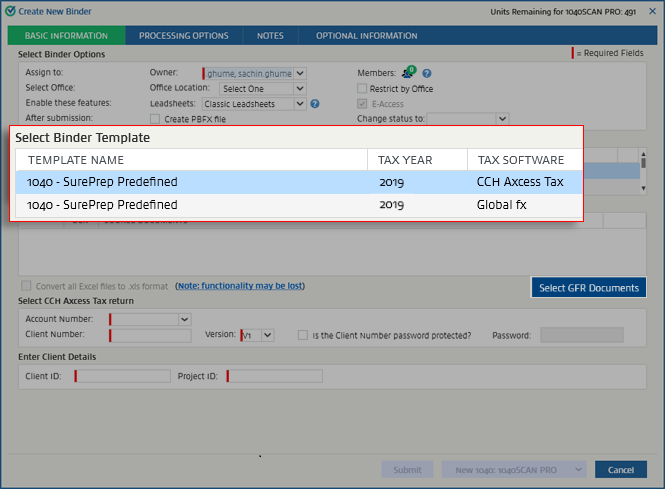
- Choose a binder template based on your tax software underSelect Binder Template. There are predefined binder templates based on tax software and binder type. You can add custom binder templates inFileRoom,Admin,SPbinder, thenBinder Template Setup.
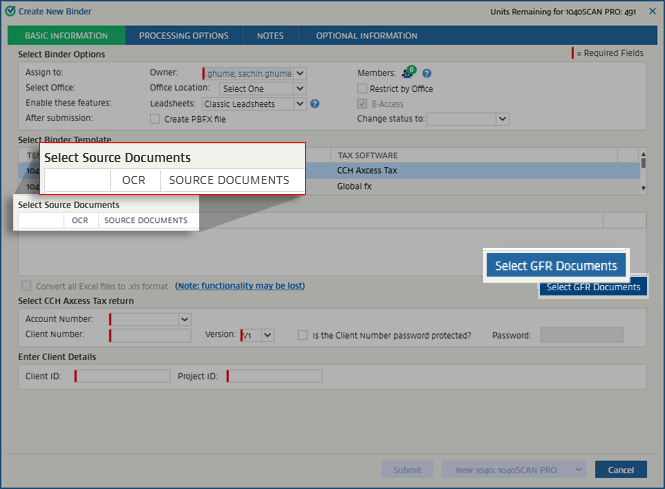
- SelectSelect GFR DocumentsunderSelect Source Documents. On the Select GFRDocuments For Workflowwindow, mark the checkbox next to each document you want to upload, then selectAdd Documents.noteExcel files with hidden sheets aren't supported. Delete the hidden sheets from the Excel files before uploading the files, make the hidden sheets visible before uploading the files, or don't upload those files.
 TheWarningscolumn on the right shows a message if the document isn't valid (for example, incorrect file format, password protected, damaged). Hover over the warning message to get a tooltip with the full text.
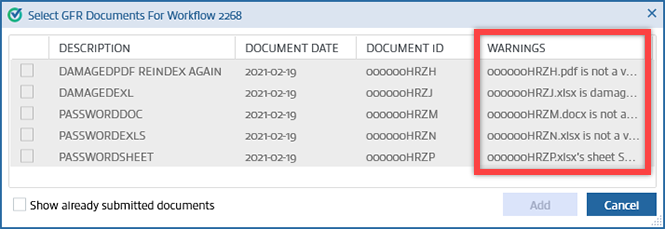 Point to the warning message to see a tooltip with the full text.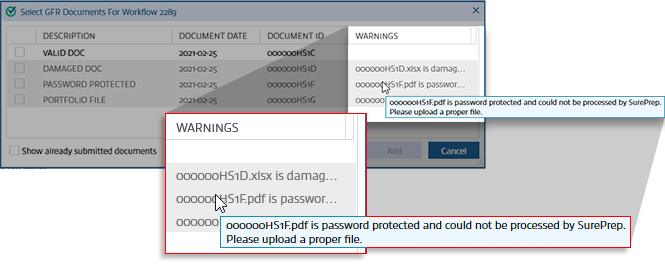
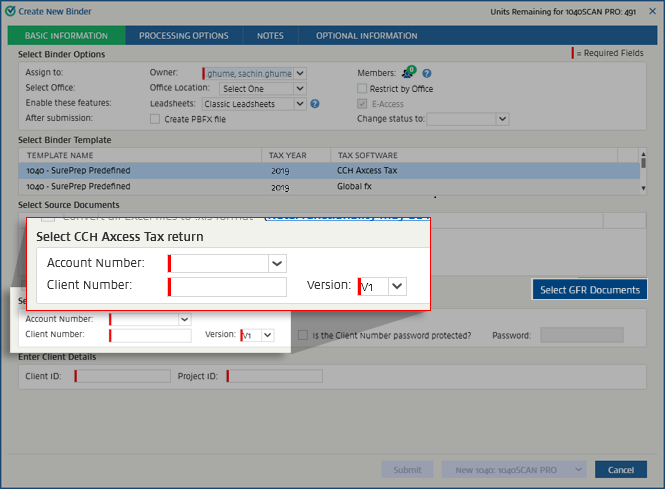
- You'll get a panel dependent on your tax software calledSelect (tax software name) return.
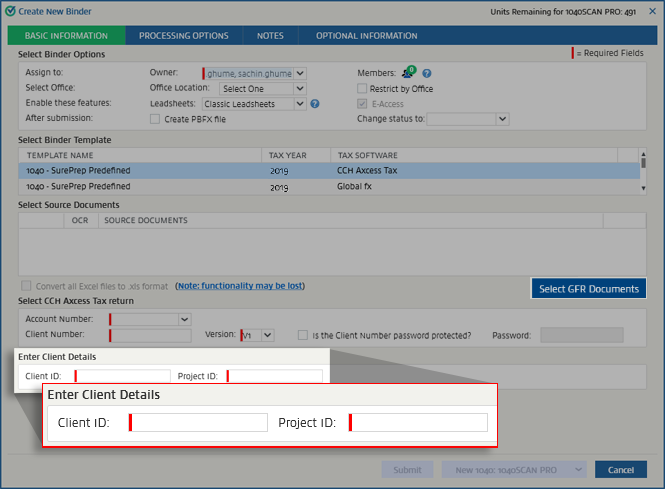
- Confirm the information underEnter Client Detailsat the bottom ofBasic Information.
- Select theProcessing Optionstab for additional settings related to processing the return.
- If you want to add notes to the binder, select theNotestab at the top.
- SelectOptional Informationto set additional information such as the client due date, estimated complexity, budgeted hours, password, and more.
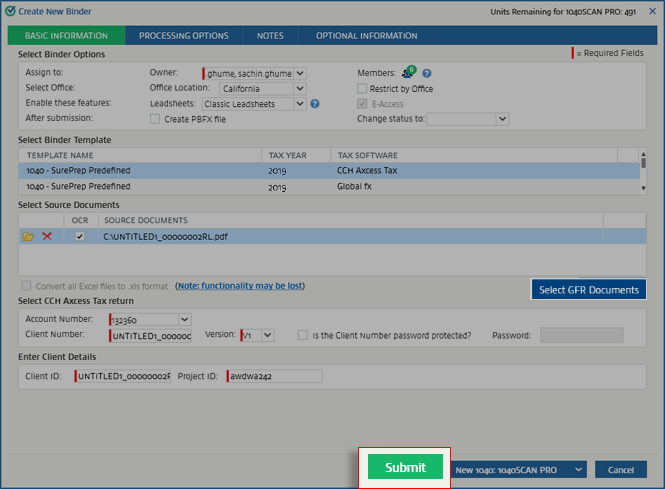
- Once you've set all the information, selectSubmit.
- You'll see theTax Folderin GoFileRoom now. The status next to the SurePrep button will change fromCreate EngagementtoIn Processing.
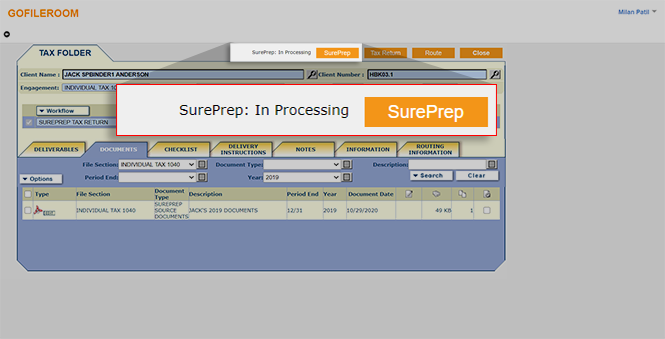
- You can go to theRouting Informationtab to view status change information such as:
- Step
- Responsible
- Assigned To
- Assigned Date/Time
- Completed Date/Time
- Priority
- Status
You can view either the Routing Summary or the Routing History.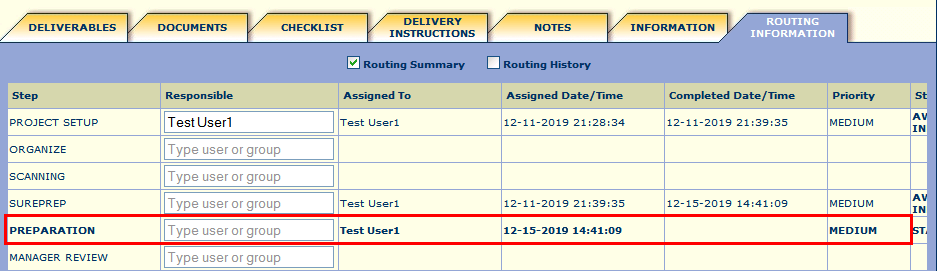
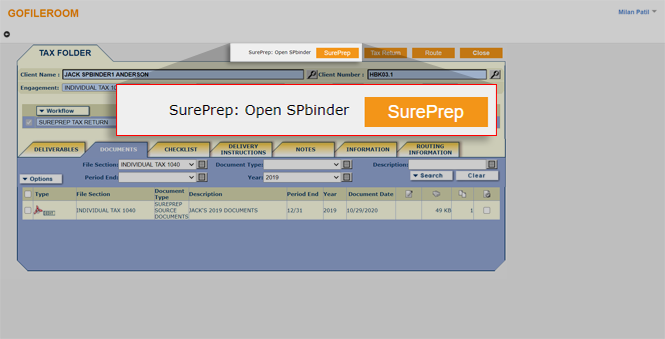
- For in-house binders, once the OCR processing is completed the status will bePending Review. For outsourced binders, once the return is verified, prepared, reviewed, and submitted back to the GFR dashboard by SurePrep, the status will beOpen SPbinder.
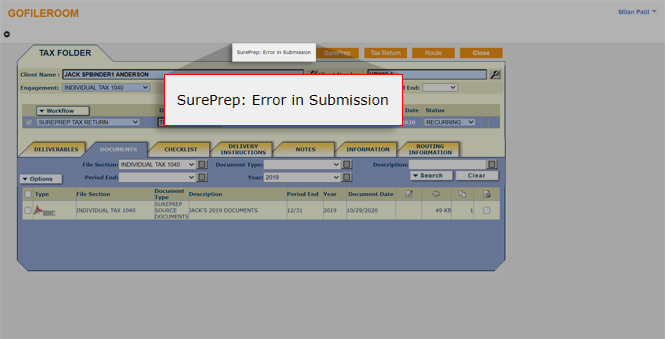
 If there are errors in the submission, theSurePrepbutton will readError In Submission. The owner will receive an email outlining the error. Correct the error, then selectSurePrepto resubmit.
 1040SCAN will process the standard documents. When completed, theSurePrepbutton will change toPending Reviewand the owner will receive an email notification. The workflow will be routed to Preparation.
- SelectSurePrepto review the return. For in-house returns, theReview Wizardwill open.
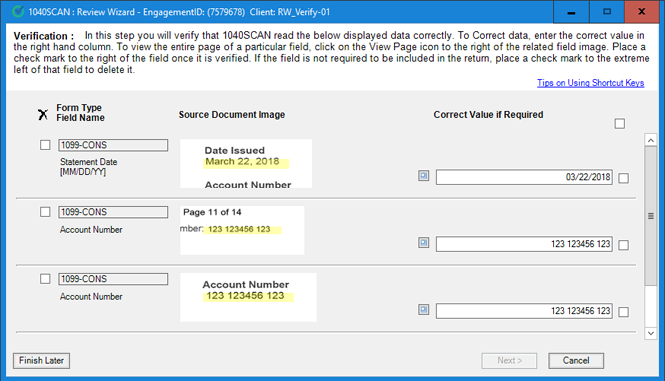 After the review steps have been completed, the status in GFR will change toOpen SPbinderFor outsource returns,SPbinderwill open. For in-house returns,SPbinderwill open after you complete the review steps.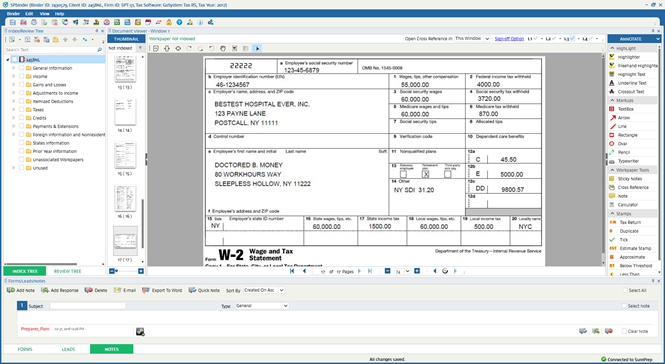
note
When a user creates a new binder from GoFileRoom, their account is automatically created in FileRoom Account Admin if it does not exist. These users with TR Accounts can also seamlessly sign in to SurePrep FileRoom, if needed.

