Before you can create folders and add documents, you'll need to verify workflow type:
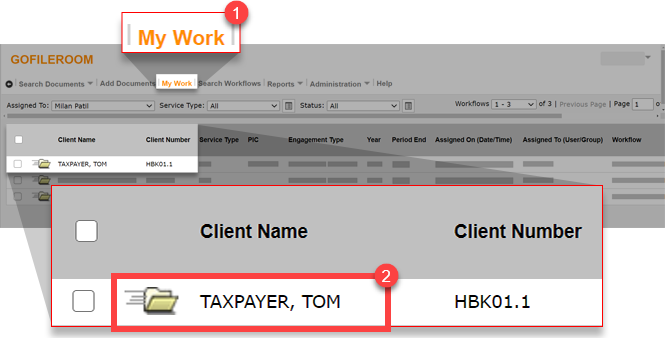
Select
My Work
then go to the Client Name column.
Select the folder of the client you need. The client name will display with last name followed by first name.
On the Tax Folder screen, go to the
Workflow
dropdown and make sure it's set to
SurePrep Tax Return
.
If the workflow isn't set to
SurePrep Tax Return
, change it to
SurePrep Tax Return
before proceeding. Change the route to self and update.
Create a folder and add documents
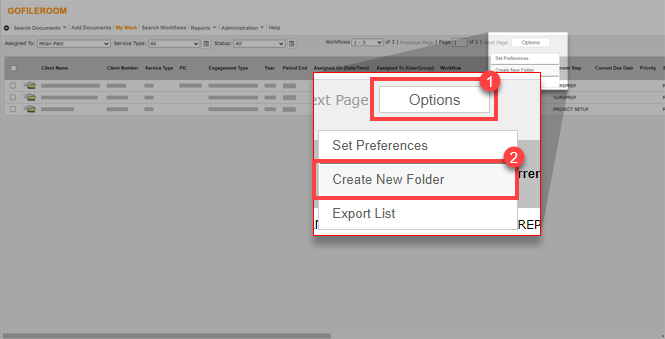
In
GoFileRoom
, select
My Work
.
Select
Options
then
Create New Folder
.
Select the service type, then select
OK
on the
Create New FirmFlow Folder
window.
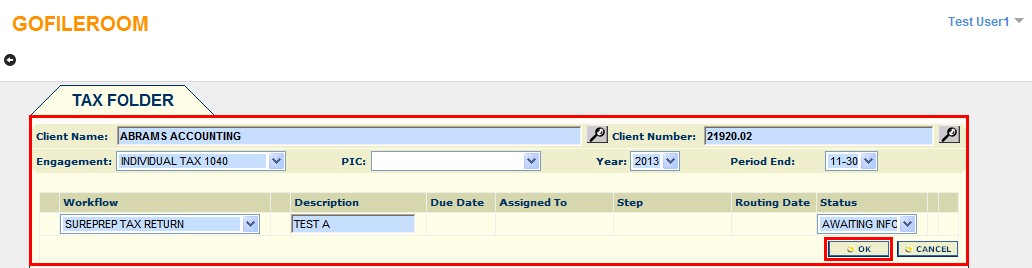
In
TAX FOLDER
enter the following details then select
OK
.
Client Name
Client Number
Engagements
PIC
Year
Period End
Workflow
Description
Due Date
Assigned To
Step
Routing Date
Status
A confirmation window opens that says "Your folder has been created." Select
OK
.
On the
Documents
tab, select
Options
then
Add
. This will allow you to add GFR documents to be submitted to SurePrep for processing.
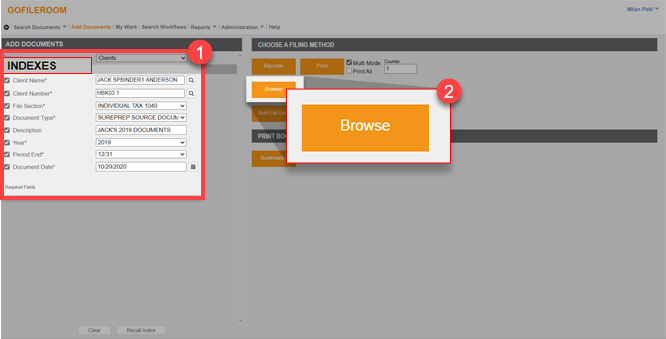
Go to the
Indexes
section and enter the information for the following:
Client Name
Client Number
File Selection
Document Type: Must be
SurePrep Source Documents
Description: Enter a description to make it easier to identify documents in the
Create New Binder
window.
Year
Period End
Document Date
Select
Browse
when you're done.
note
If you're using Barcodes, create and print the Barcode. Documents scanned and uploaded to GFR will also be available to submit to SurePrep.
On the
Upload a Document
window, select
Browse
. Select the documents to upload then select
OK
.
The files will now upload. You might get a screen that indicates the files are uploading.
After the documents have been uploaded, select the back arrow to return to
Tax Folder
.
Select
SurePrep
to create a new binder and submit the added documents.
Open the PBFX file.
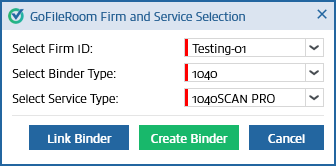
The
GoFileRoom Firm and Service Selection
window will open. Make the selections you need in the
Select Firm ID
,
Select Binder Type
, and
Select Service Type
dropdowns.
To create a new binder, select
Create Binder
. The SurePrep Create New Binder window will open.
To link to an existing binder, select
Link Binder
.
The
Link Binder
window opens. Enter the
SP Client ID
,
Client Name
,
Binder ID
,
Tax Client ID
,
Service
,
Tax Software
,
Tax Year,
or
PSProject
of the binder in the search box. You'll need to include at least 3 characters.
Use the dropdown to specify the column where the search should be performed, then select
Go
.
The binders matching the search criteria will be displayed. You can also use the filter option for each column to further filter the specific binder.
note
Binders won't appear in the
Link Binder
window if they are in
Awaiting Submission
status, have caution icons next to them in the
Fileroom
, not assigned to as owners, or don't have the 7216 consent.
Select the binder row to select it, and then select
Link
.
he
Link Binder
window will appear once the binder has been linked. The binder
Status
will be on the bottom left of the window. To open the binder, select
Open Binder
.
note
Open Binder
isn't available if the binder is in SP Processing status. Once the binder is linked successfully, an email notification will be sent to the owner of the return.
The status of the linked binder will be displayed in the
Tax Folder
window. You can now open the linked binder from GoFileRoom.
note
If you accidentally linked a binder that you didn't intend to link, contact SurePrep Support to unlink the binder.


 to return to