When you outsource returns to SurePrep for full preparation, you need to provide a copy of your tax software file. You also need a folder to download and store the completed tax software files submitted by SurePrep after preparation.
Select a network location to save your SurePrep information. Select a location that is easily accessible by all internal staff that will access data sent to and received from SurePrep.
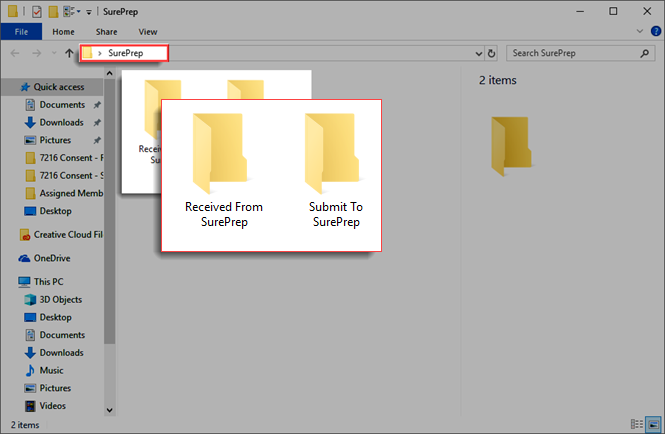
Create a main folder that will store all SurePrep information named
SurePrep
.
Within
SurePrep
, create a folder called
Submit To SurePrep
. This is a central location used to store all documents and tax files ready to upload to SurePrep.
Create a 2nd folder within
SurePrep
called
Received From SurePrep
. This is a central location used to save all workpapers and files received from SurePrep.
In each subfolder (
Submit To SurePrep
and
Received From SurePrep
), create folders for each client whose tax return is to be outsourced to SurePrep.
The folder name for each client should be the same as the client number of that client’s tax file in Lacerte.
This is the folder where the backup of Lacerte tax files will be held for the clients.
note
If you already have an individual client data structure set up on your network, you may continue to use that structure to store your clients' source documents.
Saving Lacerte Outsource paths
Follow these steps to save Lacerte Outsource paths:
Go to
FileRoom
,
Admin
,
Account Setup
, then
Tax File Activation
.
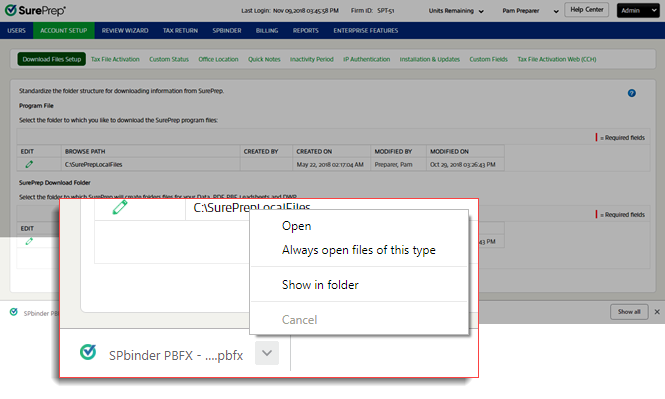
Open the PBFX file once it completes the download.
When the
Tax File Activation
window appears, select the
Lacerte
tab.
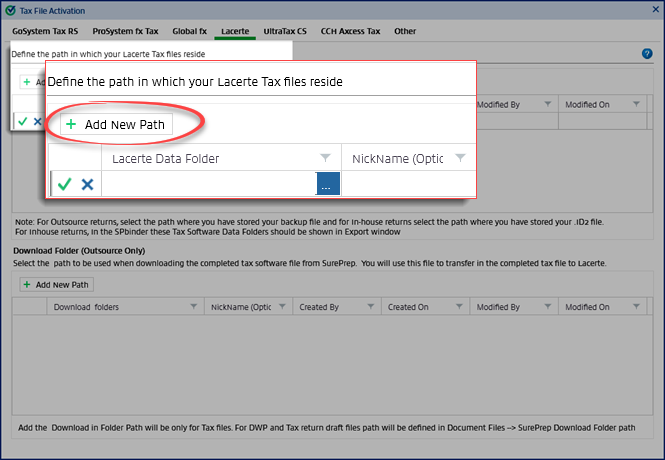
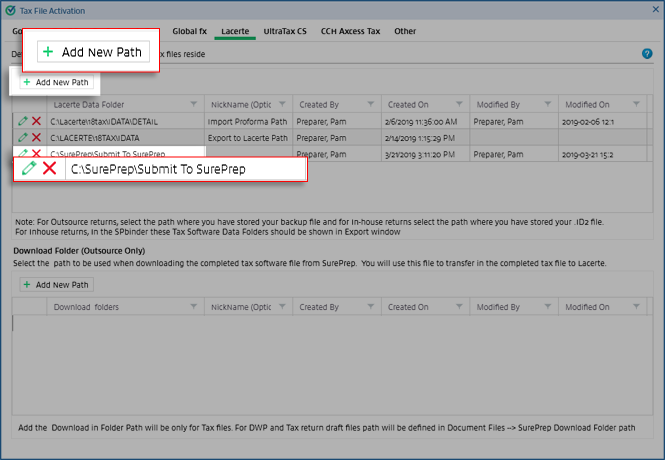
On the top, select
Add New Path
to set the network folder location where the Lacerte software files are stored prior to uploading. A new blank row will appear.
Select the
Browse
icon to select the path.
Select the path to the
Submit To SurePrep
folder created earlier.
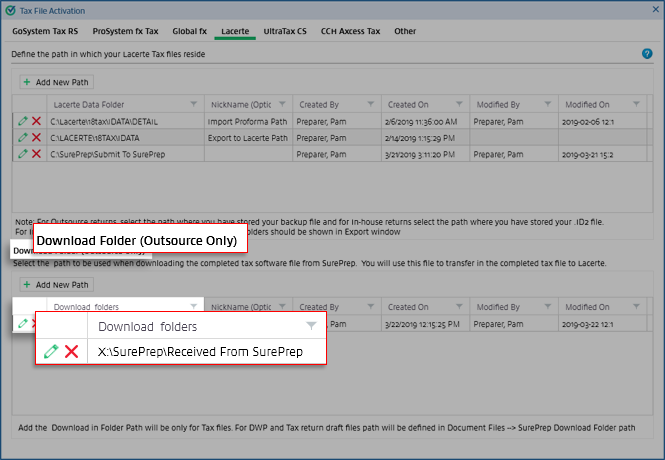
Under
Download Folder (Outsource Only)
select
Add New Path
, then select the path to the
Received From SurePrep
folder.
note
The download folder path for Outsource returns can never be a local folder path. It will always be a network path.