
Canon DR-C240 with Capture Perfect 3.1
You can use Capture Perfect 3.1 to create PDF files for 1040SCAN. After installing Capture Perfect 3.1, follow these steps:
- To open Capture Perfect 3.1, select .

- On theScanmenu, selectSelect Scanner.

- When theSelect Scannerwindow appears, selectCanon DR-C240and selectOK.

- On theScanmenu, selectScanner Setting
 Adjust the following settings on theScanner Settingwindow:Color mode:Advanced Text EnhancementPage Size:LetterDots per inch:300 dpiScanning Side:Simplex
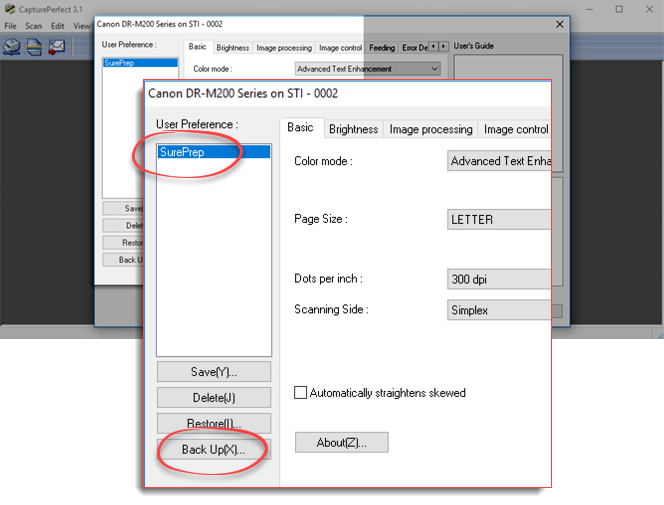 noteThe Duplex scanning side doesn’t work with these settings. SurePrep works with Canon Support to accomplish the optimum scanning result.
 - Select theBrightnesstab, then select theGammabutton.

- When theGamma Settingswindow appears, adjust the following settings, then selectOK.Custom:Select the checkSelect(from the dropdown):Front - GrayInput method:Factor 1.8

- Select theImage processingtab, then adjust the following settings:Character Emphasis:CenterColor drop-out:NoneMoire Reduction: NoneCharacter Emphasis:LowRemove Shadow:Select the checkErase Dot: Select the check

- Select theFeedingtab, then adjust the following settings:Double Feed Detection:Detect by UltrasonicFeeding Option:Standard FeedingCarrier sheet(b):None

- Select theOtherstab, then adjust the following settings:Documentation Orientation:0 degreesBatch Separation:NoneCompression ratio for saving:75Rapid recovery system:UncheckUse MultiStream:Uncheck

- Once the settings are done, selectSave.

- TheSave User Preferencewindow will appear. EnterSurePrepand selectOK.

- SelectOKat the bottom of the screen to save these settings for your SurePrep profile.

- On theScanmenu, selectScan Batch to file.

- Save the file to the desired location.

- The saved PDF (Test Scan Pages) will appear at the selected location.


Related Content
-
Canon scanner setup
Format: Article

