
Fujitsu Ricoh FI- 8170 scanner setup instructions
note
If you don’t have the driver, you can download it from: http://imagescanner.fujitsu.com/global/dl/
PaperStream Capture can be used to create PDF or TIFF files of your client’s source documents to be uploaded to SurePrep.
Complete the installation of PaperStream IP drivers. Then follow these instructions to select the driver:
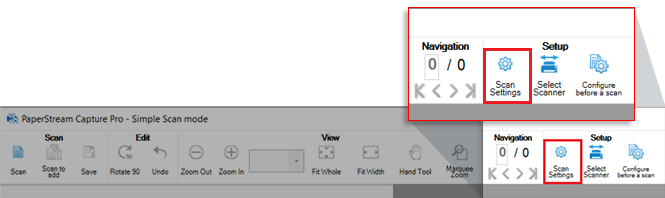
Open PaperStream Capture and select
Switch Modes
.
Select
Select Scanner
then PaperStream IP FI-8170
.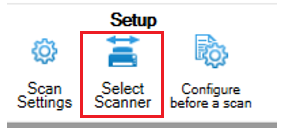
Then select
Scanner Settings
.
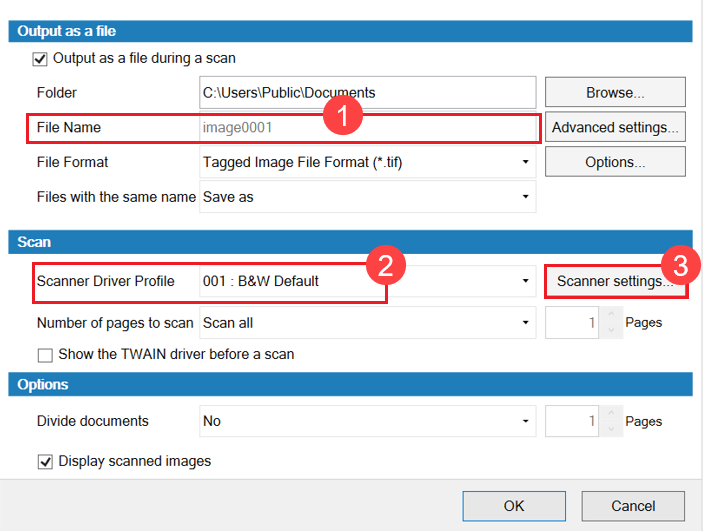
- Enter theFile Name(that is, default naming scheme)
- In theScanner Driver Profilefield, select001 : B&W Default
- SelectScanner settingsnext to theScanner Driver Profilefield.
In the Scanner Settings window, select the
Basic
tab to expand the settings.
For
Image Mode
select Black & White
. 
For
Paper Source
select Feeder (Both Sides)

Resolution
select 300 dpi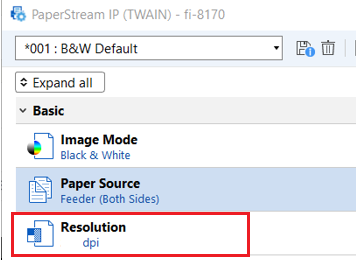
For
Paper Size
select Letter
or Legal
depending on document size. 
Select
Off
for Carrier Sheet
and Front/Back Merging

Select the
Image
tab to expand the settings.
For
Black & White Method
select Dynamic Threshold (iDTC)
.For
Tone adjustment
select Automatic (Default and grayed out)
.
For
Cleanup
turn it On
and adjust the following:- Character Thicknessshould be zero (0)
- Character Augmentationshould be zero (0)
- Noise Removalshould be zero (0)
- Background Pattern removalshould beHigh
- The White Level Followershould beAutomatic

In the
Image
tab:- Vertical streaksareOff.
- Dropout ColorisWhite
- Inverted ImageisOff

Select the
Page
tab to expand the settings.
Select
Cropping
. Then select None
in the Cropping
section, and Black
in the Background
section.
Turn
Split image
off and select Rotation
to 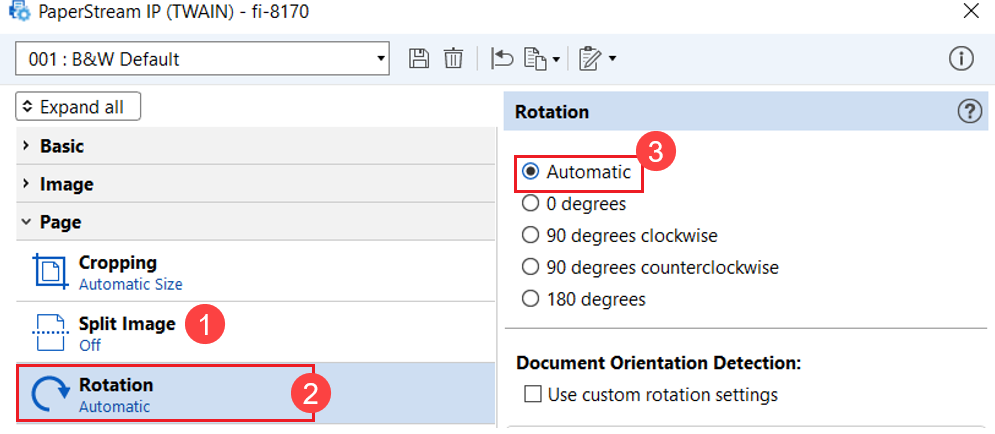
For
Edge Correction
, make sure Edge Repair
and Edge Filler
are off.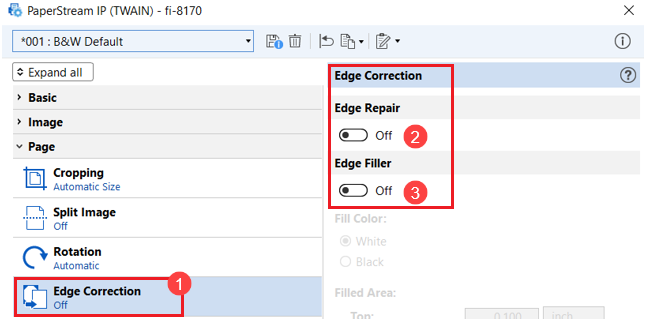
Turn
Hole Punch Removal
on and select White
for Filled color and Standard
for Mode.
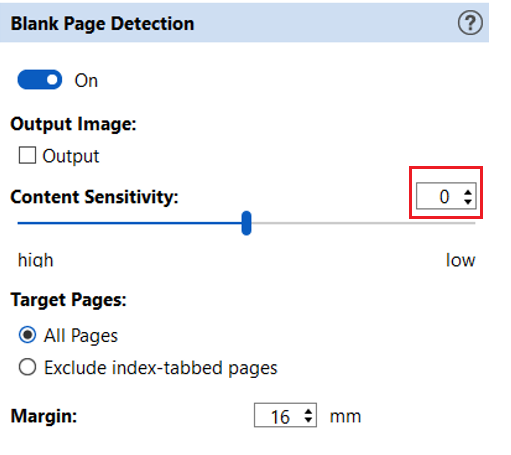
Turn
Blank Page Detection
on and set Content Sensitivity
to zero (0).
Select the
Page Feeding
tab to expand the settings.
Set
Manual Feed Mode
to Hardware Setting
.
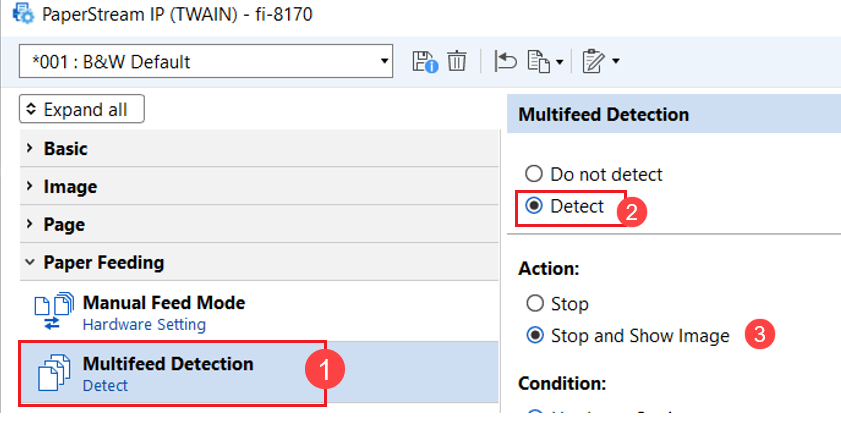
Set
Multifeed Detection
to Detect
. In the Action
section, select Stop and Show Image
. In the Condition
section, select Hardware Setting
.
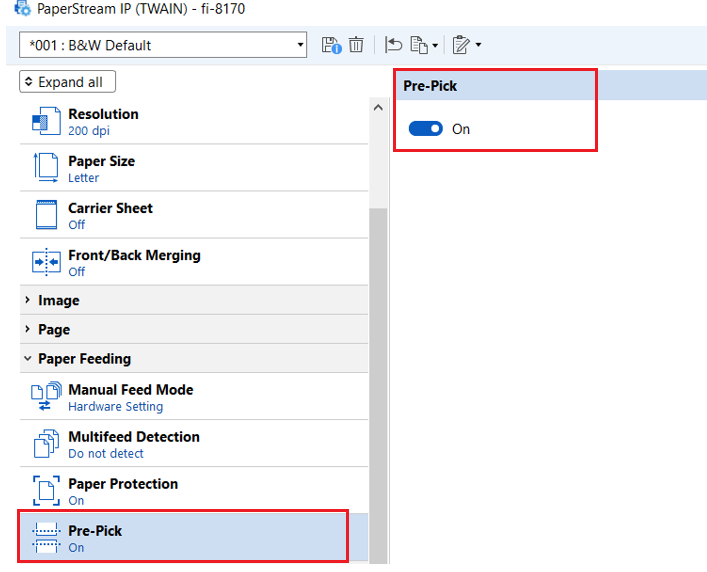
Turn
Paper Protection
and Pre-Pick
to On
.
Select
Batch
tab to expand the settings.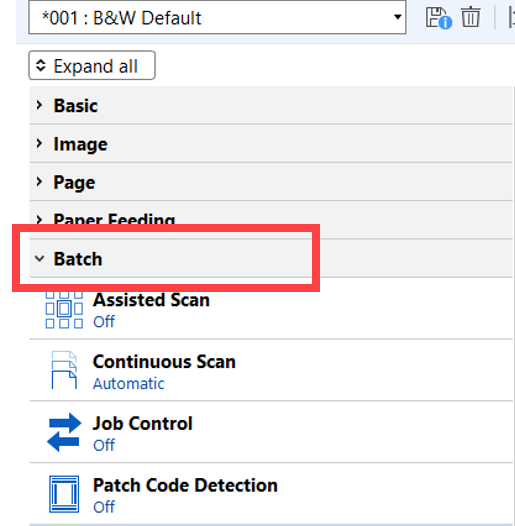
Use the table to determine what to select for the following settings.
Batch Setting | Select |
|---|---|
Assisted Scan | Off |
Continuous Scan | Automatic |
Job Control | Off |
Patch Code Detection | Off |
Barcode Detection | Off |
Automatic Profile Selection | Off |

Select the
Endorser
tab to expand the settings, and set Digital Endorser
to Off
.
On the toolbar, select the
Save
icon to save the settings and create a profile.On the
Save Profile
window, enter SurePrep
in the Profile name
field, then select OK
.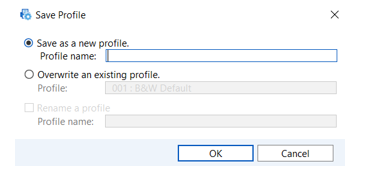
The SurePrep profile is ready to use.
Related Content
-
Fujitsu scanner setup
Format: Article