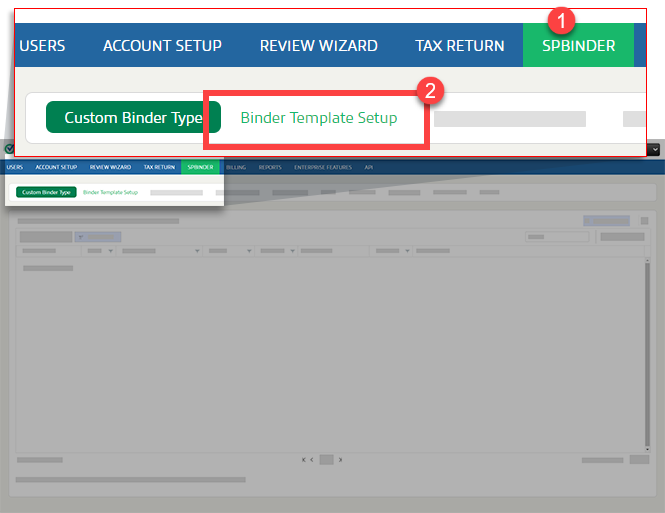
Binder Template Setup
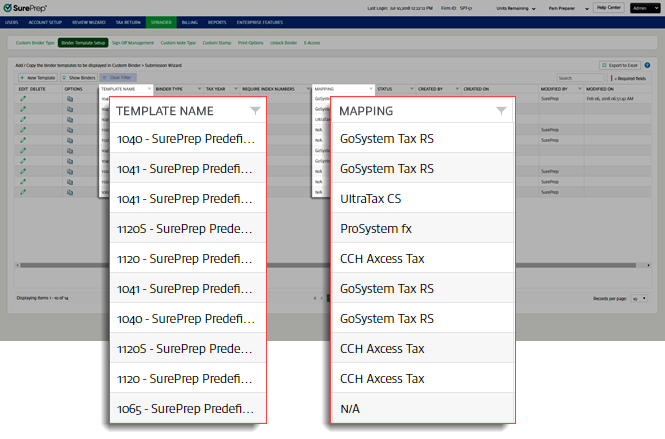
SurePrep Predefined Templates
SurePrep lets you use predefined templates, or create custom templates of your choice.
Predefined templates are available for binder types 1040, 1041, 1065, 1120 and 1120S for each of the following tax application GoSystem Tax RS, Lacerte, UltraTax CS, UltraTax CS (Virtual Office CS or SaaS), Others, and CCH Axcess Tax. You can choose the template corresponding to the tax application that you use.
You'll only be able to view the predefined templates for the tax application that your company uses. Predefined binder templates can't be edited or deleted.
Creating a New Binder Template:
Creating a new binder template will let you create new binders with pre-existing Index and source documents of your choice. These custom binder templates can be used for multiple binders in FileRoom, saving you the effort of creating a new index for each binder.
Follow these steps to create a new binder template:
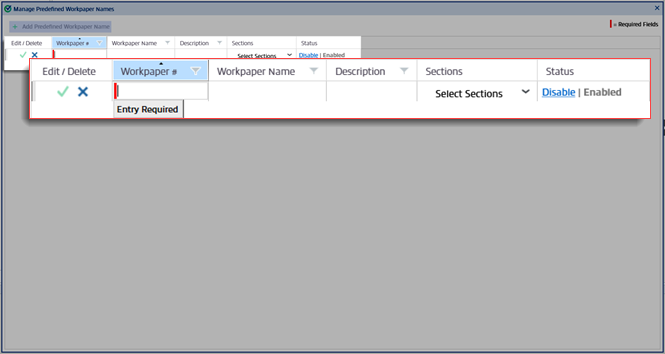
Select the
New Template

button. A blank row will be added.
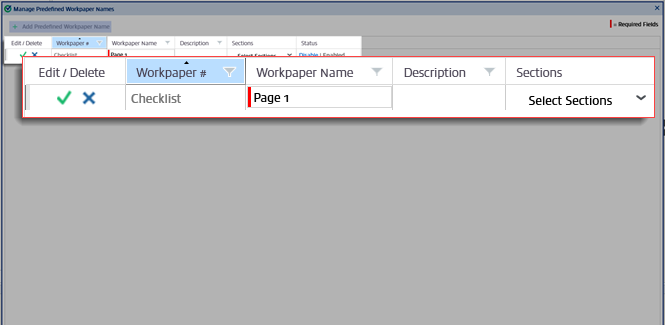
Enter the required fields marked with a red line

.
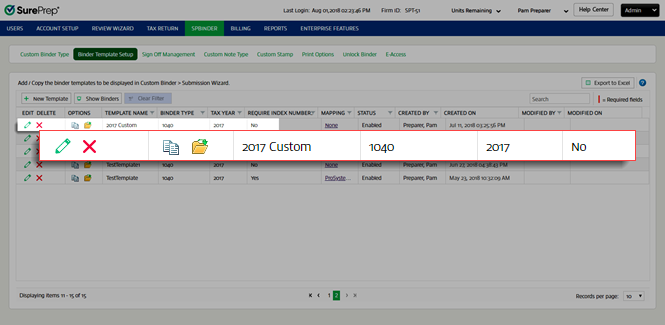
Template Name:
Enter the Template name here.
The binder
Template Name
should be unique. No 2 templates with the same name can be created.
Binder Type:
Choose the binder type from the dropdown.
Apart from the predefined binder types, the dropdown will also include the binder types added through the
Custom Binder Type
tab.
Tax year:
Select the proper tax year from the dropdown.
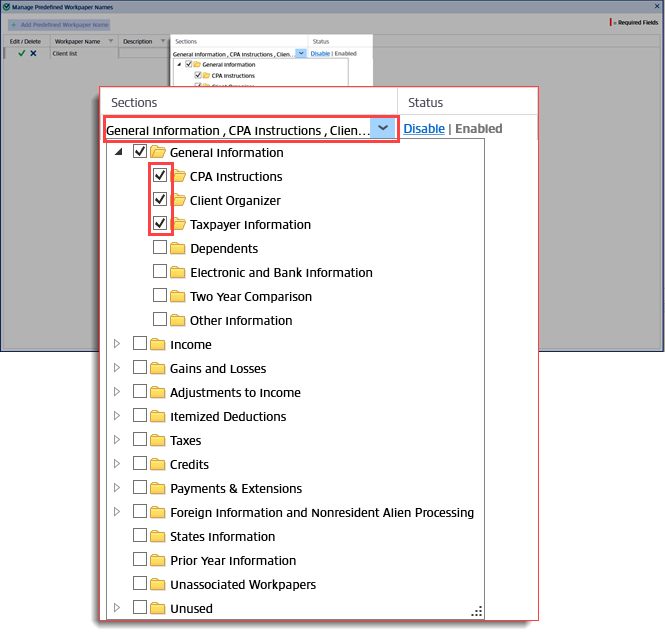
Required Index numbers:
If you require an index number with an index name, select
Yes
from the
Require index numbers
dropdown.
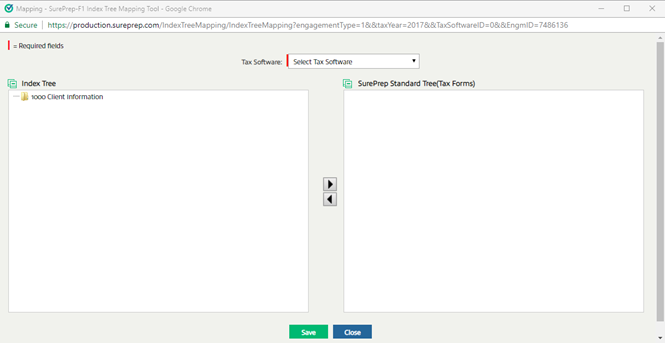
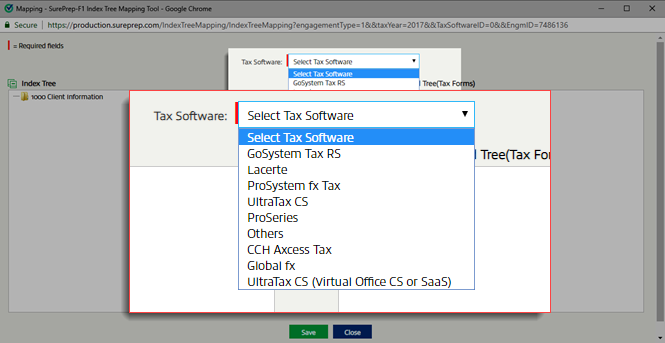
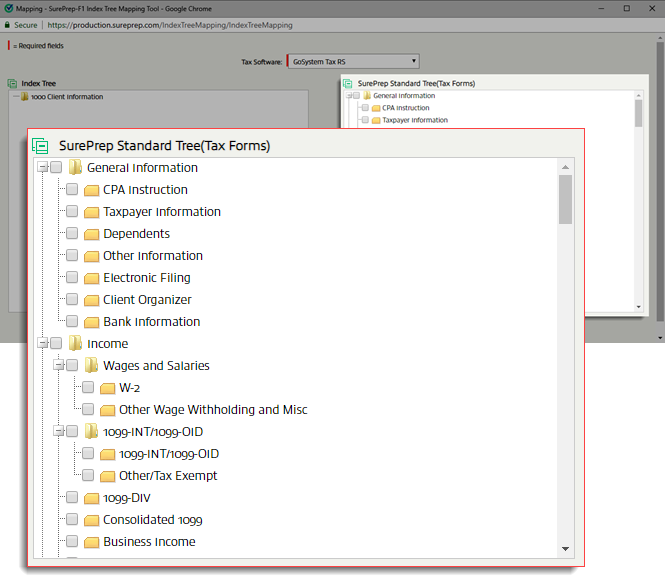
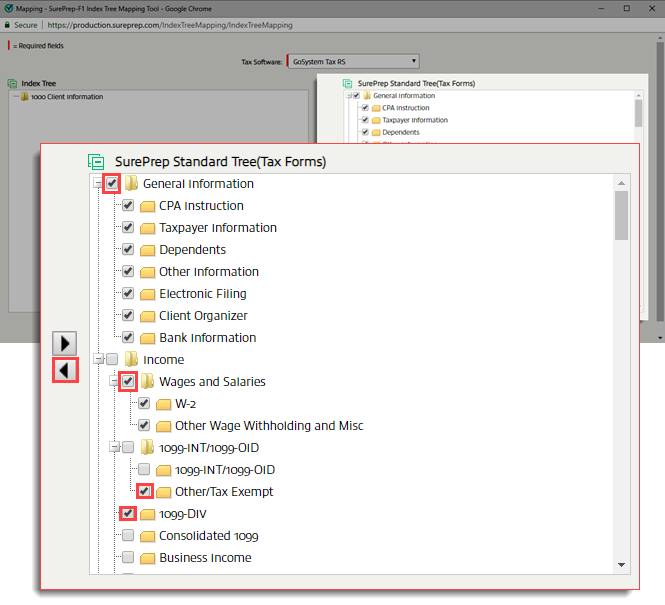
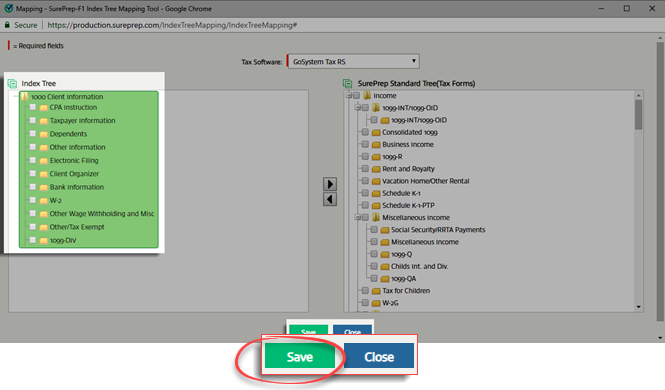
Mapping:
Once you save the new template, this column will display a link.
Select here to know more about mapping.
You can't do mapping for a custom binder. Hence, this column displays
N/A
(Not Applicable) when the binder type selected is Custom binder.
Status:
Select the status from this column as
Enabled
/
Disabled
. If the status is
Enabled
, only then the binder template will be displayed in the
Create New Binder
window.
Select the
Save
icon

to save the details. Select the
Cancel
icon

to close without saving any changes.
Created By
and
Created On
fields will be auto-populated.
If a required field
is not completed before you select the
Save
icon

, a reminder message will appear after the required field.
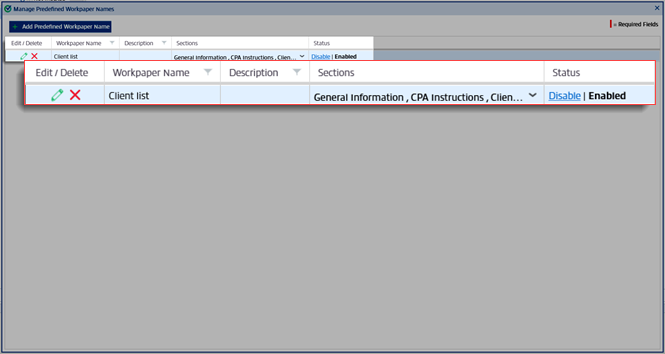
Once you select the
Save
icon
, the new binder template will be added to the
Binder Template Setup
table.
If you don’t see your template added to the table, select the next page
>
button to view the rest of the table.
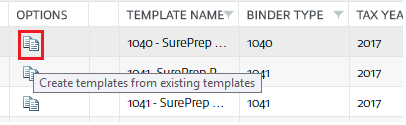
Creating Templates from Existing Templates:
Select the existing template you want to copy and select the
Copy

icon.
Before using this template to create a new binder, select the Mapping link and ensure that the mapping is done properly. The
Template Name
,
Tax Year
, and
Status
column will be auto-populated and defaulted to the original binder. You may change the selection as required.
Change the
Template Name
to a new name.
Binder Type
and the
Require Index Numbers
column will be auto-populated and uneditable.
Select the
ave
icon
to save the details.
The created binder template will be added to the
Binder Template Setup
table.
This screen will only let you customize the engagement types. SurePrep-defined templates will be available in
FileRoom
,
Create New Binder
window.
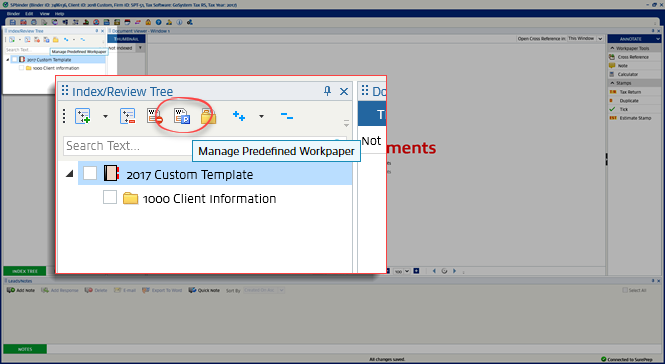
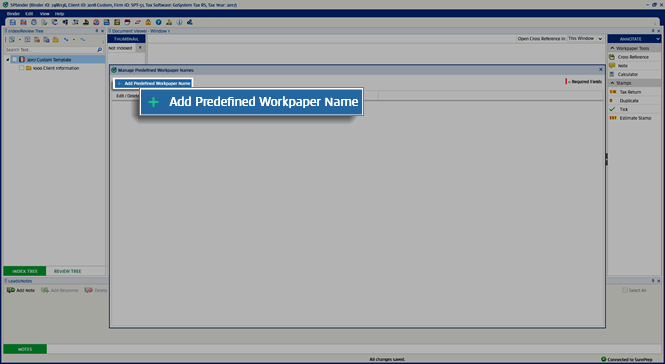
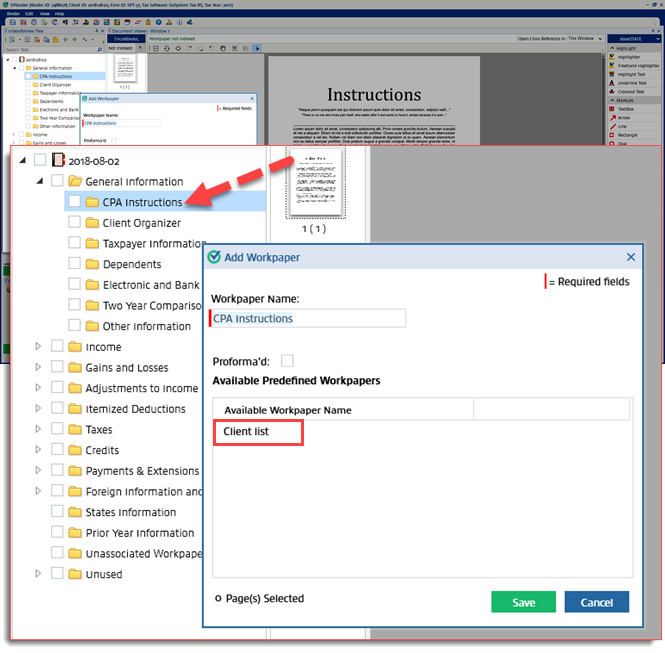
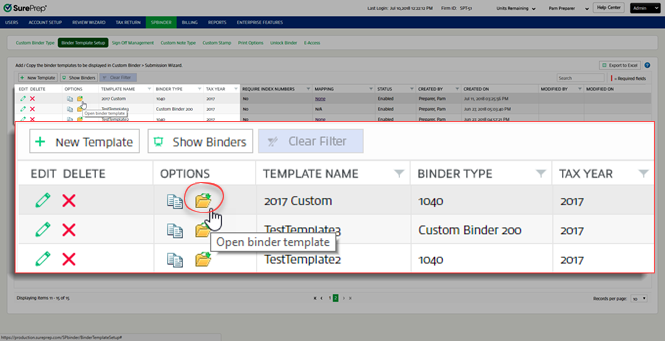
Opening a binder template will let you create Index sections and add source documents for future binders.
To open a custom binder template, select the
Open

icon under the
Options
column. This will download a SPbinder file from your browser.
You can't open and edit the SurePrep Predefined Templates.
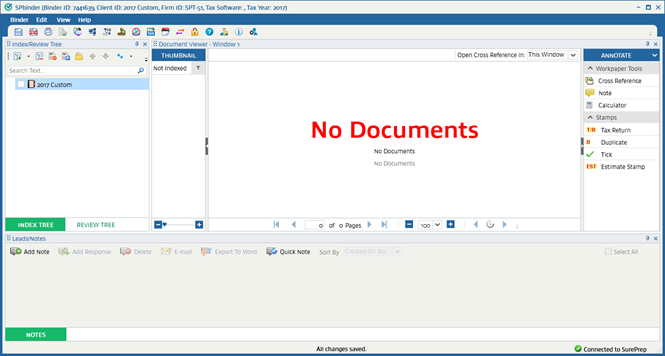
Select the downloaded SPbinder file to open SPbinder.
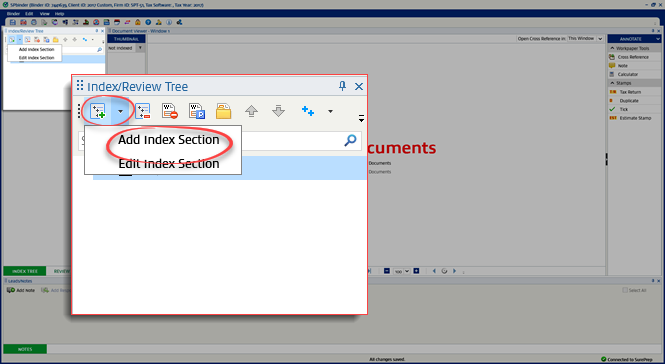
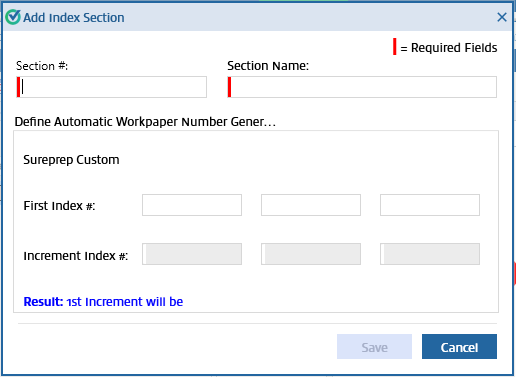
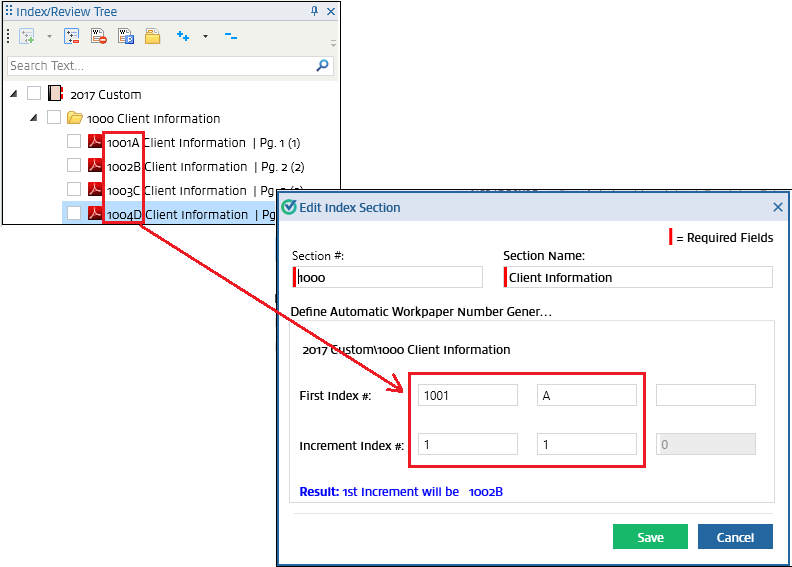
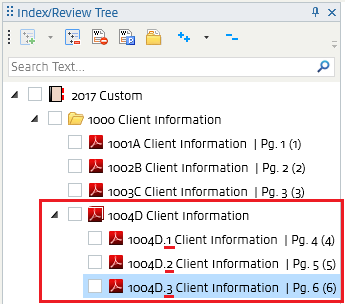
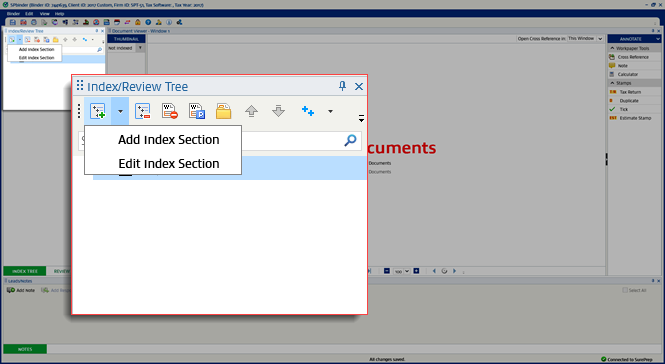
You can now create an index by adding folders and subfolders in the Index tree.
You can drag-and-drop additional documents to the template to be used in multiple binders.
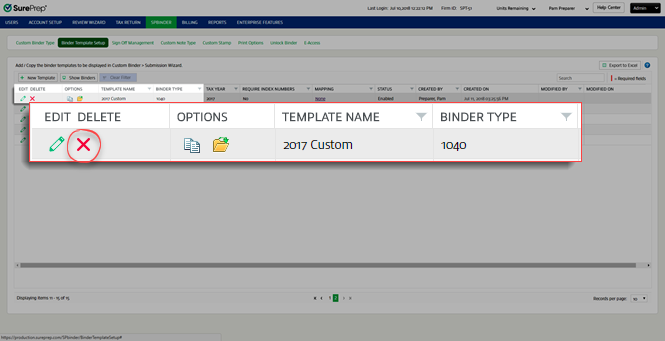
To delete a binder template, select the
Delete
icon

.
A
Binder Template Setup
window will appear. Select
Yes
to delete the template. Select
No
to cancel deleting the template.
To view binders created using templates, select
Show Binders
. All binders created in the FileRoom will be listed in this window. To revert back to templates, select
Show Template
.
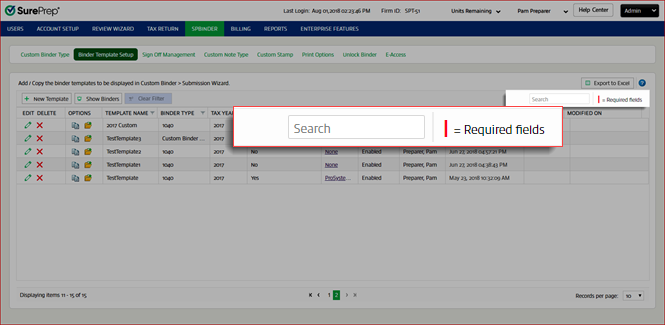
The
Clear Filter
button removes all filters that have been either applied on individual columns or when the search option has been used.
The
Clear Filter
button turns on when the filters are applied on columns or when the search field is used for searching a specific row. Otherwise, it remains inactive or grayed out.
To export data from the
Binder Template Setup
tab to Excel, select
Export to Excel
.
Select
Open
to open the Excel file. Select
Save
to save the Excel file to a specific location before opening it.
If you want specific data to be exported, use the search and/or filter functionality on individual columns, then select
Export to Excel
.
The Export to Excel, Clear Filter, and Search functionality is also available for the
Show Binders
section under
Binder Template Setup
tab.
Use the search field

to search for data. The search functionality applies to the following columns under the
Custom Binder Type
tab:


 beside