Binder Template Setup
Learn how to create, manage, map, and customize binder templates and predefined workpapers in SPbinder.
SurePrep provides predefined templates for SPbinder, but you can also create your own. By creating your templates, you can customize how a binder's index folders will look like in the
INDEX TREE
.To configure or create a binder, go to .
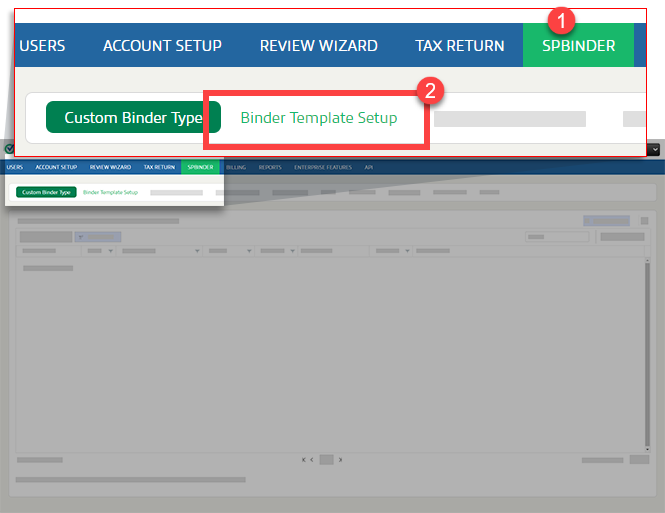
Binder Template Setup
SurePrep Predefined Templates
SurePrep lets you use predefined templates, or create custom templates of your choice.
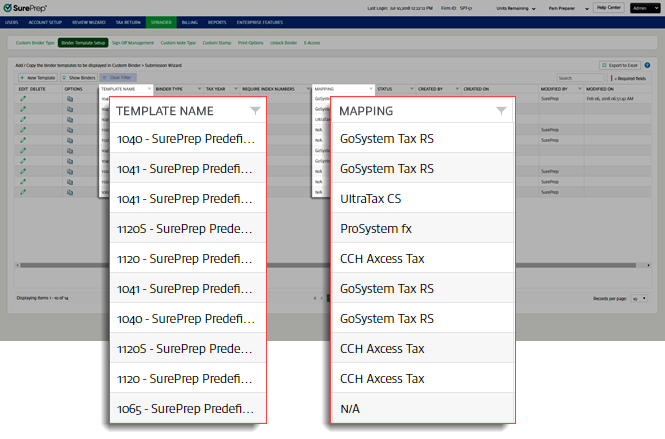
Predefined templates are available for binder types 1040, 1041, 1065, 1120 and 1120S for each of the following tax application GoSystem Tax RS, Lacerte, UltraTax CS, UltraTax CS (Virtual Office CS or SaaS), Others, and CCH Axcess Tax. You can choose the template corresponding to the tax application that you use.
note
- You'll only be able to view the predefined templates for the tax application that your company uses. Predefined binder templates can't be edited or deleted.
Creating a New Binder Template:
Creating a new binder template will let you create new binders with pre-existing Index and source documents of your choice. These custom binder templates can be used for multiple binders in FileRoom, saving you the effort of creating a new index for each binder.
Follow these steps to create a new binder template:
- Select theNew Template
 button. A blank row will be added.
 - Enter the required fields marked with a red line
 .
Details for each column:
.
Details for each column:- Template Name:Enter the Template name here.noteThe binderTemplate Nameshould be unique. No 2 templates with the same name can be created.
- Binder Type:Choose the binder type from the dropdown.noteApart from the predefined binder types, the dropdown will also include the binder types added through theCustom Binder Typetab.
- Tax year:Select the proper tax year from the dropdown.
- Required Index numbers:If you require an index number with an index name, selectYesfrom theRequire index numbersdropdown.
- Mapping:Once you save the new template, this column will display a link.Select here to know more about mapping.noteYou can't do mapping for a custom binder. Hence, this column displaysN/A(Not Applicable) when the binder type selected is Custom binder.
- Status:Select the status from this column asEnabled/Disabled. If the status isEnabled, only then the binder template will be displayed in theCreate New Binderwindow.
- Select theSaveicon
 to save the details. Select the Cancelicon
 to close without saving any changes. Created ByandCreated Onfields will be auto-populated.noteIf a required field is not completed before you select the Saveicon
 , a reminder message will appear after the required field.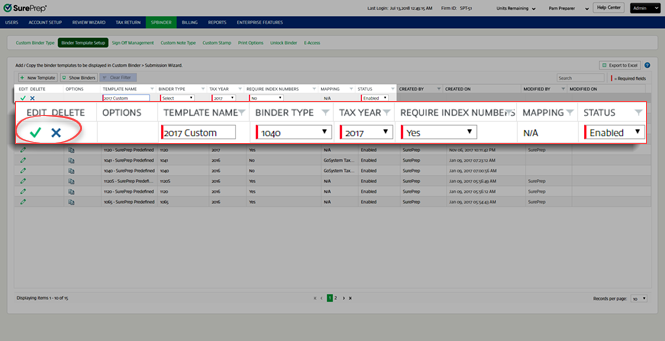
- Once you select theSaveicon, the new binder template will be added to the Binder Template Setuptable.noteIf you can't view your template added to the table, select the next page>button to view the rest of the table.
Creating Templates from Existing Templates:
- Select the existing template you want to copy and select theCopy
 icon.
icon.
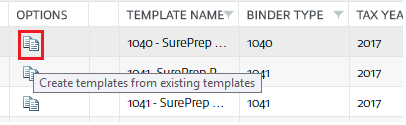 noteBefore using this template to create a new binder, select the Mapping link and ensure that the mapping is done properly. TheTemplate Name,Tax Year, andStatuscolumn will be auto-populated and defaulted to the original binder. You may change the selection as required.
 - Change theTemplate Nameto a new name.Binder Typeand theRequire Index Numberscolumn will be auto-populated and uneditable.

- Select theSaveicon to save the details.
- The created binder template will be added to theBinder Template Setuptable.noteThis screen will only let you customize the engagement types. SurePrep-defined templates will be available inFileRoom,Create New Binderwindow.
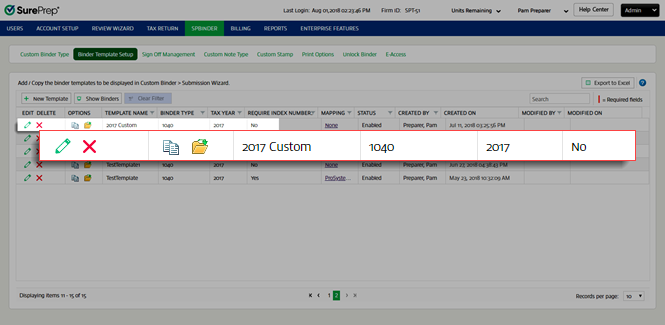
Open a binder template
Opening a binder template will let you create Index sections and add source documents for future binders.
To open a custom binder template, select the  icon under the
Open
icon under the Options
column. This will download a SPbinder file from your browser.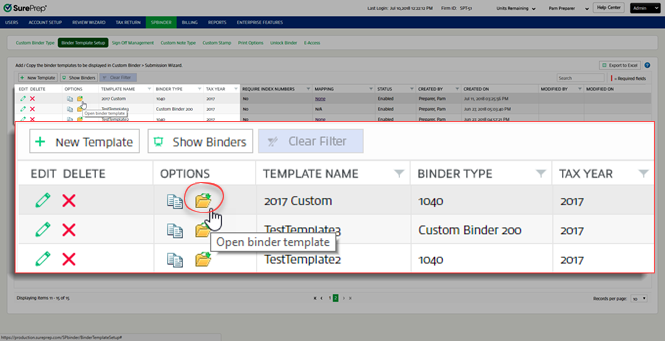
note
You can't open and edit the SurePrep predefined templates.
Select the downloaded SPbinder file to open SPbinder.
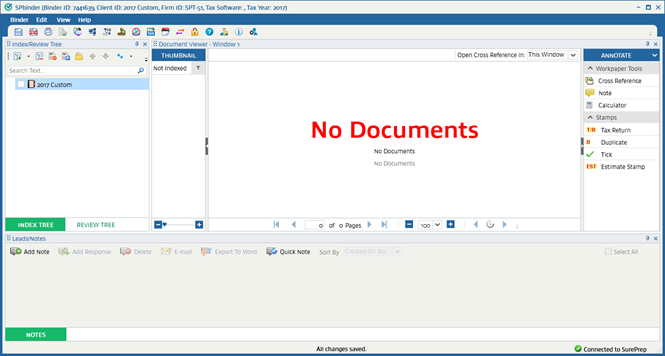
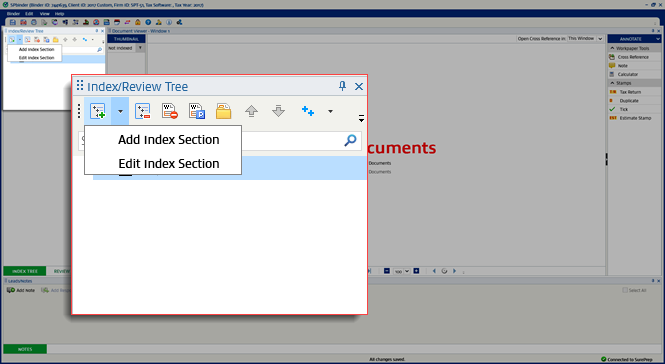
You can now create an index by adding folders and subfolders in the Index tree.
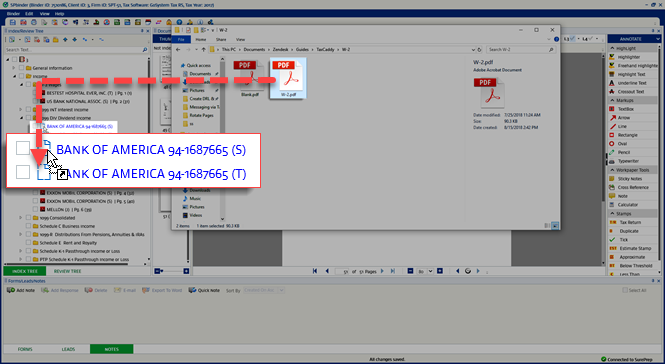
You can drag-and-drop additional documents to the template to be used in multiple binders.
Delete a binder template
To delete a binder template, select the  .
.
Delete
icon .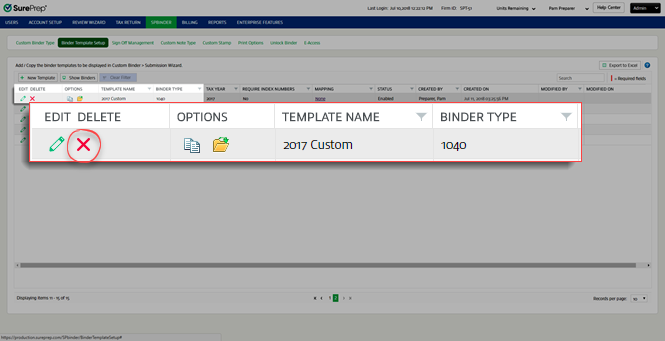
A
Binder Template Setup
window will appear. Select Yes
to delete the template. Select No
to cancel deleting the template.
View binder templates
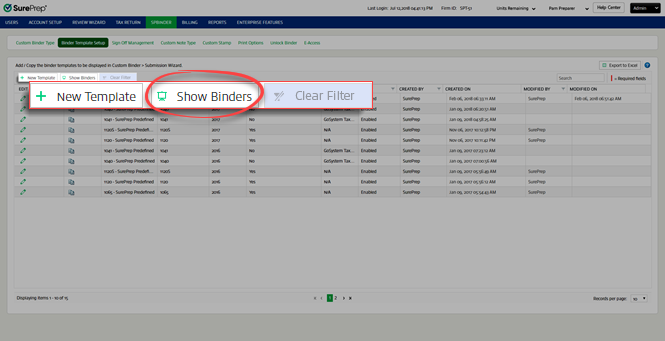
To view binders created using templates, select
Show Binders
. All binders created in the FileRoom will be listed in this window. To revert back to templates, select Show Template
.
The
Clear Filter
button removes all filters that have been either applied on individual columns or when the search option has been used.note
The
Clear Filter
button turns on when the filters are applied on columns or when the search field is used for searching a specific row. Otherwise, it remains inactive or grayed out.Export binder templates
To export data from the
Binder Template Setup
tab to Excel, select Export to Excel
.Select
Open
to open the Excel file. Select Save
to save the Excel file to a specific location before opening it.If you want specific data to be exported, use the search and/or filter functionality on individual columns, then select
Export to Excel
.note
The Export to Excel, Clear Filter, and Search functionality is also available for the
Show Binders
section under Binder Template Setup
tab.Search binder templates
Use the search field  to search for data. The search functionality applies to the following columns under the
to search for data. The search functionality applies to the following columns under the Custom Binder Type
tab:- Template Name
- Binder Type
- Tax Year
- Mapping
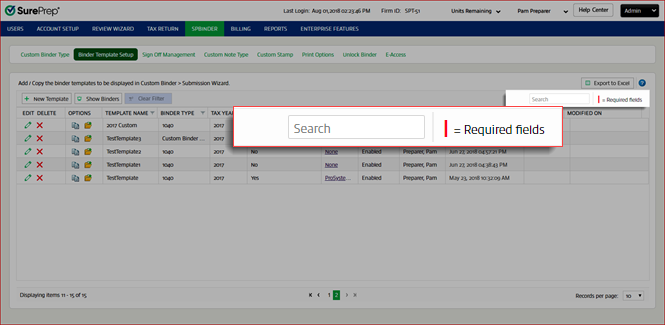
For help with the  beside
Binder Template Setup
section, select the Help icon beside Export to Excel,
.Automatic Workpaper Number Generation in SPbinder
With the help of
Index/Review Tree
, you can define the format used for future automatic number generation. When placed under a particular Index section, each workpaper will use the automatically generated number as an index number.You can generate Automatic Workpaper Numbers through the
Add Index Section
window. The defined workpaper number scheme will apply only to the Index section for which it is defined.Follow these steps to create an Index Section with indexed workpapers:
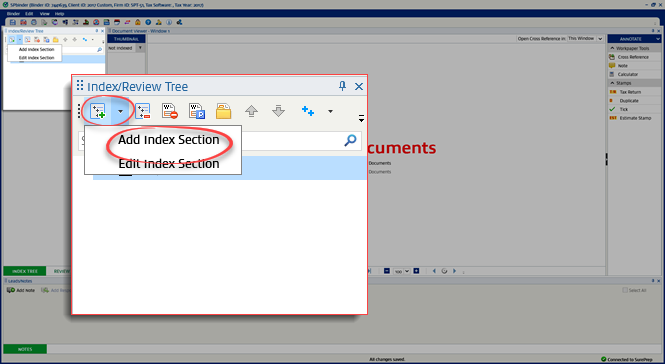
- Open the template file in SPbinder. On the Index/Review Tree, select the picklist icon adjacent to theAdd Indexicon. SelectAdd Index section.
- In theAdd Index Sectionwindow, enterSection #andSection Name.
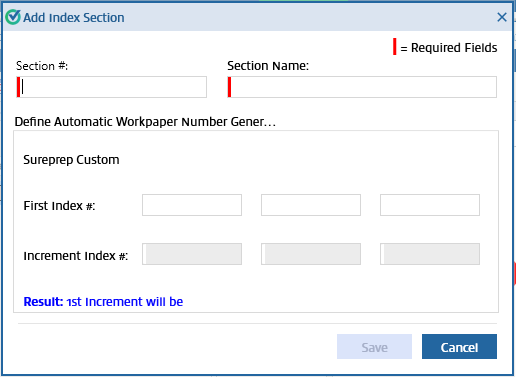 noteFields that are marked with a red line are required. Attempting to save the binder type without filling in the required field will display a notification messages.TheAccount Index Sectionwindow will only display theSection Namefield if the binder template doesn’t have theRequire Index Numbersenabled in theAccount Admin.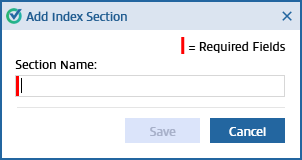
- Define the Automatic Workpaper Number Generation order.
- First Index #:Enter the 1st index number that you want to assign to your first workpaper.
- Increment Index#: Enter the number by which you want to increment the index number of each subsequently added workpaper.

- TheResultat the bottom of the window displays the index number preview for the 1st increment.
- SelectSaveto create an index in the Index tree.
- When you add a workpaper to this Index section, theAdd Workpaperwindow appears. The 1stWorkpaper#is auto-populated according to theFirst Index#.

- SelectSaveto index the workpaper.
- For the subsequent workpapers indexed to the same Index section, the workpaper number will increment in the order defined in theAdd Index Sectionwindow.
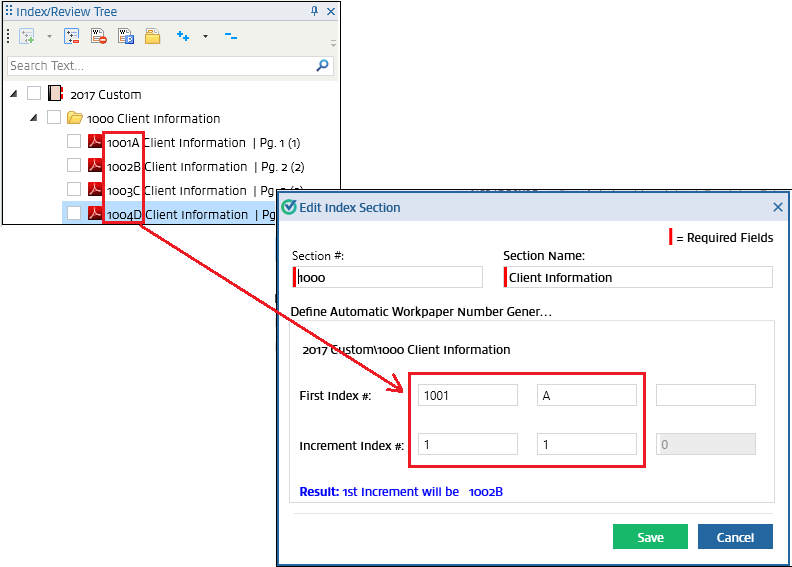 Each document indexed under this workpaper will be suffixed by the order in which it was scanned.For example:If it is the 1st document that you are indexing under the workpaper, then the workpaper number will be suffixed by '1'. And, if it is the 2nd document that you are indexing then the workpaper number will be suffixed by '2'.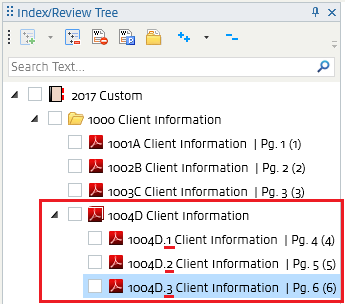
note
The ability to define automated workpaper number generation will be available only in the binder templates at the creation of the Index section. This functionality won’t be available in the SPbinder created using the binder template.
Mapping
Mapping lets you add the standard indexes to your templates. This functionality only applies to Binder Type 1040 and 1041.
note
For
Custom Binder Type,
this column will show N/A
(Not Applicable).The
Mapping
column will display None
for templates with the Binder Type set to 1040 or 1041. Follow these steps to set up Mapping:- To set upMapping, selectNone.
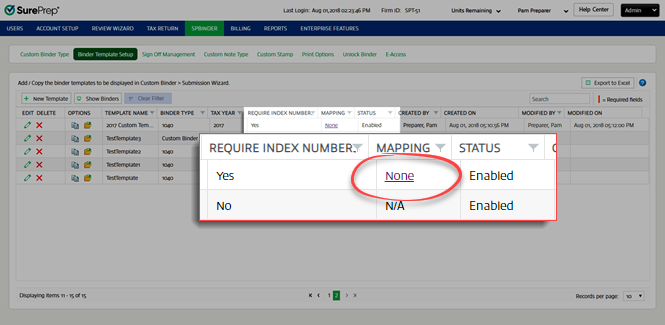
- TheMappingwindow will appear.
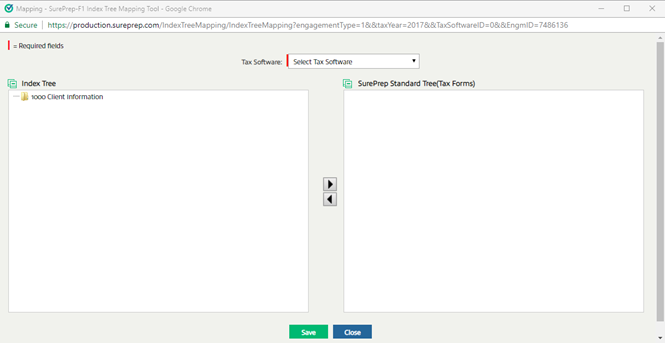
- From theTax Softwaredropdown, select the required tax application.
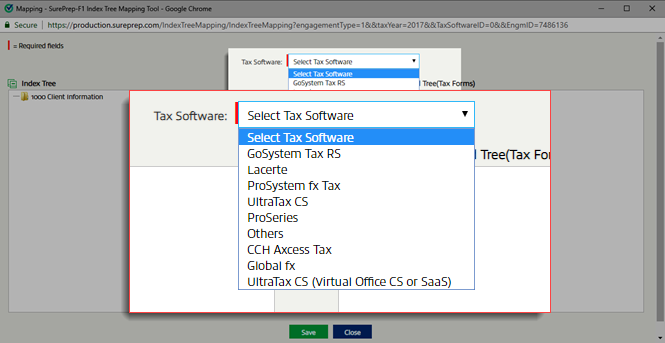
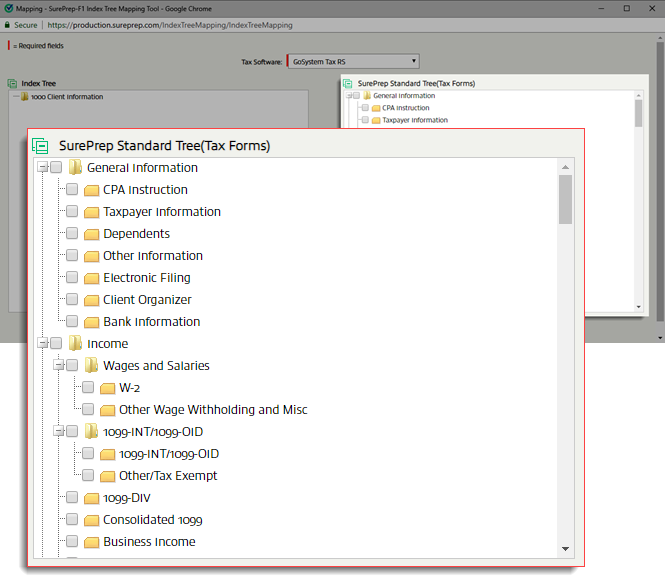
- The Standard tree for the selected tax application will be displayed in the side panel.
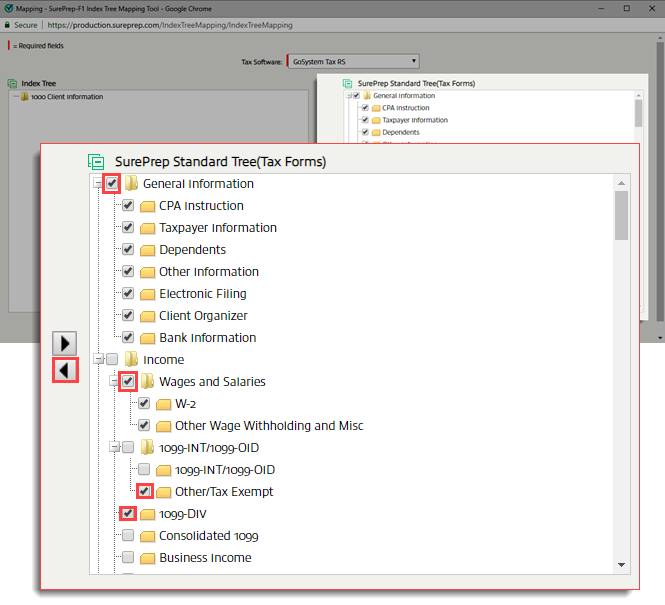
- Select required indexes from theSurePrep Standard Treepanel and then select a required index folder from theIndex Treepanel to which you want to add indexes. Select theAddicon.
- Once the selected Indexes are added in the Index tree, selectSave.
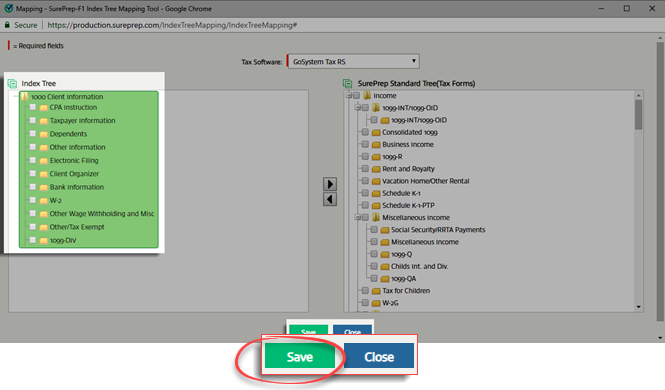
- The indexes added in the template will apply to all the binders which are created using this template.
Manage Pre-defined Workpaper
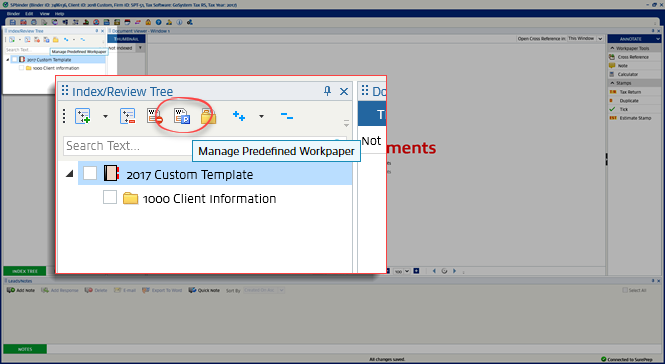
- Once the binder template is open, to add/edit/delete predefined workpapers, select theManage Predefined Workpapericon.
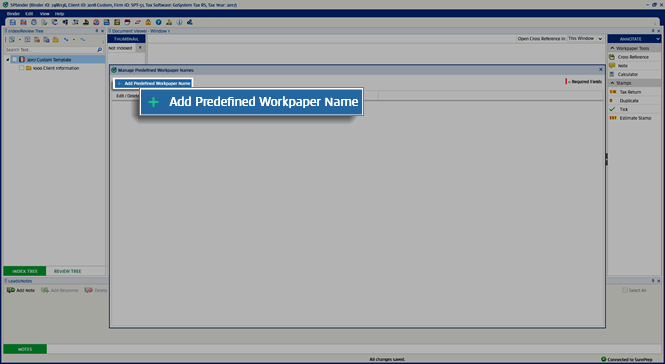
- Manage Predefined Workpaper Nameswindow will appear. To add a predefined workpaper, selectAdd Predefined Workpaper Names.
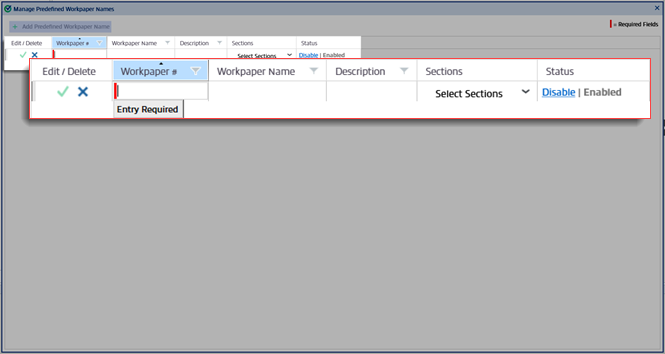
- A blank field will be added. Required fields are indicated with a line.
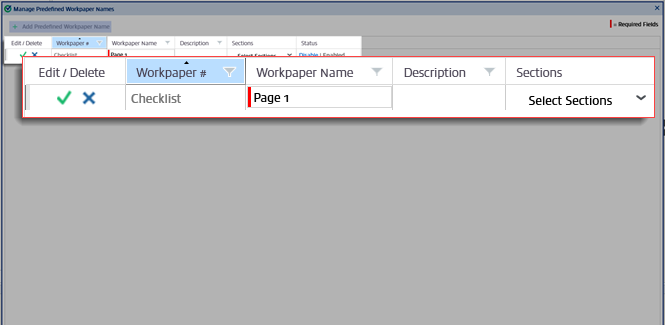
- EnterWorkpaper NameandDescription.
- On indexSections,select the dropdown to display the current Index tree structure. Drag and pull the expand icon to resize the window. Select the expand icon to further expand and view the folders in the Index tree.
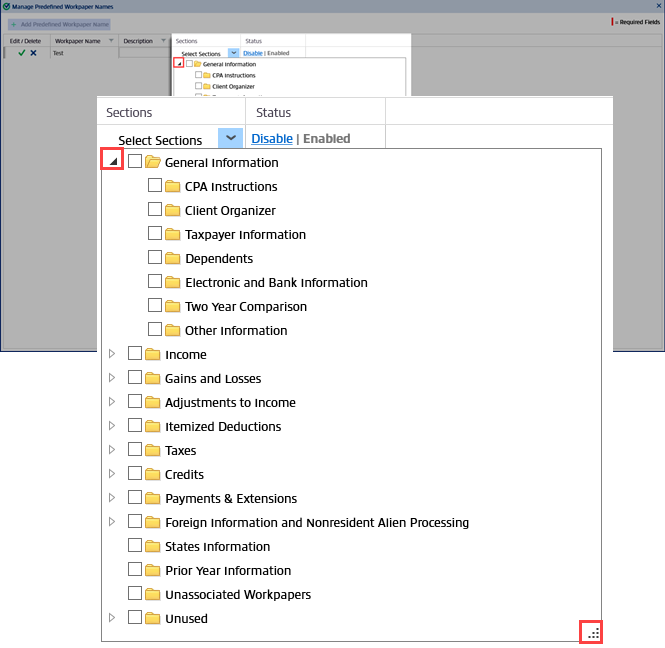 noteTheSectionsdropdown options only show the current Index tree structure. Mapping Index from theAccount Adminwon’t be included as options.
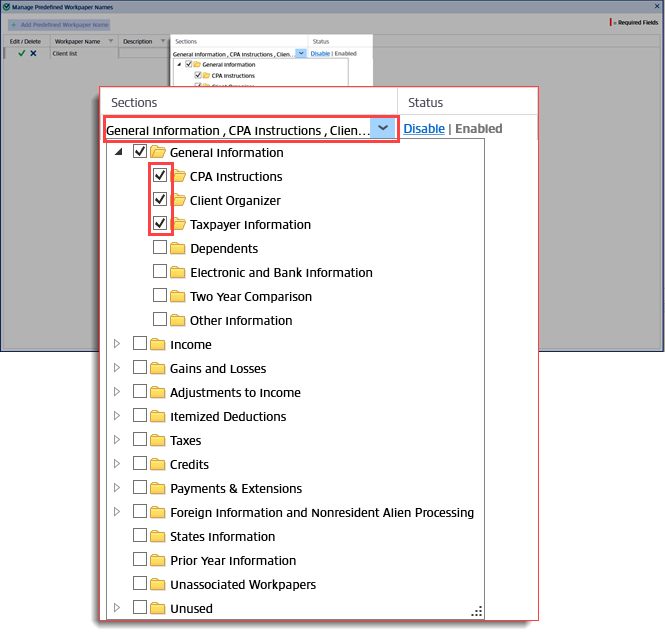
 - Check the checkbox next to the folders you want the workpaper to be available in. The selected workpaper names will be displayed in the Index section field.
- By default, the added workpaper status will beEnabled. Select theSaveicon to save the entered details. Select the Closeicon to close without saving any changes.
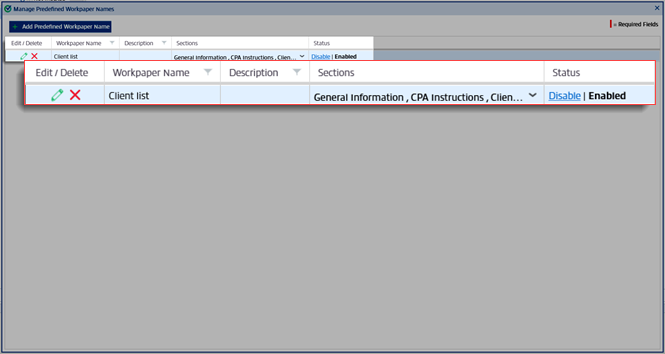
- On saving the workpaper details, it will be displayed in the window.
- To edit predefined workpapers, select theediticon to turn on the field and make the necessary changes.noteYou don’t have to edit the field toEnable/Disable workpaper. You can select the Status link and change the status. This change will be auto-saved by the system. The current system will be displayed in bold.
- Select theDeleteicon to permanently delete a field from theManage Predefined Workpapers Nameswindow. A confirmation window will be displayed for the same.
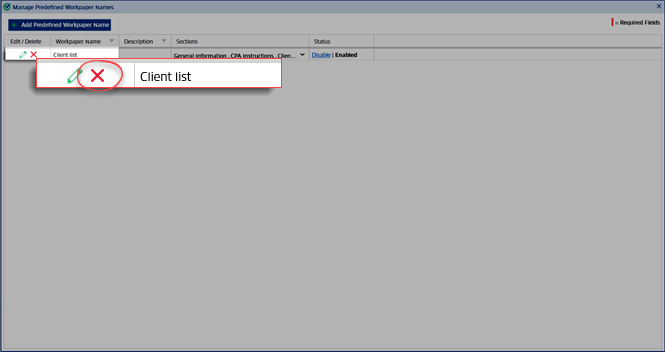
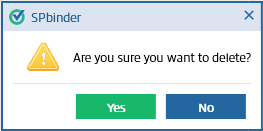
- SelectYesto permanently delete the predefined workpaper. SelectNoto close the window without saving any changes.
- The changes madeManage Predefined Workpaper Namewindow will be reflected in theAdd Workpaperwindow when any document is moved to those sections in the Index tree.
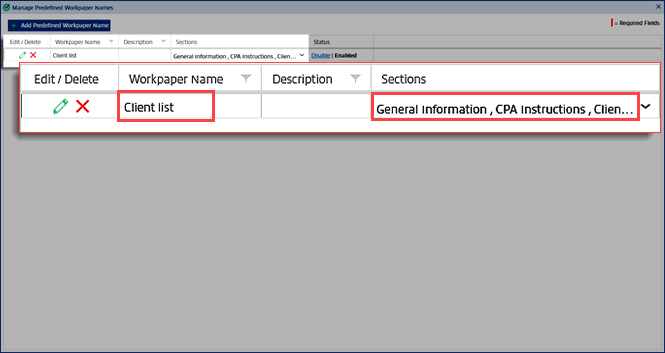
- When you try to index any Workpaper into the sections defined in theManage Predefined Workpaper Names(in this instance for workpaper Name Checklist – CPA Instructions and Client Organizer) the Checklist workpaper will be available in theAvailable Predefined Workpaperspanel in theAdd Workpaperwindow.
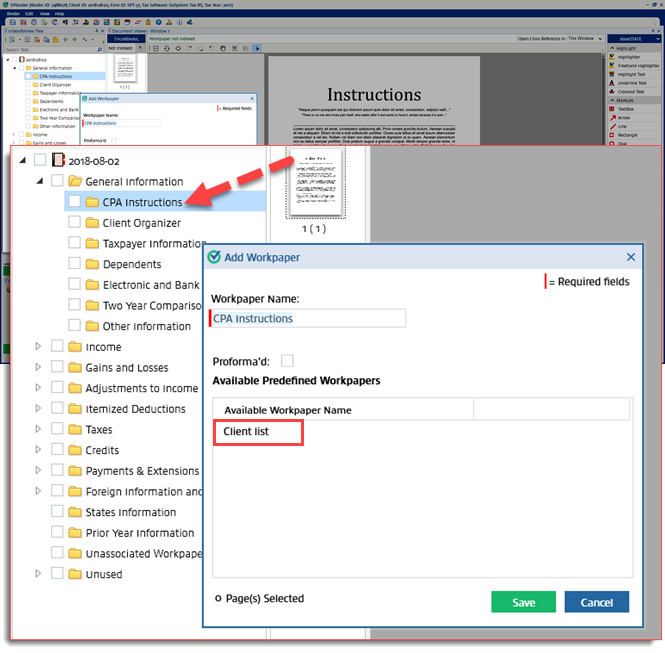 noteThis predefined Checklist Workpaper will only be available for CPA Instructions and Client Organizer sections. This predefined workpaper won’t be available for any other sections in the Index tree.
 - Roll forwardthe workpaper if you will be copying the current binder template again in the next year and want the workpaper to be available. Workpapers that are not marked forRoll Forwardwon’t be available when you copy this template to make a new one.
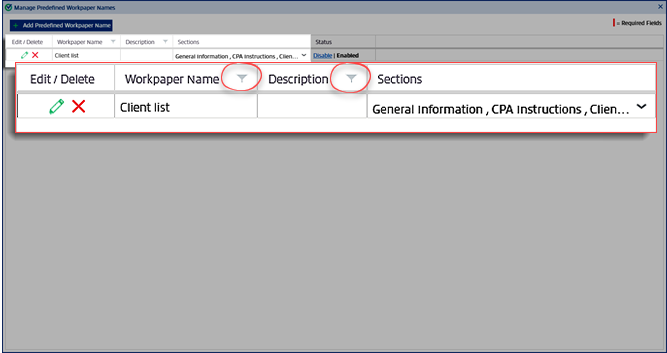
- To filter the information in theWorkpaper NameandDescriptioncolumns, select theFiltericon. Select theCloseicon to close theManage Predefined Workpapers Nameswindow.