
Add documents in SPbinder
Select the  icon in the toolbar, use
Add Document
CTRL+L
(when SPbinder is active and in focus), or select Binder
, then Add Documents
to add documents to SPbinder and optionally send them for OCR processing.Follow these steps to add more documents from inside SPbinder:
- To process additional documents, select theAdd Document icon on the toolbar or select Binder. To add local or network documents, selectAdd Documents, and if you see a submenu, selectAdd Documentin the submenu.To add documents from TaxCaddy, selectAdd TaxCaddy Documentin the submenu.To add documents from GoFileRoom, selectAdd GFR Documentin the submenu.

- TheAdd Documentwindow will open with theBasic Informationtab visible. The screen might look slightly different for you depending on your settings. Binders with leadsheets won’t have any other tab.
 Binders without Leadsheets will also have theProcessing Optionstab.
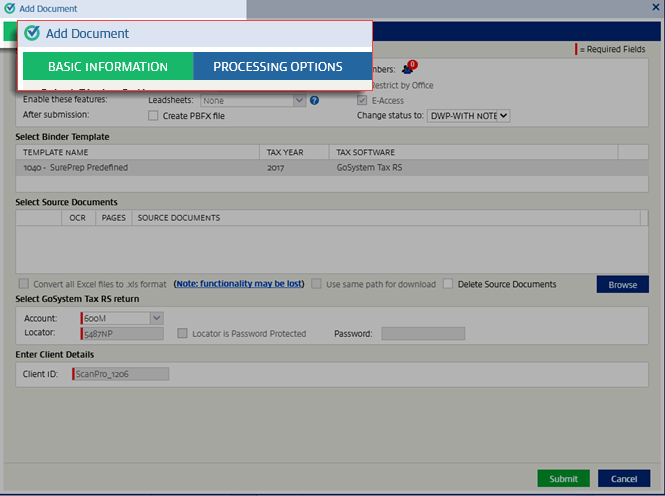
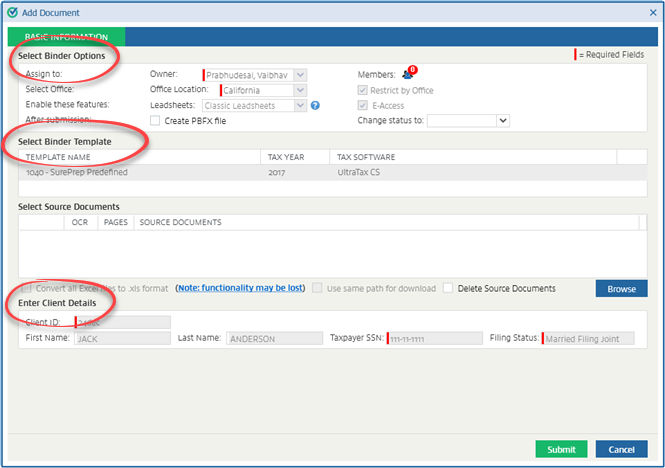
- Assign tounderSelect Binder Options, theSelect Binder Templatesection, and theEnter Client Detailssection will be populated automatically and grayed out. Remember that this screen might look slightly different for you.
 For firms using UltraTax CS, after you export the data to UltraTax CS, you will not be able to add additional documents until you open the tax return in UltraTax CS.
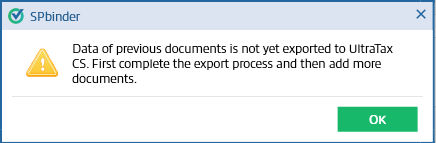
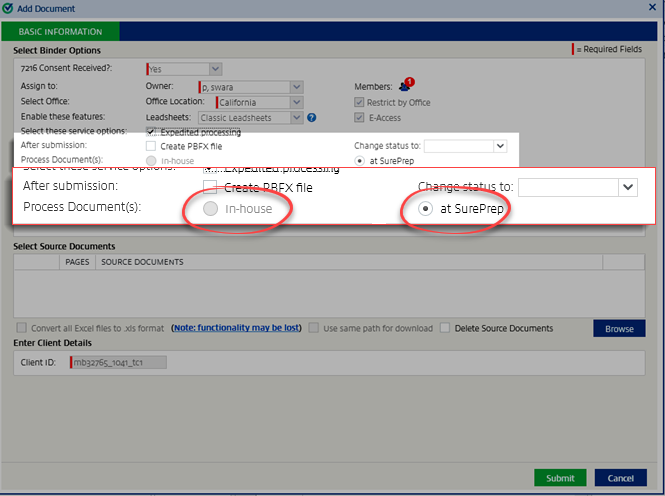
- Outsource returns will have an option forExpedited processing. Marking this option will reduce the processing time of a binder from 3 business days (the standard time required for SurePrep to process a binder) to 1 business day. SelectExpedited processingto mark the checkbox and enable this selection if you want to use it.noteAdditional fees apply for expedited processing. Consult with your manager if you should expedite processing for a faster turnaround time.

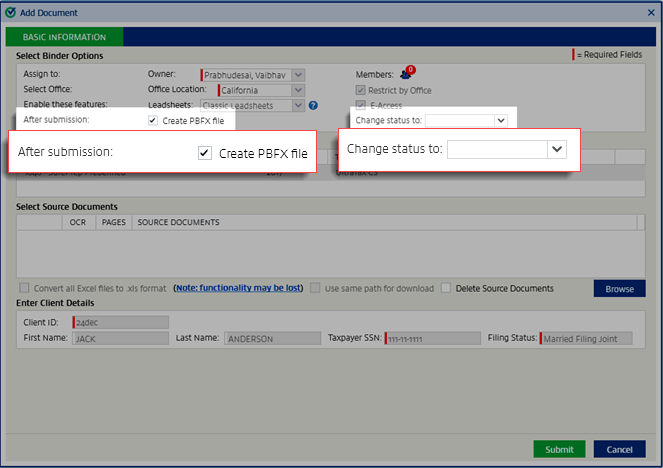
- Select your preferences for what to do after submission.Create a PBFX file: Marking this option will create a PBFX file of the SPbinder. You can open this SPbinder without using FileRoom.Change Status to: SelectingChange status toand selecting a status will display that status in FileRoom. The list will display the statuses added through .
- 1040SCANverify and Outsource binders will have a selection for processing documents. If you're using one of these service types, select eitherIn-houseorat SurePrep.In-house: Select to add the documents directly to the binder.At SurePrep: Select to submit the documents to SurePrep for processing.For 1040SCANverify Onshore/Offshore services: By default,at SurePrepwill be selected. If this is selected, it will be submitted to SurePrep for verification. If you want to verify the documents in-house, then select the optionIn-house.noteAfter you submit the documents to SurePrep for 1040SCANverify, you can continue working on the same binder. Once the documents are processed, you will receive a message to reload the subsequent documents.For Outsource Onshore/Offshore services: By default,at SurePrepis selected. If this is selected, it will be submitted to SurePrep for preparation. If you want to process the documents in-house, then selectIn-house.
- This step describes adding local or network documents. If you're adding TaxCaddy documents or GoFileRoom documents, skip to the next step. SelectBrowseunderSelect Source Documentsand select documents to upload. Source documents can be in the following formats: PDF, TIFF, EXCEL, WORD, or EML.noteExcel files with hidden sheets are not supported. Delete the hidden sheets from the Excel files before uploading the files, make the hidden sheets visible before uploading the files, or don’t upload those files.Once selected, selectSubmit. If you want to send the documents through OCR, mark the checkbox forOCR.
 noteFor Outsource Onshore/Offshore services, attaching source documents is not mandatory if the option Resubmit to SurePrep is selected. You may resubmit the binder to SurePrep for corrections or modification through this process.
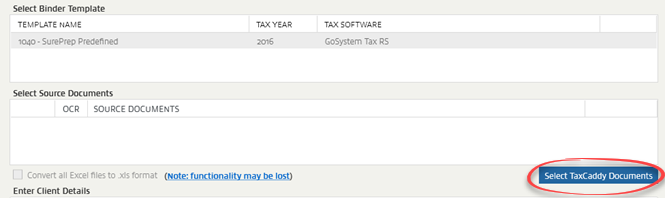
- (TaxCaddy only)This step describes adding TaxCaddy documents. If you're not adding documents from TaxCaddy, skip to the next step. SelectSelect TaxCaddy DocumentsunderSelect Source Documents.
 Select the documents to upload. When selecting documents, mark the checkbox to select all TaxCaddy documents. Note that you can't add DOC files in theSelect TaxCaddy Documentswindow. After selecting your documents, selectAdd.
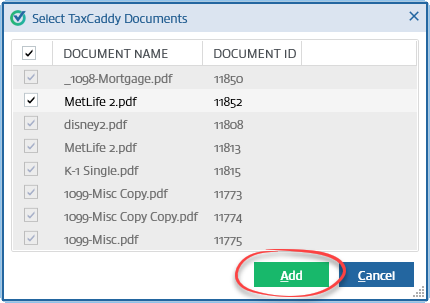
- (GoFileRoom only)This step describes adding GoFileRoom documents. If you're not adding documents from GoFileRoom, skip to the next step. SelectGFR DocumentsunderSelect Source Documents.
 You will see a list of new documents you can add. SelectShow already submitted documentsto see already submitted documents grayed out in the document list. After selecting your documents, selectAdd Documents.
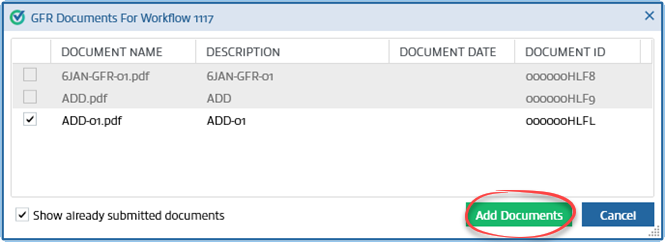
- (Only for Binders Without Leadsheet)For binders without leadsheets, you may need to provide additional information regarding the tax return, depending on your tax software. For binders with leadsheets, skip this step.GoSystem Tax RS/CCH Axcess Tax: Skip this step, no action required if you're submitting additional documents to a binder without leadsheets. The Account and the Locator Number will be auto-populated.
 Lacerte/UltraTax+ using OCR processing: If you're submitting additional documents to a binder without leadsheets, using Lacerte or UltraTax CS, and using OCR processing, then the tax software file will be automatically attached from the path that was previously used.
 If for any reason the previously browsed tax software file path is not available, then no tax software file will be attached in this section. You will have to attach the tax software file manually. You can submit additional documents only if the manually browsed tax file name, the version of the tax file, and the Client ID is the same as that of the previously submitted job.If the manually browsed tax file name is different than the one submitted in the previous job, then a warning message will be displayed.
 noteWhen using Lacerte, if the binder has already been exported and a more recent tax file is available for this binder, we recommend attaching the most recent tax file when submitting additional documents or else the tax software file will be overridden.Pro System fx, Lacerte, and UltraTax without OCR processing: If you don’t want to send the additional documents through OCR, the selected tax software section isn't available. It is not mandatory that you attach the tax software file in this case.
- For binders without leadsheets, you can change settings forReview WizardandTax ReturninProcessing Options. These settings will only apply to the additional documents being submitted.noteTheProcessing Optionstab isn't available for binders with leadsheets.

- Once the additional documents are successfully submitted, theJobs in Queuewindow will appear.
 For GoSystem Tax RS and CCH Axcess Tax binders, you can add additional documents in any status during the submission process.noteAdding additional documents to outsourced binders may cause the due date to change based on the number of pages added.However, for other tax software you can't submit additional documents until previously submitted documents are processed completely.A warning window appears if you attempt to add additional documents.
- A notification will appear at the bottom of SPbinder while the documents are being uploaded.
 You can continue to work on the binder while the documents are being added, but you can't print or export it.Once the process of adding documents is complete, you'll see a message asking if you want to add the new documents immediately. If you used OCR processing, selectAddto close SPbinder and open the Review Wizard.
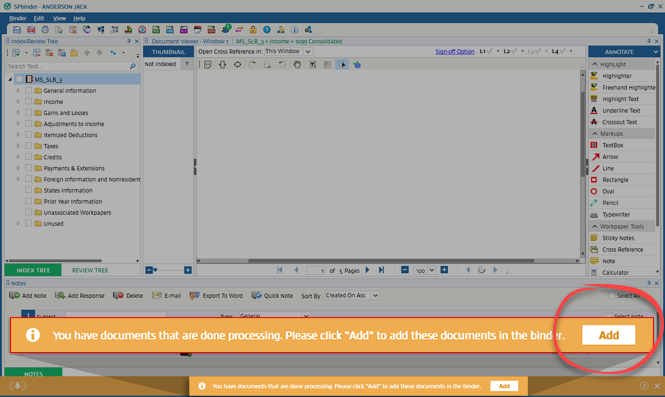 If you didn't send the documents for OCR processing, selectAddto add the additional documents in the thumbnail section.View details on Indexing pages from the thumbnail.
 If you don’t want to work on the additional documents immediately, then don’t selectAddon the notification banner. The next time you open this binder, the new pages will appear in the thumbnail section if you didn’t use OCR processing. The review wizards will open if you used OCR processing.For binders without leadsheets, the additional documents will appear as a sub-job inside the main binder. You can select
 next to the binder in FileRoom to view all the sub-jobs under it.
note
For Simplified and Without Leads binders, new documents will be processed after original documents have been exported.
Related Content
-
Add documents in the SPbinder by dragging and dropping
Format: Article