The ultimate client collaboration software for tax professionals and their taxpayers! TaxCaddy provides the most taxpayer-focused tax client portal around. TaxCaddy gathers tax information and delivers tax returns.
Select
FIRM ADMIN USER
if you'll be doing administrative tasks (for example, setup firm settings and permissions, add logo and custom branding, add clients, send invites, prepare questionnaires for the firm, and other firm-level settings).
Select
TAX PRO USER
if you're a tax professional who's managing individual client profiles.
Get started as a firm administrator
Set up
If this your firm's first time using TaxCaddy, you can use the set up articles to guide you through the process of configuring your firmwide TaxCaddy settings. Any settings you've saved are applied to all future logins, however, you can make updates to these settings as needed.
Set permissions for your users
You can give users in your firm the ability to access TaxCaddy and manage what features they can and can't perform once logged in.
Compatible software
If you're using software suited for TaxCaddy, make sure that your browser and tax software of choice will optimize your experience.
Administrative features
You can use the
Administrative
tab to take a brief tour of features in TaxCaddy's. On this page, you can learn to send Letters, configure document requests, etc.
Customize your TaxCaddy
You can use the
Firm Details
tab to tailor your TaxCaddy experience to mirror your firm's name and logo.
Edit your questionnaire
You can use the
Questionnaire
tab to make sure your firm's questionnaire meets each of your firm's current needs and view a brief summary of TaxCaddy's questionnaire features.
Upload templates
You can use the
Templates
tab to upload templates for your firm's invitations and documents, saving time by being available for reuse when needed.
Essentials
Now, put what you've learned thus far to use. Essential articles let you to add and manage your client list, building on the skills you've gained from set up.
Create your client list
You can select
Add a client
on the toolbar to add a client to your firm's list in TaxCaddy. Once they've been added, you can begin managing your clients.
Add multiple clients at once
Sometimes adding clients one at a time isn't the most time-efficient option. You can select
Import multiple clients
on the toolbar to import multiple new clients at one time.
Create Document Request Lists (DRL)
Are the document requests you send clients as comprehensive as they can be? You can select
Create Custom DRL
to automatically generate a list of documents needed from each client.
Invite new clients
When you're done adding clients, you can send your clients an invitation to sign in to TaxCaddy. Your new clients will need an invite to begin working. Select either
TaxCaddy Invitation
or
Invitation Reminder
to send it to them.
Invite statuses
A client's status will let you know if they've accepted their TaxCaddy invite. The status could show 1 of the following:
Connected
Not Enrolled
Enrolled
Refer to the following for a complete status list:
Send letters to clients
Once you've added Letter templates to TaxCaddy, you can send them to clients as needed. Send pre-uploaded templates to clients.
Send Questionnaires to clients
After creating and customizing your firm's questionnaire, you can select and send it to as many clients as needed.
Send your clients their DRL
Once a client's custom document request list was created, it's ready to be sent to and fulfilled by your client.
Intermediate
After creating your client list and sending the necessary invitations, documents, requests, etc., you're ready to further develop your TaxCaddy skills. In the Intermediate section, you can now learn more about saving time and working efficiently in TaxCaddy. You can search and filter clients and DRLs before sending them to your client, and much more.
Update client records
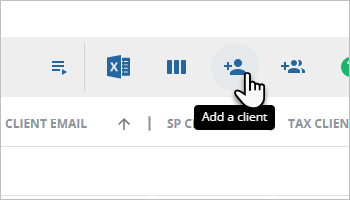
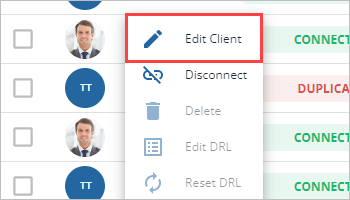
With long-term clients, their records are bound to change from when first entered. You can select
Edit Client
to edit client data to keep your records up to date.
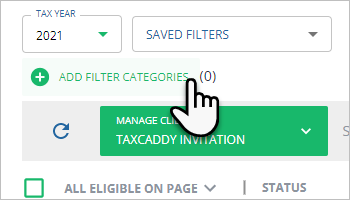
Find clients by group
You can select
Add Filter Categories
to use filters to narrow down your firm's client list. You can specify search criteria and only display clients you want to see.
Search client list
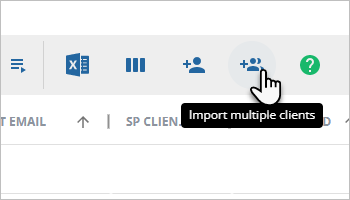
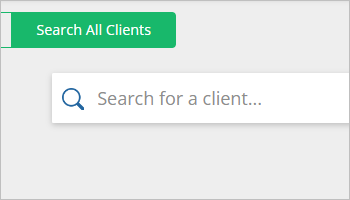
When your firm's client list grows too large, you can search for specific clients by name, email, Tax Client ID, etc.
Sort your client list
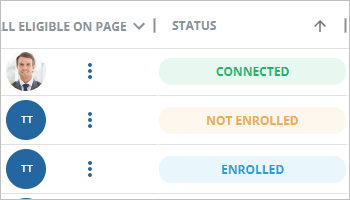
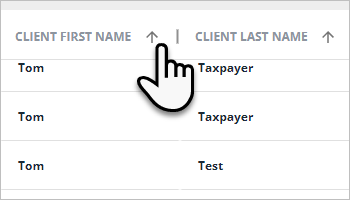
You can arrange the currently displayed clients in ascending or descending order by first or last name. Select the up or down arrow next to the name to sort by that feature.
Disconnect from a client
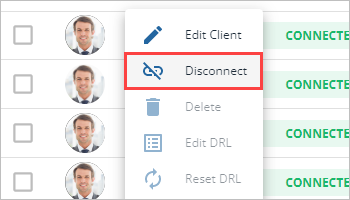
There may come a time when a former client no longer requires your services. You can select
Disconnect
to remove clients not affiliated with your firm.
Delete former clients
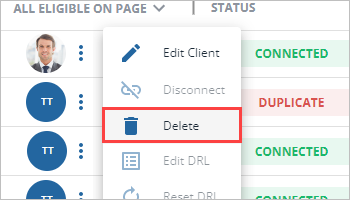
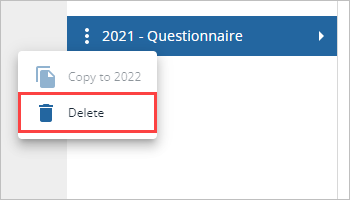
Whether done one at a time or in bulk, you can select
Delete
to delete profiles of former clients that are no longer connected with your firm.
Edit DRLs
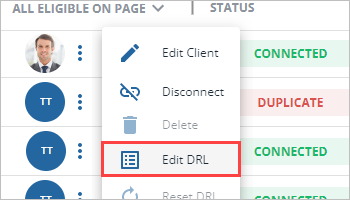
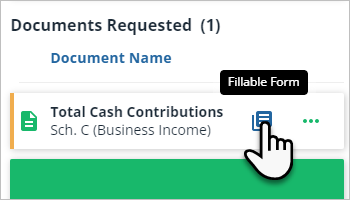
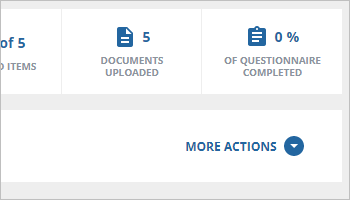
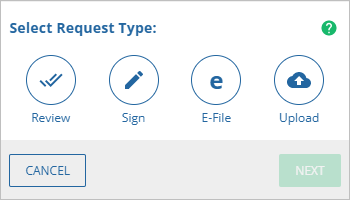
After creating a client's DRL, you may want to add or remove requests to make sure all necessary requirements are met. You can select
Edit DRL
to edit it.
Client spreadsheets
You may need access to client information when working offline. You can select
Export the client list to Excel
on the toolbar to generate an Excel file of your firm's client list.
Customize invitations
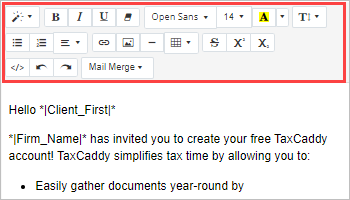
TaxCaddy offers invitation templates ready to send, however, you can tailor your invites to specifically fit your firm's needs. You can use the text and format options on the toolbar at the top of the invitation to make the changes you want.
Request categories
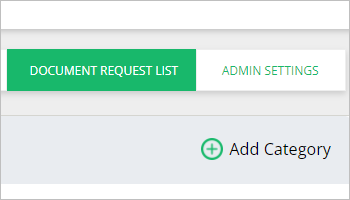
TaxCaddy includes predefined categories that you and your clients can use when moving and uploading documents. On the
Document Request List
window, the list of predefined categories will show for each tax year.
Add document categories
You can select
Add Category
to add custom categories that you and your clients can upload and move documents to in TaxCaddy.
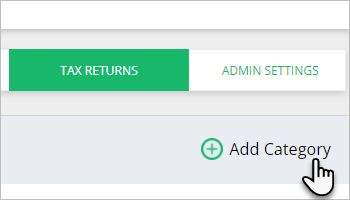
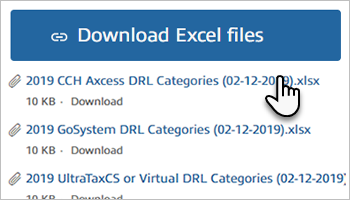
Add tax return categories
The default tax return categories may not fulfill all of your firm's needs. You can add categories that best suit your firm's needs.
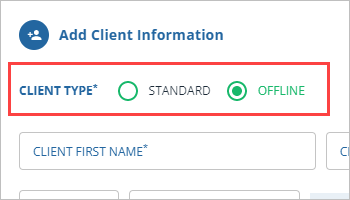
Offline client profiles
You can add clients who you donβt plan on inviting to TaxCaddy can as
Offline
clients.
Refer to the following to learn to add and self-manage Offline client profiles.
Advanced
With help from the
Advanced
articles, you can mirror your firm's color branding policy in TaxCaddy, restrict access to a previous tax year's records, and become a pro user of TaxCaddy's
Admin
features.
Fillable forms
Some forms can be completed in TaxCaddy, meaning clients can bypass the need to download, complete, and re-upload requested forms. The
Fillable Form
options is available next to the document name.
Reset your questionnaire
As your firm grows, you need a questionnaire that adapts to you. You can select
Delete
to reset and re-customize your questionnaire when needed.
Manage tax years
A client's previous tax documents may grow more sensitive as years pass. In the Revoke Access to Tax Years section, you can use the
Maintain access to tax years
dropdown to limit your firm's access to previous tax year records.
Styling TaxCaddy
You can alter TaxCaddy's color scheme to mirror your firm's branding. Your clients will see your new styling at their next sign in. You can change the following for both desktop and mobile platforms:
Primary color
Secondary color
Darker color
Integrations
With help from SurePrep's trusted partners, you can streamline your workflow to simplify your more tedious tasks. Refer to the following for a complete list of our partners.
Additional items
The Additional items section may have your answer if you have any more questions. Go to the FAQ section or read our release notes to catch up on TaxCaddy's latest.
FAQ
Select
FAQ
to find the answers to any questions you've formed from the previous articles.
Release notes
Release notes of our newest features are published with each major release. Select the
Release Notes
to stay up to date on TaxCaddy's latest features.
TaxCaddy marketing
You can easily integrate the TaxCaddy brand into your own firm's marketing with logos, images, and brochures ready to download.
DRL categories
Get a rundown of what each TaxCaddy-supported tax software can fetch when creating each of your clients' DRLs.
Get started as a tax professional user
Beginners
This section aims to start the process of guiding you through interacting with your clients. Once your firm's preferences have been set up by an Admin user at your firm, you're ready to begin managing your clients' tax returns, documents, personal information, etc. in TaxCaddy!
Access TaxCaddy
Ready to begin working with your clients in TaxCaddy? Sign in and select
TaxCaddy
from the
Admin
dropdown, then you can begin interacting with your clients.
About Overview
You can select
Overview
on the toolbar to take a tour of TaxCaddy! View a list of the client profiles you follow and see a quick guide of all the features TaxCaddy has to offer.
Visit a profile
You can select a clien'ts name to open their profile to review information regarding their uploaded documents, tax payments, invoices, etc.
Summary panel
If you're looking for a summary of a client's information in TaxCaddy, the Summary panel provides a brief recap of a client's progress.
Searching Overview
If you're not following a client but want to view their profile, you can select
Search All Clients
to search through your firm's entire client list for a specific person.
Follow a client
You select
Follow
on the client's profiles to follow them and track their progress and receive notifications of their account activity.
Activity feed
TaxCaddy keeps a log of both you and your client's actions in their profile. Select
Activity Feed
to view a log with dates and times of past activity in a client's account.
Settings
You can select the
Settings
icon to configure your profile settings to what suits you. You can update personal info, upload your photo, and set notification preferences.
Intermediate
If you're ready to tackle steps that go beyond the basics, Intermediate articles contain core actions that any tax professional using TaxCaddy should know in order to streamline their workflow. With Intermediate, you'll learn to request documents, compile a client's files into a binder, and even exchange messages with clients to assure that you both are on the same page. Read how to do all this and more below!
Issue a request
Need a document reviewed, signed, e-filed, or uploaded by a client? Issue document requests for your client to fulfill.
Upload a client's documents
You can upload documents to a client's account on their behalf. You have the option to drag and drop or upload documents like W-2s, 1099s, 1098s, and Schedule K-1s.
View documents
You can review your clients' uploaded documents without having to leave TaxCaddy. Start viewing, annotating, and signing documents.
Move documents
When uploading documents, some may be added to the wrong category. You can select
Move To
to relocate an existing uploaded document to a different category.
Irrelevant requests
Sometimes requests are no longer applicable or get fulfilled elsewhere. You can select
Already Provided
or
Doesn't Apply
to remove irrelevant requests from a client's account.
Create binders
You can select
Create Binder
to create a binder containing a client's uploaded documents and completed requests gathered so far in TaxCaddy.
Tax Return Categories
When uploading tax returns, it helps to have accurate categories for each upload. You can select
Add Category
to create and edit tax return categories.
Chat with clients
You can select
Messages
to start a new message thread with your client or reread previous messages.
Tax payments
You can select
Tax Payments
on the toolbar to upload new tax payments or mark existing ones as paid.
Invoices
You can select the
Invoices
tab to send your clients new invoices or mark existing ones as paid.
Document Flags
You can mark the flag for specific uploaded documents to be included in a client's binder.
Read/Unread a document
Alert badges appear next to newly uploaded documents, reminding you to view these files when you have a chance. You can select
Mark as Not Viewed
to manually change a document's view status.
Reply with amount
If a client has a pending document request, you can select
Reply with Amount
. The request can be fulfilled by replying with an amount rather than uploading the request.
Complete forms
After uploading a new fillable form, either you or your client can submit the requested info from the document viewer or select
Complete Form
to mark it as complete.
Remove documents
Some documents are uploaded by accident or become outdated as time passes. You can select
Delete
to remove unnecessary documents from a client's account.
Work on-the-go
You may be away from your workstation and find yourself needing TaxCaddy access. You can use the Mobile app to use TaxCaddy on-the-go.
Advanced
The Advanced section will push you to go above and beyond your current skill level, making sure the work you do in TaxCaddy is done as efficiently as possible.
Add documents to a binder
You may forget to include a document in a client's binder until after it's created, but you can select
Add Documents
to add documents to a client's existing binder.
Edit existing payments
You can select the
Tax Payments
tab to edit, download, or delete a client's existing tax payments before uploading new ones and manage a client's tax payments.
Edit existing invoices
You can select the
Invoices
tab to edit, download, or delete a client's existing invoices before sending new ones. Manage a client's invoices.
Disconnect clients
Your client may no longer require a tax professional or may find one elsewhere. You can select
Disconnect
to remove clients no longer affiliated with your firm.
Transfer documents
A document uploaded to one client's profile can be applicable to another. You can select
Transfer
to upload documents from one client's account to another.
Additional Items
Still have some User-related questions? The Additional Items section may have your answer. Go to the FAQ or read our release notes to catch up on TaxCaddy's latest.
FAQ
Find the answers to any questions you've formed from the previous articles.
Release notes
Release notes of our newest features are published with each major release. Stay up-to-date on TaxCaddy's latest features.
Prepare fillable PDFs
Are your firm's fillable documents ready for your clients' information? Configure your fillable forms to best work in TaxCaddy.