
Document flags
An efficient way to keep track of documents is to mark them with a
Document Flag
. Flagging a client’s uploaded documents in TaxCaddy lets you indicate which documents to include or exclude when uploading documents to a binder. The
Document Flag
icon will appear on the document tile and the Document Viewer panel. When you are creating a new binder or adding documents to an existing binder, the Document Flag
icon can be used to indicate which documents you want to incorporate or leave out.Follow these steps to learn more about the Document Flag feature:
- Sign in to TaxCaddy.
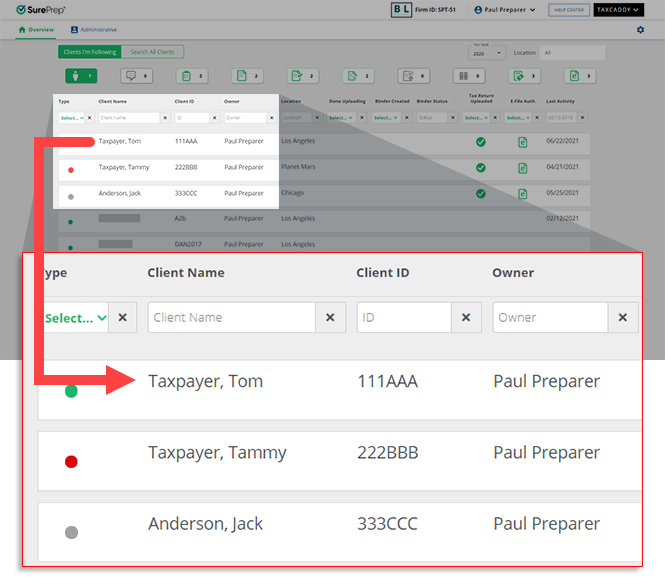
- On theOverviewscreen, select a client tile to view the client profile. You can also search for a client and select the client tile from the result.
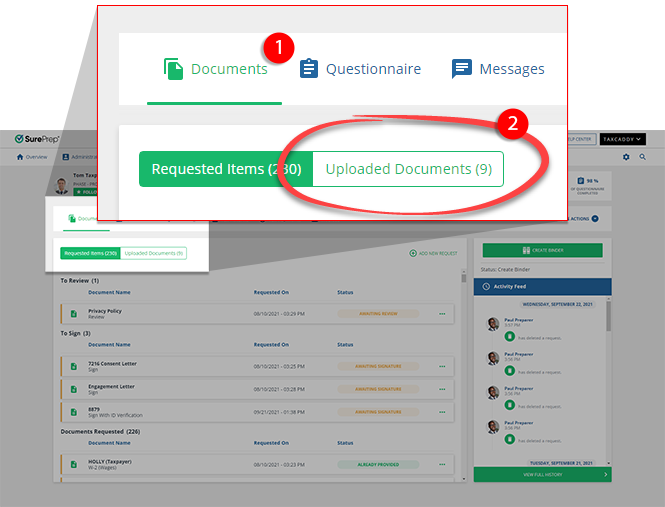
- SelectDocuments, then selectUpload Documents.
- On the document tile, select theDocument Flagicon to indicate if the document needs to be included/excluded.
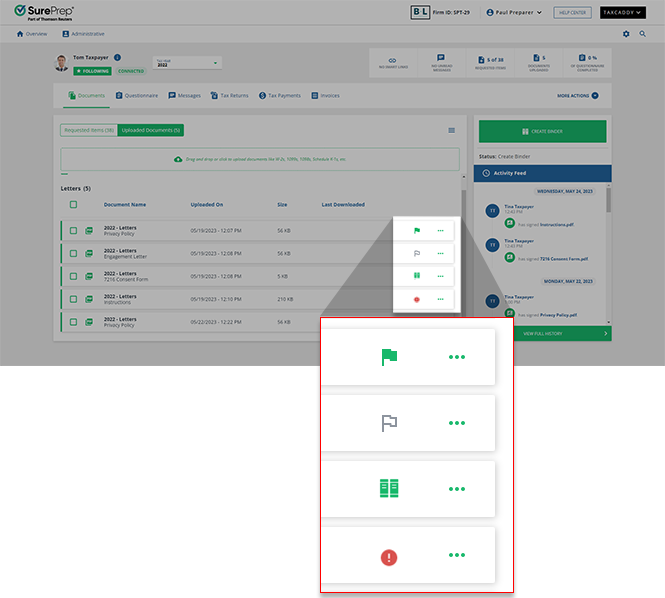 IconsDescriptionAdded to binder
 Document has already been added to the binder.Include in binder
 Document should be included in the SPbinder.Exclude from binder
 Document should be excluded from SPbinder.Cannot include in binder
 Document can't be included in the binder.
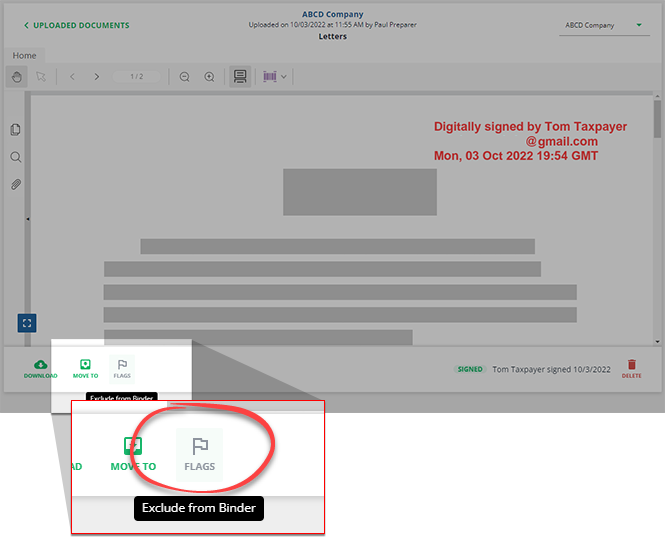
 - You can also switch the Document Flag from the Document Viewer panel.
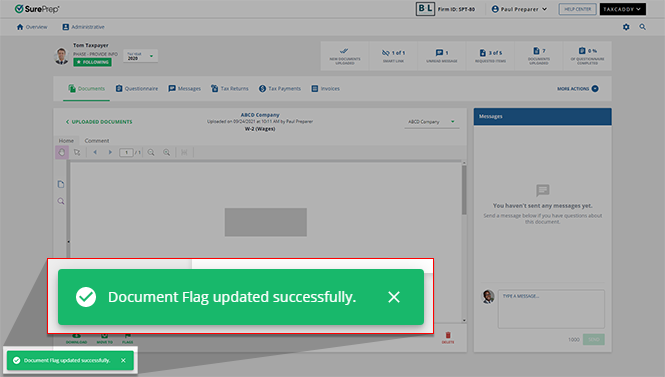
- You'll see a notification after the Document Flag has been updated.
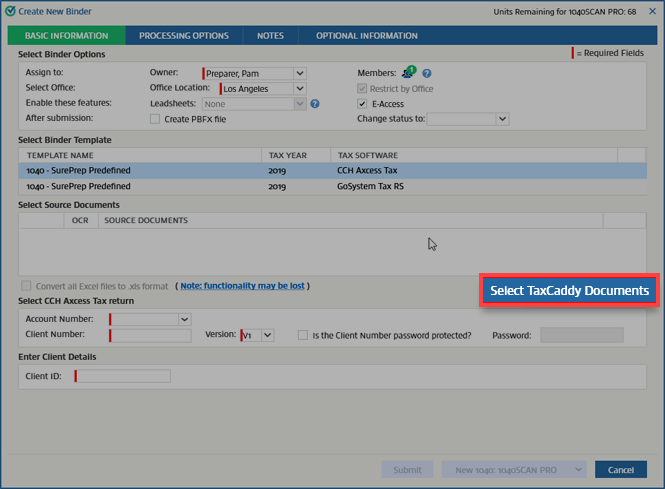
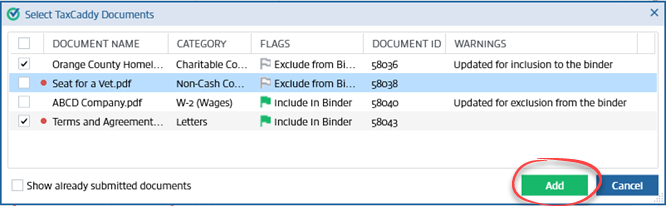
- When creating a new binder or adding documents to an existing binder, select theSelect TaxCaddy Documentsbutton.
- On theSelect TaxCaddy Documentswindow, you'll see all flagged and unflagged documents. You can select the checkbox to include the document in the binder. Conversely, you can clear the checkbox to exclude the document from being submitted to the binder.
 noteYou will see a red badge
 next to the document name when a taxpayer uploads a new document that hasn’t been viewed by a tax professional. For convenience, documents marked with theDocument Flag icon will be pre-selected by default.
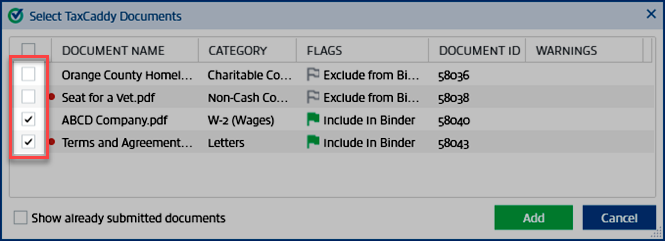 noteDocument Flags don’t prevent you from including or excluding documents from the binder. However, you will see a warning message as a reminder if you included a document that was meant to be excluded. Conversely, you will see a warning when you clear a checkbox for a document that was meant to be included.
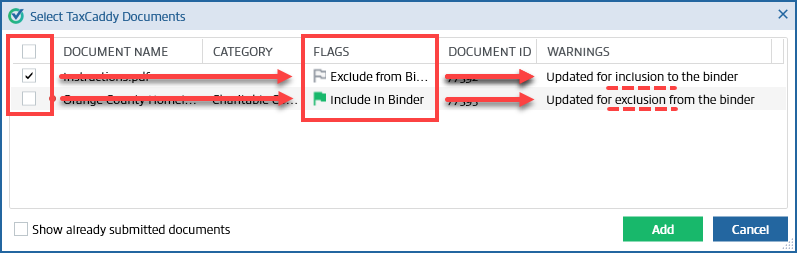
- Select the documents to include in the binder, then select theAddbutton.
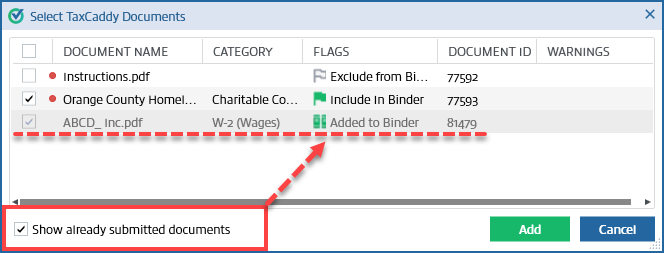
- Documents that have already been added to the binder can't be added again. To view already submitted documents, select theShow already submitted documentscheckbox.
 Documents that are incompatible (damaged, password-protected, encrypted, PDF portfolios) also can't be included in the binder.
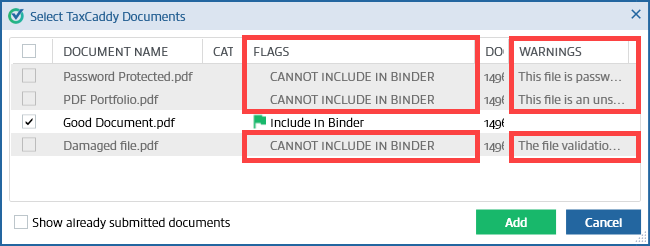
- After documents are uploaded to a binder, theDocument Flagicon changes to theBindericon to indicate that the document has already been added to the binder.
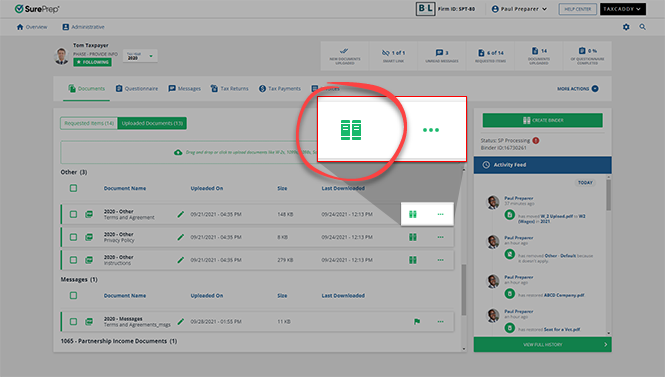 On the Document Viewer panel, the Document Flag will be removed and theADDED TO BINDERbadge will be added.
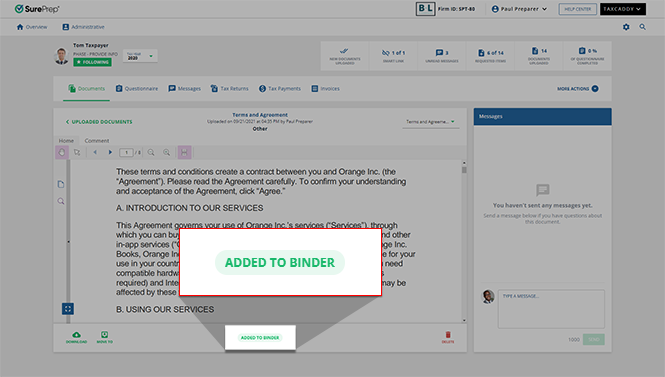
Related Content
-
Upload files to client's Uploaded Documents
Format: Article
-
Upload files to client's Uploaded Documents
Format:
Article
-
Document Viewer (PDF Viewer)
Format:
Article
-
Rename documents
Format:
Article
-
Switch between tax documents
Format:
Article