
Set up and get started
Before you can use FileRoom to process returns, you'll need to add members from your firm as users and assign permissions to user groups. Follow these steps to get started.
Create new users
Each person at your firm using SurePrep services (like FileRoom, SPbinder, TaxCaddy, Reviewer Dashboard) at your organization needs an account. In
Account Admin
, you can create a firm user account for anyone who will be accessing SurePrep services as a tax professional.Follow these steps to create new users.
- Go toFileRoom,Admin,Users, and thenUser Management.
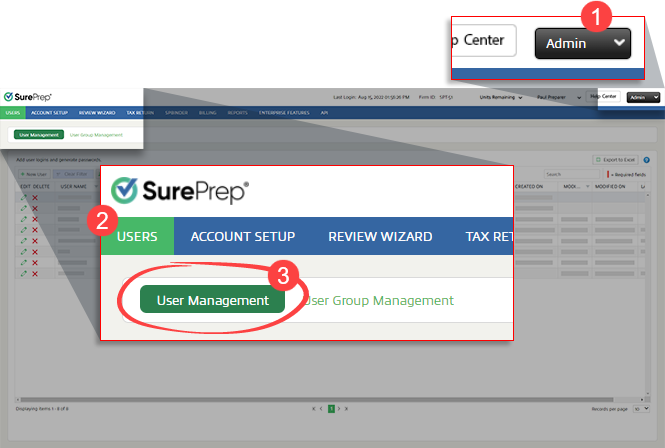
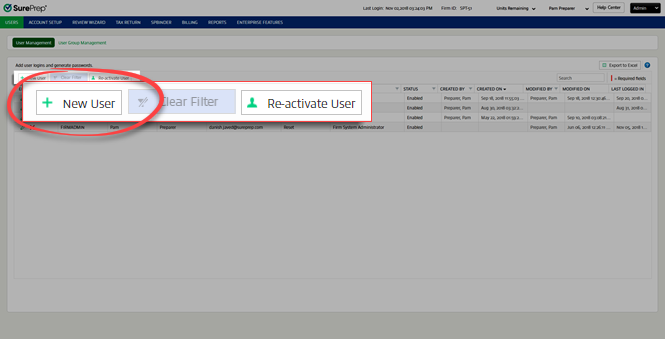
- SelectNew User. A new line appears.
- UnderUser Name, enter a user name for the new user. This is the user name that the user will use to sign in to FileRoom.
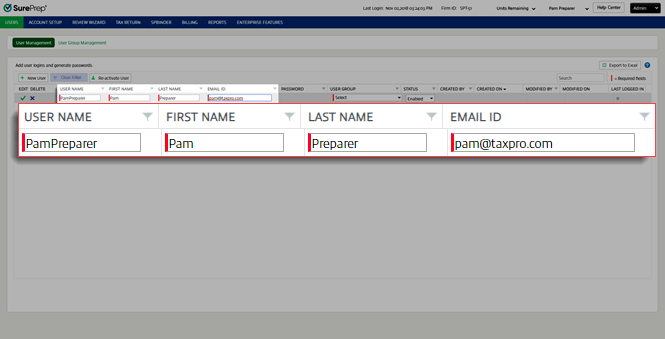
- UnderFirst Name, enter the user's first name.
- UnderLast Name, enter the user's last name.
- UnderEmail ID, enter the user's email address. This is the email address where we send the FileRoom account activation information. If you see aEnter valid email addressmessage, make sure the email address only contains alpha, numeric, and special characters such as@ . '.noteIt isn't possible to create a FileRoom user with the same email address as an existing taxpayer in TaxCaddy.If you need to use an email address that is currently used by a taxpayer TaxCaddy account, ask the user to change their taxpayer TaxCaddy account's email address.
- UnderOffice Location, select the user's assigned location and then selectSave.noteYou can assign a user to multiple office locations.
- WithUser Group, you can control access to different features across SurePrep. If needed, you can assign different access and permissions for each user group depending on their role in your organization. UnderUser Group, select the assigned user groups, then selectSave.noteA user with aFirm System Administratoruser group role assigned to their account can access everything and create firm-level changes for all users. Only grant that level of access when absolutely necessary and to people you trust.- If a user is assigned to more than 1 group, then the combination of both group permissions will be used based on which ever group has a higher permission.
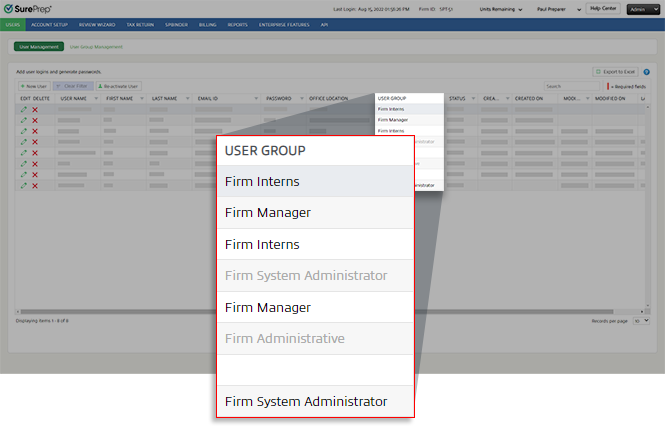
- If your firm uses Single Sign On (SSO), you will see an additional columnSSO Mapped ID. Provide your email address or another field that IDP can provide here.
- Select theSaveicon to save and create the new user. The user receives an activation email.
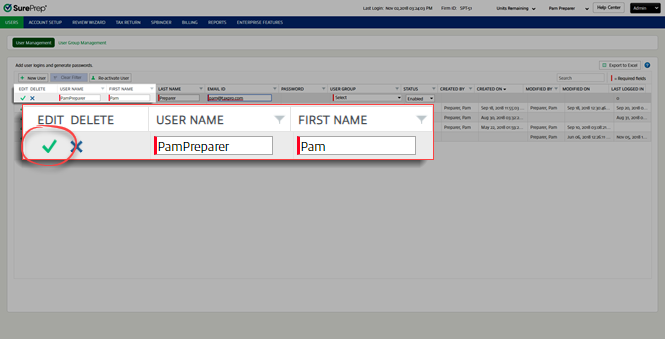
- A success message appears.noteThe link in the user activation email expires after 120 hours.After you create an account, the user will receive an invite email. The user will need to access their invite to create an account within 120 hours before the invitation expires.
What's next?
After the new user is added, they’ll get an invitation sent to their email address within a few minutes from
NOREPLY@sureprep.com
. Request the user to select the link and set up their account.User Group Management overview
User groups let you grant specific permissions to groups of users. There are some included SurePrep-defined User Groups, and you can create additional groups. To access User Group Management, go to
FileRoom
, Admin
, Users
, then User Group Management
.
You can perform the following actions on the
User Group Management
page:- Creating new user groups
- Assigning users to user groups
- Permissions explained
- Changing user group permissions
- Deleting user groups
- Exporting user groups to Excel

