
Upload documents
Show all hidden content
Uploading documents lets you add and share tax documents with your tax professional. You can also use the upload documents feature to fulfill existing documents requested by your tax professional.
note
You can also retrieve documents directly from your financial institution, share downloaded or saved documents from your phone with TaxCaddy, or upload requested items.
TaxCaddy.com on PC, Mac, or tablet
Follow these steps to upload documents using TaxCaddy.com on your PC, Mac, or tablet.
- Sign in to TaxCaddy.com.
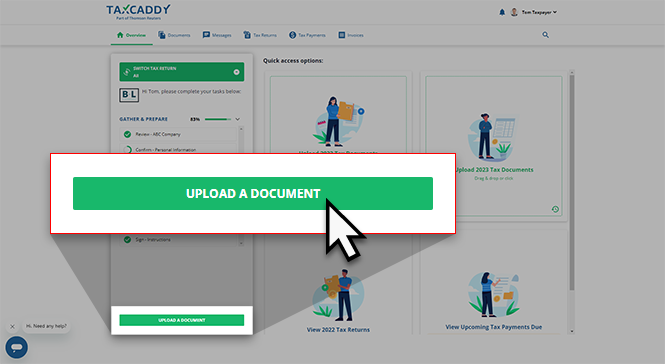
- From theOverviewscreen, you will see theUPLOAD A DOCUMENTfeature following yourTask List. SelectUPLOAD A DOCUMENT.
- Go to the location of the files on your device and select the files to upload.noteAccepted file formats include: PDF, DOCX, XLS, and XLSX. You can upload multiple files to the same category at 1 time.
- When theUpload Documentswindow appears, select aCategoryandTAX YEARfor the document.noteIf you are uploading multiple files that need to be filed to separate categories, selectDecide Later.If your tax professional has enabled 1041 tax return profiles on your account, select the correct
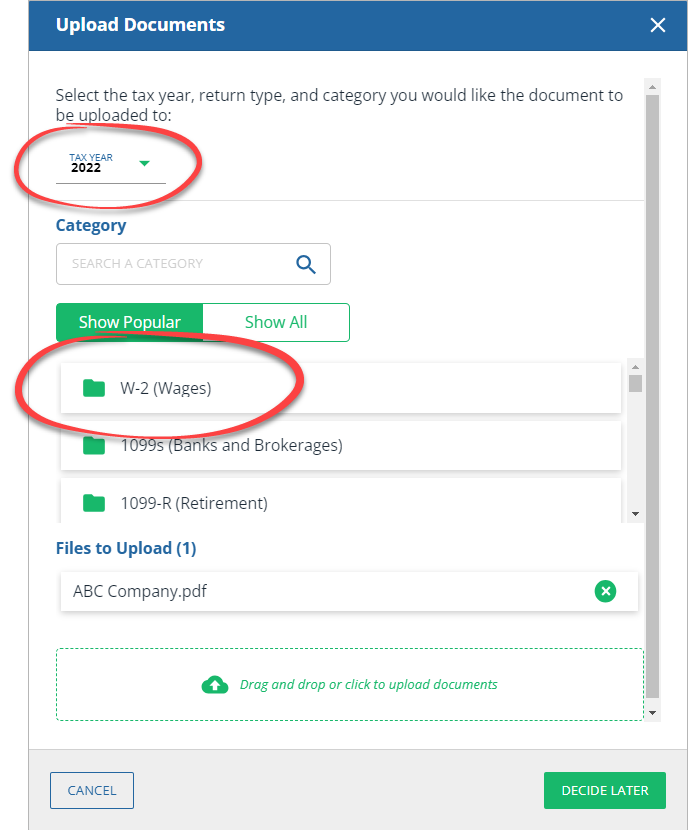 TAX RETURNin addition to theTAX YEARbefore selecting theCategory.
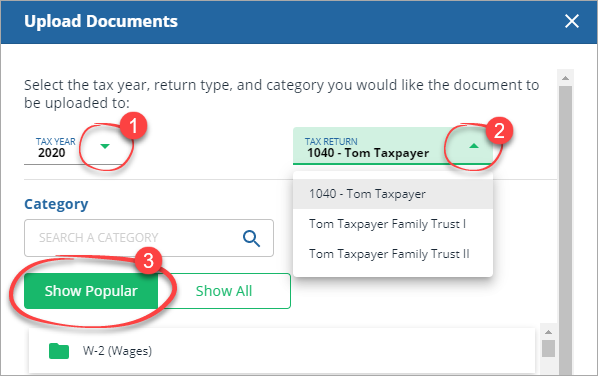 noteSome categories only apply to 1040 tax return types and won’t appear when moving a 1041 specific document and vice versa.If you are unable to find a category, select theShow Alltab.
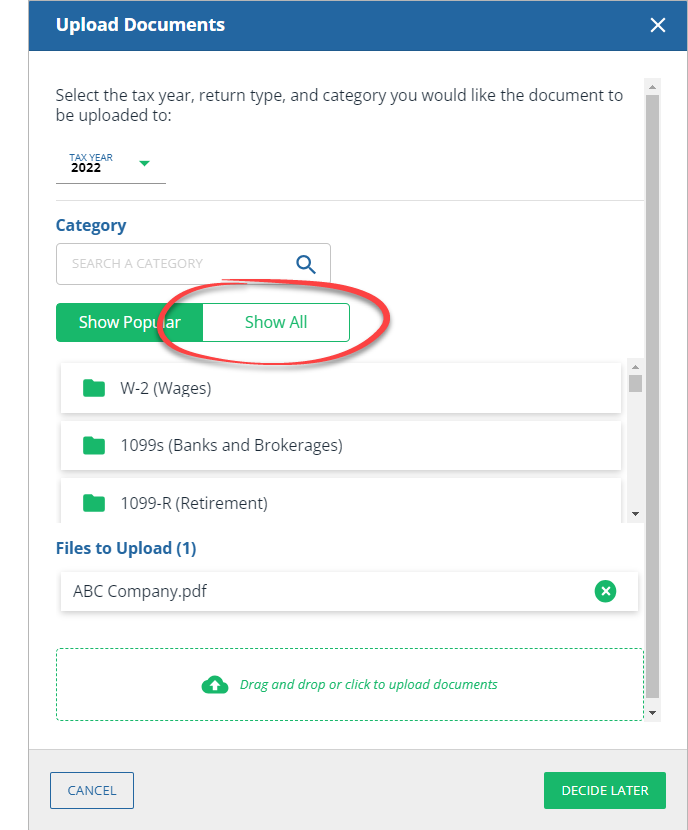 You can also use the search bar to find your category.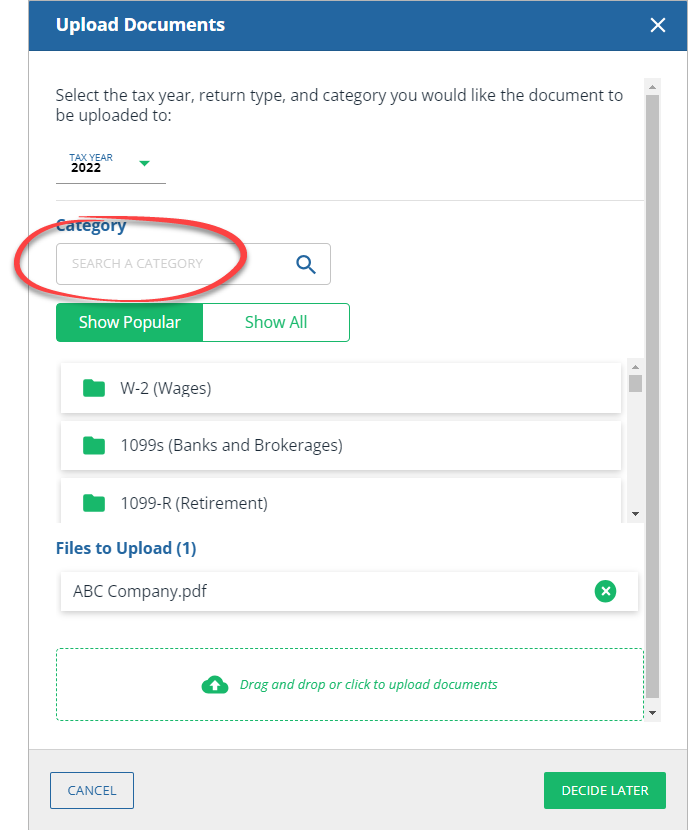
- Select a subcategory or select+Add Newto add a new subcategory.
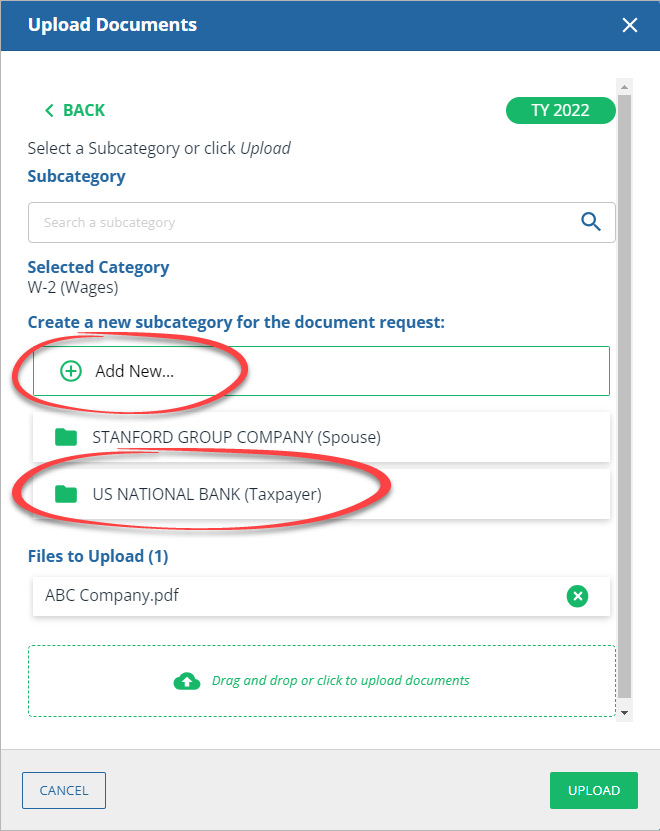
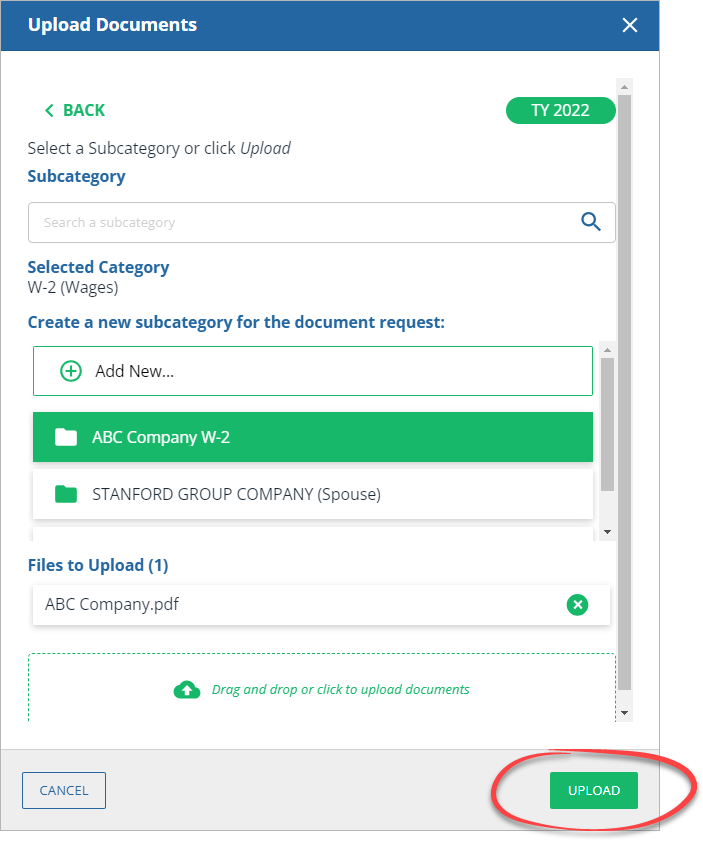
- After you've selected your subcategory, selectUPLOAD.
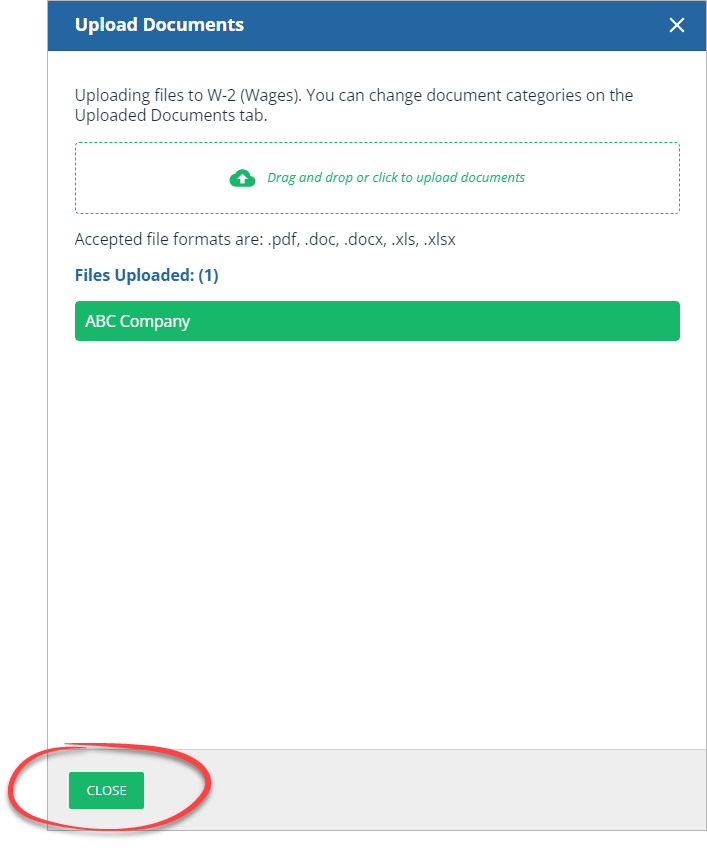
- Wait for the files to complete uploading, then selectCLOSE.noteSelectDrag or click here to upload documentsor drag additional documents onto the drop zone to upload more documents to the same category.
- To view uploaded documents, go to tab. Documents will appear in the assigned category and tax year.
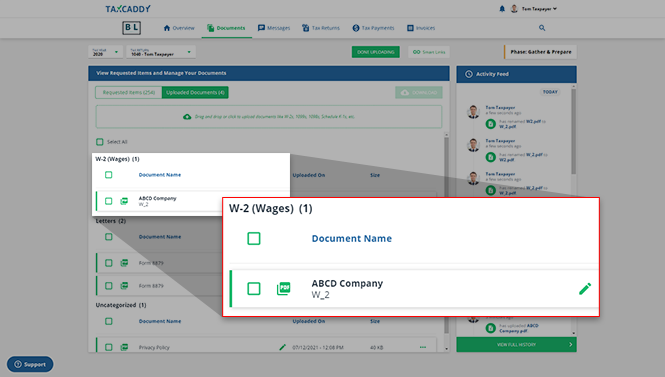
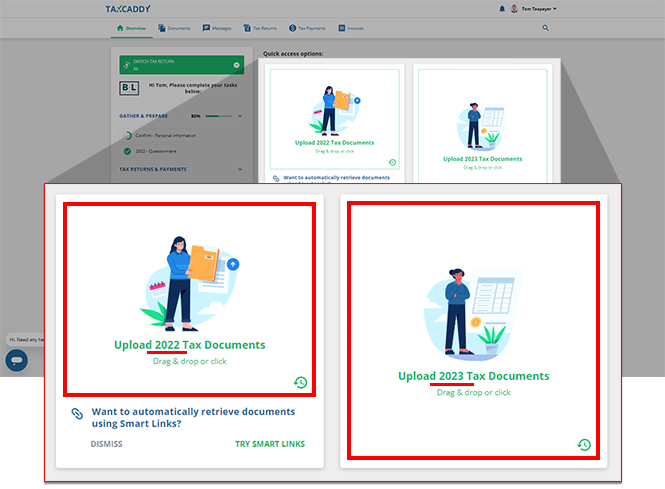
- Alternatively, you will see panels toUpload _____ Tax DocumentsinQuick access options. Each panel uploads documents to a specific tax year. You can select the panels or drag documents on either one of the top 2 panels. Your document will be uploaded according to the tax year listed on the panel.
iOS mobile app
Follow these steps to upload documents by taking a photo with the TaxCaddy iPhone mobile phone app or uploading from other services.
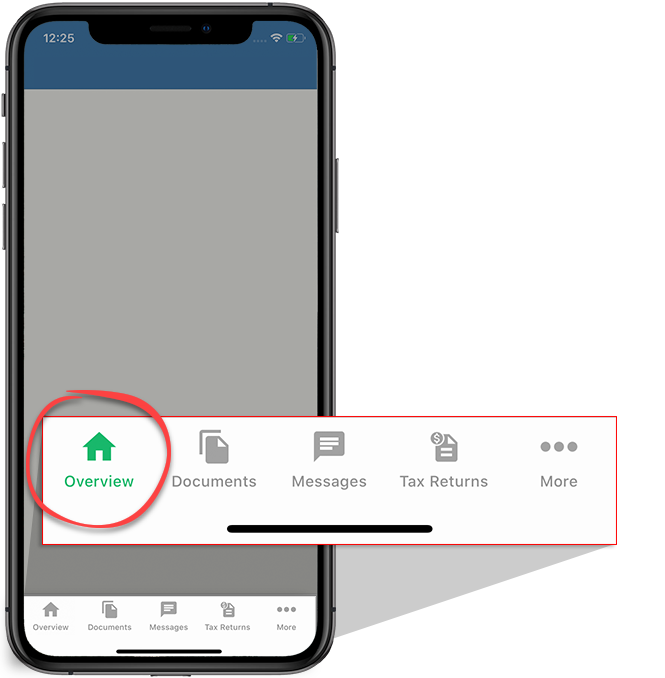
- Sign in to the TaxCaddy mobile app. If you're already signed in, make sure you're on theOverviewscreen by selecting theOverviewicon on the navigation bar.
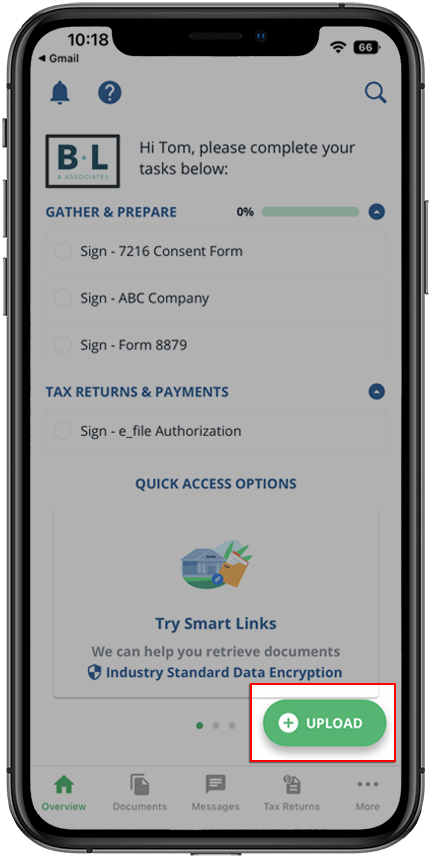
- Select+UPLOAD.
- You can upload a document from your device or take a photo. To upload from a local device or iCloud, selectUpload Files.
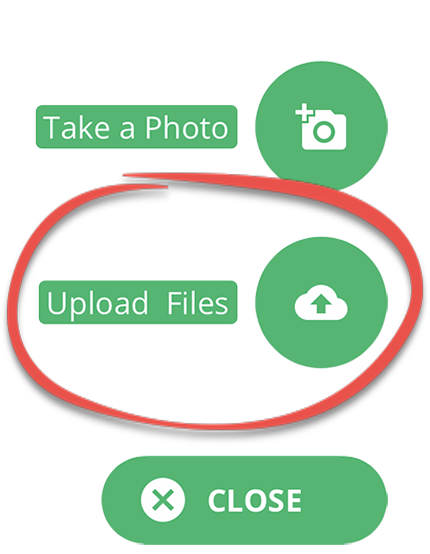 noteAccepted file formats include: PDF, DOCX, XLS, and XLSX. You can upload multiple files to the same category.Alternatively, you can go to theDocumentsscreen, select theMenuicon, thenUpload Files.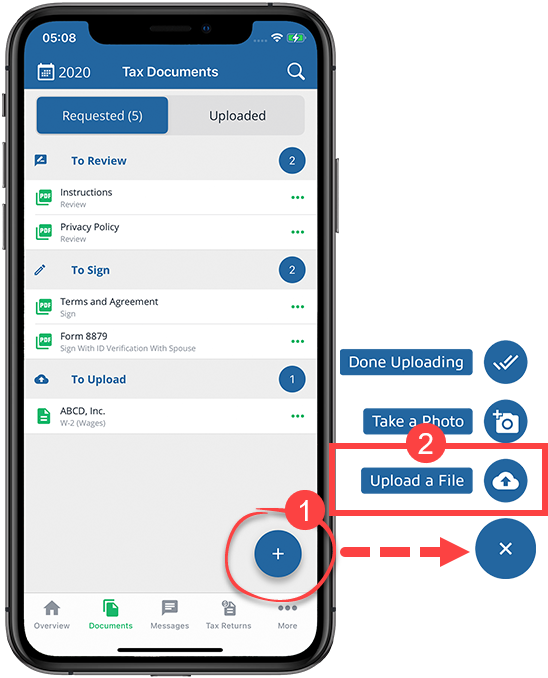
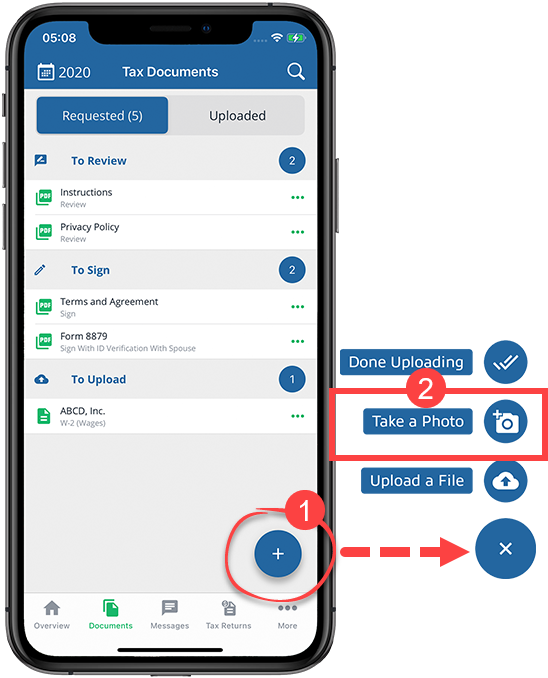
- If you prefer to take a photo of your document, selectTake A Photo.
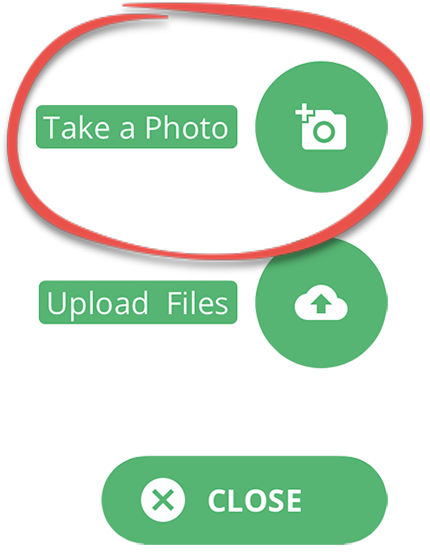 Alternatively, you can go to theDocumentsscreen, select theMenuicon, thenTake a Photo.
 If you selectedTake a Photofor the 1st time, TaxCaddy will need permission to access the camera. SelectSET PERMISSIONto continue.
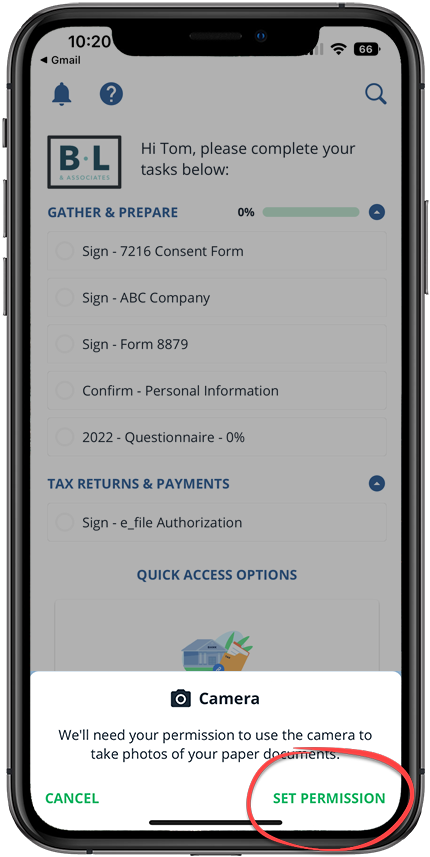 If you see the requesting permission window, selectOKto let TaxCaddy access your camera.
 - Position the camera over the document. Additional instructions appear onscreen. The photo will be captured automatically when the camera is properly aligned with the document. If TaxCaddy can't automatically take the photo after 20 seconds, you'll be given an option to take it manually.
- Select the tax year to upload the document to another tax year.
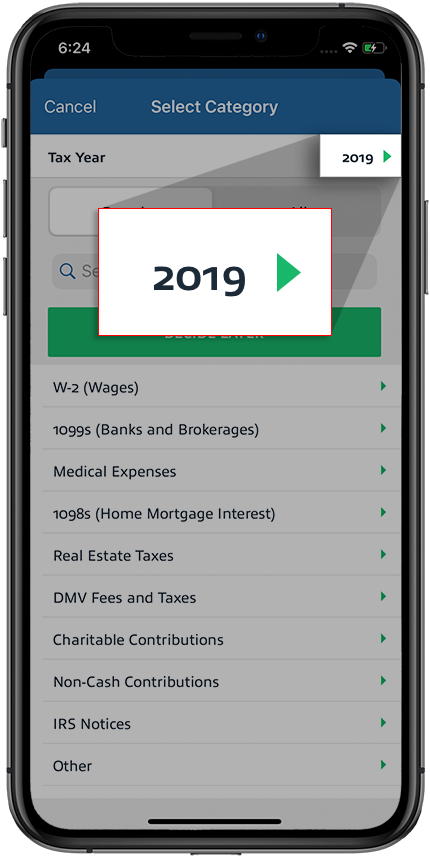 If your tax professional has enabled 1041 tax return profiles on your account, select the correctTax Returnin addition to theTax Yearbefore selecting theCategory.
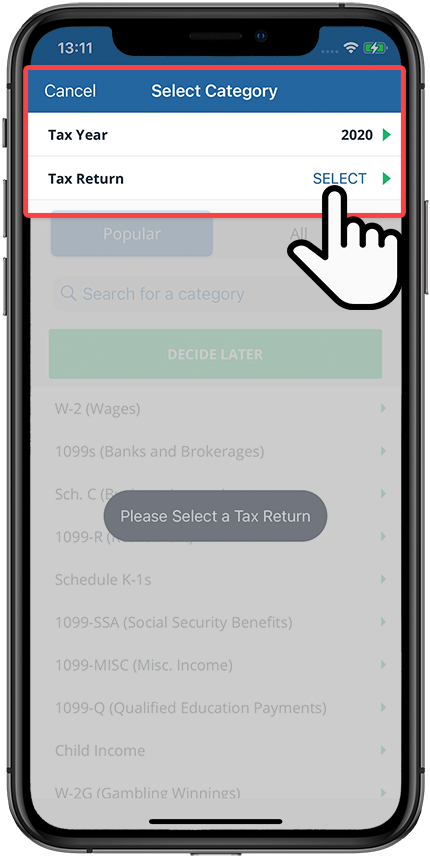 noteSome categories only apply to 1040 tax return types and won’t appear when moving a 1041 specific document and vice versa.
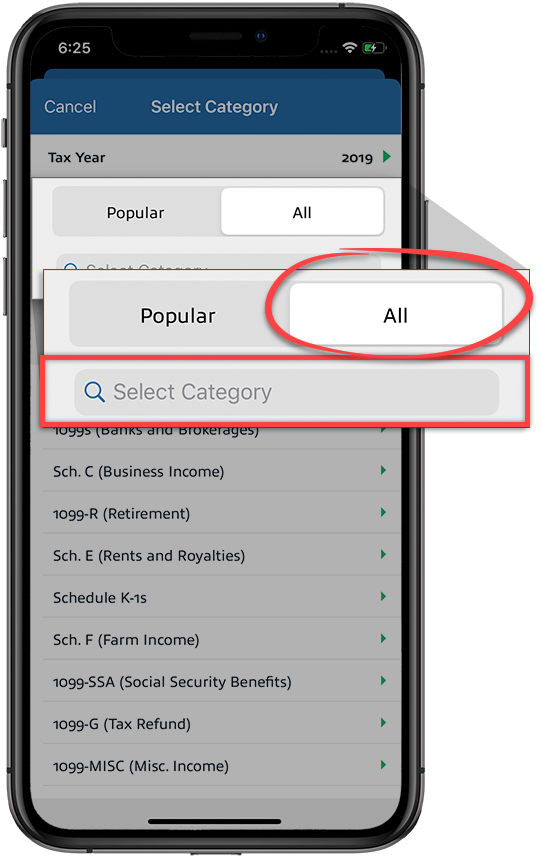
 - Select a category for the document, or selectDecide Laterto skip without selecting a category.
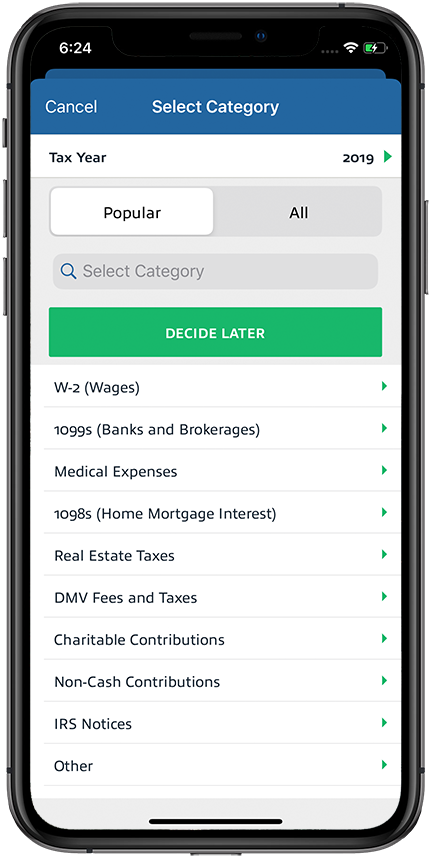
- You can also select theAlltab to view all the categories or use the search input field to search for a category by name.
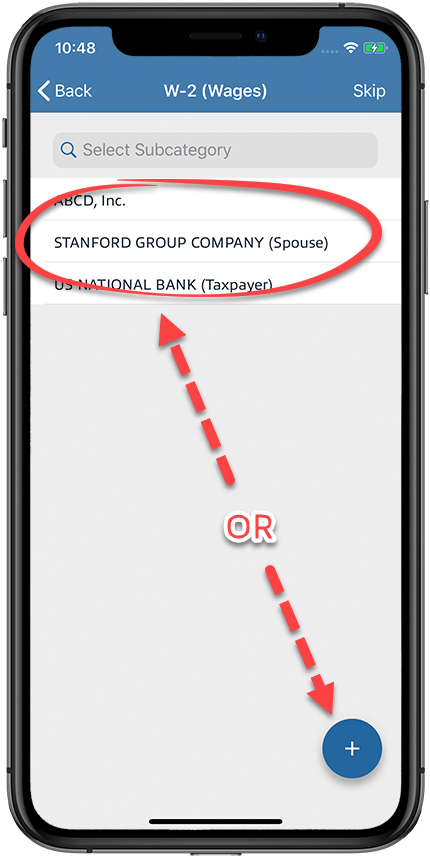
- If necessary, select a subcategory or add a new subcategory. To add a new subcategory, select theAddicon.
 If you selected to add a new category, enter the new category name and selectNext.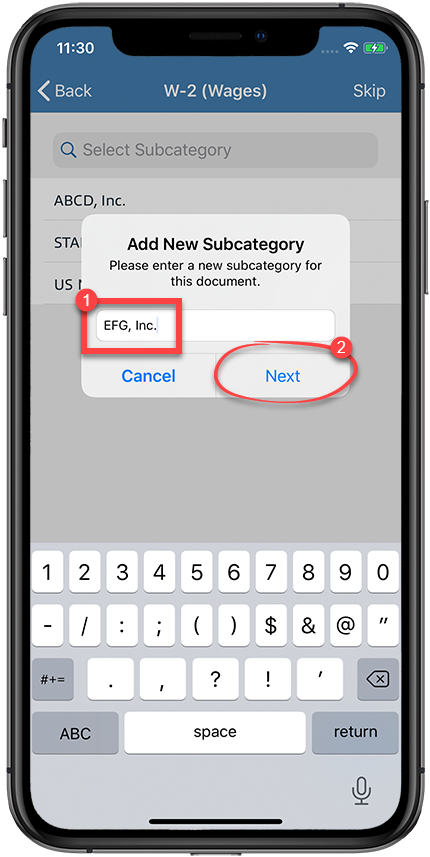
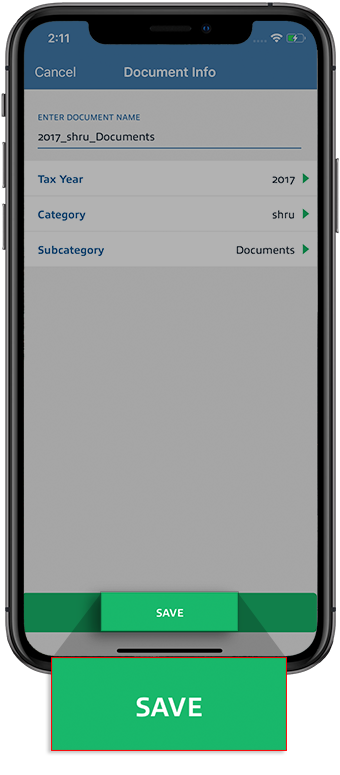
- Review your document information. You can select theEnter Document namefield to change the document name. Similarly, you can select tax year, category, or subcategory to select different options if necessary.
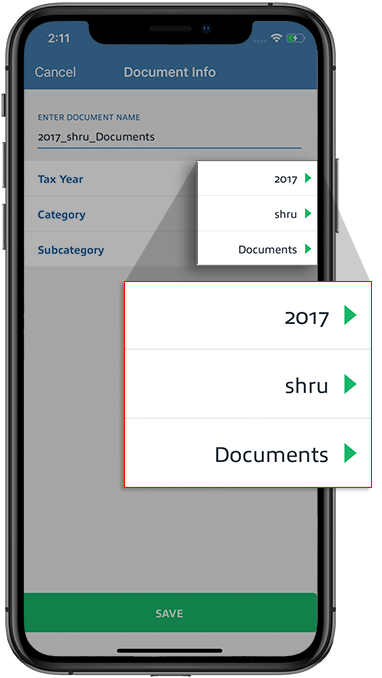
- SelectSAVEto upload the document.
Android mobile app
Follow these steps to upload documents by taking a photo with the TaxCaddy Android mobile phone app.
- Sign in to the TaxCaddy mobile app.
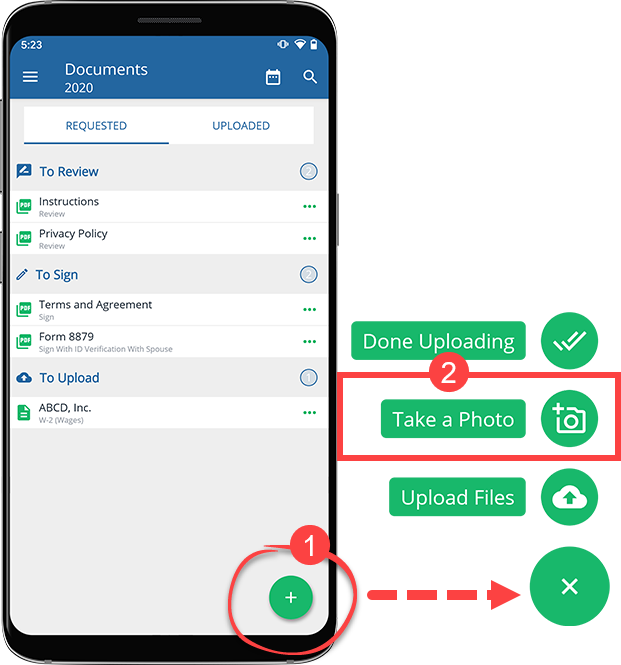
- Select the floating upload icon.
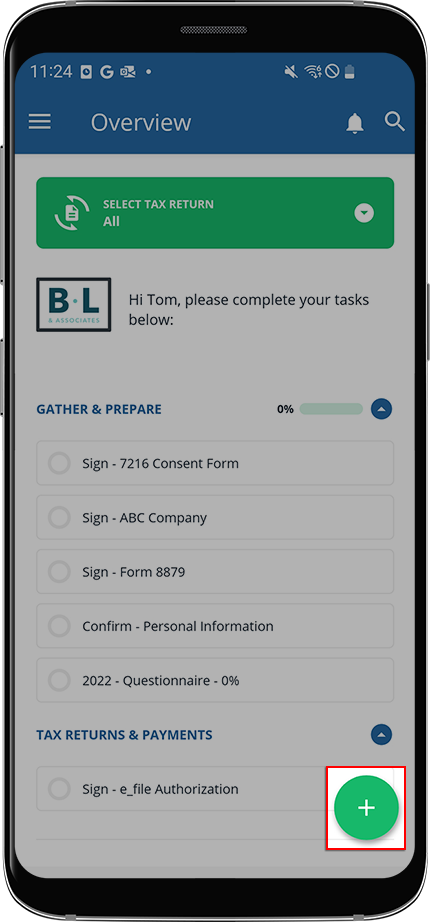
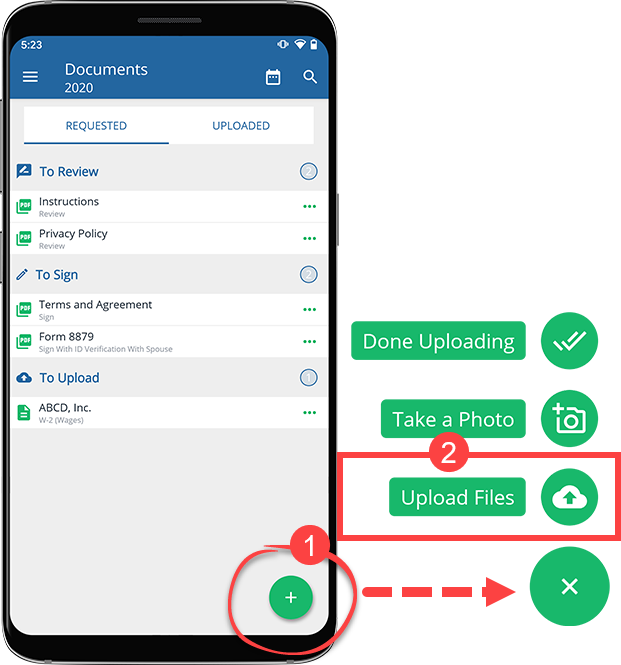
- You can upload a document from your device or take a photo. To upload from local device, Drop Box, or Google Drive, selectUpload Files.Alternatively, you can selectMenu,Documents,Menu, thenUpload Files.
 noteAccepted file formats include: PDF, DOCX, XLS, and XLSX. You can upload multiple files to the same category.If you selectedUpload a Filefor the 1st time, TaxCaddy will need permission to access the device storage. SelectSET PERMISSIONto continue.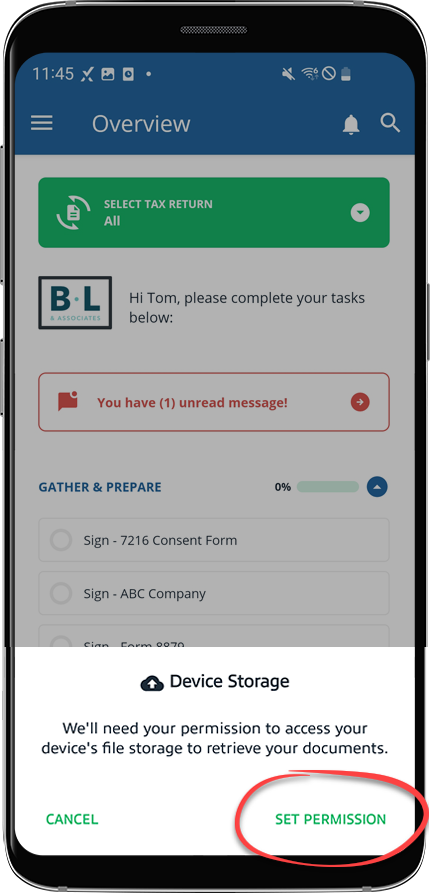
- If you prefer to take a photo of your document, selectTake A Photo.Alternatively, you can select theMenuicon,Documents,Menuicon, thenTake a Photo.
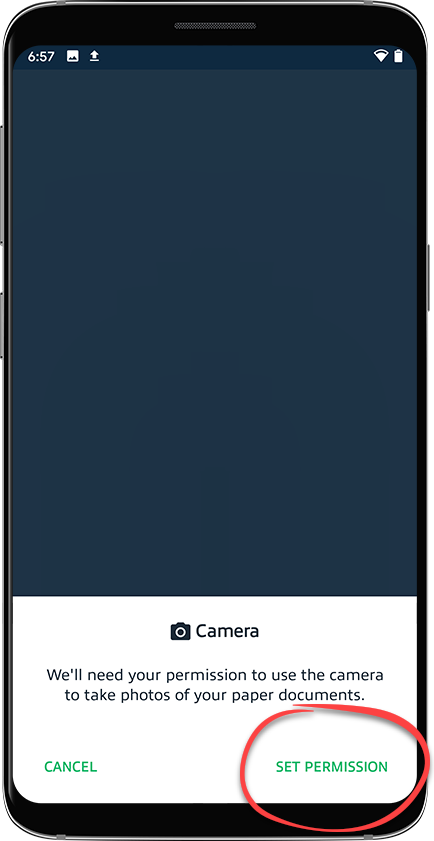
 If you selectedTake a Photofor the 1st time, TaxCaddy will need permission to access the camera. SelectSET PERMISSIONto continue.
 If you see the requesting permission window, selectOKto give TaxCaddy access to your camera.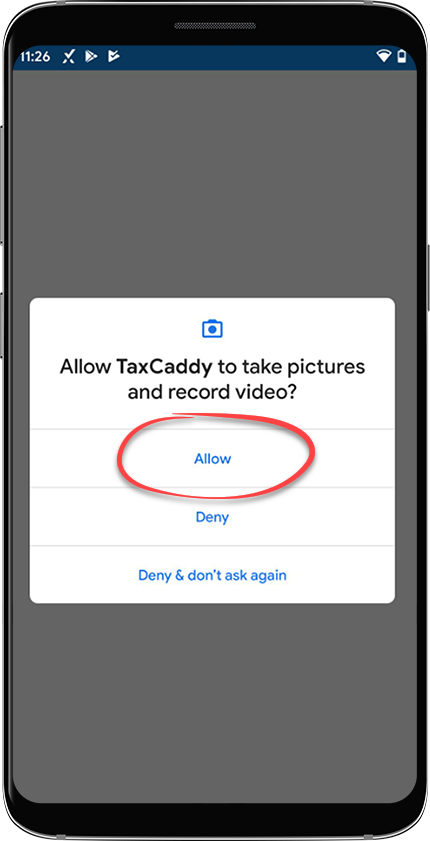
- Position the camera over the document. Additional instructions appear onscreen. The photo will be captured automatically when the camera is properly aligned with the document. If TaxCaddy can't automatically take the photo after 20 seconds, you'll be given an option to take it manually.
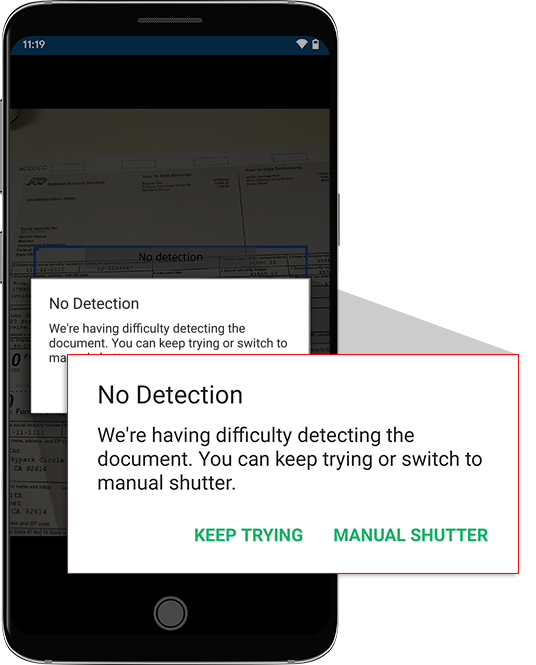
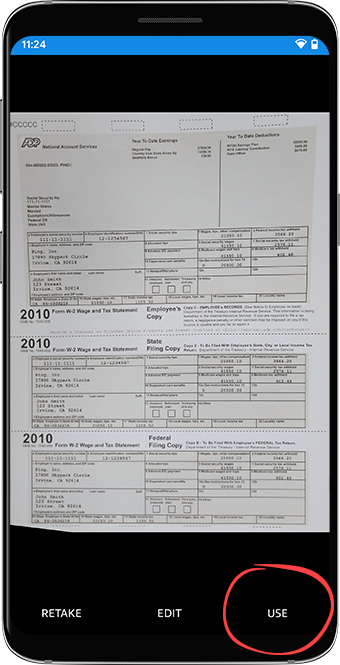
- SelectRETAKEto take the photo again,EDITto edit the photo, orUSEto use the current photo.
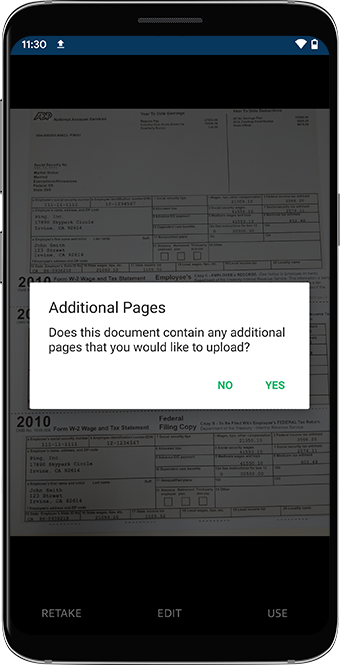
- After taking the photo, confirm whether or not the document contains multiple pages.
- Select the tax year to upload the document to another tax year.
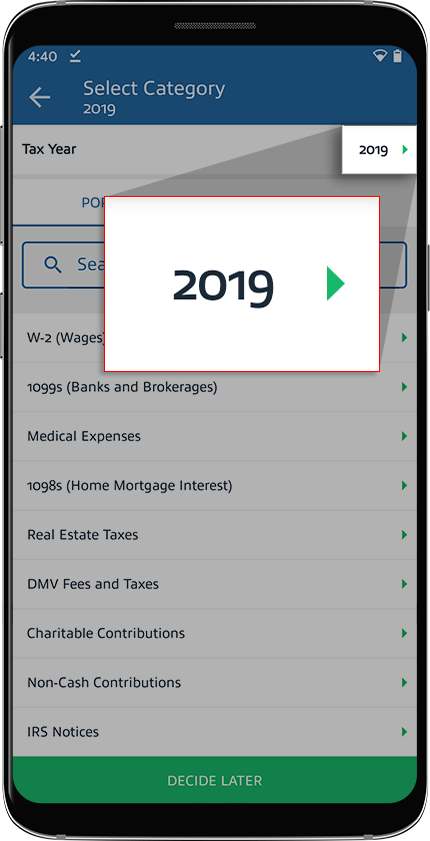 Select the tax year where the document should be uploaded.If your tax professional has enabled 1041 tax return profiles on your account, select the correct
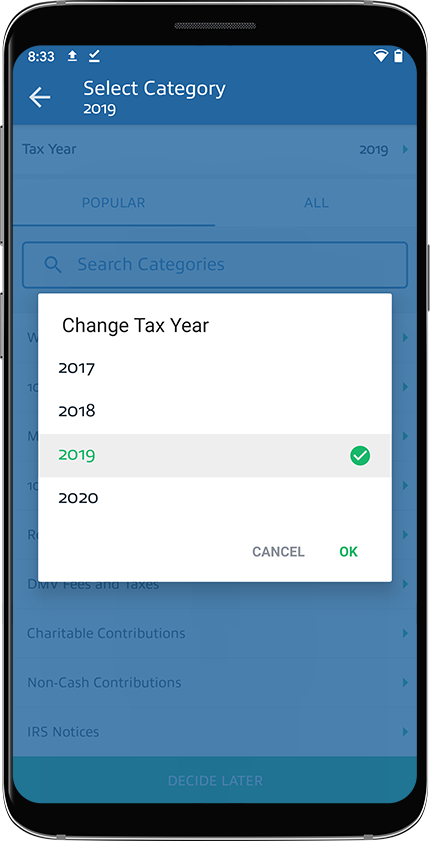 Tax Returnin addition to theTax Yearbefore selecting theCategory.
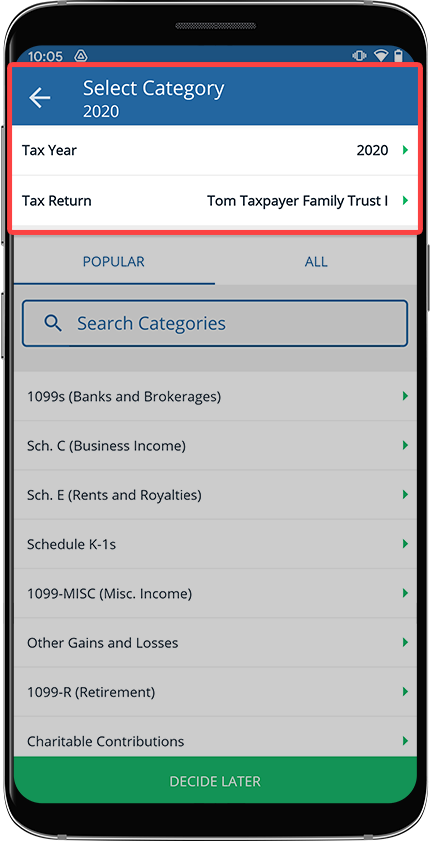 noteSome categories only apply to 1040 tax return types and won’t appear when moving a 1041 specific document and vice versa.
 - Select a category for the document, or selectDecide Laterto skip without selecting a category.
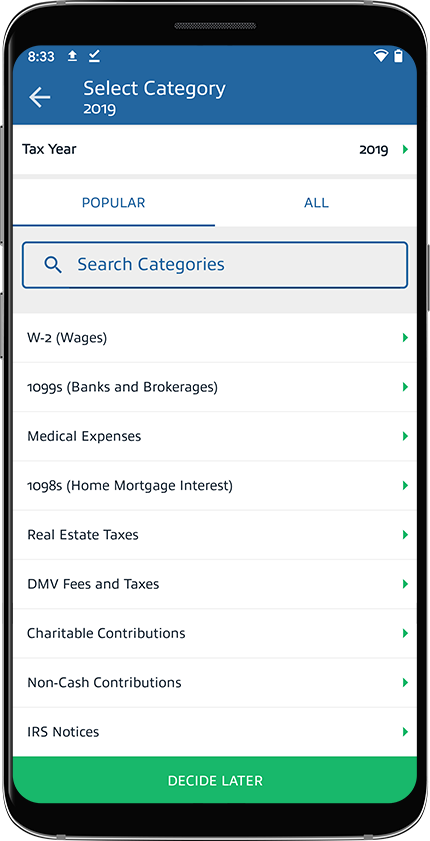
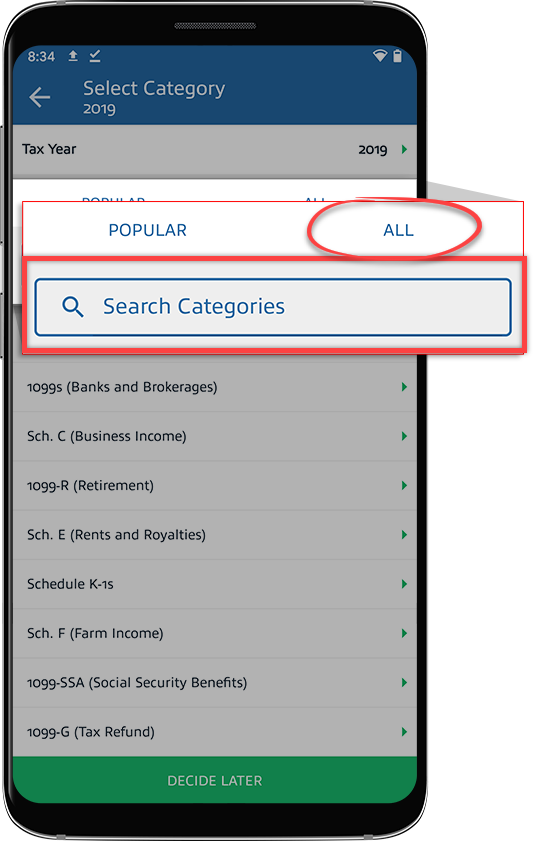
- You can also select theAlltab to view all the categories or use the search input field to search for a category by name.
- If necessary, select a subcategory or add a new subcategory. To add a new subcategory, select theAddicon.
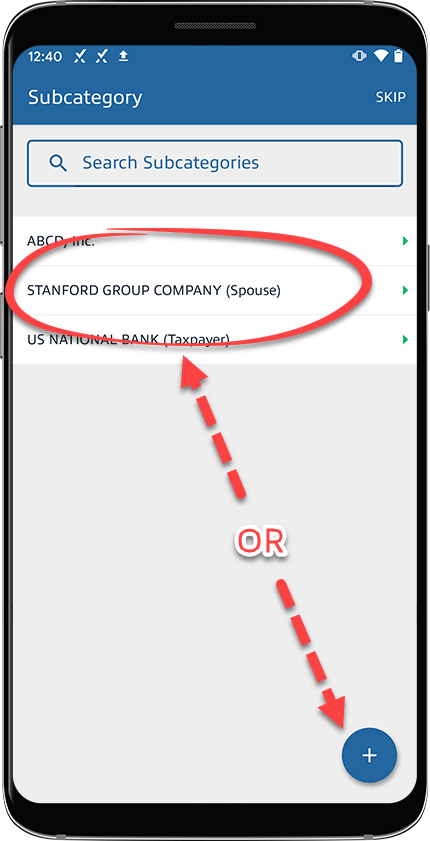 If you selected to add a new category, enter the new category name and selectNext.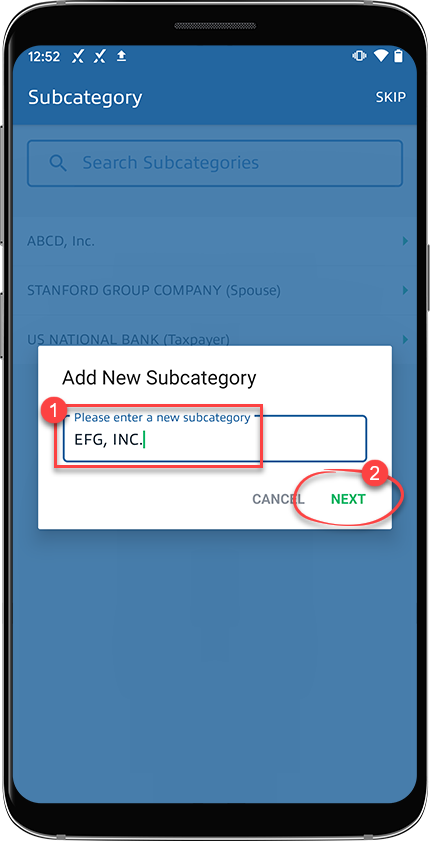
- Review your document information. You can select theDocument namefield to change the document name. Similarly, you can select tax year, category, or subcategory to select different options if necessary.
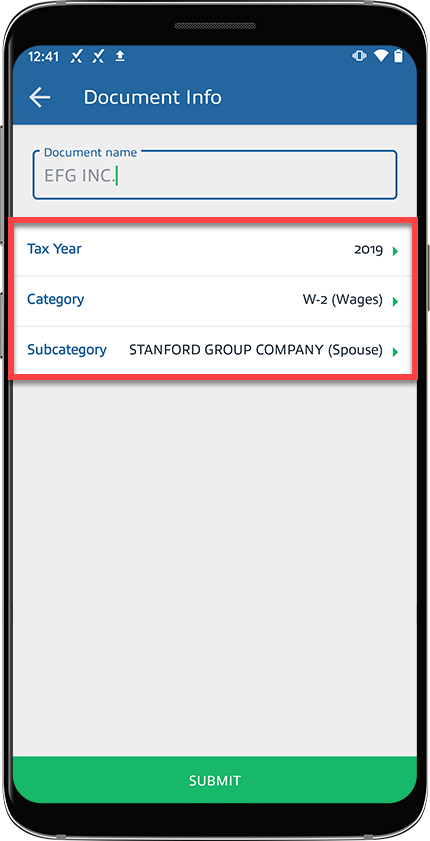
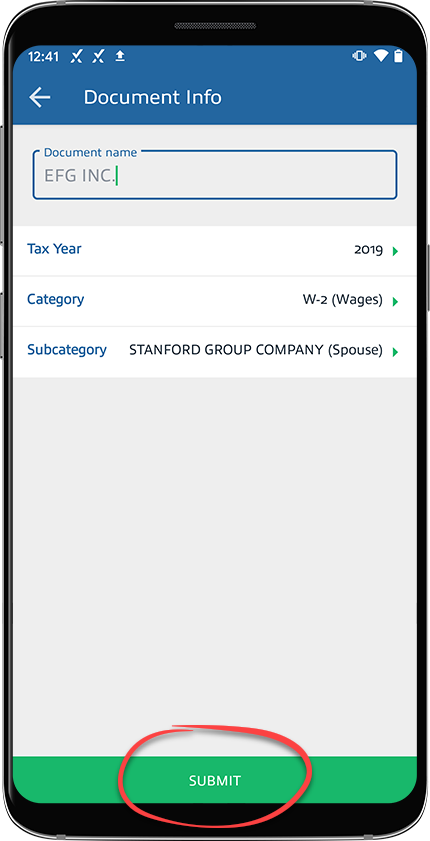
- SelectSUBMITto upload the document.
note
Files exceeding 1GB in size can't be uploaded.
Related Content
-
Document auto-categorization in TaxCaddy
Format: Article
-
Import saved or downloaded documents on your phone with TaxCaddy
Format:
Article
-
Add charitable contributions
Format:
Article

