
Create your account without an invitation
Show all hidden content
If your tax professional uses TaxCaddy, then you don't have to worry about creating your account. For your convenience, we highly recommend waiting for your tax professional to send you a TaxCaddy invite. The TaxCaddy invite link sent to your email address will automatically take you directly to your TaxCaddy account.
However, if you would like to create your TaxCaddy account yourself manually, you are welcome to follow the instructions in this article to do so and sign in for the 1st time.
important
If your spouse has already signed up with TaxCaddy, have your spouse invite you through Settings and use the link you're sent to sign up.
TaxCaddy.com on PC, Mac, or tablet
Sign Up
Follow these steps to create a new account on TaxCaddy.com on your PC, Mac, or tablet.
note
TaxCaddy works best on Google Chrome browser, but is also supported on Firefox, Edge, and Safari. TaxCaddy is not supported on Internet Explorer. When using taxcaddy.com on a tablet, we recommend viewing in landscape screen orientation for the best results.
- Whitelist TaxCaddy.com with your email provider to ensure our emails reach you.
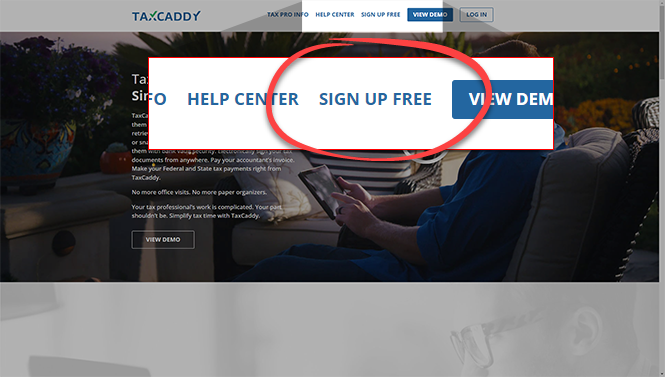
- If you received a TaxCaddy email invitation from your tax professional, select the link in that email to open the TaxCaddy enrollment screen in your browser (recommended).However, if you haven’t been sent an invite email from a tax professional and want to sign up on your own, go toTaxCaddy.comand selectSign up freeat the top. You can also click here to sign up!
- On theFirst Time Enrollmentscreen, enter the following information and then selectCREATE ACCOUNT.
- First Name
- Last Name
- Email Address- Your email address (Tip: Use the email address shared with your tax professional).
- Country Code- If your mobile phone number is located outside the U.S.A. then change the country code.
- Mobile Number- Omit any symbols when entering your phone number (for example, hyphens, brackets, etc.).
- Create Password- Create a strong password to keep your personal info safe and protect your files.
noteIn some instances, auto-populated fields may cause the signup process to fail erroneously. Enter fields manually.A valid password needs have the following:- A number
- A special character (for example, !@#$%^&*(){}:?><,.)noteSpaces are not permitted.
- Both upper and lower case letters
- 8 to 72 characters
As you enter a password, each requirement will become highlighted for each completed requirement.Your password needs meet all the requirements. You can select the Mask to show or hide your entered password.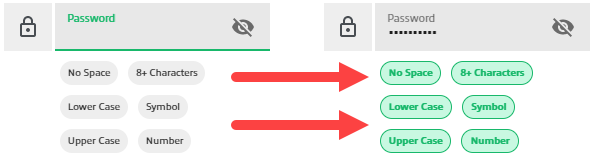
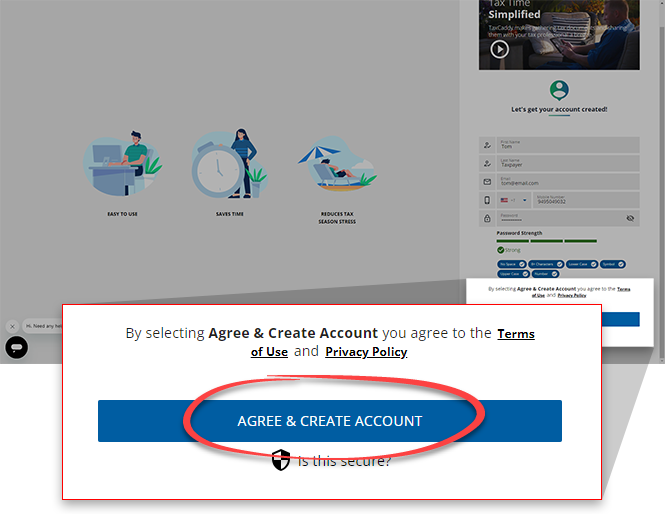
- You can selectTerms of Useto read the end-user license agreement. Once you're done, selectAGREE & CREATE ACCOUNTto agree to theTerms of Useand create your account
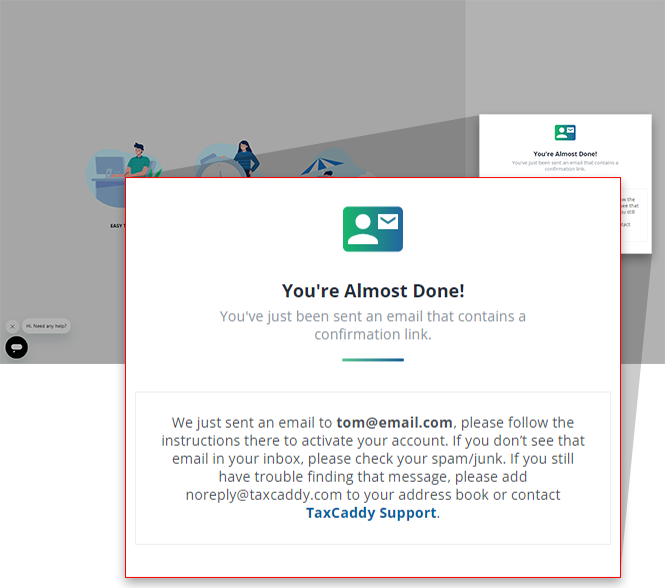
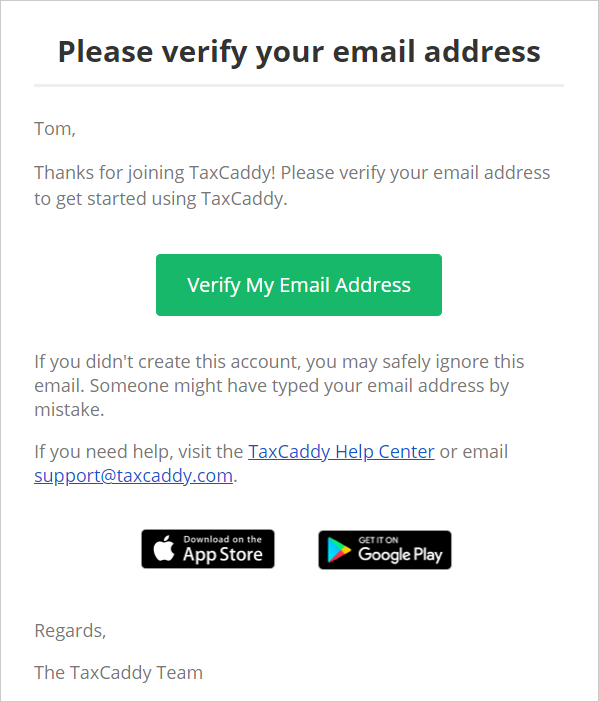
- TaxCaddy directs you to check your email for a message verifying your email address.
- In the email verification message from TaxCaddy, selectVerify My Email Address.noteThe link sent to verify your email address expires in 30 days.
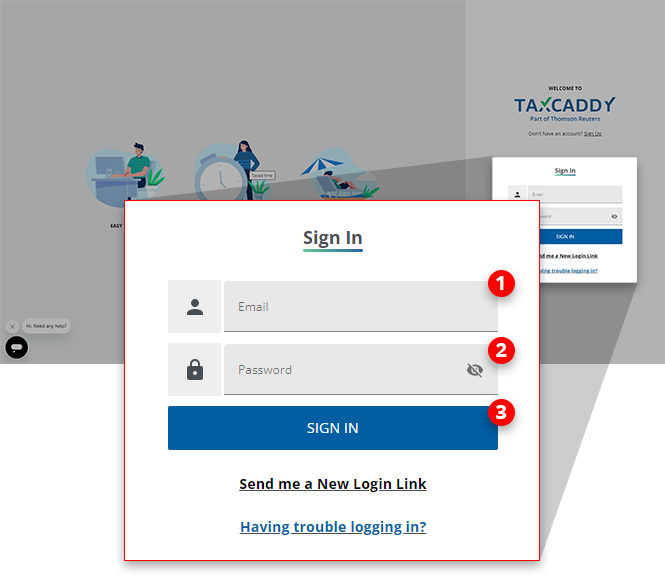
- TaxCaddy verifies that your email address has been verified and you can now sign in to your account. Enter your email address intoEmailand your password intoPassword. Then, selectSIGN IN.
 You can selectUnmaskto view your typed password. Similarly, you can selectMaskto mask (for example, *****) the password field.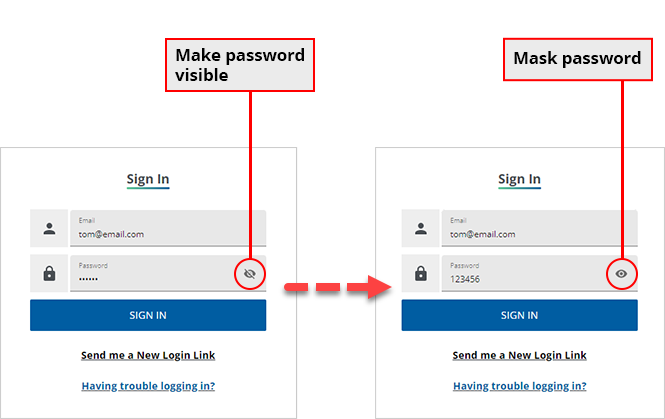
- Alternatively, you can sign in from TaxCaddy.com on web or the TaxCaddy mobile app on Android and iOS.
Enabling Two-Factor Authentication
Two-factor authentication (2FA) adds an extra layer of security when accessing TaxCaddy. When you sign in to TaxCaddy, a verification code will be sent as a text message to your mobile phone. You'll need to provide a verification code to log in. By setting up 2FA, your TaxCaddy account will be protected in case your account credentials are compromised.
Follow these steps to turn on Two-Factor Authentication(2FA):
- This screen will inform you of the two-factor authentication process. SelectSETUP TWO FACTOR AUTHENTICATION.

- Provide your mobile phone number, then selectSEND VERIFICATION CODE. You will receive a verification code in a few minutes.
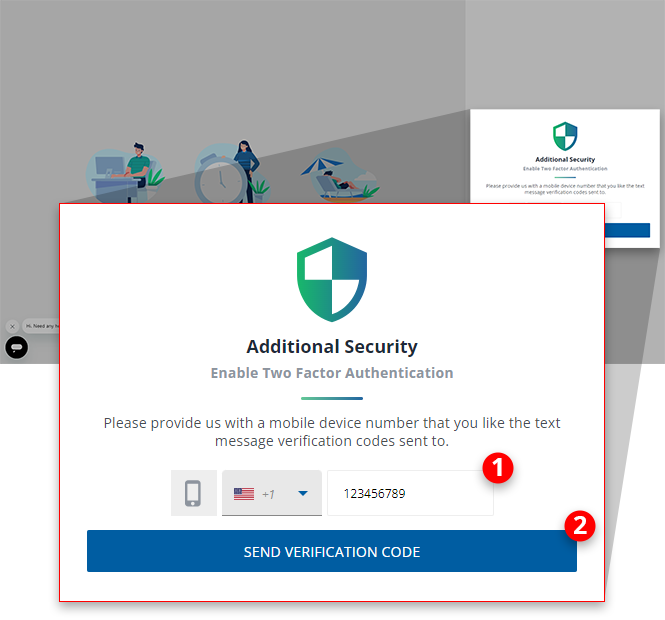 noteDue to local restrictions, some countries may not receive TaxCaddy verification code SMS on their mobile phone when they need to sign in, sign documents, etc.Contact TaxCaddy Support if you are experiencing difficulty receiving your verification code.
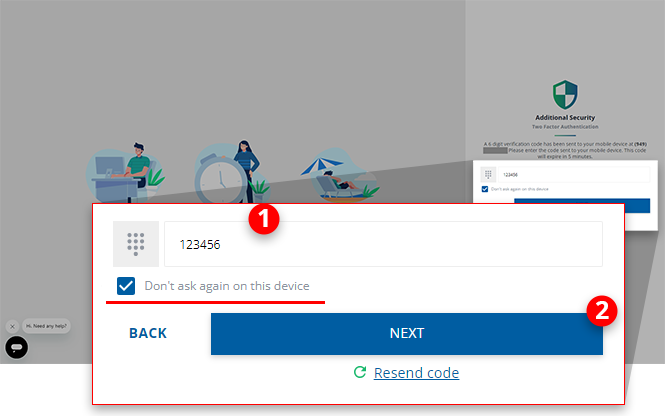
 - Provide the verification code that was sent to your mobile phone, then selectNEXT.noteThe verification code expires after 5 minutes.
Setup Default Tax Year
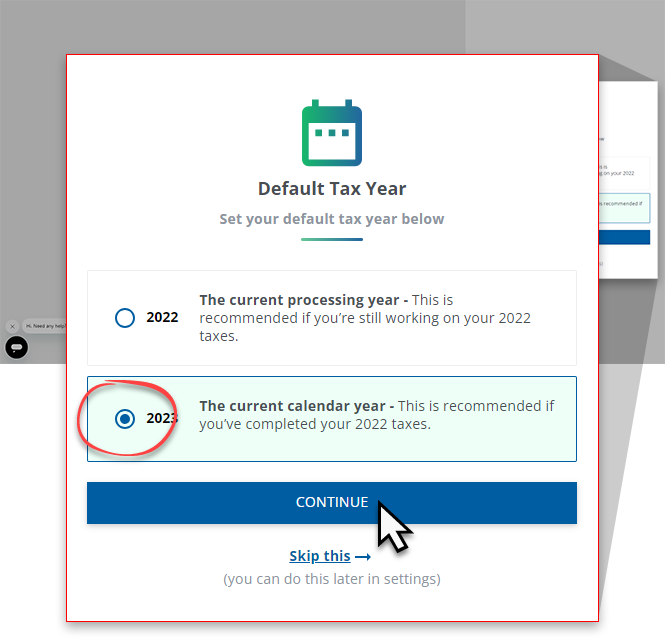
Next, you can select a default tax year. Each time you sign in, the selected default tax year will show you documents, invoices, and tax returns associated with that tax year. You can also switch between tax years at any time irrespective of the default tax year.
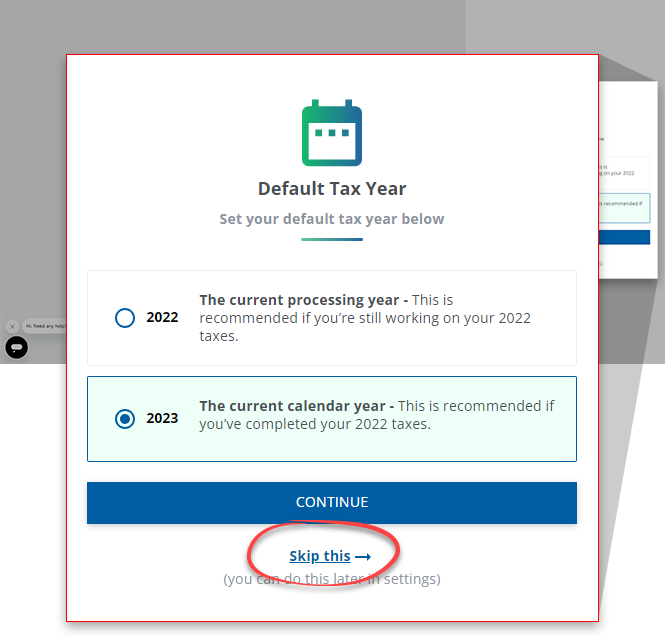
To skip this step, select
Skip this
.
note
You can change the default tax year from the
Settings
screen. Setup Connection Request
You will see a connection request only if a tax professional has requested permission to connect with you.
note
If you didn't receive a connection request, then skip to the next step. You can also get a connection request from the
Overview
screen when your tax professional sends you the request. Granting permission lets the tax professional to:
- Access your tax documents
- Communicate with you
- Send you letters, questionnaires, and other requests
- Upload your tax return for you to review.
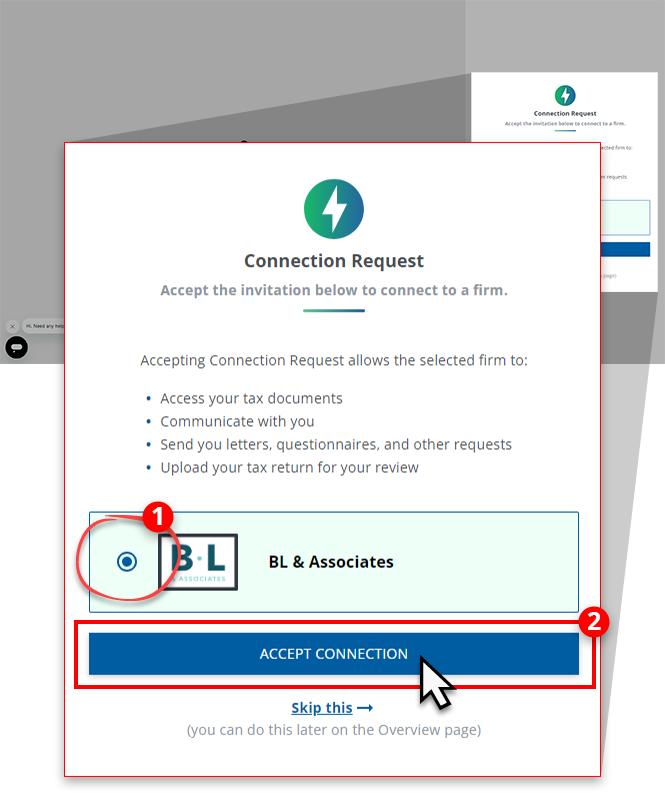
To accept a connection request, select
ACCEPT CONNECTION
.
To skip the setup, select
Skip this
. If you skip the setup process, then you can connect with your tax professional from the Overview
screen.Add Spouse
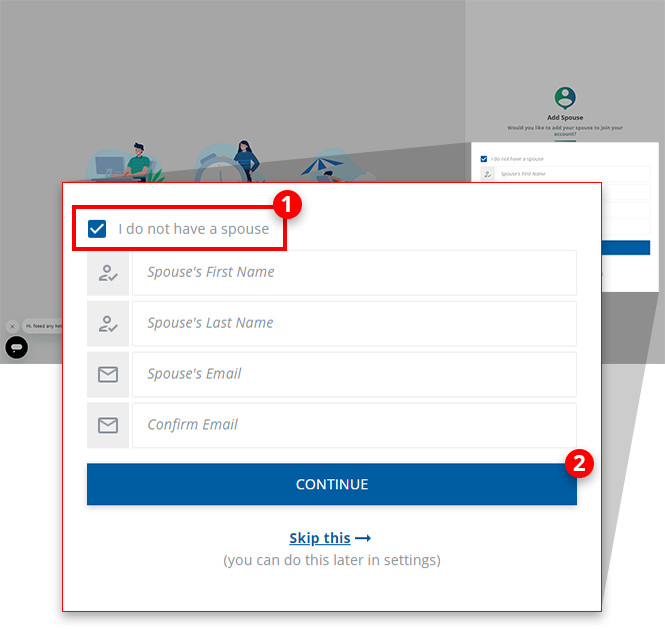
You'll now be prompted to invite your spouse to join your account.
If you don’t have a spouse, select
I don’t have a spouse
, and select CONTINUE
.
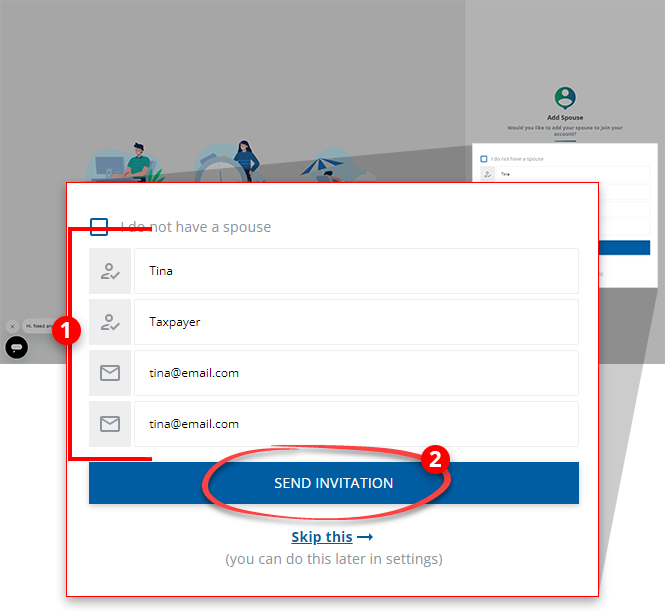
You can either enter your spouse's email address and select
SEND INVITATION
, or select Skip this
to sign in without entering any spouse information. You can also add an additional user later in Settings
.
Select
CONTINUE
to log into TaxCaddy.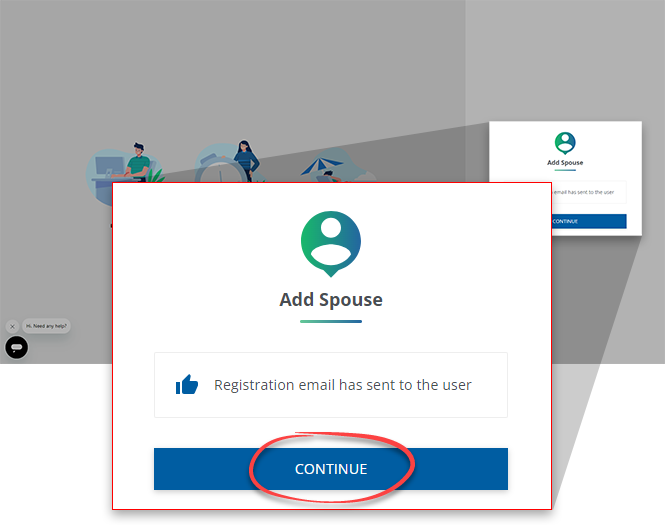
Because it's your first time logging in, you will be presented with our
Onboarding Tutorial
, where you can familiarize yourself with the different TaxCaddy features. Select NEXT
to progress through the tutorial or select SKIP
if you'd like to proceed to TaxCaddy.
You can select
NEXT
to progress through the tutorial or select SKIP
if you'd like to proceed to TaxCaddy.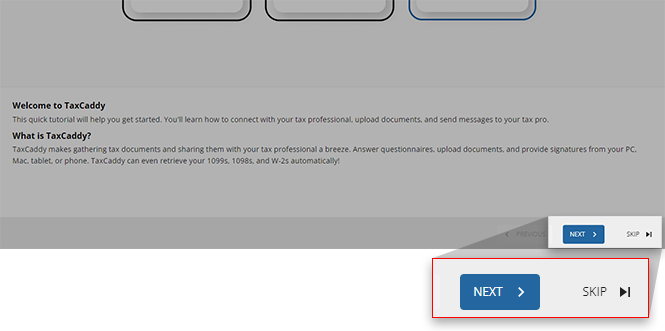
iOS mobile app
Follow these steps to create a new TaxCaddy account on your iPhone mobile phone app.
- Whitelist TaxCaddy.com with your email provider to ensure our emails reach you.
- Download and install the TaxCaddy mobile app.
- Open the TaxCaddy mobile app, if you see the welcome screen, tapGET STARTEDto sign up.
 However, if you see the sign-in screen, tapSIGN UP.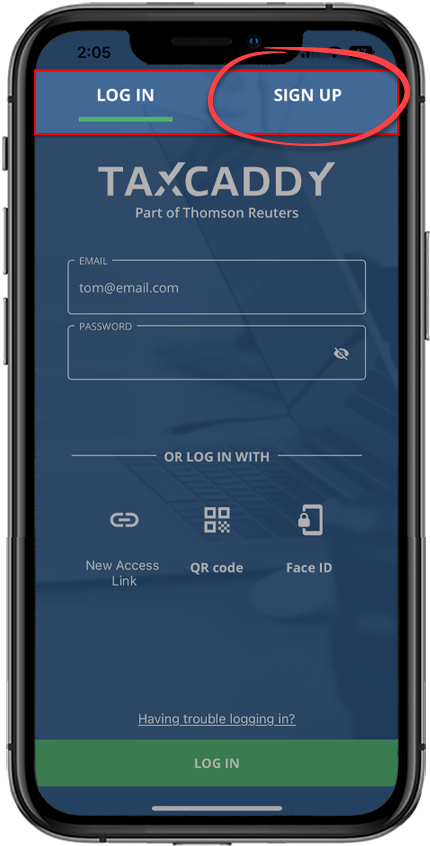
- Enter the following information, then tapNext:
- First Name
- Last Name
- Email Address- Your email address (Tip: Use the email address shared with your tax professional).
- Country Code- If your mobile phone number is located outside the United States of America then change the country code.
- Mobile Number- Omit any symbols when entering your phone number (for example, hyphens, brackets, etc.).
- Create Password- Create a strong password to keep your personal info safe and protect your files.
noteWe recommend you create your TaxCaddy account using the same email address your tax professional has on file. If you create your account using a different email address, contact support after logging in to TaxCaddy for the 1st time to ensure your tax professional can connect with your account.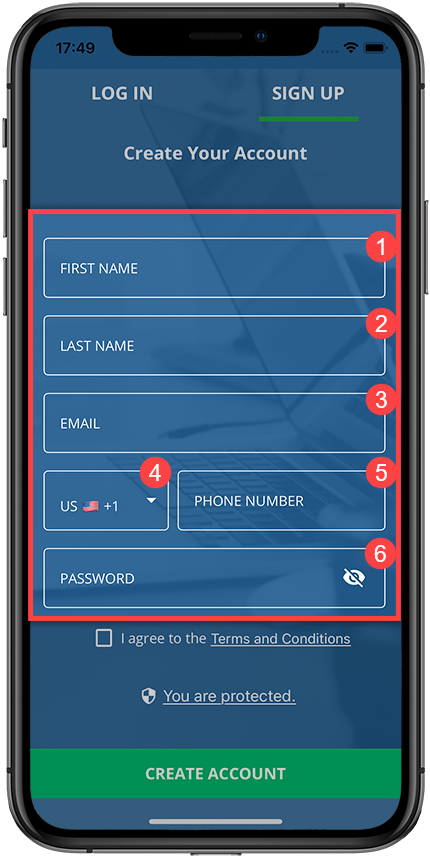 Omit any symbols when entering your phone number (for example, hyphens, brackets, etc.).
 - Enter a password into thePasswordfield. Once your account is created, you will need to enter this password to sign in to your TaxCaddy account.
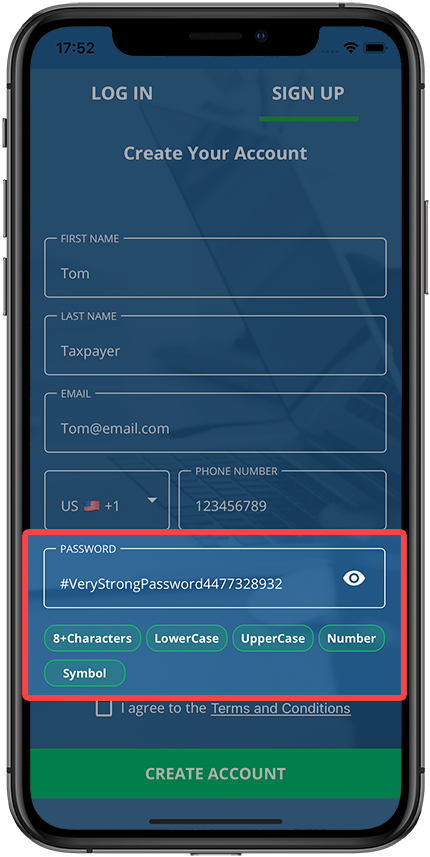 Create a strong password to keep your personal info safe and protect your files. A valid password needs to have the following:
- A number
- A special character (for example, !@#$%^&*(){}:?><,.)noteSpaces are not permitted.
- Both upper and lower case letters
- 8 to 72 characters
Your password needs to meet all the requirements. Each password requirement will become highlighted as you enter a password. You can select theMaskto show or hide your password.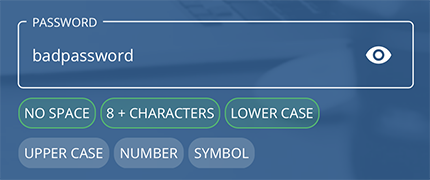
- You can tapTerms of Useto read the end-user license agreement, then tapAGREE & CREATE ACCOUNTto proceed.
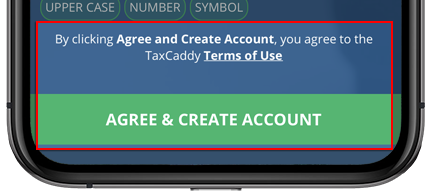
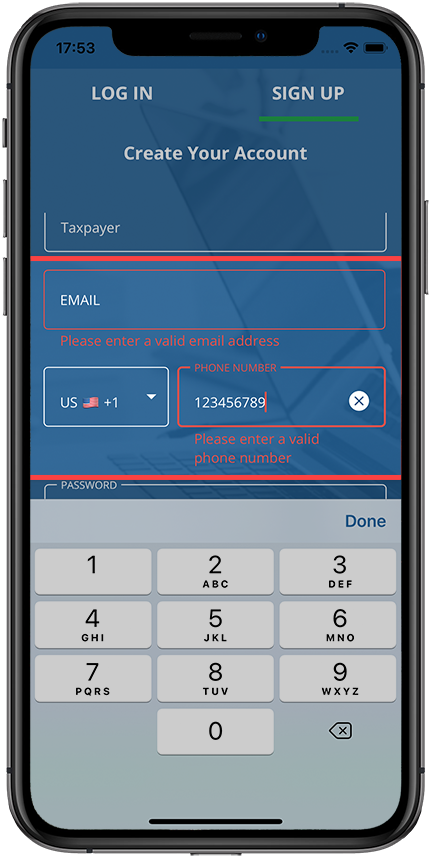
- You will see an error messages if a field is invalid or missing required information. Enter the information then tapCREATE ACCOUNTto try again.
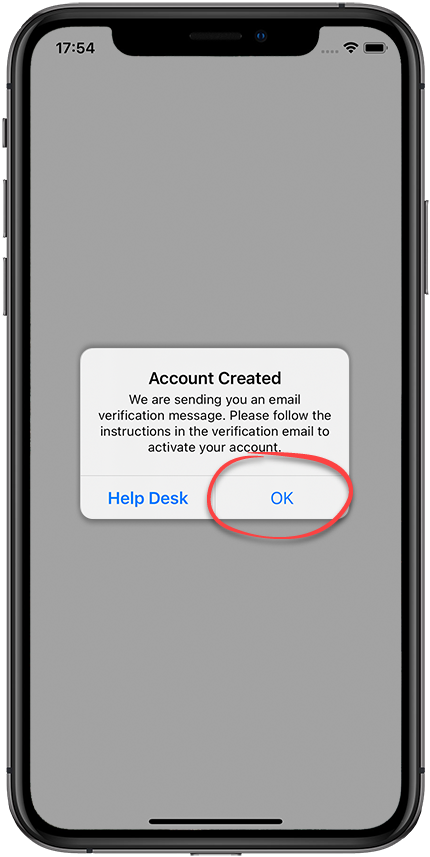
- You will receive a confirmation message if your account is created successfully. TapOKto continue.
- Check your email for an email verification message from TaxCaddy. TapVerify My Email Address. Your email address is verified.noteThe link sent to verify your email address expires in 30 days.
- In the TaxCaddy app, enter your email address in theEmailfield, your password into thePasswordfield, then tapLOG IN.

- Two-factor authentication (2FA) adds an extra layer of security when accessing TaxCaddy. When you sign in to TaxCaddy, a verification code will be sent as a text message to your mobile phone. You'll need to provide a verification code to log in. By setting up 2FA, your TaxCaddy account will be protected in case your account credentials are compromised. To continue, tapSETUP TWO-FACTOR AUTHENTICATION.
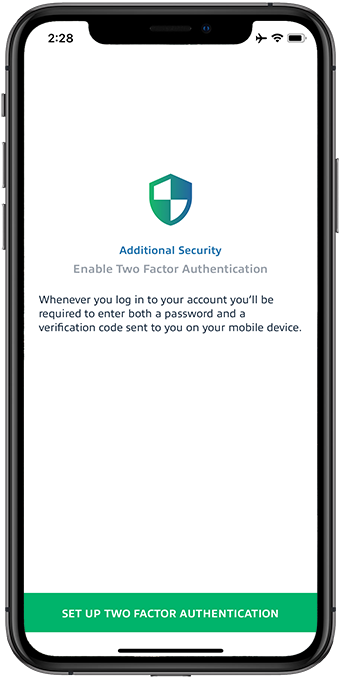
- Provide your mobile phone number, and then tapSEND VERIFICATION CODE. If you don't seeSEND VERIFICATION CODE, tap the background to lower the number pad.
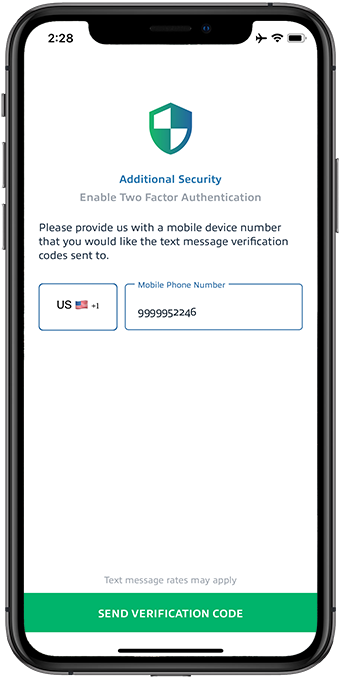 noteDue to local restrictions, some countries may not receive TaxCaddy verification code SMS on their mobile phone when they need to sign in, sign documents, etc.Contact TaxCaddy Support if you are experiencing difficulty receiving your verification code.
 - Provide the verification code that was sent to your mobile phone, and tapSUBMIT.

- Next, you can select a default tax year. Each time you sign in, the selected default tax year will show you documents, invoices, and tax returns associated with that tax year. You can switch between tax years at any time irrespective of the default tax year. You can also change the default tax year from theSettingsscreen. After you select the default tax year, tapCONTINUE.
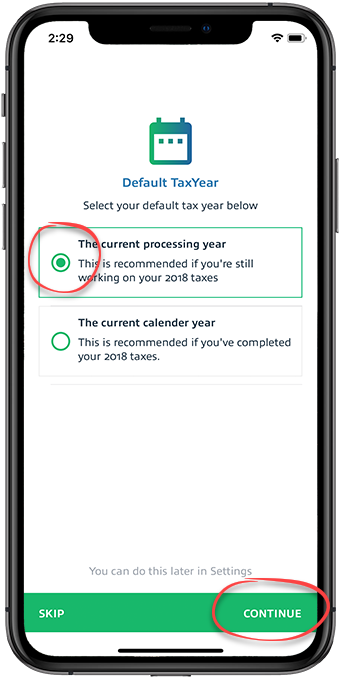 To skip the setup process, tapSKIP.noteYou can change the default tax year from theSettingsscreen.Tap here to learn more about changing the default tax year.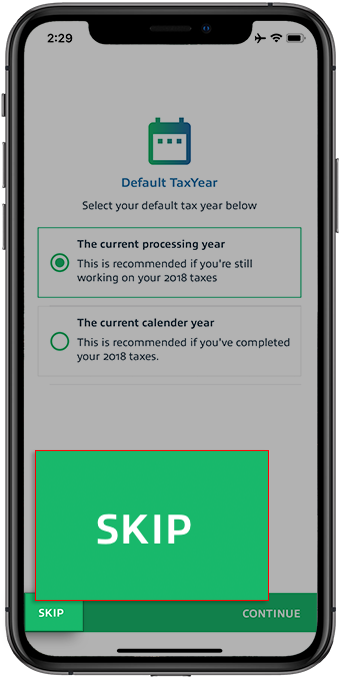
- TheConnection Requeststep only appears if you have a pending connection request from your tax professional.noteIf you didn't receive a connection request, then skip to the next step. You can also accept connection request from theOverviewscreen when your tax professional sends you the request. Tap here to learn more about connecting with your tax professional.Granting permission grants the tax professional to:
- Access your tax documents
- Communicate with you
- Send you letters, questionnaires, and other requests
- Upload your tax return for you to review.
To accept a connection request, tapACCEPT CONNECTION. To skip the setup process tapSKIP. If you skip the setup process, then you can connect with your tax professional from theOverviewscreen.Tap here to learn more about connecting with your tax professional.Tap here to learn more about disconnecting from your tax professional.
 - You'll now be prompted to invite your spouse to join your account.If you don’t have a spouse, tapI don’t have a spouse, and tapCONTINUE.
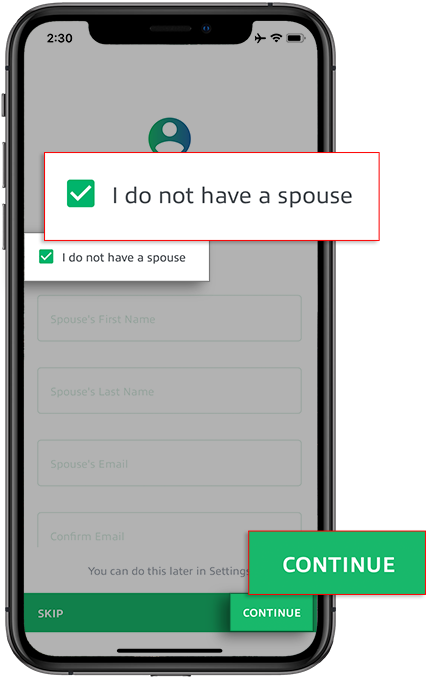 You can either enter your spouse's information then tapSEND INVITATION, or tapSKIPto sign in without entering any spouse information. You can also add an additional user later inSettings.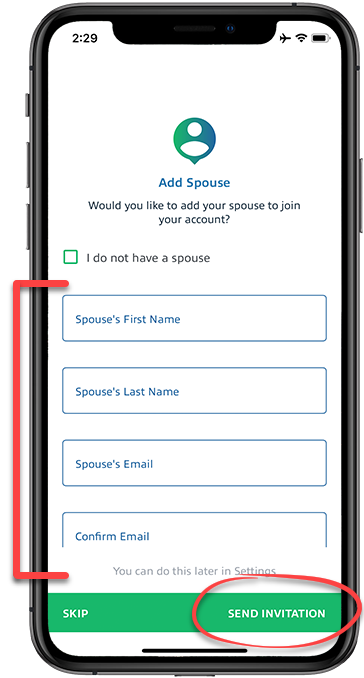
- You're now logged in to TaxCaddy.
Android mobile app
Follow these steps to create a new TaxCaddy account on your Android mobile phone app.
- Whitelist TaxCaddy.com with your email provider to ensure our emails reach you.
- Download and install the TaxCaddy mobile app.
- Open the TaxCaddy mobile app, if you see the welcome screen, tapGET STARTEDto sign up.
 However, if you see the sign-in screen, tapSIGN UP.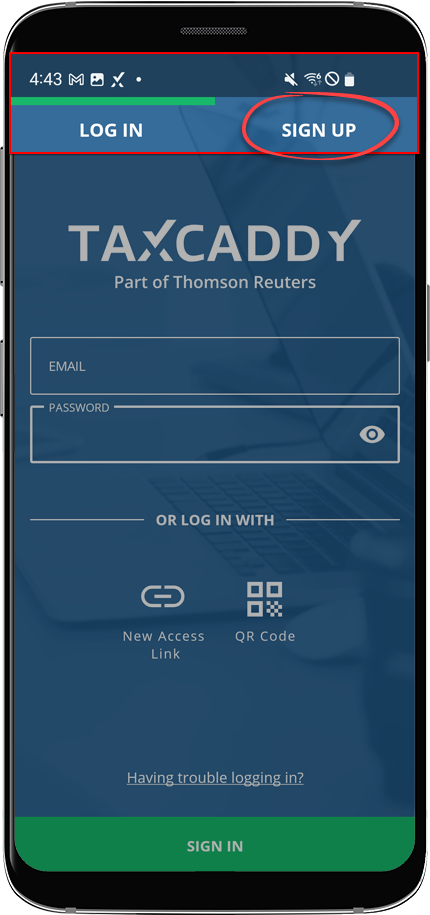
- Provide the following information:
- FIRST NAME
- LAST NAME
- EMAIL- Your email address (Tip: Use the email address shared with your tax professional).
- COUNTRY CODE- If your mobile phone number is located outside the United States of America then change the country code.
- MOBILE NUMBER- Omit any symbols when entering your phone number (for example, hyphens, brackets, etc.).
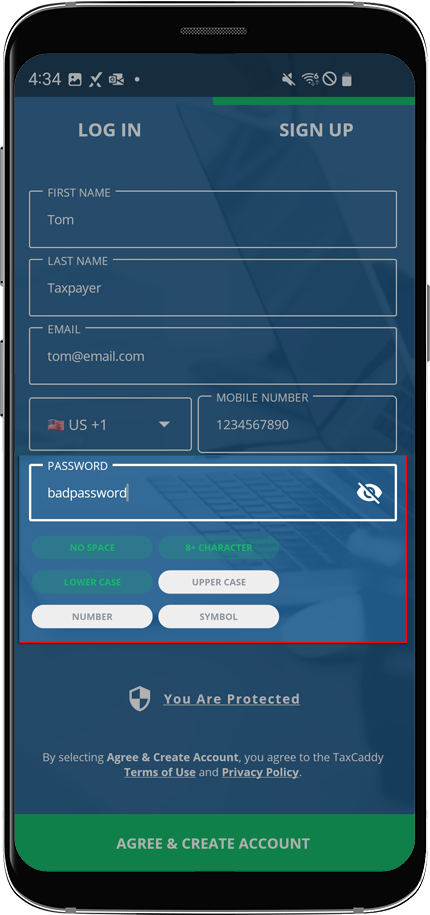
- PASSWORD- Create a strong password to keep your personal info safe and protect your files.
noteWe recommend you create your TaxCaddy account using the same email address your tax professional has on file. If you create your account using a different email address, contact support after logging in to TaxCaddy for the 1st time to ensure your tax professional can connect with your account.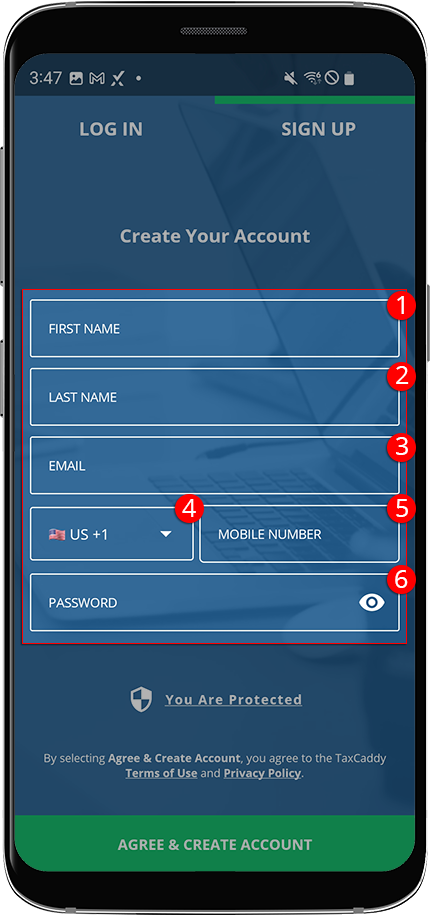 Omit any symbols when entering your phone number (for example, hyphens, brackets, etc.).
 - Enter a password into thePASSWORDfield. Once your account is created, you will need to enter this password to sign in to your TaxCaddy account.
 A valid password needs have the following:
- A number
- A special character (i.e. !@#$%^&*(){}:?><,.)noteSpaces are not permitted.
- Both upper and lower case letters
- 8 to 72 characters
Your password needs to meet all the requirements. Each password requirement will become highlighted as you enter your password. You can select theMaskto show or hide your password.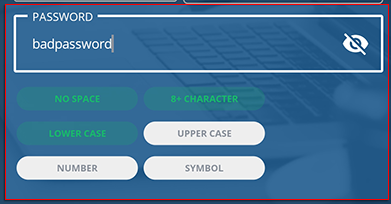
- You can tapTerms and ConditionsandPrivacy Policyto read the end-user license agreement. TapAGREE & CREATE ACCOUNTto create your TaxCaddy account.

- You will see an error messages if a field is invalid or missing required information. Enter the information then tapCREATE ACCOUNTto try again.
- You will receive a confirmation message if your account is created successfully. TapOKto continue.

- Check your email for an email verification message from TaxCaddy. TapConfirm my email addressto confirm your email address.noteThe link sent to verify your email address expires in 30 days.
- In the TaxCaddy mobile app, enter your email address in theEMAILfield, your password in thePASSWORDfield, then tapSIGN IN.

- Two-factor authentication (2FA) adds an extra layer of security when accessing TaxCaddy. When you sign in to TaxCaddy, a verification code will be sent as a text message to your mobile phone. You'll need to provide a verification code to log in. By setting up 2FA, your TaxCaddy account will be protected in case your account credentials are compromised. To continue, tapSETUP TWO-FACTOR AUTHENTICATION.

- Provide your mobile phone number, then tapSEND VERIFICATION CODE.
 noteDue to local restrictions, some countries may not receive TaxCaddy verification code SMS on their mobile phone when they need to sign in, sign documents, etc.Contact TaxCaddy Support if you are experiencing difficulty receiving your verification code.
 - Provide the verification code that was sent to your mobile phone, then tapSUBMIT.

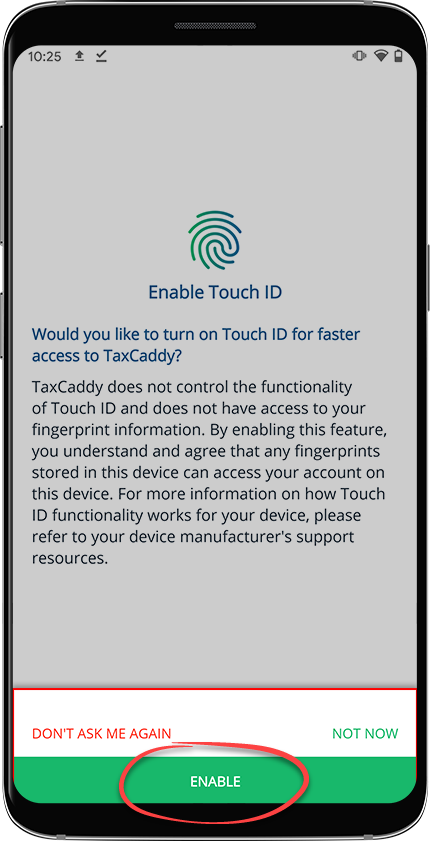
- If your device supports biometric sign-in then you can tapEnableto turn on future sign-in without entering a password. You can tapNOT NOWorDON'T ASK ME AGAINto dismiss the screen.
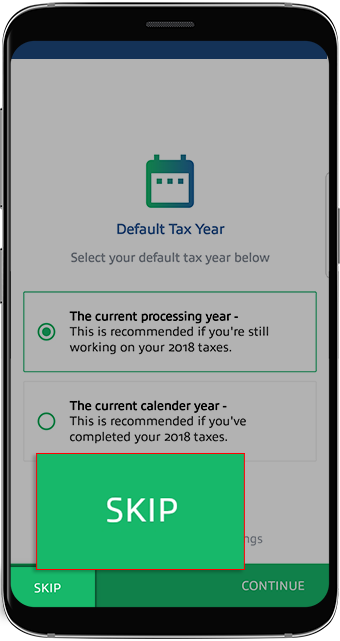
- If you don't see theDefault Tax Yearscreen, skip to the next step.Next, you can select a default tax year. Each time you sign in, the selected default tax year will show you documents, invoices, and tax returns associated with that tax year. You can switch between tax years at any time, irrespective of the default tax year. You can also change the default tax year from theSettingsscreen. After you select the default tax year, tapCONTINUETo skip the setup process, tapSKIP.noteYou can change the default tax year from theSettingsscreen. Tap here to learn more about changing the default tax year.
- TheConnection Requeststep only appears if you have a pending connection request from your tax professional.noteIf you didn't receive a connection request, then skip to the next step. You can also accept connection request from theOverviewscreen when your tax professional sends you the request. Tap here to learn more about connecting with your tax professional.Granting permission lets your tax professional:
- Access your tax documents
- Communicate with you
- Send you letters, questionnaires, and other requests
- Upload your tax return for you to review.
To accept a connection request, tapACCEPT CONNECTION. To skip the setup process tapSKIP. If you skip the setup process, then you can connect with your tax professional from theOverviewscreen after you log in.
 - You'll now be prompted to invite your spouse to join your account.If you don’t have a spouse, tapI don’t have a spouse, and tapCONTINUE.
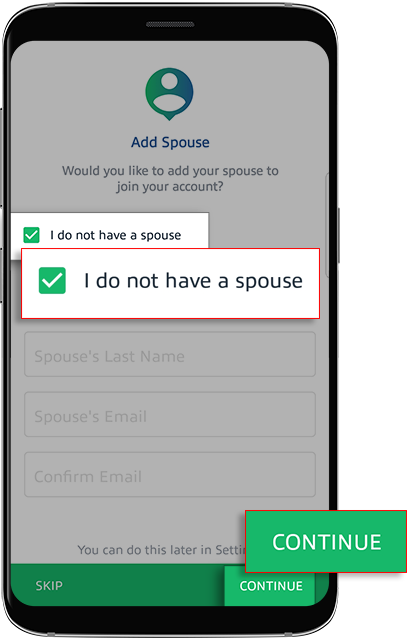 You can either enter your spouse's information then tapSEND INVITATION, or tapSKIPto sign in without entering any spouse information. You can also add an additional user later inSettings.
- You're now logged in to TaxCaddy.
What's next?
After logging in, you will see an Overview of your TaxCaddy account and a task list with requests from your tax professional.
Related Content
-
Set up your TaxCaddy account
Format: Article

